
Plain stones can become tiny works of art fast. A few simple marks can make them feel magical.
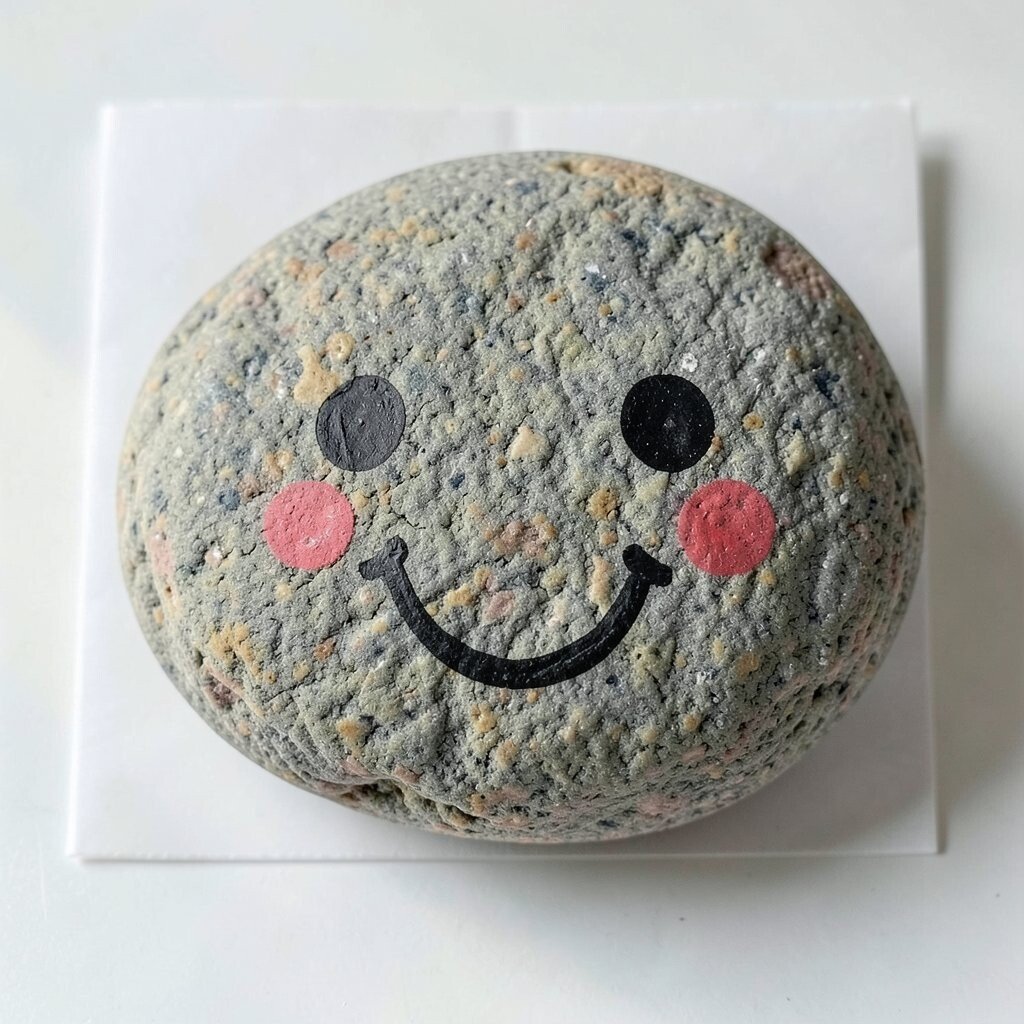
1. Happy Dot Faces
Top Happy Dot Faces Craft Tutorials
- 🎄 Some of my "Happy Dot" paintings. I hope they put a smile … from facebook.com.
- 🎨 Hygloss Products Happy Smiley Face Yellow Dot Stickers for … from amazon.ca.
- 💅 HAPPY FACE® Polka Dot | Red & White – 12"x18" Sheet from happycrafters.com.
- 🍅 Dot Day Craft Ideas Videos from snapchat.com.
- 🖼️ Firework dot art with a New Year twist ✨ 🎉 Here's a fun and … from instagram.com.
Start with a smooth pebble and paint a simple face using bright dots for eyes, cheeks, and a smile. The result is cheerful, easy to read, and perfect for beginners who want instant charm.
This idea is low-cost because you only need a stone, a paint pen, and a little black or white paint. Add freckles, glasses, hats, or tiny eyebrows to make each face feel personal and full of character.
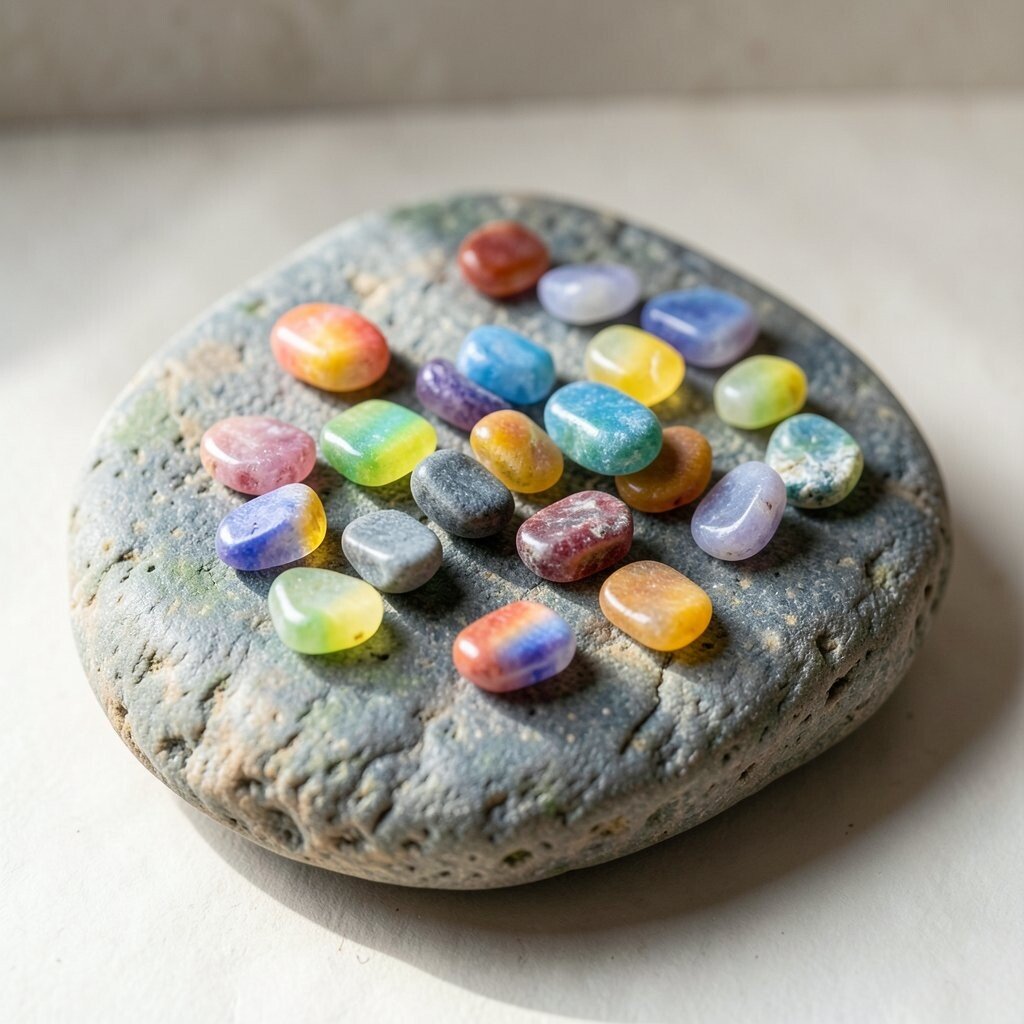
2. Mini Rainbow Stones
Top Mini Rainbow Stones Craft Tutorials
- 🗺️ Using rainbow stones for decoration from facebook.com.
- 🎄 Creativity for Kids Garden Stones Kit – Rainbow from business.walmart.com.
- 💅 Rainbow Stone Arrows – a mini-rant : r/Eldenring from reddit.com.
- 🧑🌾 Rainbow Glass Stones Crafting Fish Tanks Succulent … from ebay.com.
- 👓 Mosaic Stepping Stone Kit, Craft Kits for Kids (Ages 8+) from sdgs-kitakyushu.iges.jp.
Paint short rainbow bands across the stone for a clean, colorful look that feels fresh and happy. The curved shape of the rock makes the rainbow look playful, even when the lines are not perfect.
This style is great for quick gifts, garden decor, or desk accents. Try soft pastel shades for a calm trend or bold neon colors for a more modern pop.
If you want a personal touch, write a tiny word like “hope,” “joy,” or “shine” under the rainbow. A thin brush or paint marker keeps the lines neat without adding much cost or time.
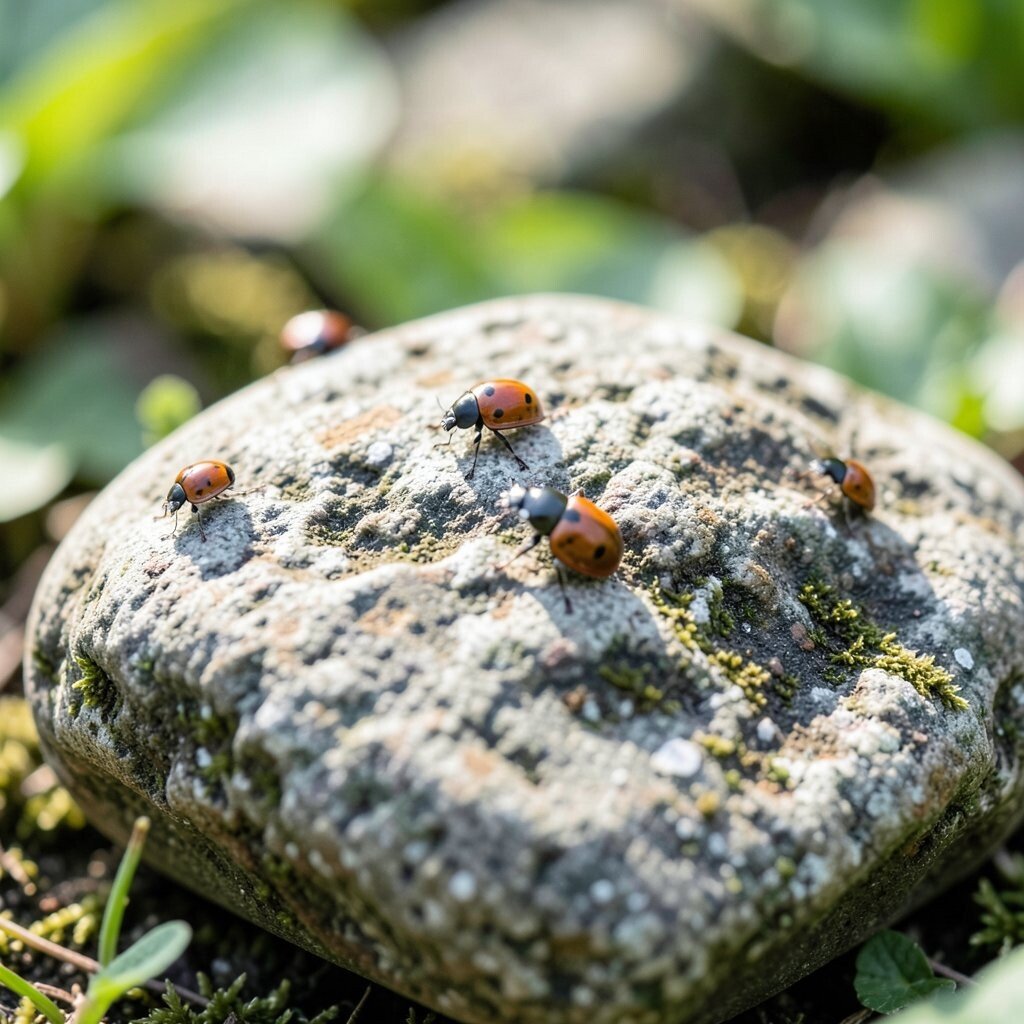
3. Tiny Ladybugs
Top Tiny Ladybugs Craft Tutorials
- 🍁 Ladybug 🐞 Prints This week's #creativereadandplay theme … from facebook.com.
- 🗺️ 3D Ladybug Crafts – Three Ways from capturingparenthood.com.
- 🍁 Seashell Ladybug Craft from stillplayingschool.com.
- 🧑🌾 How to Make a Cute 3D Ladybug Craft from onetimethrough.com.
- 🍁 Ladybug Craft Ideas from housingaforest.com.
A red stone with black spots can turn into a cute ladybug in just a few minutes. The round shape helps the design look natural, and kids often love how simple it is.
Paint the body red first, then add a black head and spots. You can make each bug unique by changing the number of spots, the size of the eyes, or even the wing pattern.
These stones work well in flower pots, fairy gardens, or as little paperweights. If you already have red and black paint at home, this idea costs almost nothing and still looks polished.
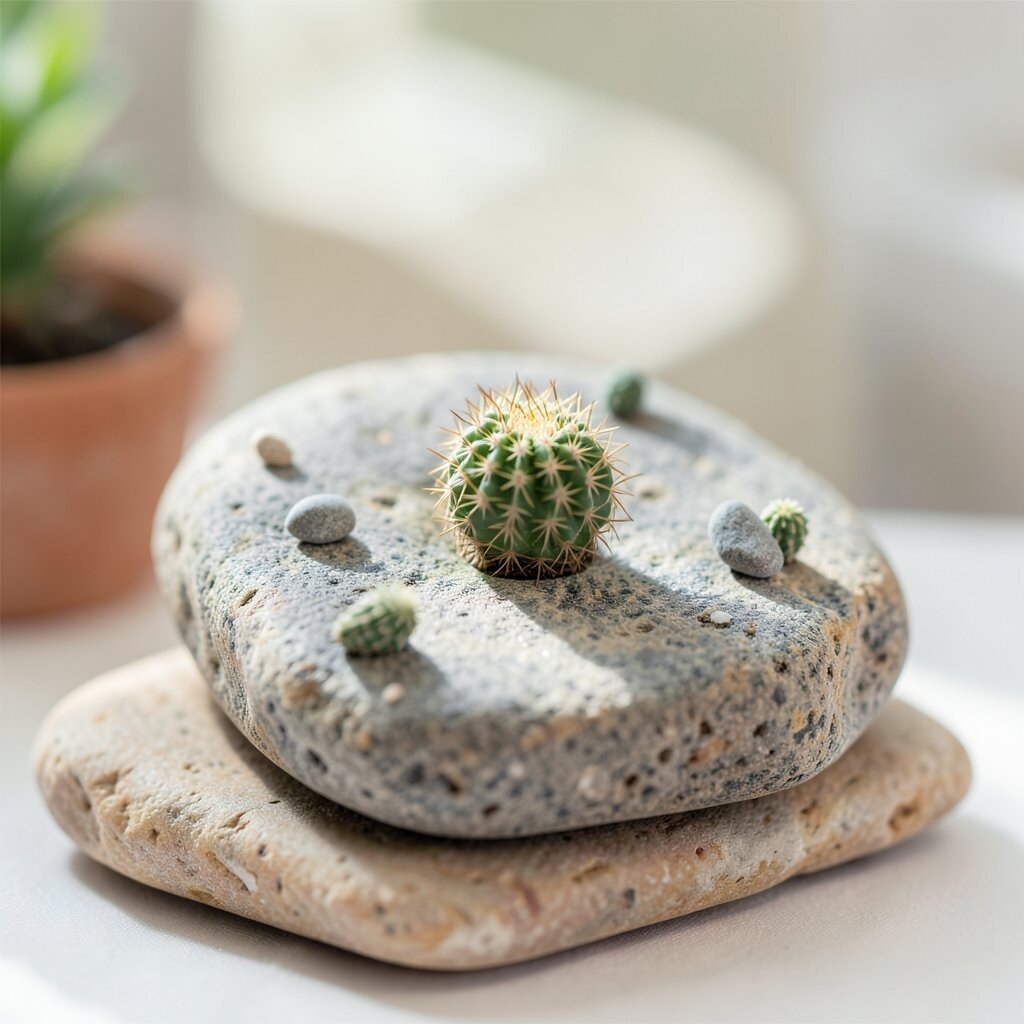
4. Tiny Cactus Rocks
Top Tiny Cactus Rocks Craft Tutorials
- 👓 Cactus painted rocks! 🌵 These would look so cute on the … from facebook.com.
- 🧑🌾 Cactus Painted Rocks That Look Adorably Real from modpodgerocksblog.com.
- 🍂 Rock Cactus Garden – Easy and Fun DIY Project from clumsycrafter.com.
- 🎄 Pet Cactus Rocks from thebestideasforkids.com.
- 🧑🌾 How to Make Painted Cactus Rocks – Lifes Carousel from lifescarousel.com.
Green paint and a few light lines can make a stone look like a cute cactus. This style is calm, trendy, and easy to match with home shelves or small plant displays.
Use a light green base and add darker green stripes or dots for texture. A tiny flower on top makes the cactus feel extra sweet, and it only takes a small dab of color.
For a personal twist, paint a tiny pot shape at the bottom or add a name on the front. If you want a set, make several in different shapes so the group looks lively and fun.
These are smart for budget crafting because they need very little paint and no special tools. They also dry quickly, which makes them a great choice for busy afternoons.
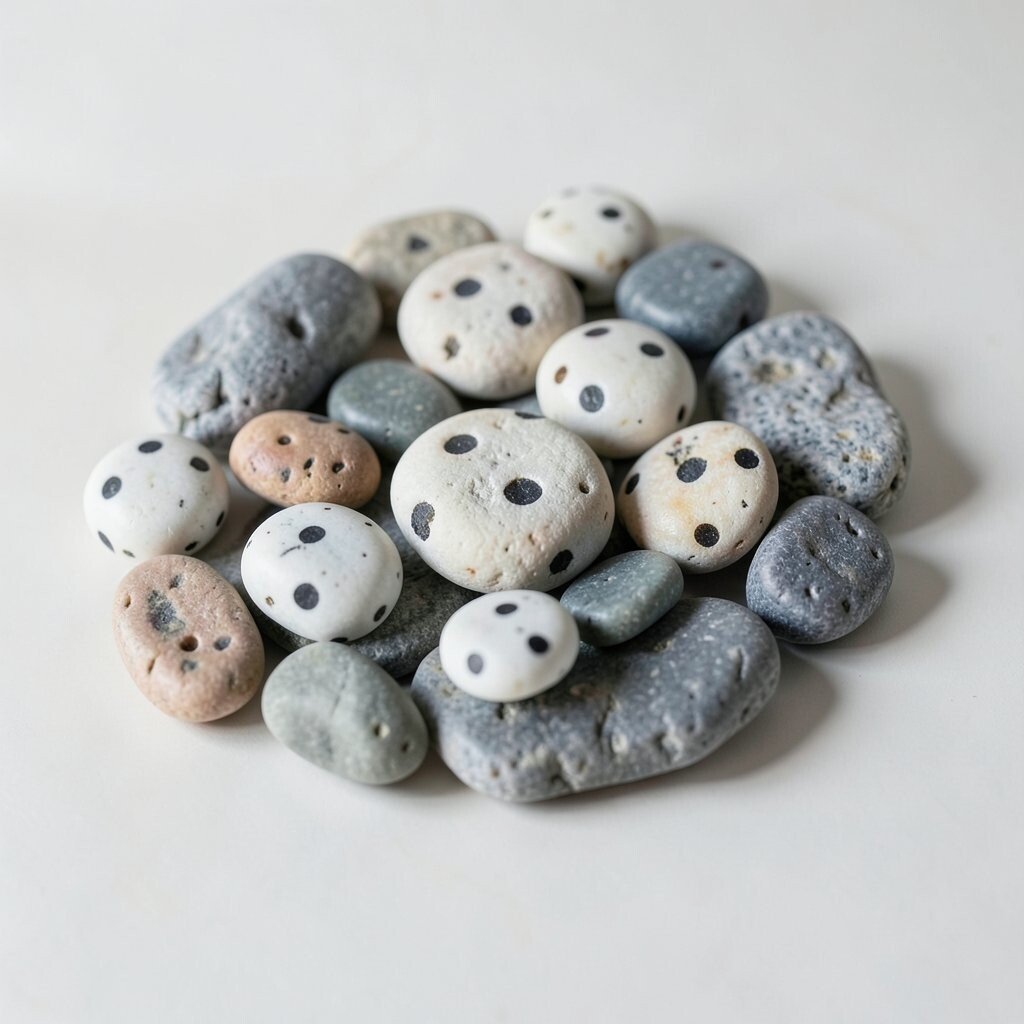
5. Polka Dot Party Stones
Top Polka Dot Party Stones Craft Tutorials
- 🎄 Vintage Polka Dot Zoo Party from karaspartyideas.com.
- 🍂 Set of 5 colorful polka dot stones, dot art painted rock … from ebay.com.
- 🗺️ Colorful Chevron & Polka Dots First Birthday Party from hwtm.com.
- 🍅 20 International Dot Day Art Projects for Kids from artsycraftsymom.com.
- 🧑🌾 Bee Theme Burlap Ribbon – Black, White, Yellow Polka … from trailscouncil.org.
Cover the stone with bright dots in a mix of sizes for a playful, party-like look. The whole design feels lively and bold, and it is easy to make without any drawing skills.
Use the end of a brush, a cotton swab, or a dotting tool to keep the circles neat. Try matching colors to a room, a holiday, or a favorite sports team for a more personal feel.
These stones can brighten a table, shelf, or classroom corner with very little effort. Because the supplies are simple, this is a friendly project for anyone watching costs while still wanting something eye-catching.
6. Sweet Bee Stones
Top Sweet Bee Stones Craft Tutorials
- 🍁 Make a couple of these honey bee stones and decorate … from facebook.com.
- 🖼️ How to paint honey bee on stone🐝 #diy #art #craft # … from instagram.com.
- 🖼️ 7 Honey Bee Crafts for Kids-That Are Sweet, Simple, and Fun from carolinahoneybees.com.
- 🎨 Honey bee stones that are quick to paint and perfect for … from facebook.com.
Yellow and black stripes can turn a pebble into a tiny bee with lots of personality. Add small wings and big eyes, and the stone suddenly looks ready to buzz off.
This idea works well because the shape of the stone can suggest a round bee body. You can make it silly, cute, or neat, depending on how wide you paint the stripes and wings.
For a custom touch, write a short word like “busy” or “kind” on the back. Bee stones are also a fun trend for spring and garden decor, and they make sweet gifts for teachers or friends.
If you already own yellow, black, and white paint, the cost stays very low. A clear sealer can help the colors stay bright if you want to place the stone outdoors.
7. Galaxy Pebbles
Top Galaxy Pebbles Craft Tutorials
- 🗺️ How to make galaxy painted rocks! Tutorial—> https … from facebook.com.
- 🎨 Ball Rolling Galaxy craft activity guide from bakerross.co.uk.
- 🍂 How to make Galaxy Painted Rocks from the-gingerbread-house.co.uk.
- 🍁 Galaxy Glow Pebble – Glow Surfaces LLC from glowsurfaces.com.
- 💅 🌌✨ DIY Galaxy Light Jar – A Magical Craft Kids Will Love … from instagram.com.
Dark blue, purple, and black paint can make a stone look like a tiny night sky. A few white specks on top create stars, and the finished piece feels dreamy and dramatic.
This style is unique because no two galaxy stones ever look the same. Blend colors with a sponge or fingertip for a soft cloud effect, then add dots for planets or sparkling light.
Kids and adults both enjoy this look because it feels creative without needing perfect lines. If you want a personal theme, paint a small moon shape, a favorite constellation, or even a tiny initial.
Galaxy stones can be made with a few leftover paints, so they are easy on the wallet. They also fit modern room decor trends, especially when grouped in a small bowl or tray.
8. Smiley Weather Stones

Top Smiley Weather Stones Craft Tutorials
- 🧑🌾 great for weather theme and education. Check out my … from facebook.com.
- 🍂 DIY “Welcome Stone” – a super fun and simple craft using … from facebook.com.
- 🖼️ Weather Theme Crafts for Kids Sunny and Cloudy DIY Fun … from instagram.com.
- 🍂 Painting smiley face rocks with acrylics from facebook.com.
- 🖼️ Painted a Rock from lemon8-app.com.
Paint a sun, cloud, raindrop, or lightning bolt with a friendly face to make the stone feel lively. The bright symbols are easy to recognize and work well for young artists who want quick success.
This idea is useful for learning, since it can help children talk about weather while they paint. You can keep the shapes simple and still make each one look cute and full of energy.
Try a sleepy moon, a windy cloud, or a rainbow after rain for more variety. To personalize the set, write the day’s mood on the back or match the colors to a favorite season.
These stones are affordable because they need only a few basic paint colors. They also make fun classroom helpers, desk toys, or small gifts that feel thoughtful without costing much.
9. Heart Message Stones
Top Heart Message Stones Craft Tutorials
- 🍂 Inspirational sayings for heart shaped stone? from facebook.com.
- 🍅 Valentine heart stone craft for kids from the-gingerbread-house.co.uk.
- 💅 Heart Memorial Stone For Mom – 5.5 Inch Garden Memorial With … from gospodarkazielona.pl.
- 💅 Create these simple Love Stones to hide or gift to someone … from facebook.com.
A heart shape painted in red, pink, gold, or lavender gives a stone a warm and loving feel. The design is simple, but it can still look elegant and special.
Write a short message inside the heart or around it, such as “kind,” “friend,” or “be brave.” The smooth stone surface makes the message feel like a tiny keepsake.
These are great for Valentine’s Day, birthdays, or just-because gifts. If you want to make them more personal, use a favorite color combination or add a small symbol that means something to the person receiving it.
Heart stones are also a good option when you want a project with low supply costs. A paint pen and one or two colors can be enough to create something sweet and meaningful.
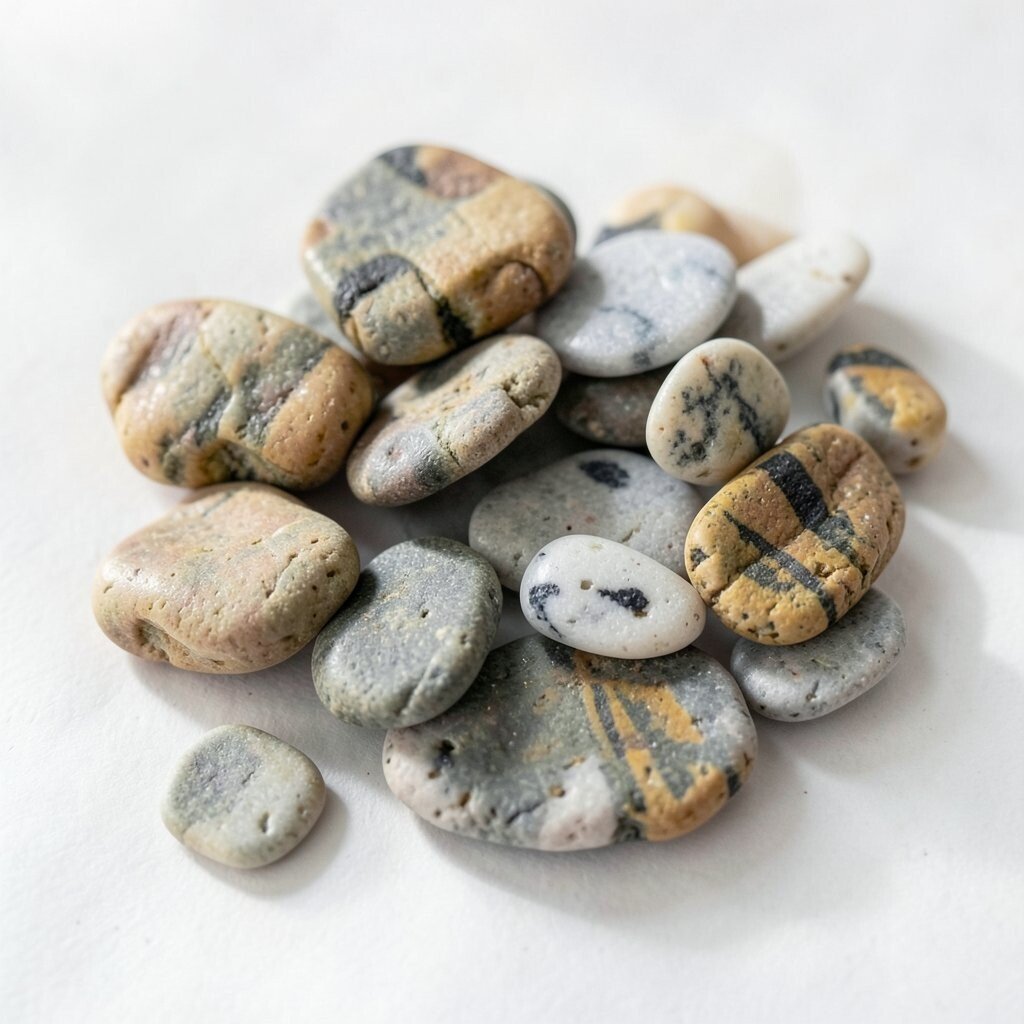
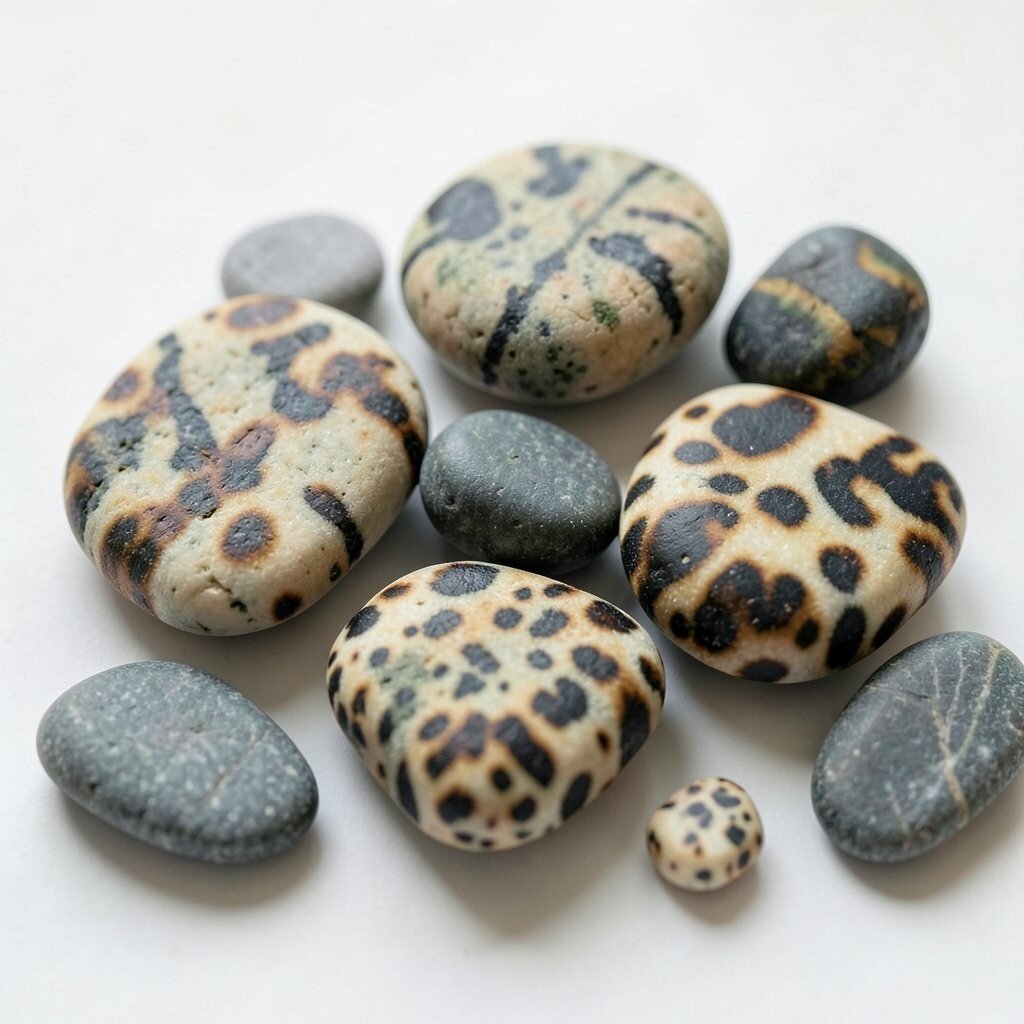
10. Animal Print Stones
Top Animal Print Stones Craft Tutorials
- 👓 🐾DIY Garden Stepping Stones with your pet's paw prints. … from facebook.com.
- 💅 Handprint Garden stepping stones : r/crafts from reddit.com.
- 🗺️ New Milestones Paw Print Kit Stonecraft Memory In A 8” … from ebay.com.
- 🍂 How to Make Footprint DIY Stepping Stones from acraftedpassion.com.
- 👓 Stepping Stones Animal Kit – Paint¿Your¿Own Fun from mindware.orientaltrading.com.
Turn a pebble into a leopard, zebra, or cow print design with simple spots and stripes. The patterns look bold and stylish, and they are forgiving if the marks are a little uneven.
This idea feels trendy because animal prints are always popular in decor and accessories. Use tan, black, white, or brown for a classic look, or try pink and teal for a more playful version.
You can personalize the stone by choosing a favorite animal or mixing two prints on one rock. These stones make fun shelf pieces, and they can also be used as game tokens or name markers.
Since the shapes are simple, this project stays quick and budget-friendly. A fine brush or marker helps, but even a toothpick can work for small spots and lines.
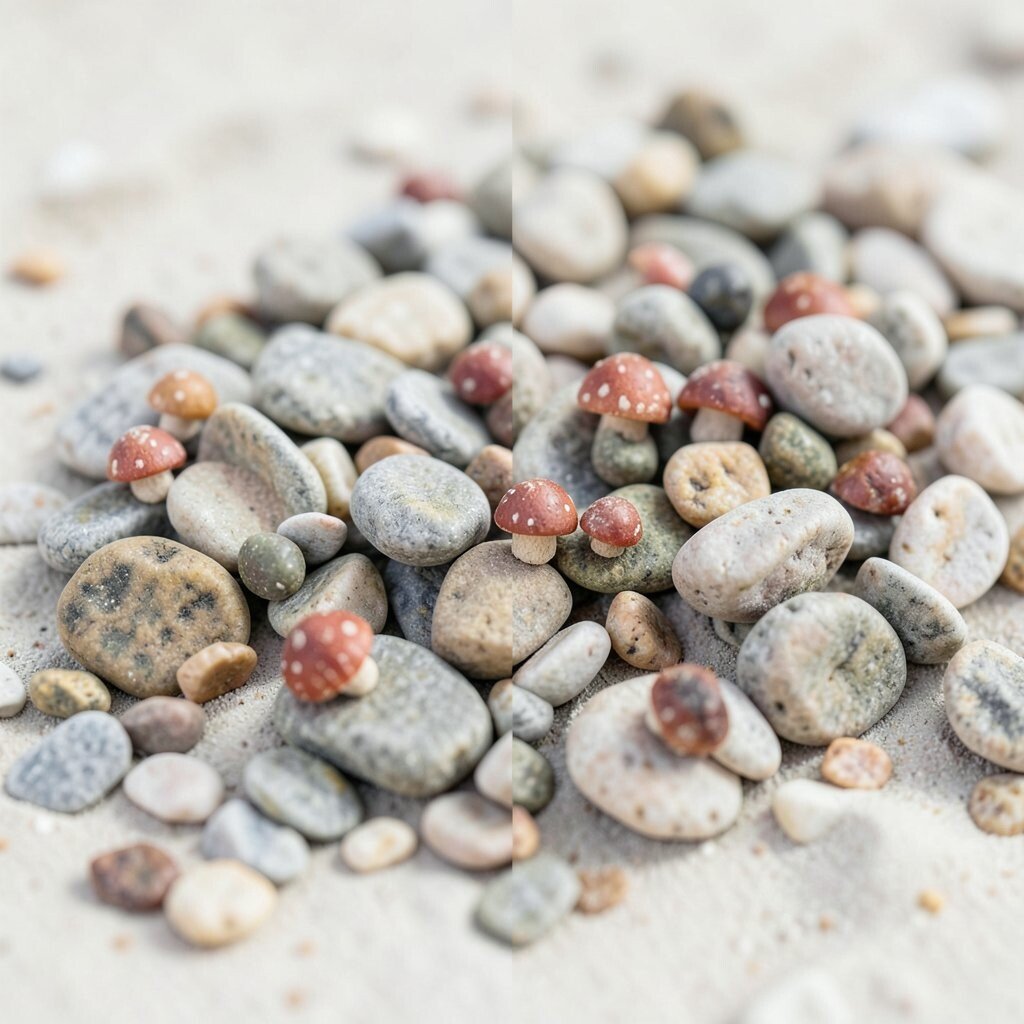
11. Tiny Mushroom Stones
Top Tiny Mushroom Stones Craft Tutorials
- 👓 Miniature mushroom garden with uv resin from facebook.com.
- 🖼️ Rock Mushrooms Are a Cute Spring Craft from modpodgerocksblog.com.
- 🗺️ Mini Crystal Gemstone Mushroom Carving Confetti Fairy … from ebay.com.
- 👓 I wanted to share a simple tutorial on how to quickly create … from facebook.com.
- 🖼️ 🎄🍄 Joyful Mushroom Acorn Craft (or Santa … from instagram.com.
Paint a red or brown cap with white dots to create a tiny mushroom that feels straight out of a storybook. The rounded stone shape works beautifully for this design and gives it a cozy forest look.
This style stands out because it feels whimsical without being hard to paint. Add a small stem, a little grass, or a tiny snail beside it to make the scene feel complete.
For a custom touch, try different cap colors like blue, orange, or purple. Mushroom stones are great for fairy gardens, and they can also brighten a shelf with a soft, handmade charm.
The supplies are simple, so this is a nice choice for crafters who want a cute result on a small budget. If you seal the stone, the colors can stay bright and fresh for a long time.
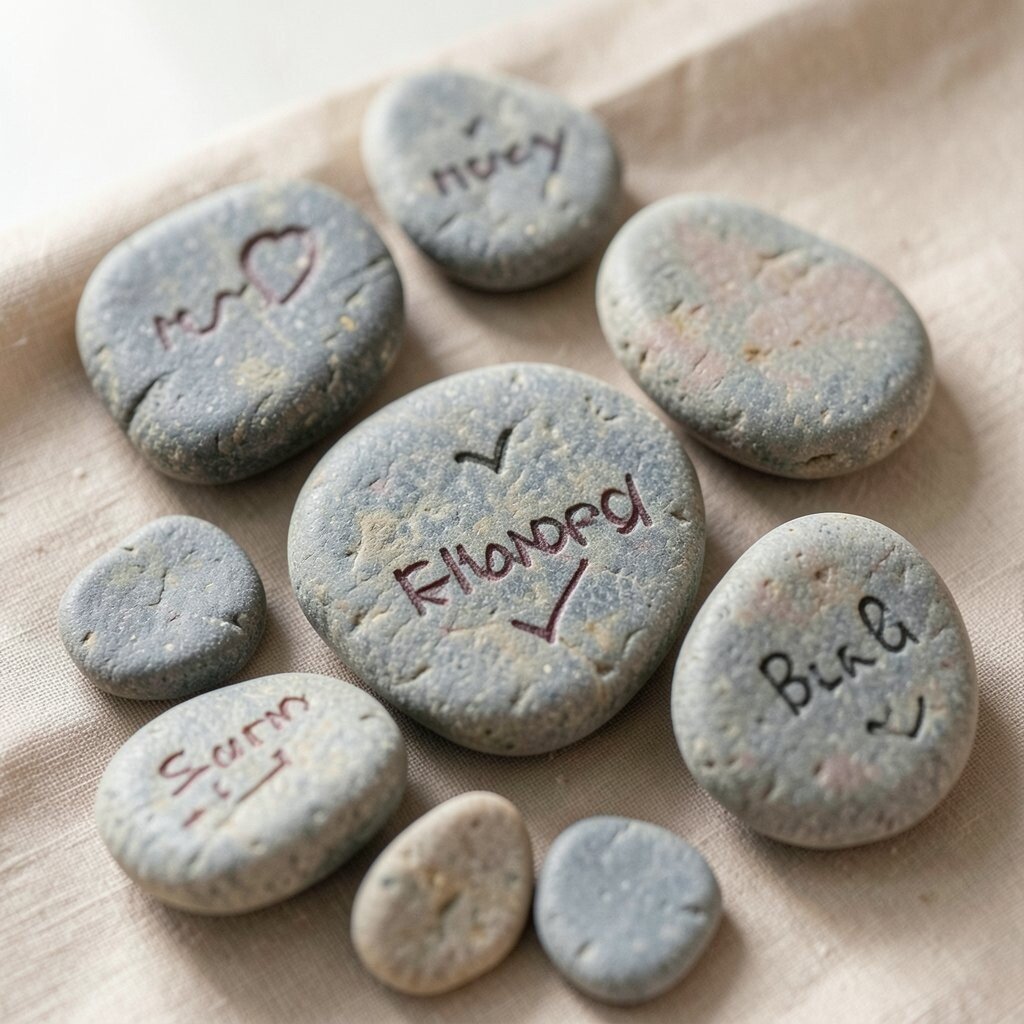
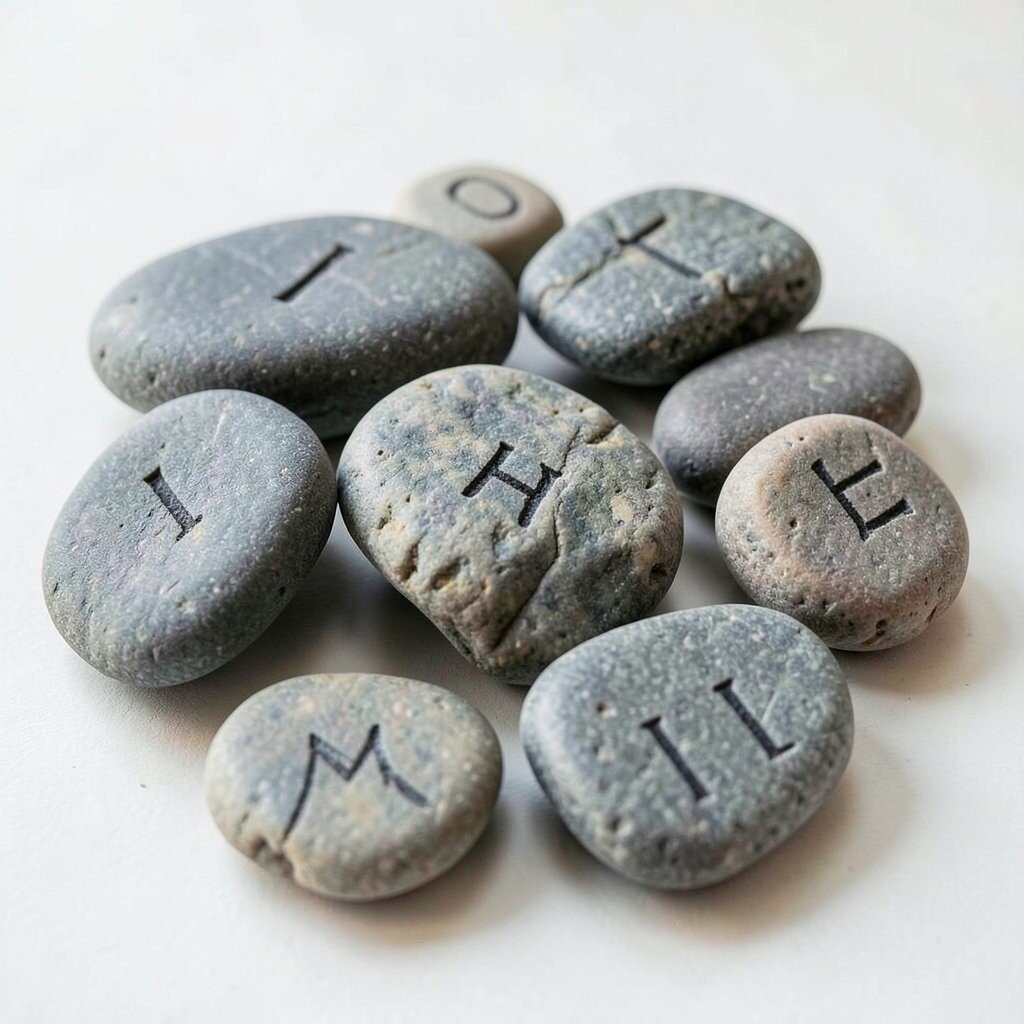
12. Name Initial Stones
Top Name Initial Stones Craft Tutorials
- 🧑🌾 Carving the Entire Alphabet into Pebbles. #pebble #stone #craft … from instagram.com.
- 💅 What are the steps to create a name stone for each child? from facebook.com.
- 🧑🌾 How to Make Homemade Story Stones from happyhooligans.ca.
- 🗺️ DIY Stepping Stones: Starting a Family Tradition from sustainmycrafthabit.com.
- 🎨 Make Market Stepping Stone Letters from tiktok.com.
Paint one big letter on each stone for a clean and modern look. This idea is easy to read, quick to make, and perfect for labeling spaces in a pretty way.
Use bold colors, soft pastels, or metallic paint depending on the style you want. You can also add tiny flowers, stars, or dots around the letter to make each stone feel more special.
These are useful for kids’ rooms, office desks, or family spaces where simple labels help things stay neat. Personalization is the best part here, because you can choose initials, nicknames, or even short words that matter to you.
Because you only need one letter at a time, this is a very low-cost craft. A paint marker makes the job easier, but a steady hand and a small brush can do the trick too.
13. Tiny Food Stones
Top Tiny Food Stones Craft Tutorials
- 🍁 Cute food stones 🍓🎨 Easy, fun & creative DIY idea for kids! … from instagram.com.
- 🧑🌾 Cute food stones 🍓🎨 Easy, fun & creative DIY idea for kids! … from facebook.com.
- 🎄 Mud Kitchen Food from playteachrepeat.com.
- 🖼️ 12 Miniature Food Toys Set – DIY Resin Craft Kit For Kids … from willacedron.pl.
- 💅 Dollhouse Miniatures – Foods, Drinks & Groceries from miniaturesweethk.com.
Paint a slice of pizza, a strawberry, a donut, or a cupcake on a stone for a fun and cheerful result. The tiny food art looks cute right away and brings a playful feel to any collection.
This idea is especially fun because you can match the food to a favorite snack or meal. Bright colors make the design pop, and simple shapes keep the painting fast and stress-free.
Try a personal theme like favorite desserts, lunch treats, or breakfast foods for a set that feels made just for you. These stones are also popular as little gifts, fridge decor, or playful desk buddies.
The cost stays low since each food design can be done with only a few paint colors. If you want extra shine, add a clear coat so the tiny toppings and details stand out more.