Imagine a world where colors dance and swirl, creating mesmerizing patterns that captivate the eye. This is the magic of acrylic pouring art, where each creation is a unique masterpiece waiting to unfold. Prepare to be enchanted as we delve into a collection of ideas that promise to spark your creative journey.
1. Galaxy Pour

Top Galaxy Pour Craft Tutorials
- 🎄 Paint pour galaxy paintings from pem.org.
- 🎨 Galaxy Paint Pour Canvas | Crafts For Kids from crayola.ca.
- 🎨 American Crafts Color Pour Galaxy Surge Pre-Mixed Paint Kit from americancrafts.com.
- 🍁 How to Paint a Galaxy – Easy Acrylic Painting on Canvas from colorfulcraftcorner.com.
- 🍅 I have been experimenting, looking for the perfect recipe … from facebook.com.
Ever wanted to capture the universe on canvas? Galaxy pours let you swirl deep blues, purples, and shimmering whites to mimic the night sky. Add metallic silver for stars and watch your creation light up.
The beauty of this technique lies in its unpredictability. Each pour is a unique snapshot of a galaxy far, far away. Use silicone oil to create cell-like structures, giving your piece that celestial feel.
This project is affordable, requiring only a few colors and a dash of glitter. Perfect for those nights when you want to bring the cosmos indoors.
2. Ocean Wave Pour
Top Ocean Wave Pour Craft Tutorials
- 🍅 Acrylic Pour Painting Ocean Waves: 5 Tutorials with Video from loveacrylicpainting.com.
- 🎨 Creating ocean waves art on canvas from facebook.com.
- 🖼️ “Ocean Wave” acrylic pour on 16×20 wrapped canvas. My … from reddit.com.
- 🎨 Ocean Wave Acrylic Pour! – CraftyJenn – WordPress.com from craftyjennblog.wordpress.com.
- 💅 Tutorial – How to create Resin Ocean Waves by from instagram.com.
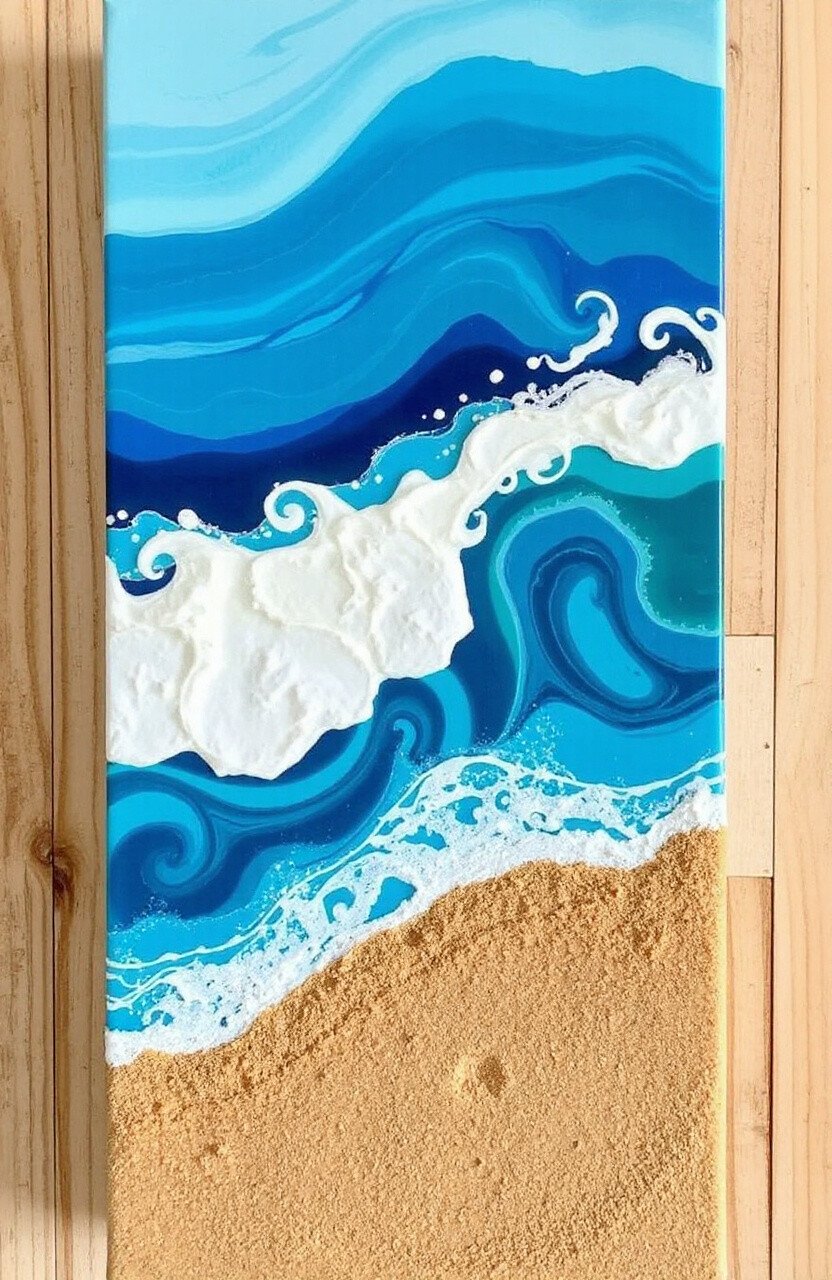
Bring the serenity of the ocean into your home with an ocean wave pour. Use shades of blue, turquoise, and white to create the rolling waves and sea foam.
Add a dash of sand texture medium at the bottom for a beachy feel. This artwork is not only calming to look at but also fun to make. When friends visit, they’ll be transported to a sunny beach!
Affordable and soothing, this technique is perfect for creating a relaxing atmosphere. Hang it in your bathroom or living room for a splash of the sea.
3. Fire and Ice Pour
Top Fire And Ice Pour Craft Tutorials
- 🎨 Fire and ice glaze combination ideas? from facebook.com.
- 🖼️ Fire And Ice from craftedpour.com.
- 💅 Any tips for a first fire and ice pour? from facebook.com.
- 🖼️ Pour Painting-Fire and Ice – Completed Projects from forum.lettucecraft.com.
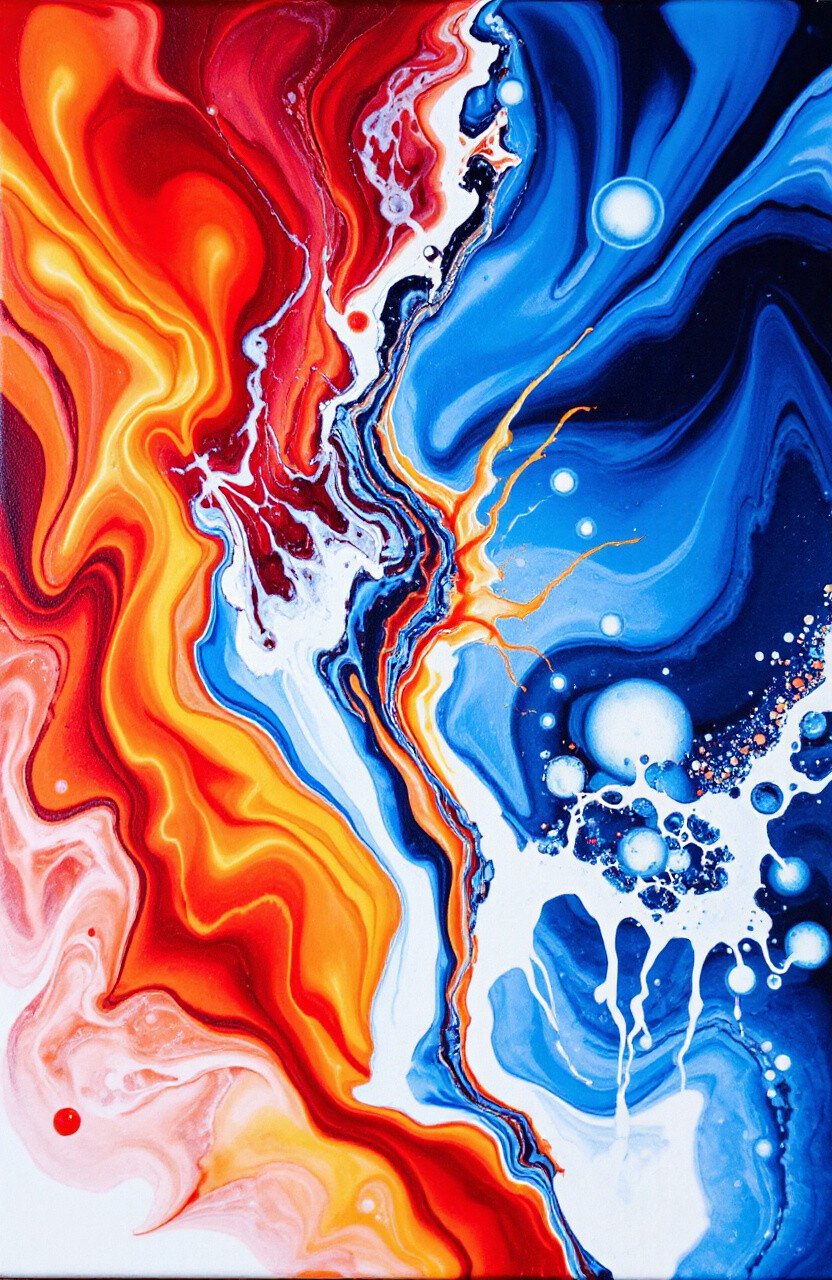
Combine the elements with a fire and ice pour. Use reds, oranges, and yellows for the fire, and contrast them with cool blues and whites.
This dual-themed piece is striking and dramatic. You’ll love watching how the colors interact and blend. Try using a blow dryer to push the paint around for added texture and movement.
Creating this fiery yet cool piece is affordable and doesn’t require many materials. It’s a bold statement that can add energy to any room.
4. Metallic Geode Pour
Top Metallic Geode Pour Craft Tutorials
- 🎨 Resin Geode Pour on Canvas with Glitter from resincraftsblog.com.
- 🍅 4" geode skull paint pour with crystals from facebook.com.
- 🍂 How to make epoxy geode art from bestbartopepoxy.com.
- 💅 Green Poured Art Geode Canvas – Projects | Plaid Online from plaidonline.com.
- 🍅 Paint Pouring Geode on Canvas – Art Kit – SKU PP0223 from cratejoy.com.
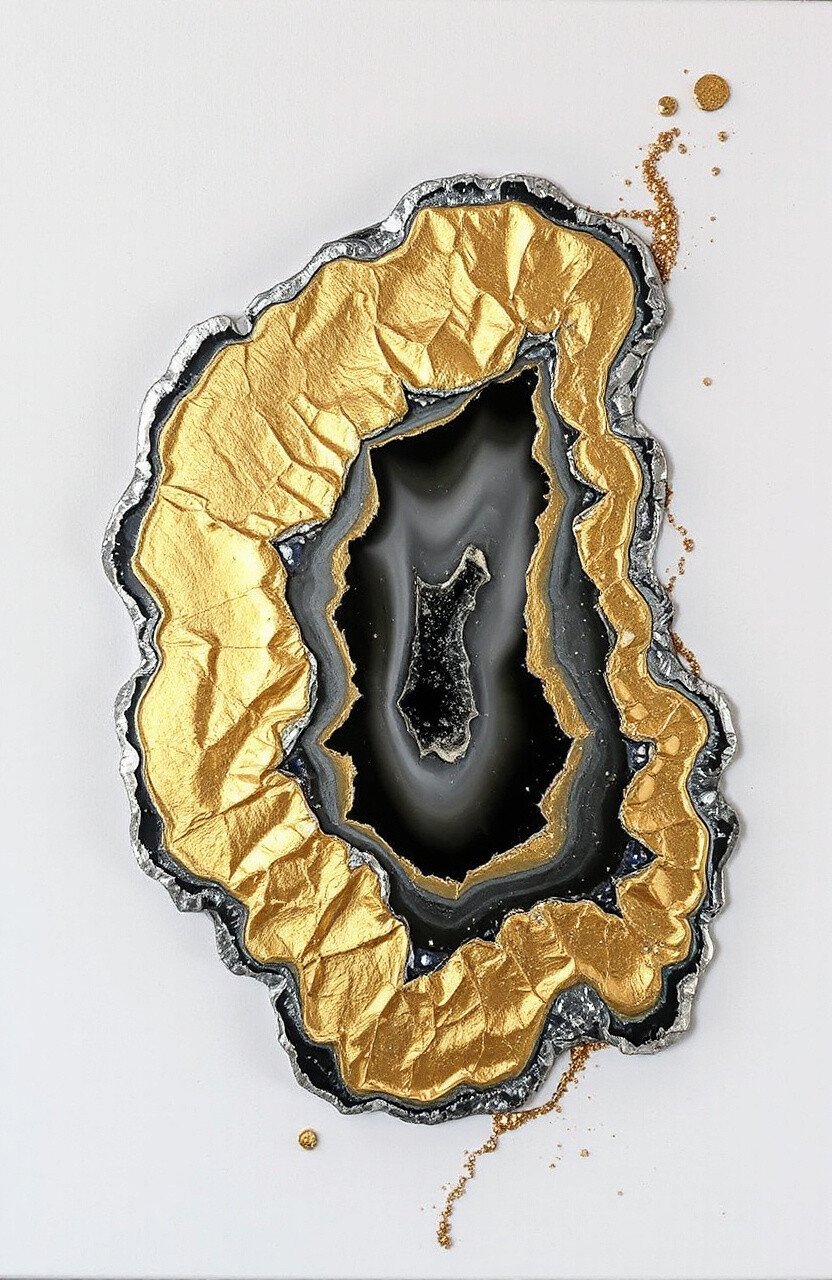
Embrace the luxury of geodes with metallic colors like gold, silver, and copper. Add a touch of white and black for contrast.
This technique mimics the look of sliced geodes, with their intricate patterns and shiny surfaces. Use a palette knife for creating sharp, rocky edges and sprinkle some glitter for that extra sparkle.
It’s a little more on the pricier side due to metallic paints, but the result is a chic, elegant piece that oozes sophistication.
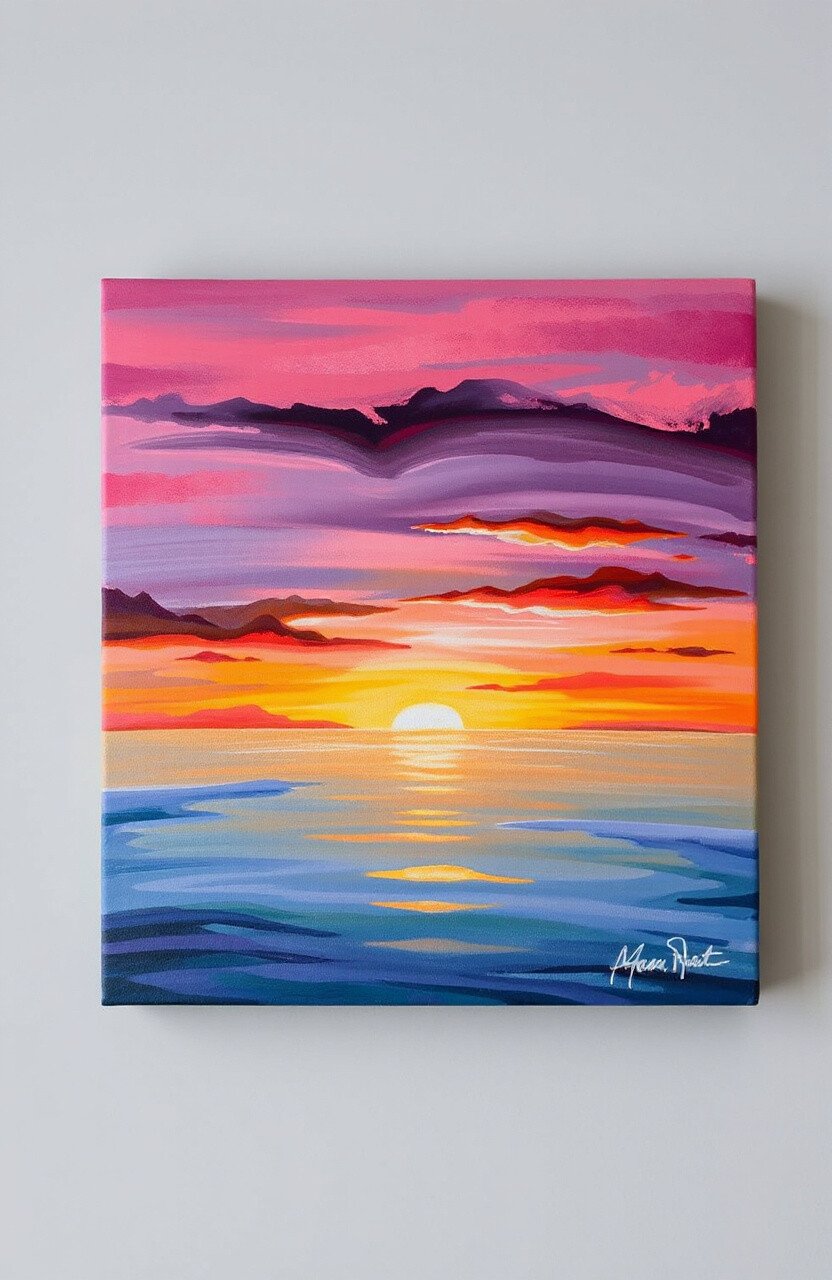
5. Sunset Horizon Pour
Top Sunset Horizon Pour Craft Tutorials
- 👓 H10 Atlantic Sunset Horizons Collection | Hotel in Tenerife from h10hotels.com.
- 👓 Horizon Group STMT DIY Marbling Art Studios Set from walmart.com.
- 🗺️ Broken Horizon at Sunset from artfulhome.com.
- 👓 Sunset from themes.shopify.com.
- 🍅 Framed Moroccan Rug Wall Art – Sunset Horizon Design … from myrugy.com.
Capture the beauty of a sunset with warm reds, oranges, and hints of purple. Blend them into a golden horizon line.
This idea is all about creating a peaceful, dreamy effect. Add a touch of white to create the illusion of clouds drifting by. It’s especially beautiful for evening relaxation spaces.
Reasonably priced, you can use leftover paints from other projects. It’s a wonderful way to bring the outdoors inside.
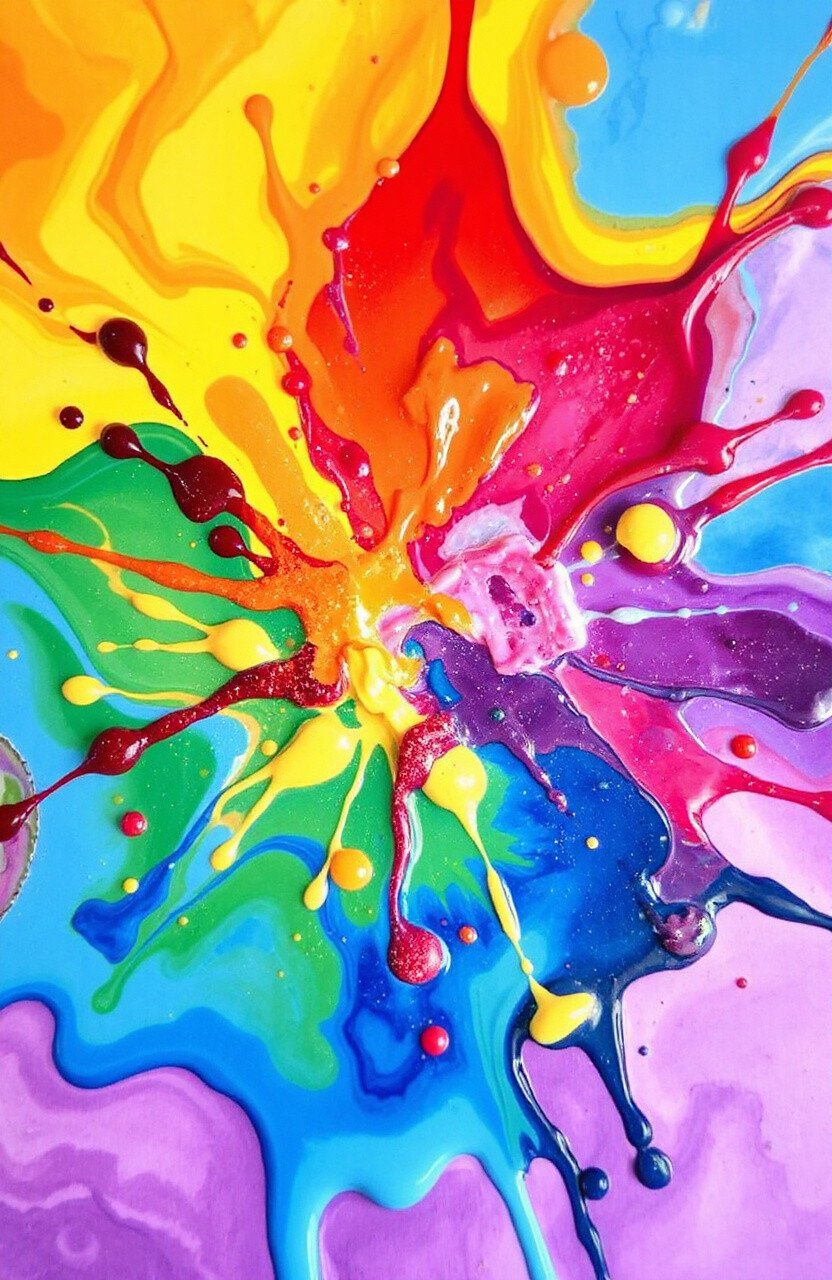
6. Rainbow Splash Pour
Top Rainbow Splash Pour Craft Tutorials
- 🍁 What would be the easiest way to make this rainbow? from facebook.com.
- 🍅 Colorations® Paraben-Free BioColor® Paint from discountschoolsupply.com.
- 🧑🌾 Making a rainbow from facebook.com.
- 🗺️ Vibrant Rainbow Crafts for Kids: Unleash Colorful Creativity from imthecheftoo.com.
Brighten any room with a rainbow splash pour. Layer the colors of the rainbow and tilt the canvas to let them flow and blend.
This piece is all about joy and vibrancy. It’s a great project for kids too, as they’ll love watching the colors mix. Try adding some glitter or gloss finish for extra shine.
It’s an affordable way to fill your home with color and cheer. A perfect piece for a child’s room or art studio.
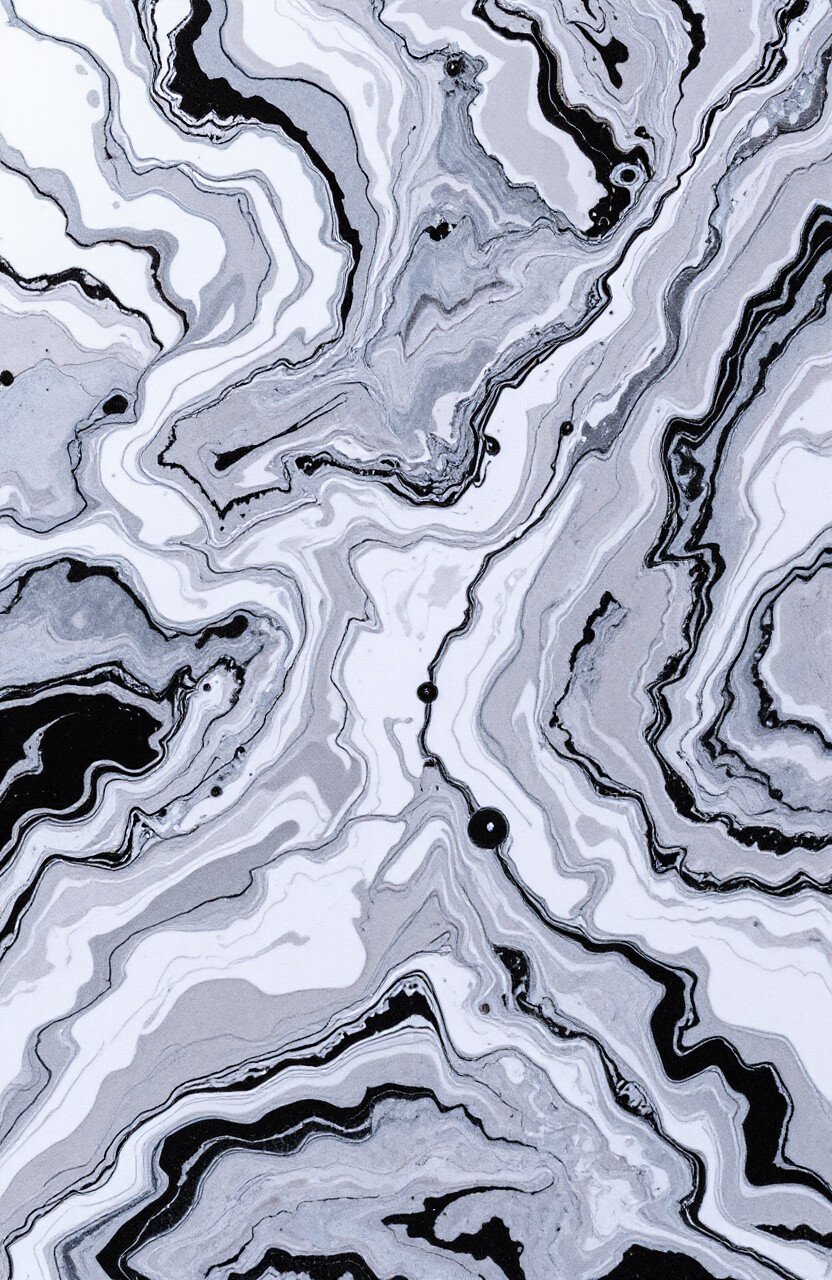
7. Marble Effect Pour
Top Marble Effect Pour Craft Tutorials
- 💅 MARBLE EFFECT from youtube.com.
- 🍂 Carrara Marble Effect Kit with epoxy resin – Resin Pro from resinpro.us.
- 🍁 How to do Marble Effect Art (Acrylic, Resin, Enamel) from doodlecraftblog.com.
- 🧑🌾 How to achieve a marble effect with resin coasters using … from facebook.com.
- 🍂 Marble Looks with Resin from little-windows.com.
Create an elegant marble effect using whites, blacks, and grays. Swirl the colors gently for that classic marbled look.
This technique is timeless and chic. Ideal for modern and minimalist spaces, it brings a touch of class without overwhelming the senses. Use a feather or stick to create fine veins for added realism.
Cost-effective and stylish, this project is perfect for creating sophisticated art with minimal color palette.
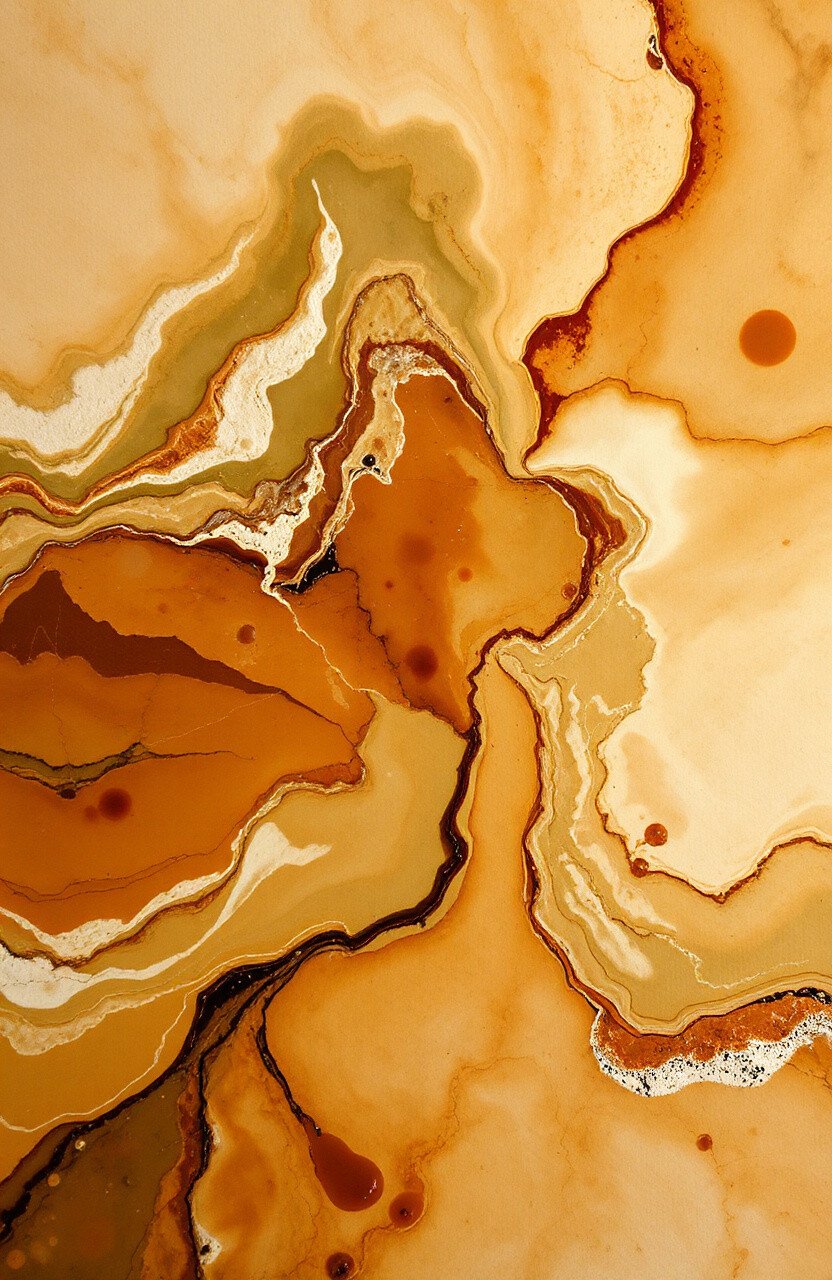
8. Earthy Tones Pour
Top Earthy Tones Pour Craft Tutorials
- 🗺️ Swipe Pour Art with Earthy Tones on 8 Inch Tile from facebook.com.
- 💅 Lightwish 8 Iridescent Metallic Colors Pouring Acrylic Paint … from lightwish.com.
- 🗺️ Four Ways to Make the Best Fluid Art – Earthy Tones! from facebook.com.
- 💅 Earth Paint Pour Canvas craft activity guide from bakerross.co.uk.
- 🧑🌾 New color pallets! Earthy tones this time. This is an acrylic … from instagram.com.
Embrace the natural world with earthy tones like browns, greens, and ochres. These colors blend beautifully to create a grounding, organic piece.
This artwork is perfect for nature lovers. It brings the calming essence of the outdoors into your home. Try adding some plant motifs or leaf patterns for an extra touch.
Affordable and easy to personalize, it’s great for any room where you want a touch of nature.
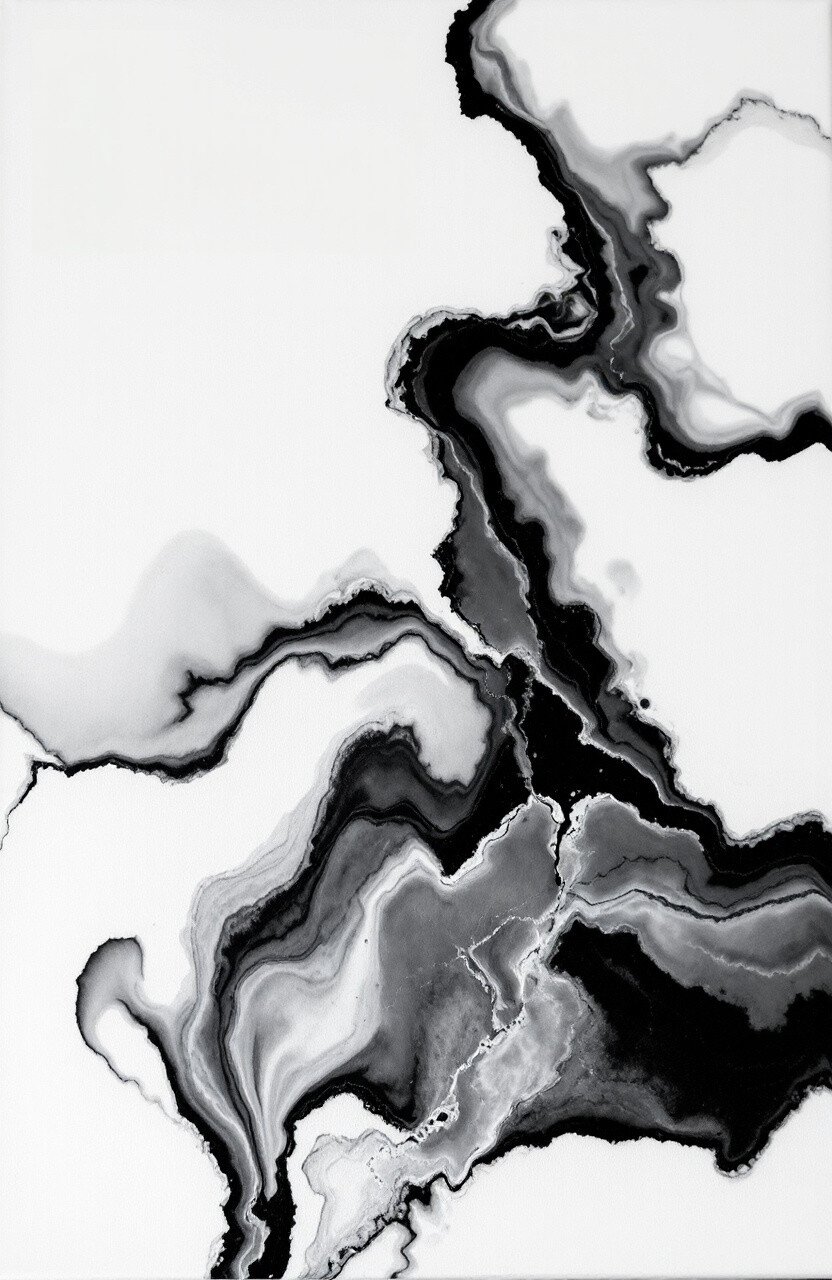
9. Black and White Abstract Pour
Top Black And White Abstract Pour Craft Tutorials
- 🎨 Abstract # 9 Acrylic pour/painting from facebook.com.
- 💅 Original Abstract Acrylic Pour Painting 9 x 12 Canvas … from ebay.com.
- 🍂 Black, White and Gold Acrylic Pouring ~ Create an Eye- … from reddit.com.
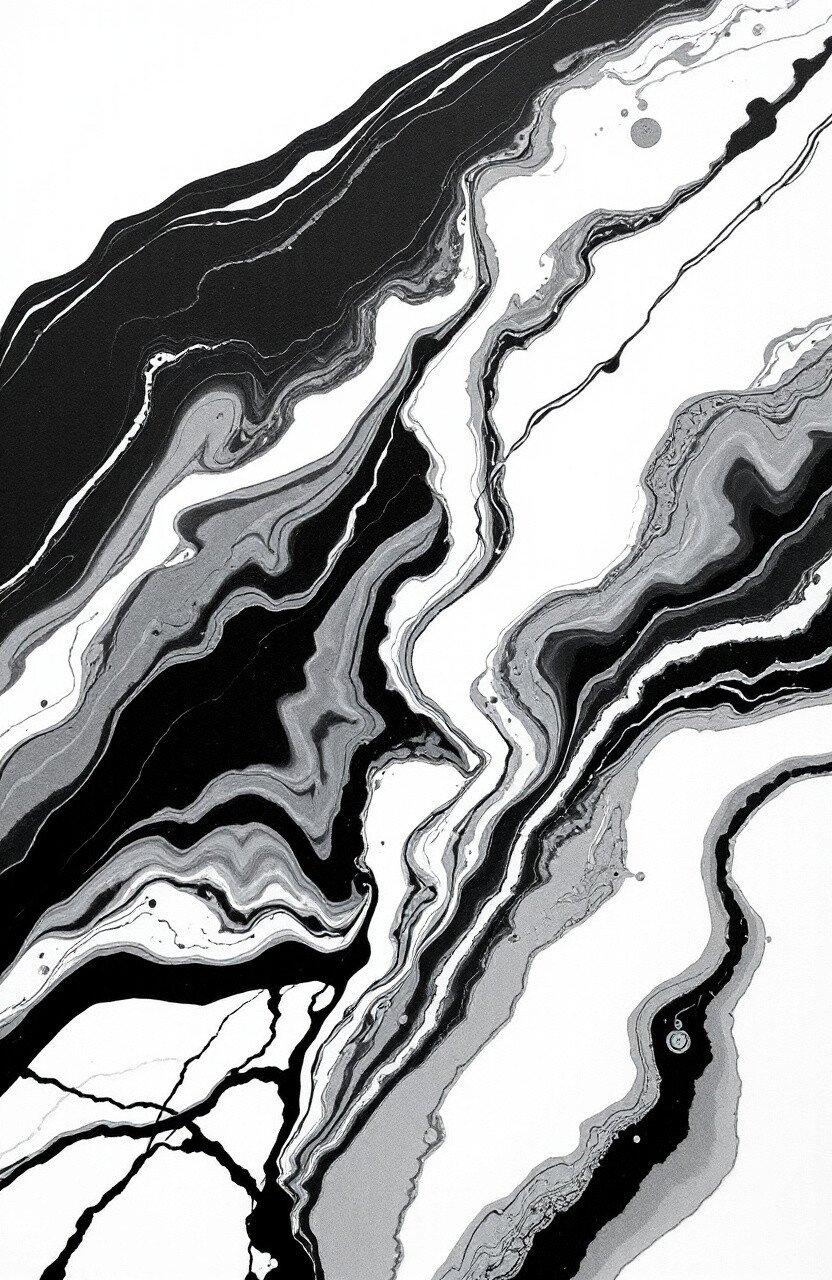
For a bold statement piece, try a black and white abstract pour. The contrast creates striking patterns and designs.
This classic color combination exudes sophistication and drama. It’s perfect for modern spaces or as a centerpiece. Use masking tape to create defined lines or patterns before pouring the paint.
Simple yet impactful, this project is cost-effective and versatile. It suits any room with a monochrome theme.
10. Floral Burst Pour
Top Floral Burst Pour Craft Tutorials
- 🎨 Kaffe Fassett Floral Burst – Maroon || February 2023 from ebay.com.
- 💅 Floral Burst – Beginner Downloadable Embroidery Pattern from lovecrafts.com.
- 🍅 Burst background flower technique tutorial from facebook.com.
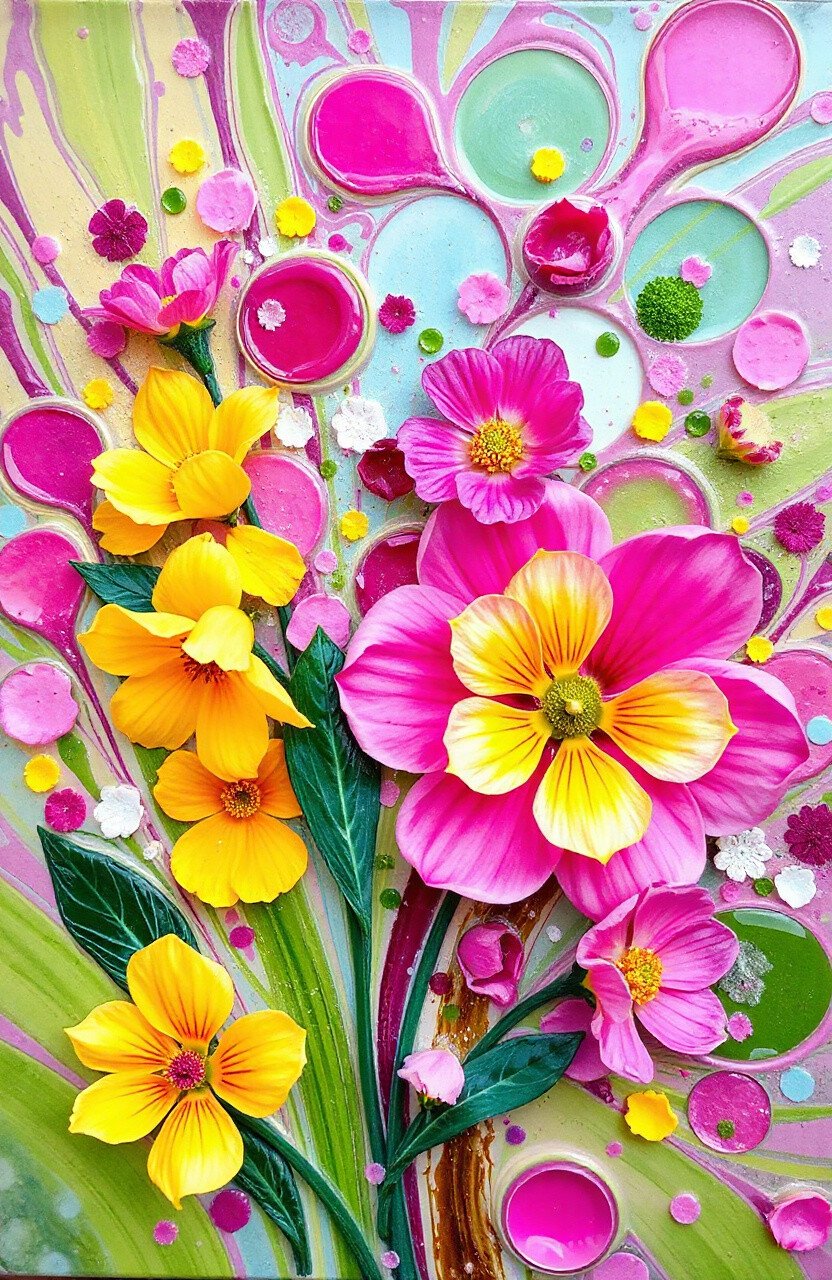
Celebrate springtime with a floral burst pour. Use bright pinks, purples, and yellows to mimic a blooming garden.
This cheerful piece is ideal for brightening up a space. Add some leaf green for contrast and use a straw to blow the paint into petal-like shapes. It’s a fun way to bring flowers indoors without the upkeep.
Inexpensive and vibrant, it’s perfect for living rooms or as a gift for nature lovers.
11. Cosmic Swirl Pour
Top Cosmic Swirl Pour Craft Tutorials
- 🎨 DIY cosmic swirl baking soda ornaments from facebook.com.
- 🎨 Make Your Own Baking Soda Cloud Ornaments … from facebook.com.
- 🖼️ 1st Attempt at Cosmic Swirl from soapmakingforum.com.
- 🗺️ Make Your Own Baking Soda Cloud Ornaments … from facebook.com.
- 💅 DIY Nebula Sensory Bottles 🌠✨ Create mesmerizing … from instagram.com.
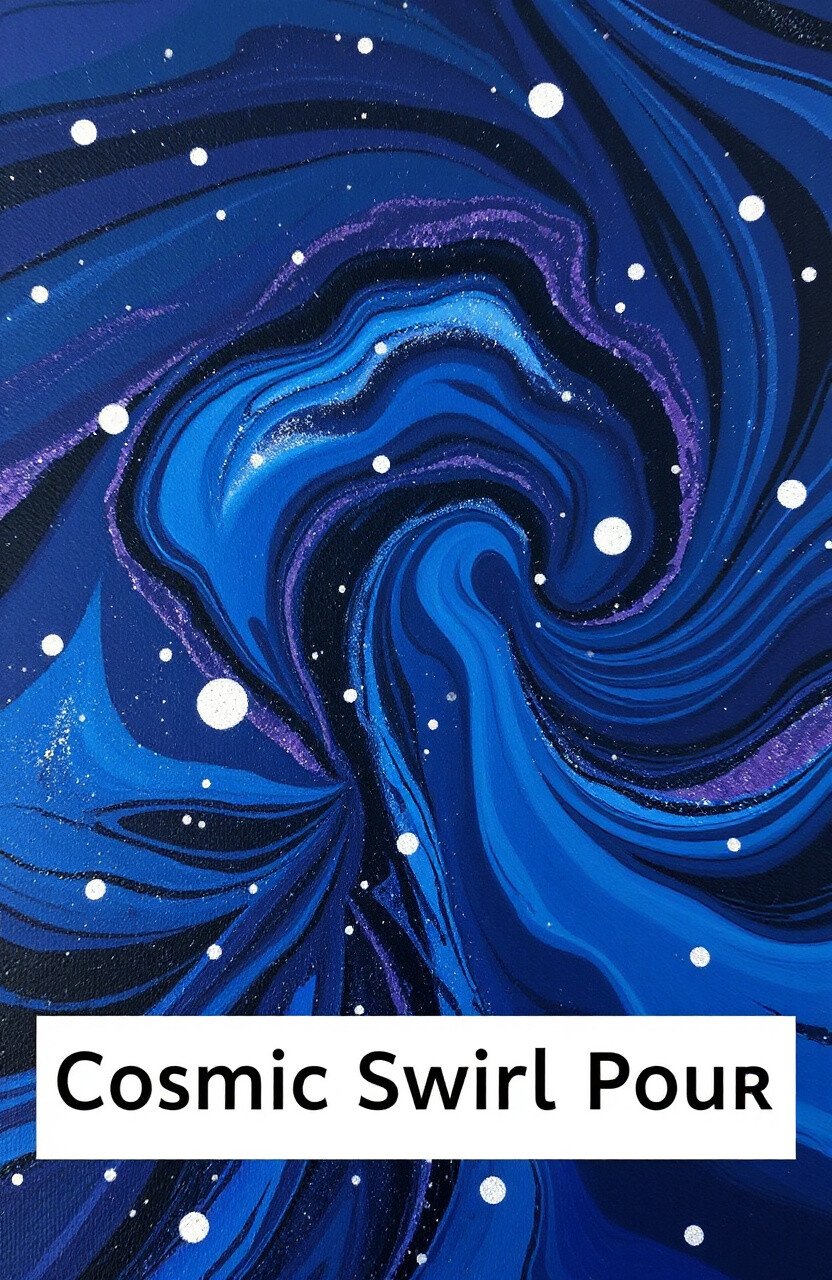
Get lost in space with a cosmic swirl pour. Use dark blues, blacks, and purples to create a swirling galaxy effect.
This idea captures the mystery and wonder of the universe. Add some silver or white dots for stars and let your imagination run wild. Perfect for stargazing nights at home!
While it might require a few more paint colors, the result is a captivating piece that draws you in. Ideal for bedrooms or study areas.
12. Pastel Dream Pour
Top Pastel Dream Pour Craft Tutorials
- 🧑🌾 Prima Watercolor Confections Watercolor Pans 12/Pkg … from walmart.com.
- 🍁 Set of 12 Soft Colors for Art Painting, Drawing, and Bl from ebay.com.
- 🎨 Prima Marketing Dreams 12 Pastel Watercolours Set from craftelier.com.
- 🎨 Acrylic pour painting with soft pastel colors from facebook.com.
- 🍁 12 Pastel Tone Pencils With Metal Tin & Downloadable … from timeofcelebration.org.
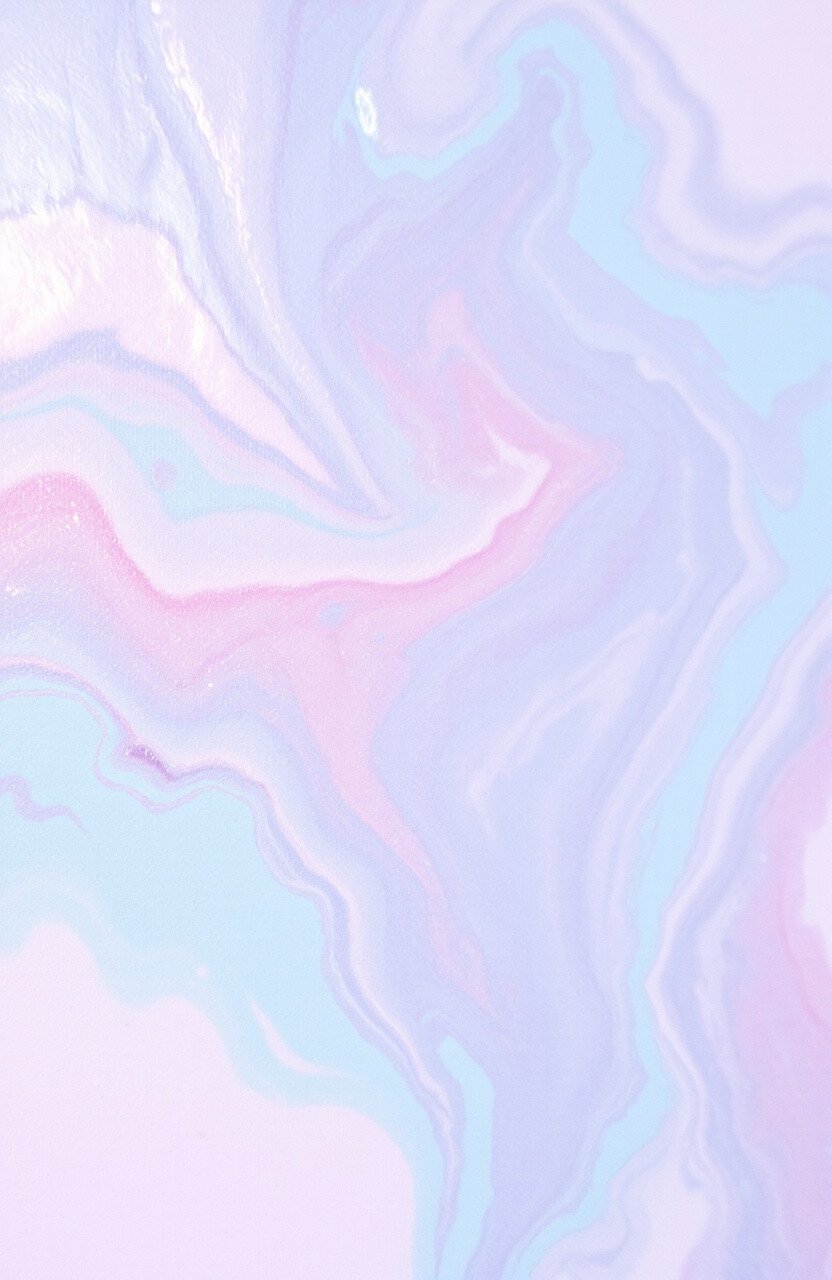
Bring a soft, dreamy quality to your space with a pastel dream pour. Use gentle shades of pink, blue, and lavender.
This technique is perfect for creating a calming, serene environment. It’s like a whisper of color that enhances any room. Use a pearl finish for a subtle shimmer effect.
Affordable and soothing, this piece is ideal for bedrooms or nurseries, where calmness is key.
13. Jewel Tones Pour
Top Jewel Tones Pour Craft Tutorials
- 🍅 FolkArt Jewel Tone Acrylic Craft Paint Kit, 15 Piece Set … from walmart.com.
- 🍂 Jewel tone dirty pour art challenge result from facebook.com.
- 👓 Jewel Tones Painted Furniture Finish – Easy! from thegraphicsfairy.com.
- 🎨 Straight pour from youtube.com.
- 💅 Kimberbell Mylar Sheets – Jewel Tones 12-Pack For Embroidery … from jicowood.com.
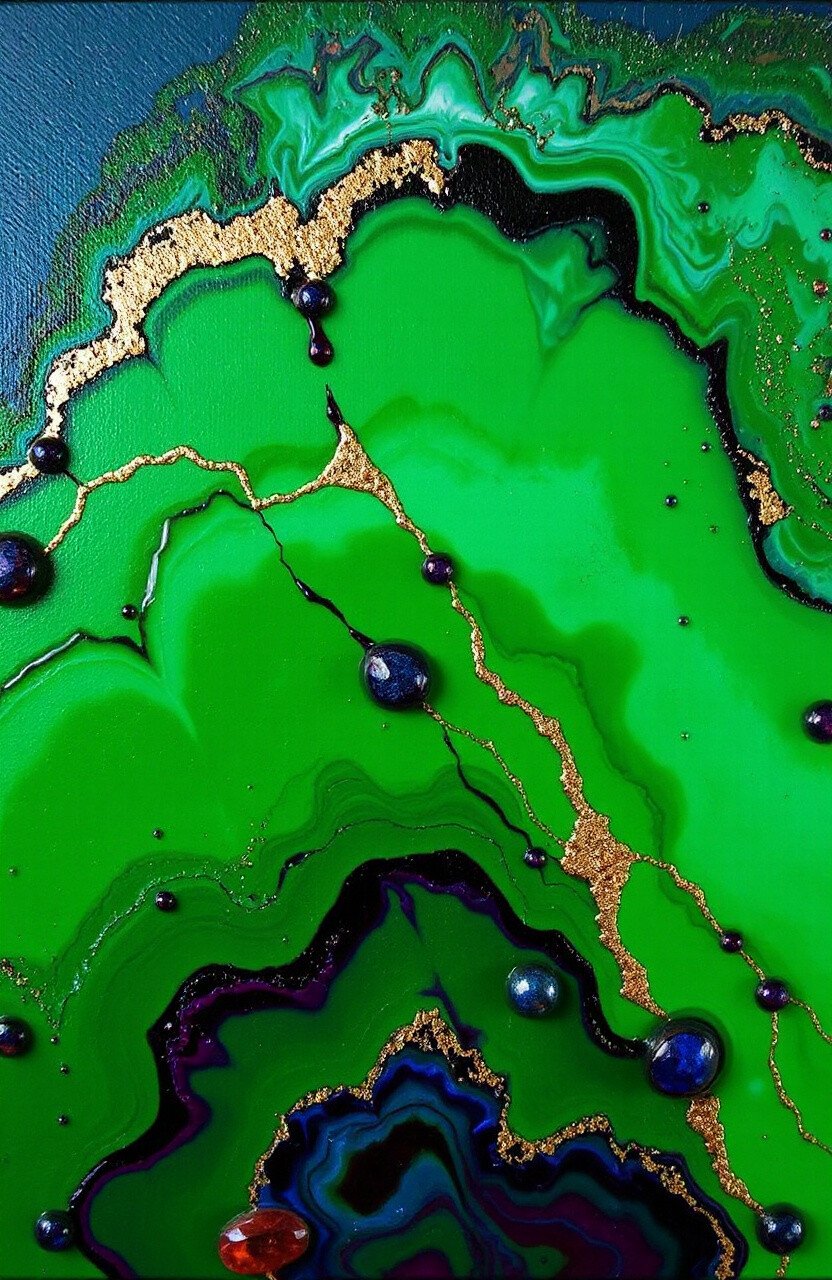
Embrace luxury with a jewel tones pour. Rich emeralds, sapphires, and rubies create a vibrant, opulent piece.
This idea is about bold color and richness. It’s perfect for adding a pop of color to a neutral room. Use gloss varnish for a high-shine finish that enhances the jewel-like quality.
Though slightly more expensive with the rich colors, it’s a stunning addition to any home. Great for dining rooms or entrance halls.
14. Forest Stream Pour
Top Forest Stream Pour Craft Tutorials
- 🖼️ Forest Stream #acryliconcanvas #artwork #artist from facebook.com.
- 🖼️ Patcraft | Home from patcraft.com.
- 👓 Forest Stream Painting (Peder Mork Monsted) ~ from painefreecrafts.com.
- 🍁 Eurographics Forest Stream Puzzle – 1000 Piece from craftwarehouse.com.
- 🗺️ Forest and stream – Duckboats from duckboats.net.
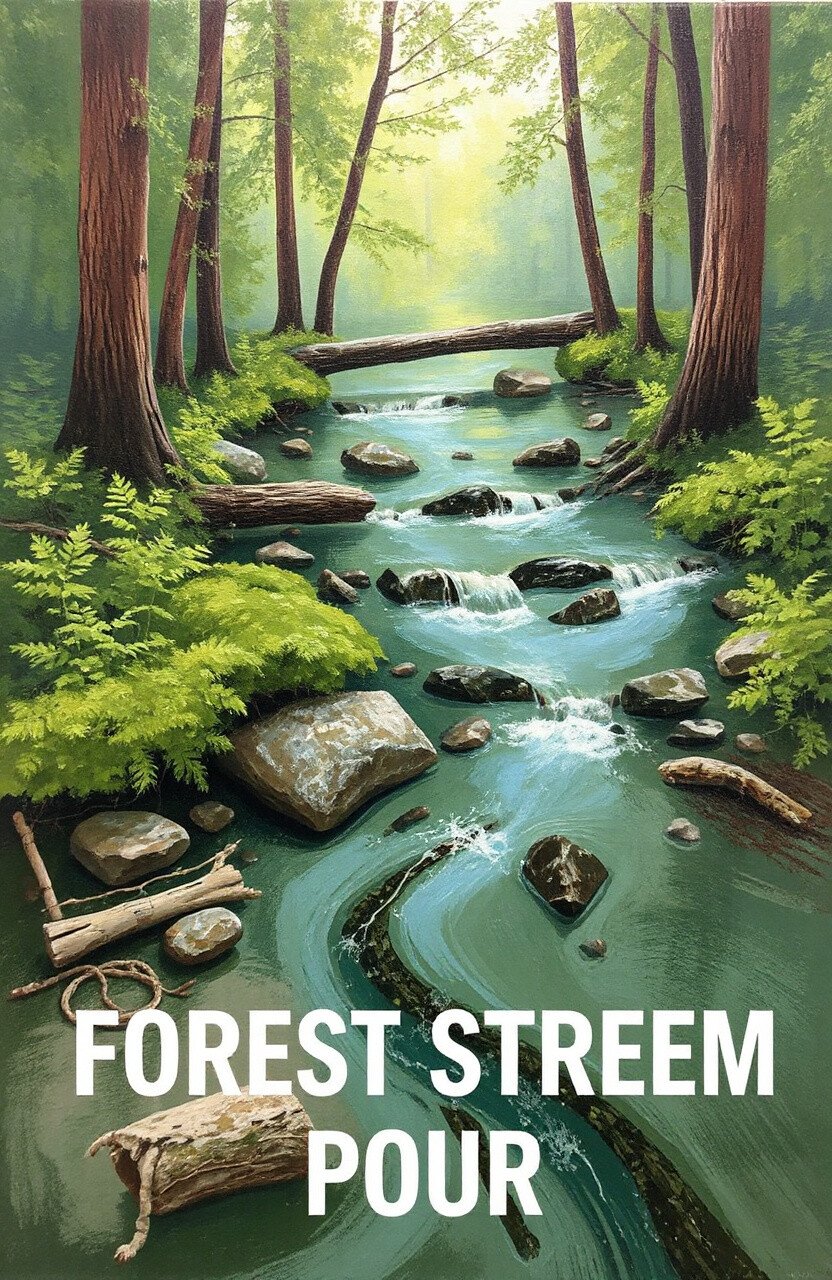
Capture the tranquility of a forest stream with earthy greens, browns, and hints of blue. This piece is a nod to nature’s beauty.
It’s a soothing, relaxing project that brings a bit of the outdoors inside. Add some texture medium for the look of running water. Ideal for those who love hiking or nature walks.
Very budget-friendly, this artwork is great for creating a calming atmosphere in living or dining areas.
15. Neon Lights Pour
Top Neon Lights Pour Craft Tutorials
- 🍅 FolkArt ® Drizzle™ Paint Set Neon Lights, 4 pc. – 50416 from plaidonline.com.
- 🎄 GenCrafts Neon Acrylic Pour Paint, Set of 12 Neon Color … from walmart.com.
- 🧑🌾 How to make bars look like neon lights? from facebook.com.
- 👓 15 Pack EL Wire Portable Neon Lights Cuttable … from ebay.com.
- 🎨 EASY GLOW – NEON GLOW HTV from craftadhesiveproducts.com.
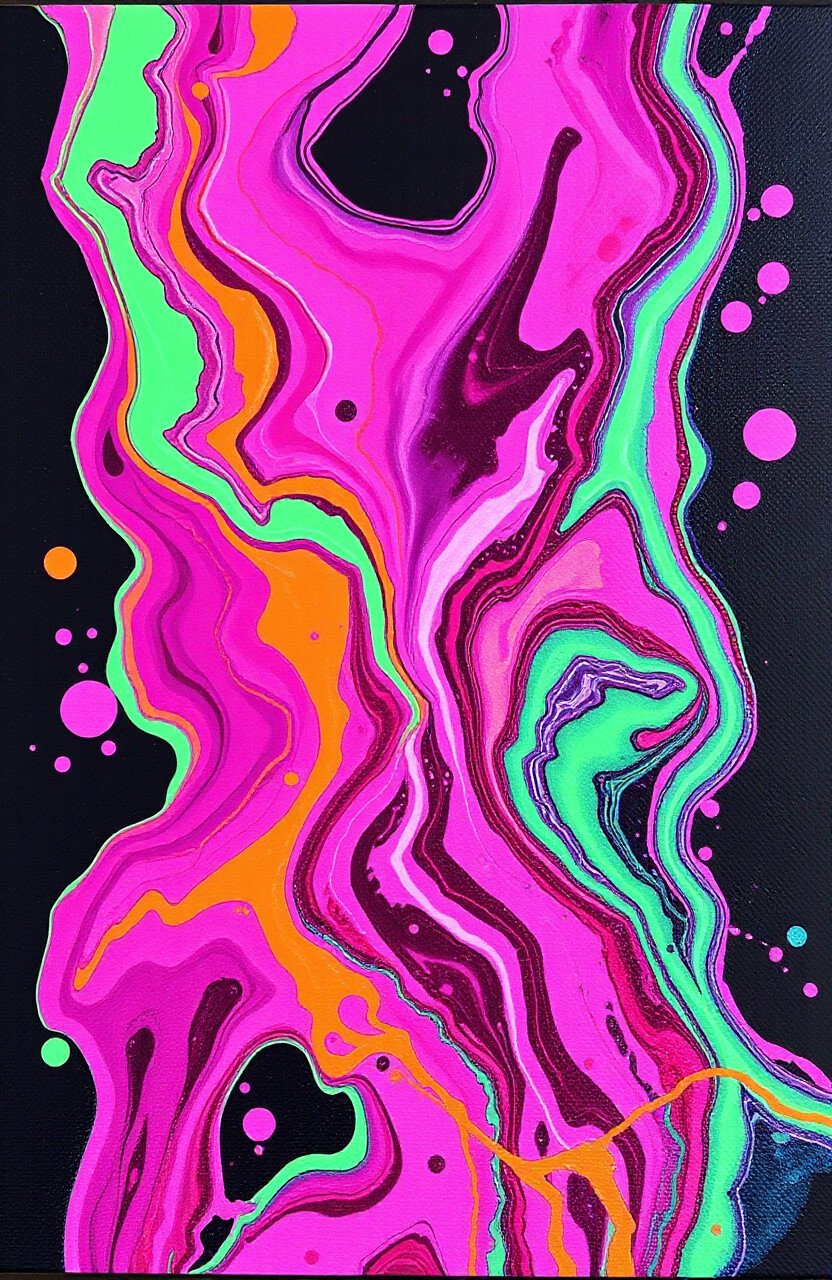
Go bold with a neon lights pour. Bright pinks, greens, and oranges glow like city lights at night.
This piece is all about energy and excitement. It’s perfect for adding a modern, edgy vibe to a room. Use a black background to make the colors pop even more.
Affordable and fun, this project is great for game rooms or creative spaces. It’s a real conversation starter!
16. Earth and Sky Pour
Top Earth And Sky Pour Craft Tutorials
- 🎨 Earth and Sky Play (@earthandskyplay) from facebook.com.
- 🧑🌾 Wrapping up 2025 with my Top 12 crafts, chosen by you 🫶 … from facebook.com.
- 🍁 Anna☀️| Nature Arts & Crafts (@earth_and_sky_play) from instagram.com.
- 🍂 In love with this lantern! I am going to try to make this! I can' … from facebook.com.
Blend the elements with an earth and sky pour. Use browns and greens for the earth, and blues and whites for the sky.
This technique captures the balance of nature, perfect for creating a harmonious environment. Use a soft brush to blend the colors gently for a seamless look.
Very economical, it’s ideal for any room where you appreciate the beauty of nature.
17. Monochrome Magic Pour
Top Monochrome Magic Pour Craft Tutorials
- 🍂 Monochrome with some Magic of Pearls!🖤 NEW video … from facebook.com.
- 👓 Craft Resin Epoxy from instagram.com.
- 🎄 Create a magical monochrome scene on grey card Quick … from facebook.com.
- 🧑🌾 How To Do Acrylic Pouring from stepbysteppainting.net.
Keep it simple with a monochrome magic pour. Use varying shades of a single color for a unified, cohesive look.
This idea is all about elegance and simplicity. It’s perfect for minimalist spaces or as a backdrop for other art. Experiment with textures for added depth.
Cost-effective and chic, this piece fits any room with a modern aesthetic.
18. Autumn Leaves Pour

Top Autumn Leaves Pour Craft Tutorials
- 🎨 18 autumn arts and crafts ideas from restless.co.uk.
- 💅 42 Best Fall Leaf Craft Ideas – DIY Decorating Projects With … from countryliving.com.
- 🎄 Fall leaf craft ideas for pressed leaves from facebook.com.
- 🖼️ Vintage Autumn Harvest #18 Fall Leaf & Pie Craft Sewing … from ebay.com.
- 🍂 10 of my favourite 'autumn leaves' crafts 🍁 🍃 🍂 As winter … from instagram.com.
Celebrate the beauty of fall with an autumn leaves pour. Use warm browns, oranges, and reds to mimic the changing leaves.
This project is all about warmth and coziness. It’s perfect for adding a seasonal touch to your home. Use a palette knife to create leaf shapes for authenticity.
Inexpensive and seasonal, this artwork brings a bit of fall indoors. Ideal for living rooms or hallways.
19. Stormy Sky Pour

Top Stormy Sky Pour Craft Tutorials
- 🍂 Watercolor painting of stormy sky from facebook.com.
- 💅 Easy Cloudy Sky Paper Plate Craft for Kids from kidsactivitiesblog.com.
Capture the drama of a stormy sky with dark grays, blues, and hints of white. This piece is full of movement and emotion.
It’s perfect for those who love dramatic, moody art. Use a blow dryer to create swirling cloud patterns for added effect. It’s a bold statement piece for any room.
Affordable and intense, this project is great for adding depth and interest to living spaces.
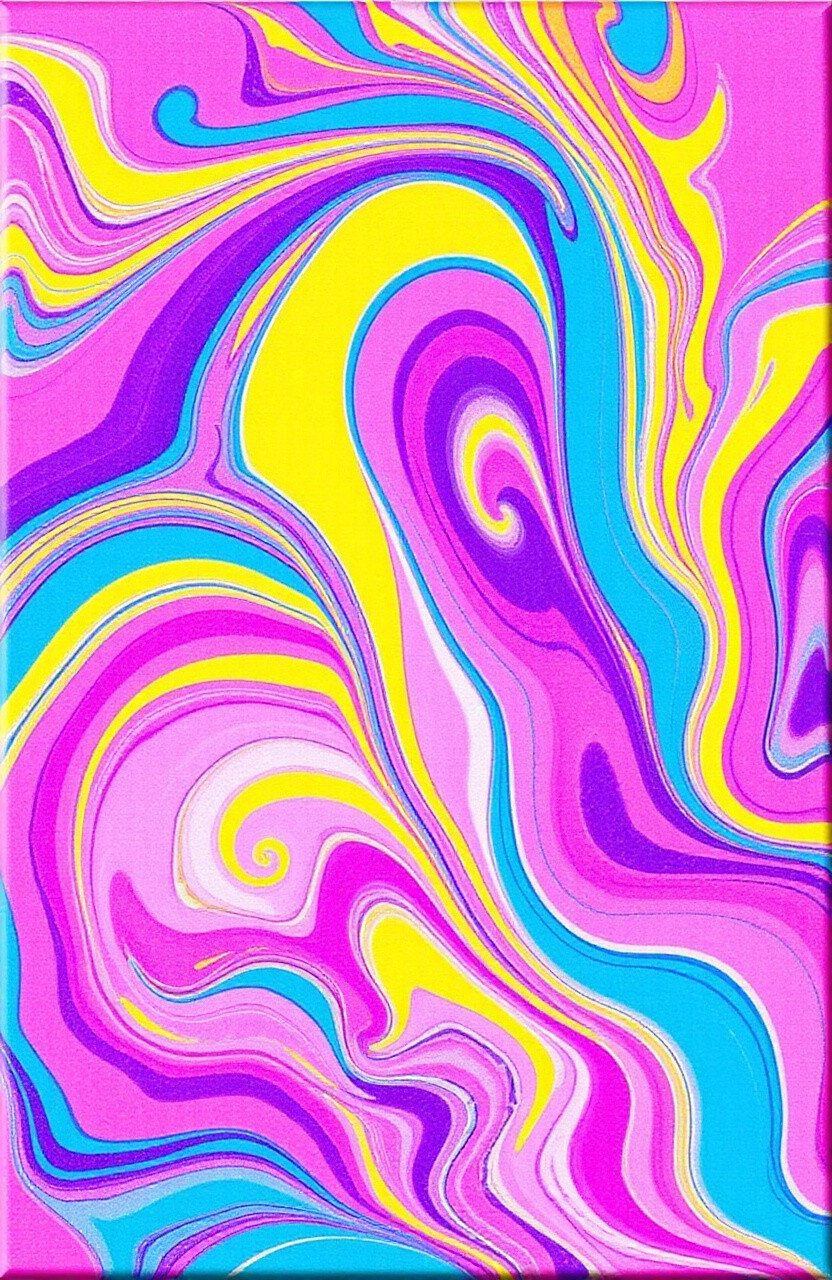
20. Candy Swirl Pour
Top Candy Swirl Pour Craft Tutorials
- 👓 Candy swirls recipe video tutorial from facebook.com.
- 👓 DIY Candy Cane Swirl Paint Pour Ornaments from diyjoy.com.
- 🖼️ Candy Swirl Lollipop MP Soap Recipe from wholesalesuppliesplus.com.
- 🎄 💞💜💞💜Cotton Candy Swirl Overlay Glittersweet 💞💜💞💜 from facebook.com.
Indulge your sweet tooth with a candy swirl pour. Use bright, fun colors like pink, blue, and yellow to create a whimsical effect.
This artwork is all about fun and playfulness. Perfect for kids’ rooms or creative spaces, it brings a sense of joy and imagination. Use a straw to create swirly patterns reminiscent of candy.
Affordable and delightful, it’s sure to bring a smile to anyone’s face.
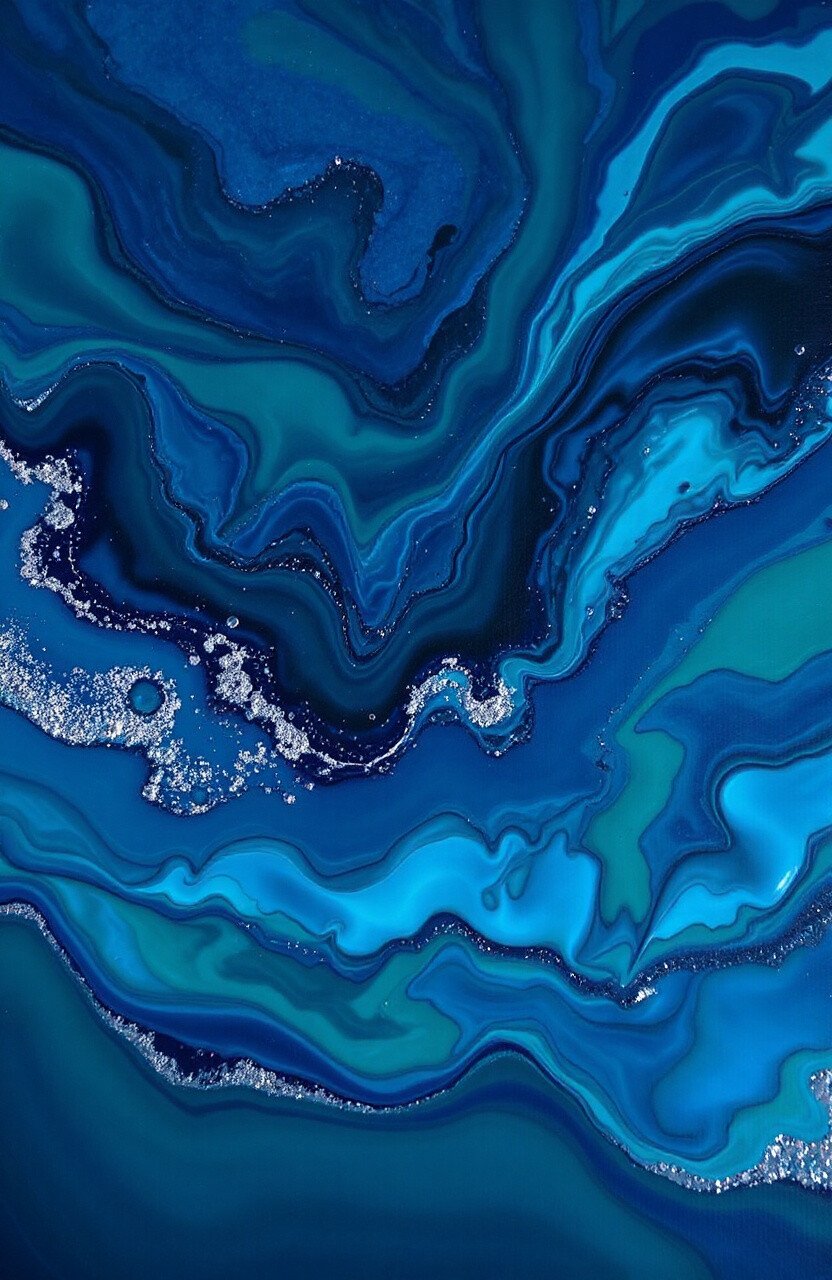
21. Deep Sea Pour
Top Deep Sea Pour Craft Tutorials
- 🍁 Smarts & Crafts Deep Sea Craft Kit, 200+ Pieces, For … from walmart.com.
- 🗺️ Learn how to make a deep sea fish decoration with this craft video. from facebook.com.
- 🍂 Fun Express Sea Creatures Craft Kit Assortment – Bulk 60 Pc from cityofharrah.com.
- 🎨 Okay! I got my Amaco celadon test blends back. I used C19 … from instagram.com.
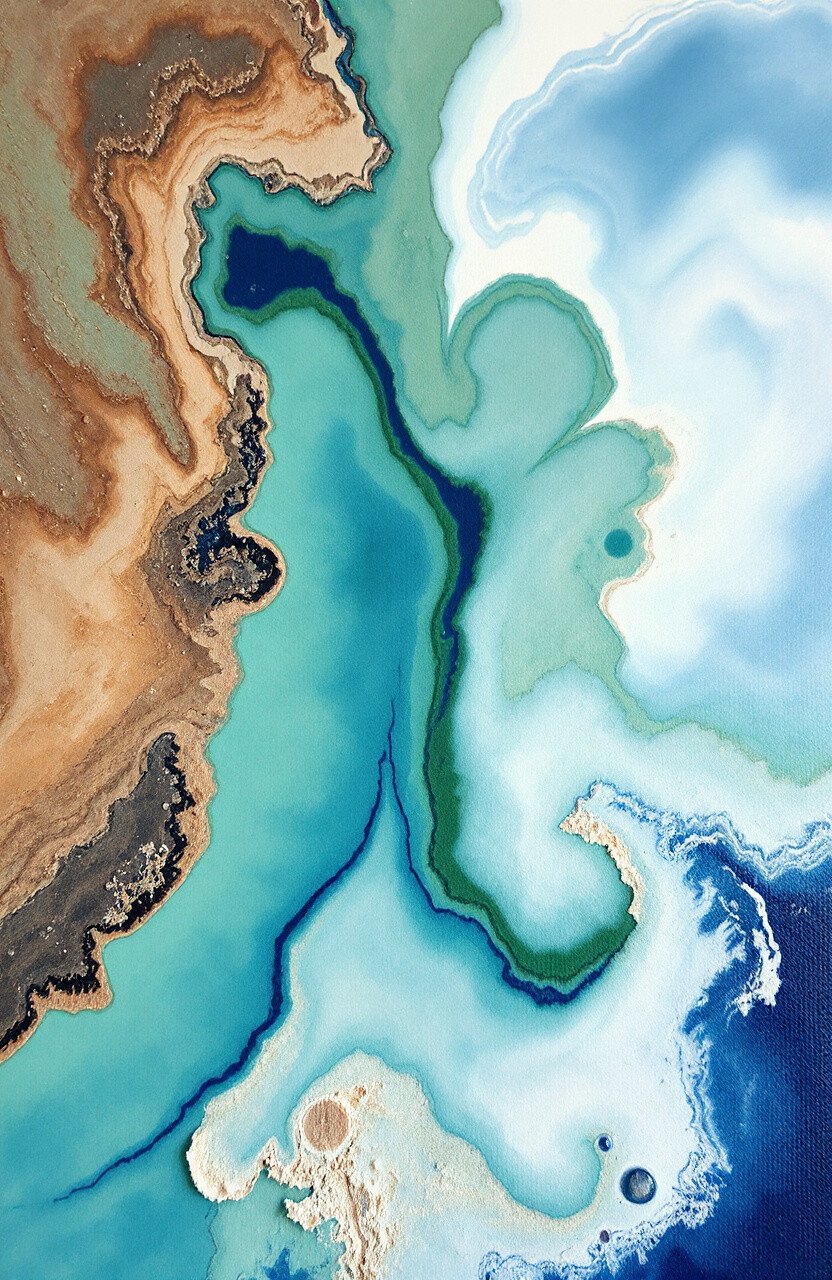
Explore the mysteries of the ocean with a deep sea pour. Use dark blues, greens, and hints of white for an underwater effect.
This idea is perfect for creating a calming, immersive environment. Add some pearl or metallic blue for the shimmer of water. It’s ideal for bathrooms or relaxation areas.
While it uses a few more materials, the result is a stunning, deep piece that draws you in. Great for ocean lovers.
22. Vintage Tones Pour

Top Vintage Tones Pour Craft Tutorials
- 👓 ARTEZA Craft Acrylic Paint, Set of 20 Vintage Tones, 60 ml … from amazon.sg.
- 🗺️ Arteza Acrylic Craft Paint Art Supply Set, 60ml Bottles … from walmart.com.
- 👓 Vintage Guitar PAS Oil Pastels 22 Colors used Japan made. from ebay.com.
- 🎨 I honestly LOVE making these! The sweet simplicity of … from facebook.com.
- 🍁 Inspiring Vintage Vinyl Painting Ideas for Your Craft Projects from lemon8-app.com.
Embrace the nostalgia with vintage tones like sepia, dusty rose, and muted greens. This piece has a timeless, classic feel.
It’s perfect for vintage-themed rooms or as a contrast to modern decor. Use a satin finish for a subtle sheen that enhances the vintage look.
Cost-effective and charming, this project adds a touch of the past to any space.
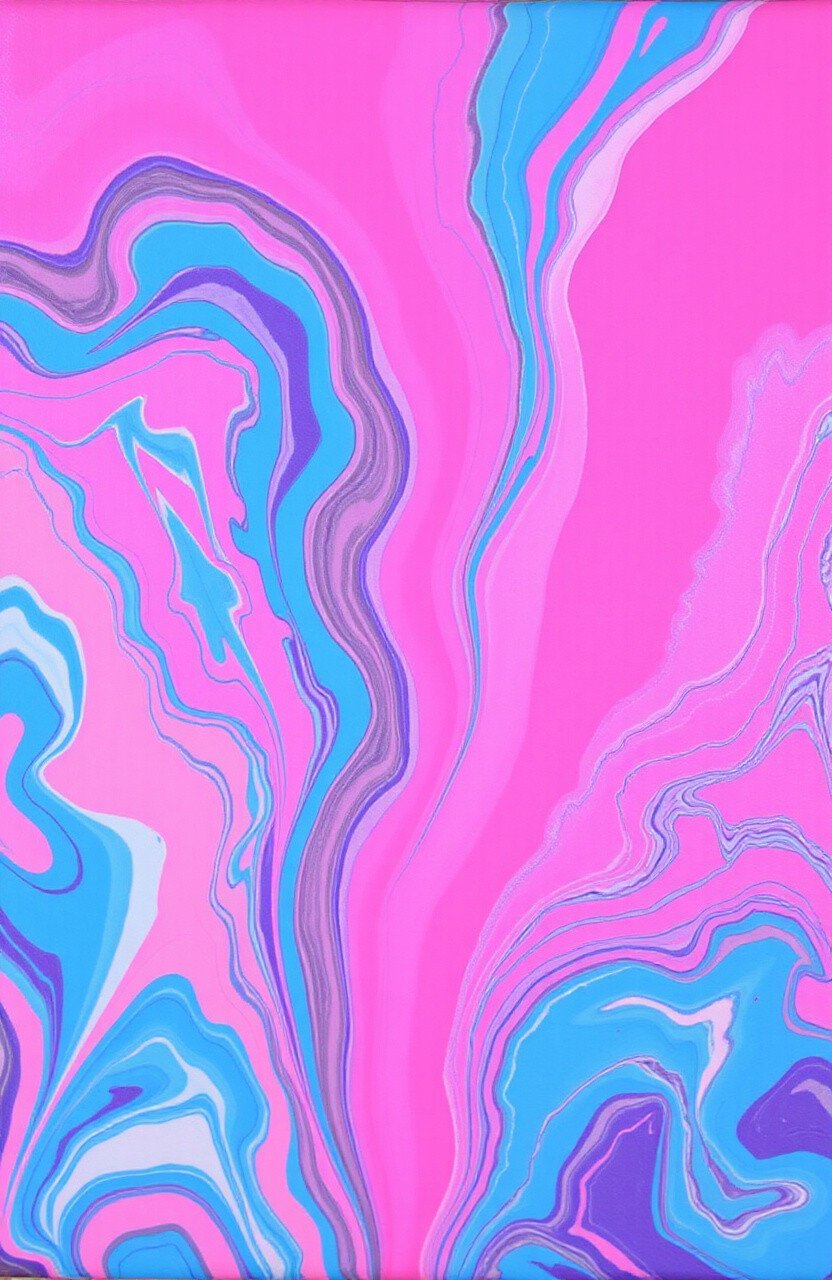
23. Bubblegum Pop Pour
Top Bubblegum Pop Pour Craft Tutorials
- 🍅 Here's how you can make a little bubblegum machine. from facebook.com.
- 🍂 Pop Rocks – Candy Bubblegum (Pack of 24) from walmart.com.
- 🍅 I'll always try🙋🏻♀️✨ #bubblegum #bubblegumcover … from tiktok.com.
- 🍁 Bubblegum Pop Music: Notable Artists and Characteristics from masterclass.com.
Bring a burst of fun with a bubblegum pop pour. Use bright pinks, purples, and blues for a lively, energetic piece.
This artwork is ideal for creating a playful, youthful vibe. Perfect for kids’ rooms or creative spaces, it’s all about bold colors and energy. Add some gloss for an extra pop.
Affordable and exuberant, it’s sure to brighten any day.
24. Zen Garden Pour
Top Zen Garden Pour Craft Tutorials
- 🍁 1/8" Zen Garden Paint Pour Cast Acrylic Sheets from custommadebetter.com.
- 🗺️ DIY Zen Gardens for Kids from projectswithkids.com.
- 🎄 So Magic DIY – Magic Wonder Garden – Make Your Own … from walmart.com.
- 💅 DIY office zen garden with wooden tray and stones from facebook.com.
- 👓 LOGOFUN 6-Piece Mini Zen Garden Rake Set – Gold Metal … from glowblacksburg.com.
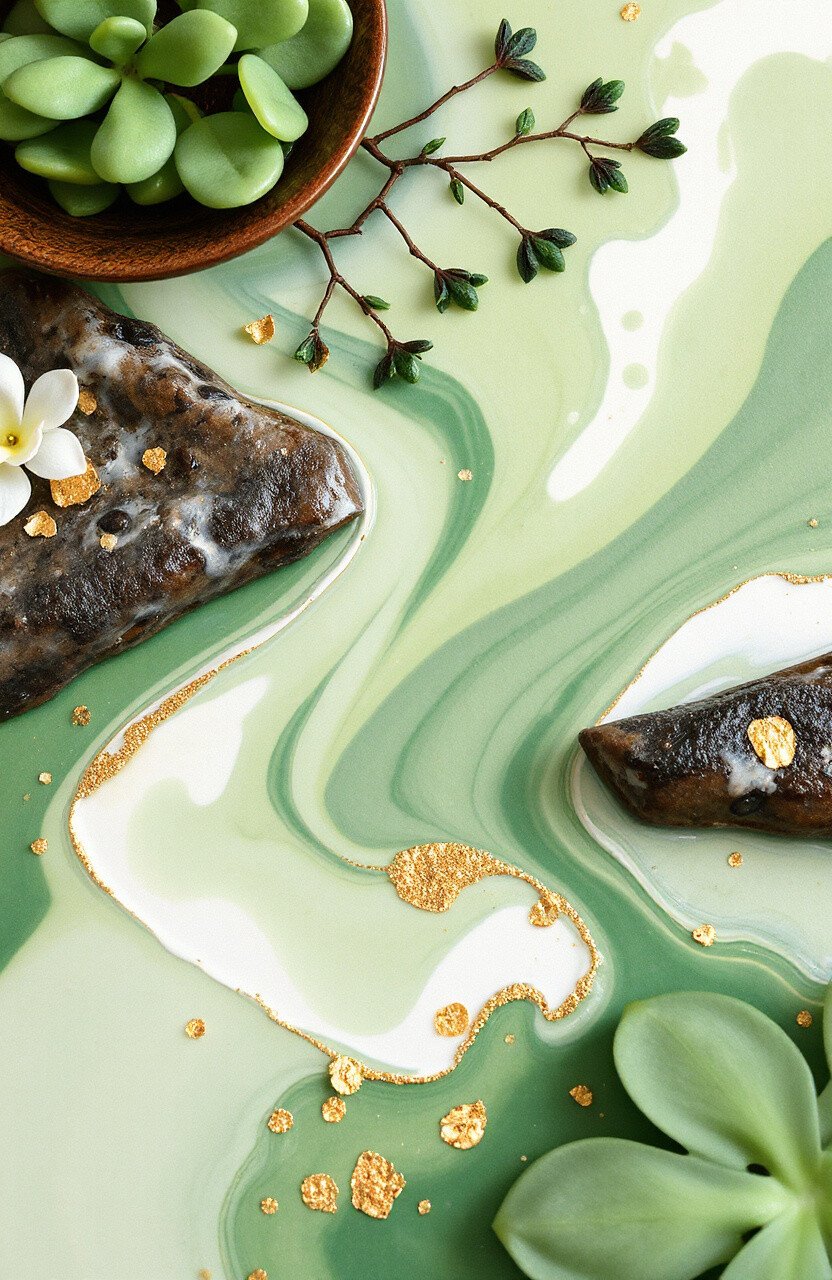
Create a peaceful oasis with a zen garden pour. Use calming colors like soft greens, blues, and browns for a relaxing effect.
This piece is all about tranquility and balance. It’s perfect for meditation spaces or bedrooms. Add some gold accents for a touch of luxury and warmth.
Cost-effective and serene, this project is perfect for anyone looking to create a calming environment at home.