Clay projects can feel magical even on a small budget. The right supplies make that magic easier to shape.
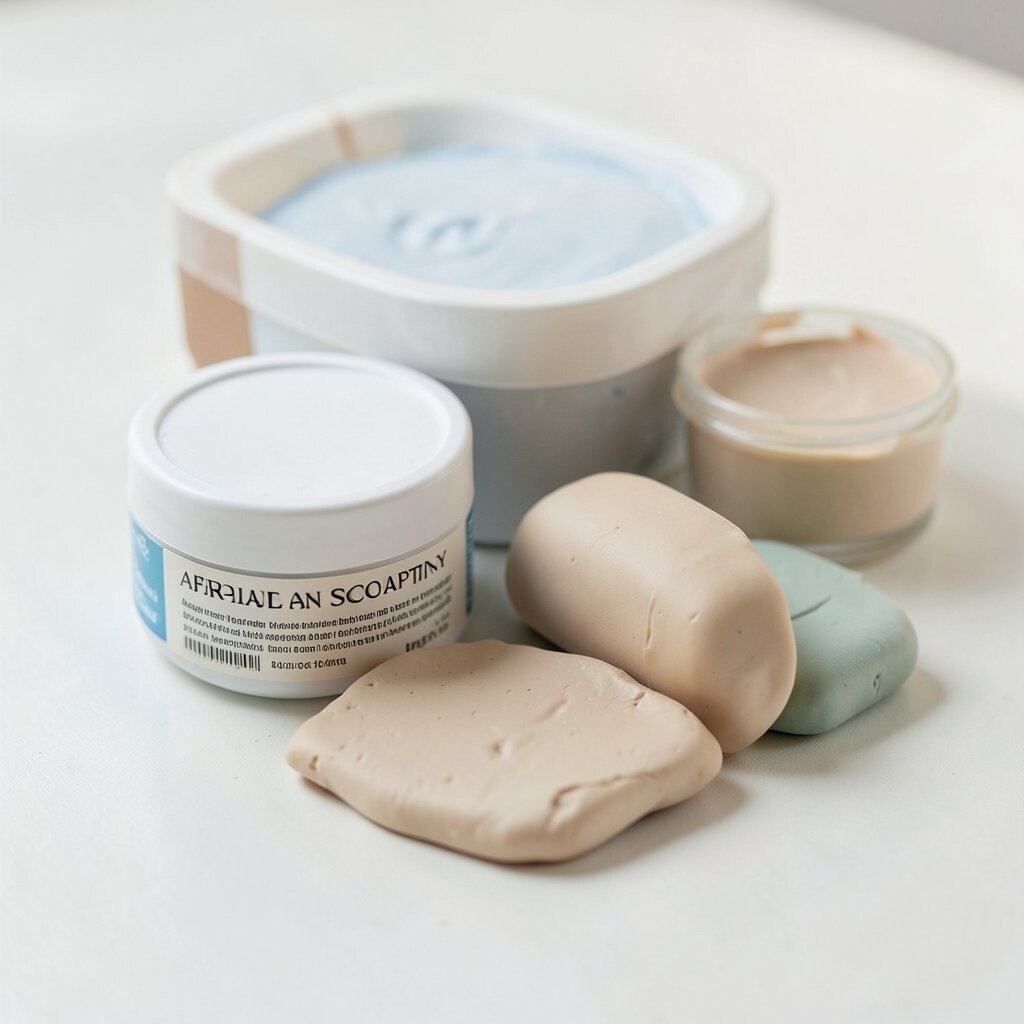
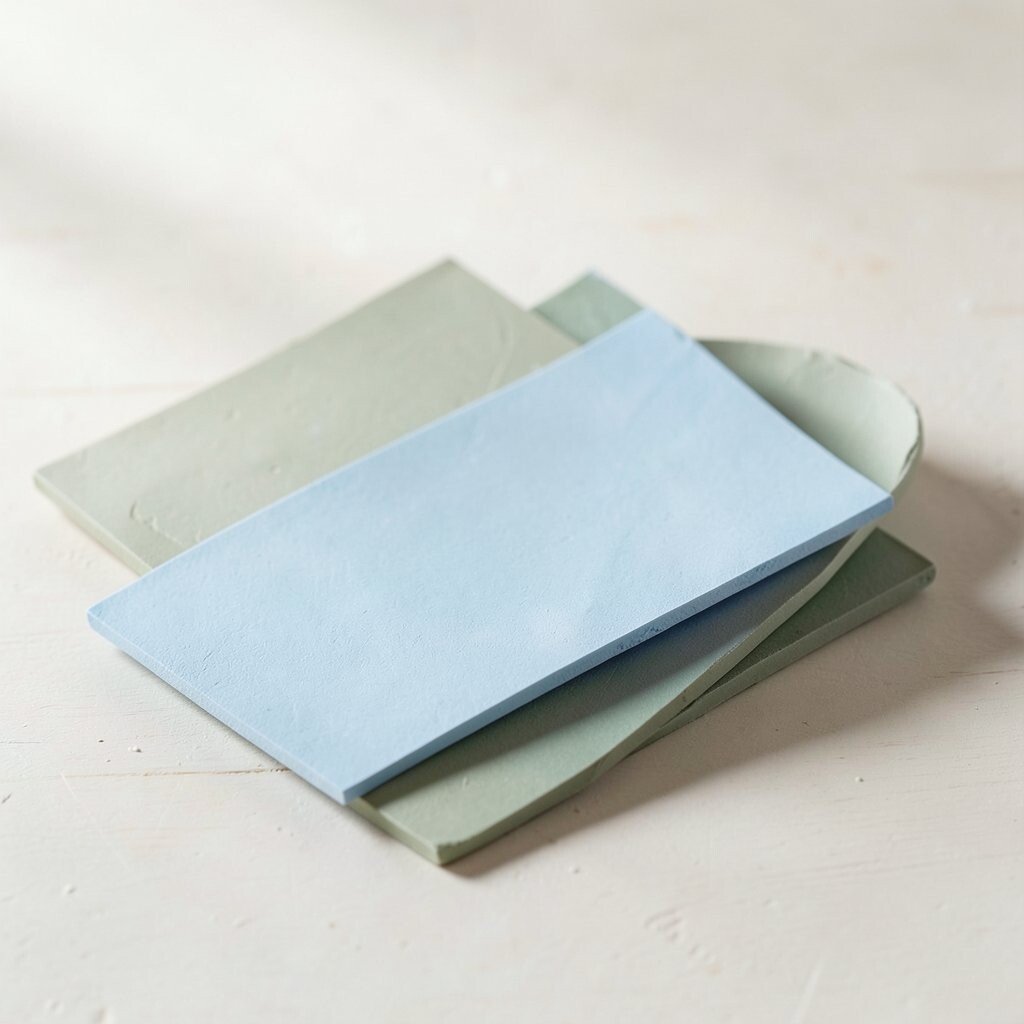
1. Air-Dry Clay
Top Air-Dry Clay Craft Tutorials
- 🧑🌾 30 Air Dry Clay Ideas to Try from lovelyindeed.com.
- 👓 air dry clay crafts from gatheringbeauty.com.
- 👓 Air Dry Clay Project ideas First-timers must try from medium.com.
- 🍅 Some of my little air dry clay projects : r/airdryclay from reddit.com.
- 🎨 Air-Dry Clay Crafts with Crayola | Creative DIY Ideas from crayola.com.
Air-dry clay is soft, smooth, and easy to press into cute shapes. It dries on its own, so you do not need a kiln or oven.
This makes it a smart pick for school crafts, home projects, and quick gifts. It is also a friendly choice for beginners because mistakes can often be fixed with a little water. Try mixing in paint, stamps, or tiny beads to give each piece a personal look.
2. Polymer Clay

Top Polymer Clay Craft Tutorials
- 🍁 Polymer Clay Crafts – 21 Clever Ideas To Try! from katherinededul.com.
- 🍁 20+ Easy Polymer Clay Craft Ideas from homemadeheather.com.
- 🍅 16 simple polymer clay projects to try from montmarte.com.
- 🧑🌾 Polymer Clay Projects | Online Guide | Chapter 2 from sculpey.com.
- 🧑🌾 Sculpting With Polymer Clay : 8 Steps (with Pictures) from instructables.com.
Polymer clay comes in bright colors and feels firm but bendable in your hands. After shaping, it bakes in a home oven and keeps fine details very well.
It is great for charms, earrings, mini food, and tiny figures. Many makers like it because the colors stay bold and the finish can look clean and polished. For savings, buy starter packs or use a few colors that can be blended into many shades.
Current craft trends often use polymer clay for playful jewelry and pastel home decor. You can add texture with lace, buttons, or leaves for a custom touch. If you want a neat result, keep your work surface clean and use simple tools like a blade and a roller.
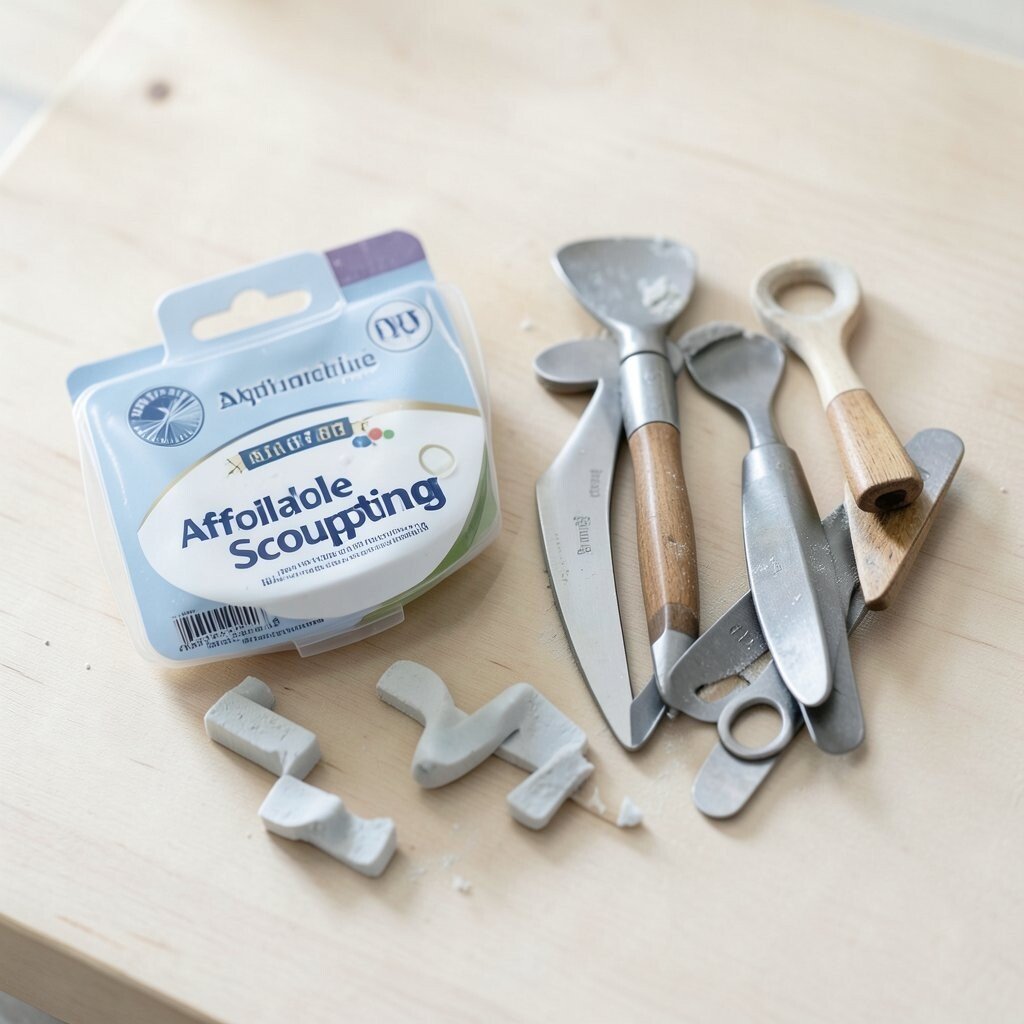
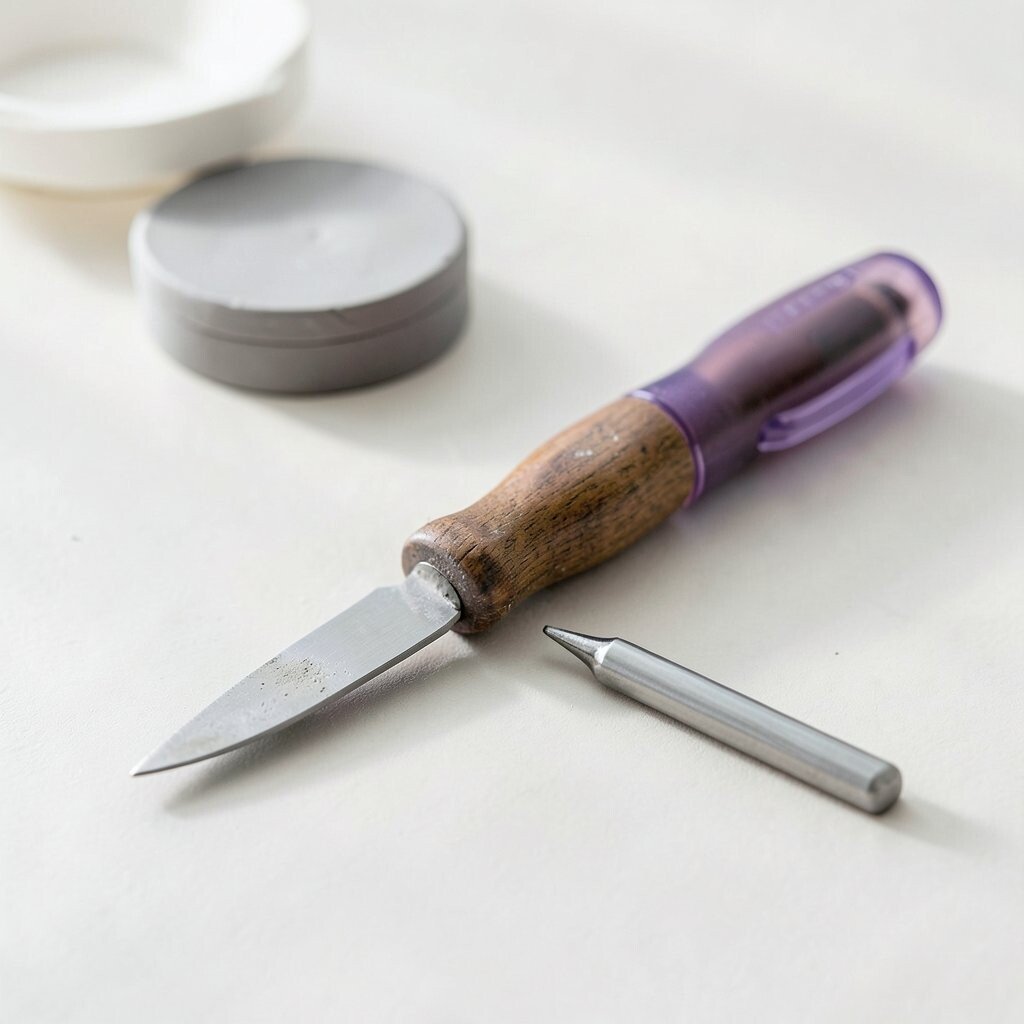
3. Sculpting Tool Set
Top Sculpting Tool Set Craft Tutorials
- 💅 Crafter's Toolkit Sculpting Tools – Sculpting, Set of 3 from dickblick.com.
- 🧑🌾 Model Kit of Three Double-Sided Sculpting Clay Tools from walmart.com.
- 🎄 3 Pcs Tool Set for Embossing and Sculpting Clay … from ebay.com.
- 🍁 3pcs Soft Silicone Pottery & Clay Sculpting Tool Set from rivercraftceramics.com.
- 🍁 Double-Ended Stainless Steel Sculpting & Modeling Tools from michaels.com.
A basic sculpting tool set gives you shaping sticks, loop tools, and smoothers. The tools are small, but they can make clay look much more polished.
They help with lines, eyes, edges, and tiny details that fingers cannot do well. A simple set is often enough for most projects, so you do not need fancy gear right away. Pick tools with wooden or plastic handles for a light, comfy feel.
These tools are useful for both soft clay and firmer clay. They also help kids and adults make cleaner shapes with less mess. If you want a personal kit, label each tool or keep it in a pouch with your favorite colors.
4. Rolling Pin or Clay Roller
Top Rolling Pin Or Clay Roller Craft Tutorials
- 🍁 Uxcell 5pcs Wood Clay Roller 4" Snowflake Pattern Rolling … from walmart.com.
- 🎄 Ceramics: 5 ways to make clay slabs without a slab roller from craftychica.com.
- 🍁 4 Pcs Acrylic Rolling Pin Clay Roller Bar Round Stick Solid … from ebay.com.
- 🖼️ Clay Slab Rollers and Rolling Pins from dickblick.com.
- 🎨 Should I buy my daughter a rolling pin for clay? from facebook.com.
A rolling pin or clay roller flattens clay into even sheets with little effort. The surface looks smooth and ready for cutouts, tiles, or layered designs.
Many crafters use acrylic rollers because they are easy to clean and do not stick as much. A budget kitchen rolling pin can also work well if you keep it only for clay. For a special touch, choose a roller with guides so your clay stays the same thickness.
5. Work Mat

Top Work Mat Craft Tutorials
- 🍅 Work mats for crafting, cutting and DIY projects from vaessen-creative.com.
- 🍂 5 Must Have Crafting Mats to Use Today! from scrapbook.com.
- 🍁 Spectrum Noir Craft Mat from crafterscompanion.com.
- 🍅 24" x 36" Self-Healing Cutting Mat 5-Ply – Double-Sided … from michaels.com.
- 🗺️ Why Every Crafter Needs a Magnetic Glass Craft Mat in Their … from silhouette-secrets.com.
A work mat keeps clay from sticking to the table and helps protect your space. It also gives your project a neat, tidy base.
Silicone mats are popular because clay peels off them easily. Some mats have measurement lines, which makes cutting and sizing much simpler. If you want a personal setup, pick a mat in a bright color that makes crafting feel cheerful.
6. Acrylic Clay Cutter Shapes

Top Acrylic Clay Cutter Shapes Craft Tutorials
- 🍂 6Pcs Acrylic Polymer Clay Tools Snowflake & Arch Shape … from walmart.com.
- 🧑🌾 6 Organic Shapes Clay Cutters for Polymer Clay, Small & … from michaels.com.
- 🗺️ Basic and Classic Shapes Polymer Clay Cutters from theclayimpress.com.
- 🍁 Elegant Shape No. 6 Clay Cutter from wildhoneycutters.com.
- 🍂 set 6 acrylic tools crafting polymer clay earrings featuring from temu.com.
Acrylic clay cutters make crisp shapes like hearts, stars, leaves, and circles. They give projects a clean edge that looks neat and modern.
These cutters are useful for earrings, ornaments, and tiny craft sets. Since they come in many styles, you can match them to holidays, seasons, or favorite themes. To save money, start with a small shape set and add more only when you need them.
Trendy makers often use simple geometric cutters for a fresh, stylish look. You can press patterns into the clay before cutting for extra charm. A light dusting of cornstarch or water can help the cutter lift cleanly.
7. Clay Conditioning Pasta Machine

Top Clay Conditioning Pasta Machine Craft Tutorials
- 🎄 Cheap Pasta Machines for Polymer Clay – A Review from thebluebottletree.com.
- 💅 Clay conditioner pasta machine for Polymer Clays from ebay.com.
- 🍁 What is a clay conditioner machine? from facebook.com.
- 🍁 Atlas Pasta Machines for Polymer Clay – A Review from thebluebottletree.com.
- 🍁 Pasta Machine, Clay Tool, 9 Thickness Settings, Crank Handle … from michaels.com.
A clay conditioning machine rolls and softens clay with very even pressure. It can make hard clay easier to use and help colors blend smoothly.
This tool is handy for people who make a lot of pieces or want flat sheets fast. It also saves hand strength, which is nice for longer craft sessions. Look for a sturdy machine that can be clamped to a table for safer use.
Many artists use this tool for color mixing and layered designs. It gives a neat, professional look without much extra work. If you want a unique style, feed in two colors side by side and fold them for pretty marbled effects.
8. Detail Brushes

Top Detail Brushes Craft Tutorials
- 👓 Craft & Stencil 8 Piece Brush Set by Craft Smart® from michaels.com.
- 🍂 Specialty Brushes from usartsupply.com.
- 👓 Detail Paint Brush Set with Triangular Handles – 10pcs from artgoldenmaple.com.
- 💅 Hello Hobby Craft Paint Cup Set with Hog Bristle … from walmart.com.
- 🎨 Spill Proof Craft Paint Cup Set with Hog Bristle Brushes 8 Piece … from ebay.com.
Detail brushes are small, soft brushes that help paint tiny faces, lines, and accents. They make clay pieces look lively and full of character.
These brushes are a low-cost way to improve almost any finished project. A few sizes can cover most needs, from tiny dots to thin outlines. Keep them clean and store them with the bristles up so they last longer.
They are great for adding freckles, blush, lettering, and tiny flowers. You can also use them with glue, varnish, or water for finishing work. For a personal style, choose colors that match your favorite craft theme or room decor.
9. Acrylic Paint Set

Top Acrylic Paint Set Craft Tutorials
- 💅 Testors Craft Acrylic Paint Set 9/Pkg-Auto Truck – Walmart from walmart.com.
- 🧑🌾 Rosa Talent Glossy Acrylic Paint Set for Decor 9 colors … from michaels.com.
- 💅 Auto Detail Acrylic Paint – 9 Piece Set from hobbylobby.com.
- 🗺️ 9-Color Acrylic Craft & Model Paint Set & Brushes, 1/4 oz. ea. from dkhardware.com.
- 🎄 1/2 Gallon Acrylic Paint Set – 9 Bottles from discountschoolsupply.com.
Acrylic paint adds bright color to clay pieces after they dry or bake. The paint sits on top in a bold layer and can make simple shapes stand out.
This is a budget-friendly supply because one set can work on many projects. Matte paint gives a soft look, while glossy paint feels lively and bold. Try mixing a few colors to make custom shades that fit your own style.
Paint trends now often lean toward soft pastels, earth tones, and playful rainbow mixes. Small jars or tubes are enough for most home crafters. Seal painted pieces with a clear coat if you want them to last longer.
10. Clear Sealant or Varnish

Top Clear Sealant Or Varnish Craft Tutorials
- 👓 Top Coats and Sealers for Crafts – A Comprehensive Guide! from thegraphicsfairy.com.
- 🖼️ Craft Varnish from walmart.com.
- 🗺️ What is the best clear sealer/varnish I can use for acrylic … from reddit.com.
- 🍅 What kind of sealant or varnish do you use after painting … from facebook.com.
- 🗺️ Topcoat/Sealer – Acrylic Paint from homedepot.com.
Clear sealant gives clay pieces a finished shine or a smooth matte look. It can also help protect paint from scratches and dust.
This supply is useful for jewelry, decor, and gifts that will be handled often. Some sealants dry fast, while others take longer but give a stronger finish. Check the label so you choose one that fits your clay type.
A thin coat usually looks cleaner than a heavy one. You can make pieces look glassy, satin, or soft depending on the product. For a unique touch, seal only parts of the piece to create mixed textures.
11. Wire Clay Cutter

Top Wire Clay Cutter Craft Tutorials
- 🎄 Tools : Wire Cutters from theceramicshop.com.
- 🖼️ Pro Cutting WIre Tool – 11 inch – Creative Crafts from creative-crafts.com.
- 🍂 Knives, Clay Cutters, Trimming & Needle Tools from georgies.com.
- 🗺️ Wire Clay Cutter with Wood Handles from munrocrafts.com.
- 👓 Clay Cutter Wire from walmart.com.
A wire clay cutter slices blocks of clay into neat sections with little effort. It is simple, sharp, and very handy for clean cuts.
This tool saves time when you are working with large lumps or firm clay. It also helps keep edges tidy, which is useful for detailed work. Many crafters like stainless steel wire cutters because they are strong and easy to wipe clean.
Use slow, steady pulls for the best result. A cutter with comfy handles can make longer sessions easier on your hands. If you want a personal touch, keep one cutter just for certain clay colors to avoid mixing shades.
12. Texture Stamps

Top Texture Stamps Craft Tutorials
- 🍂 IOD Vintage Textures 12"x12" Decor Furniture Stamp from goodsonvintagetreasures.com.
- 🎄 IOD Vintage Textures, Stamp Collection 12"x 12" from decoupagecentral.com.
- 💅 Vintage Textures – 12 x 12 IOD Stamp (1 Sheet) from locker61.com.
- 🖼️ IOD Vintage Textures Decor Stamp (1 Sheet Set) 12"x12 … from texasinlaws.com.
- 💅 vintage textures | stamp 12" x 12" (1 sheet) from milkpaint.com.
Texture stamps press pretty patterns into clay and make plain surfaces look special. They can create lace looks, dots, leaves, stripes, and more.
These stamps are a fun way to add style without needing advanced skill. They work well on jewelry, bowls, ornaments, and wall pieces. Since many sets are reusable, they are a smart buy for crafters who like variety.
Nature patterns and simple repeating shapes are very popular right now. You can also make your own stamps with buttons, shells, or carved erasers. Press gently so the design stays clear and does not flatten the whole shape.
13. Sandpaper Sheets
Top Sandpaper Sheets Craft Tutorials
- 🎄 General's Sandpaper Pad Lead Pointer – 13 sheets … from ebay.com.
- 🧑🌾 Detail Sander, 13 Grit Levels 60–10000, Color-Coded … from amazon.ae.
- 🎄 Premium Sandpaper Set 72 Pcs: 13 Grits for DIY ✅ from vxb.com.
- 🖼️ These pack of assorted grit sandpaper sheets are your best … from facebook.com.
- 👓 Proxxon 240 Grit Sandpaper for PS 13, 3 Sheets of 20 Pads … from vertexdynamicslab.com.
Sandpaper helps smooth rough edges after clay dries or bakes. It can turn a bumpy piece into something neat and polished.
This is a low-cost supply that can improve the final look a lot. Fine-grit sheets work best for gentle smoothing, while medium grit can fix larger bumps. Use a light touch so you do not scratch the surface too much.
Many makers sand the edges of jewelry and small decor pieces for a cleaner finish. You can also use it to shape tiny details with care. For a custom setup, keep a few grit levels in one folder so they are easy to grab.
14. Foam Clay

Top Foam Clay Craft Tutorials
- 🗺️ Foam Clay from youtube.com.
- 🧑🌾 Introduction to Foam Clay Crafts from facebook.com.
- 👓 Halloween Foam Clay – Buy your kids' clay here from lindehobby.com.
- 🧑🌾 S'mores creatures made with foam clay : r/crafts from reddit.com.
- 🎄 Foam Clay Sculpting Foam for Cosplay 300 Gram Gray, 14 … from walmart.com.
Foam clay is light, squishy, and fun to mold into fluffy-looking shapes. It often has tiny foam beads that give it a bumpy, playful texture.
Kids and beginners enjoy it because it feels soft and easy to shape. It is a nice choice for animals, clouds, toppings, and cute mini scenes. Since it is light, it works well for projects that should not feel heavy.
Foam clay is popular in kawaii-style crafts and colorful desk decor. You can mix it with other clays for fun texture contrast. To keep costs down, use it for small accents instead of full large pieces.
15. Modeling Clay

Top Modeling Clay Craft Tutorials
- 🎨 15 Cute Things to Make with Air Dry Clay from colorfulcraftcorner.com.
- 💅 15+ clay projects for beginners from swoodsonsays.com.
- 🗺️ 20 Clay Crafts For Creative Play from kiwico.com.
- 🧑🌾 35 air dry clay ideas for adults and kids from gathered.how.
- 🎄 15+ Creative Clay Crafts You Can Make At Home For … from craftyartideas.com.
Modeling clay stays soft and does not need baking, which makes it very easy to use. It comes in many colors and can be reused for practice pieces.
This is a good choice for sketching ideas before making a final clay project. It helps you test shapes, poses, and size without worry. A basic pack is often affordable and useful for both kids and adults.
Because it stays flexible, it is great for stop-motion figures and classroom fun. You can make quick changes and try new ideas fast. For a unique project, blend colors together to create a swirled, dreamy look.
16. Clay Storage Containers

Top Clay Storage Containers Craft Tutorials
- 🍁 What are some container options for storing polymer clay … from facebook.com.
- 🎄 Clear 16 Case Photo & Craft Keeper by Simply Tidy® from michaels.com.
- 🎄 Air To Clay Reusable Empty Storage Box Holds 16 … from ebay.com.
- 🎨 Good storage box for clay? Gift for tween sculpty artist from reddit.com.
- 🎨 Everything Mary Craft Organizer With 16 Stackable Clear Jars … from us.shein.com.
Storage containers keep clay soft, clean, and ready for the next project. Clear boxes also let you see colors at a glance.
This is a simple supply that can save money by reducing dried-out clay waste. Small sealed tubs, zipper bags, or stackable bins all work well. Choose containers that close tightly so the clay stays fresh longer.
Organized storage makes crafting feel calmer and faster. You can sort by color, type, or project idea. For a personal system, add labels or stickers so your favorite supplies are easy to find.
17. Needle Tool

Top Needle Tool Craft Tutorials
- 🖼️ Introduction to Punch Needle Crafting from diaryofaquilter.com.
- 🍅 DIY Punch Needle Wooden Handle Set Embroidery Felting … from thesongbirdcenter.com.
- 🍁 Costume needle from oldschool.runescape.wiki.
- 🍅 Punch Needle Crafting for Beginners: Essential Tools & … from aprettyfix.com.
- 🧑🌾 1-17Pcs Punch Needle Tool Kit Embroidery Stitching … from aliexpress.com.
A needle tool has a sharp point that helps mark lines, holes, and tiny details. It is small, simple, and very useful for careful work.
This tool can make eyes, stitching marks, and clean guide lines. It also helps pop air bubbles before baking or drying. Since it is inexpensive, it is a smart add-on for almost any clay kit.
Use it with a light hand so you do not poke too deep. Many crafters keep one in a pouch with their other detail tools. For a custom project, use the point to sign your name or add a tiny pattern.
18. Glaze Pens or Liquid Chalk Markers

Top Glaze Pens Or Liquid Chalk Markers Craft Tutorials
- 🍅 Sakura Glaze Gel Pen – 18 Color Bundle from jetpens.com.
- 🖼️ Craft Paint | Acrylic, Metallic, Outdoor & More | Retailers from michaels.com.
- 🗺️ Chalk Markers from writeyboards.com.
- 👓 JusArt Acrylic Paint Markers Brush Tip 18 Colors, Water-Based … from us.shein.com.
- 🧑🌾 Craft Markers from markersupply.com.
Glaze pens and liquid chalk markers add bright accents with easy control. They can make letters, dots, outlines, and tiny art details look crisp.
These supplies are handy when a brush feels too messy or too large. They are also great for kids who want simple decorating tools. Look for pens that dry well and work on sealed clay surfaces.
They fit current trends that favor bold edges and handmade labels. You can use them for names on gifts, cute faces, or modern line art. Try a few colors together for a lively, custom finish.
19. Molds and Silicone Forms

Top Molds And Silicone Forms Craft Tutorials
- 🧑🌾 New 19 Styles Cactus Silicone Candle Mold Succulent Plants … from us.shein.com.
- 🎨 Molds and Shapes – Unique high quality silicone craft molds. from moldsandshapes.com.
- 🧑🌾 Bulk lot of 19 molds Shiny Resin Silicone Straw Topper … from ebay.com.
- 🖼️ Bee Honeycomb Silicone Soap Mold – 19 Cavity Plaster from store.lamarzocco.com.
- 🍂 19 silicone crafting molds. Some new with from mercari.com.
Molds and silicone forms help shape clay into repeatable designs with ease. They are smooth, flexible, and often very simple to use.
This is a helpful supply for making flowers, cabochons, mini foods, and decorative parts. It saves time and gives pieces a neat, even look. Many molds are affordable, especially when bought in small sets.
You can make many pieces that match, which is great for gifts or shop items. Some makers also use molds to test new color blends and styles. For a personal twist, paint the finished shapes in your own favorite color palette.
20. Apron and Table Cover
Top Apron And Table Cover Craft Tutorials
- 🍁 I turned a torn/stained tablecloth that my grandmother gave … from reddit.com.
- 🎄 I make aprons from old tablecloths. I end up with a lot of … from facebook.com.
- 🖼️ How To: Turn a Table Cloth into an Apron – kmacdiy from kmacdiy.wordpress.com.
- 🍂 Apron made from thrift store tablecloth from facebook.com.
- 🖼️ McCalls Crafts # 8438 Apron Table Cloth Placemat Runner … from ebay.com.
An apron and table cover help keep clothes and furniture safe from clay dust and paint. They also make the craft space feel ready and organized.
This is a practical buy that can prevent extra cleanup and stress. A wipeable table cover is especially useful for messy projects and kids’ craft time. Choose a fabric or plastic style that fits your space and budget.
Many crafters like cheerful aprons with pockets for tools and brushes. That small detail makes the work area more personal and fun. A bright cover can also make the whole setup feel like a real studio.
21. Craft Knife with Safety Cap
Top Craft Knife With Safety Cap Craft Tutorials
- 💅 Craft Knife from sliceproducts.com.
- 🎄 Excel Hobby Blades Light Duty Aluminum Craft Knife with … from walmart.com.
- 🖼️ Excel 19064 – K1 Aluminum Craft Knife w/Safety Cap, #11 … from tequipment.net.
- 🗺️ Shop K1 Craft Knife for Precision Cutting from excelblades.com.
- 🍁 Slice Craft Knife from target.com.
A craft knife helps cut clean edges, trim shapes, and make tiny cuts with care. The safety cap keeps the blade covered when it is not in use.
This tool is useful for precise work on baked clay, paper templates, and layered designs. It is a smart choice for makers who want neat lines and sharper detail. Use it on a firm surface and keep fingers away from the blade path.
Many modern clay projects use crisp cuts for a sleek, handmade look. A small knife can do a lot without taking up much space. For a personal touch, pair it with a favorite ruler or cutting mat to build a mini crafting station.