Quilting stitches can change a project in surprising ways. A simple line of thread can make fabric feel new.
Some stitches look soft and cozy, while others feel bold and modern. The right choice can add beauty, strength, and a personal touch.
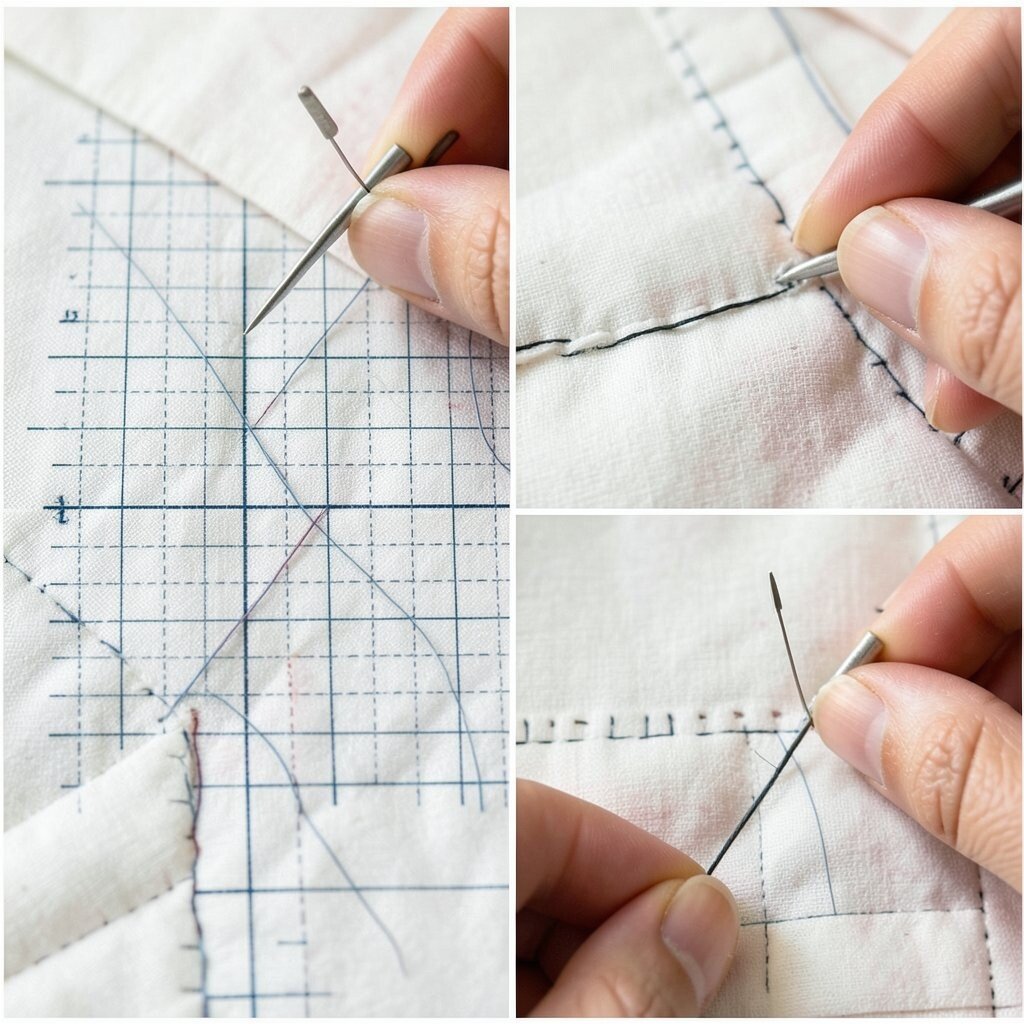
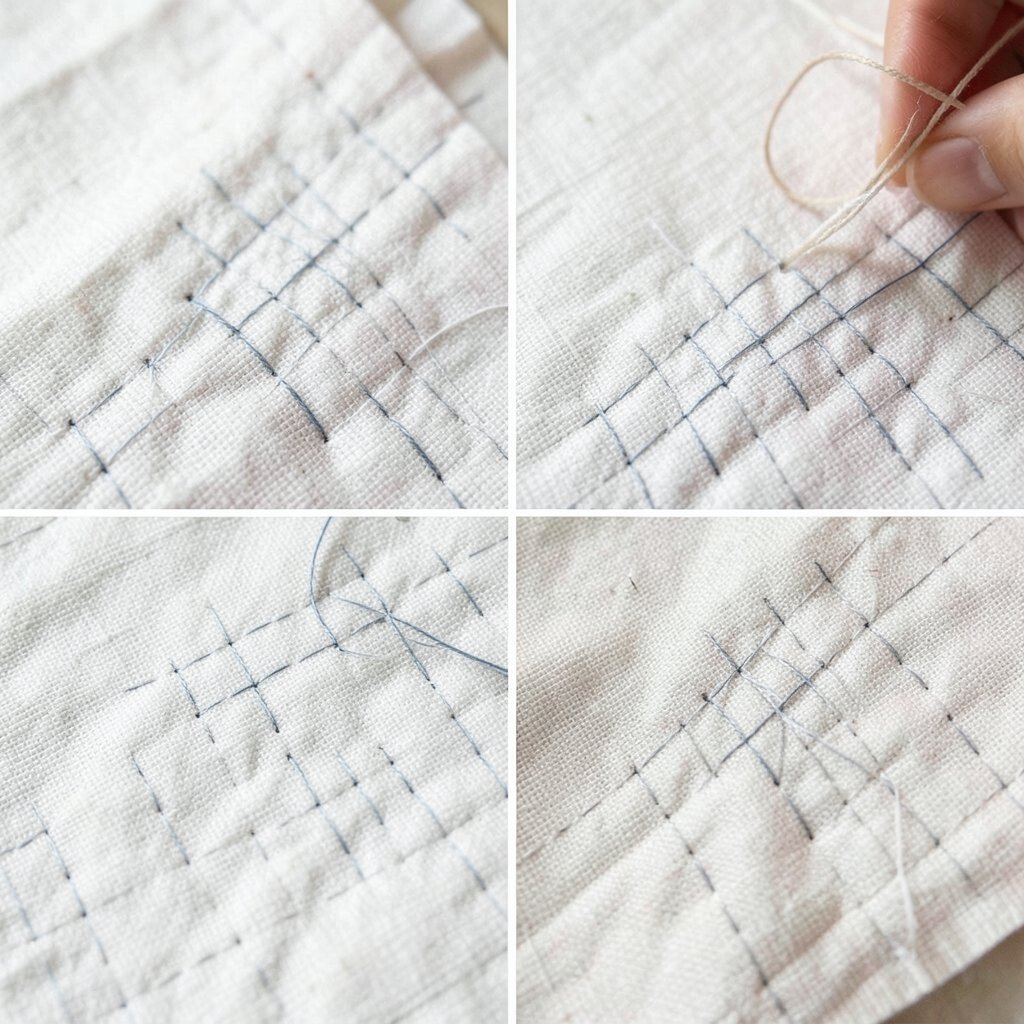
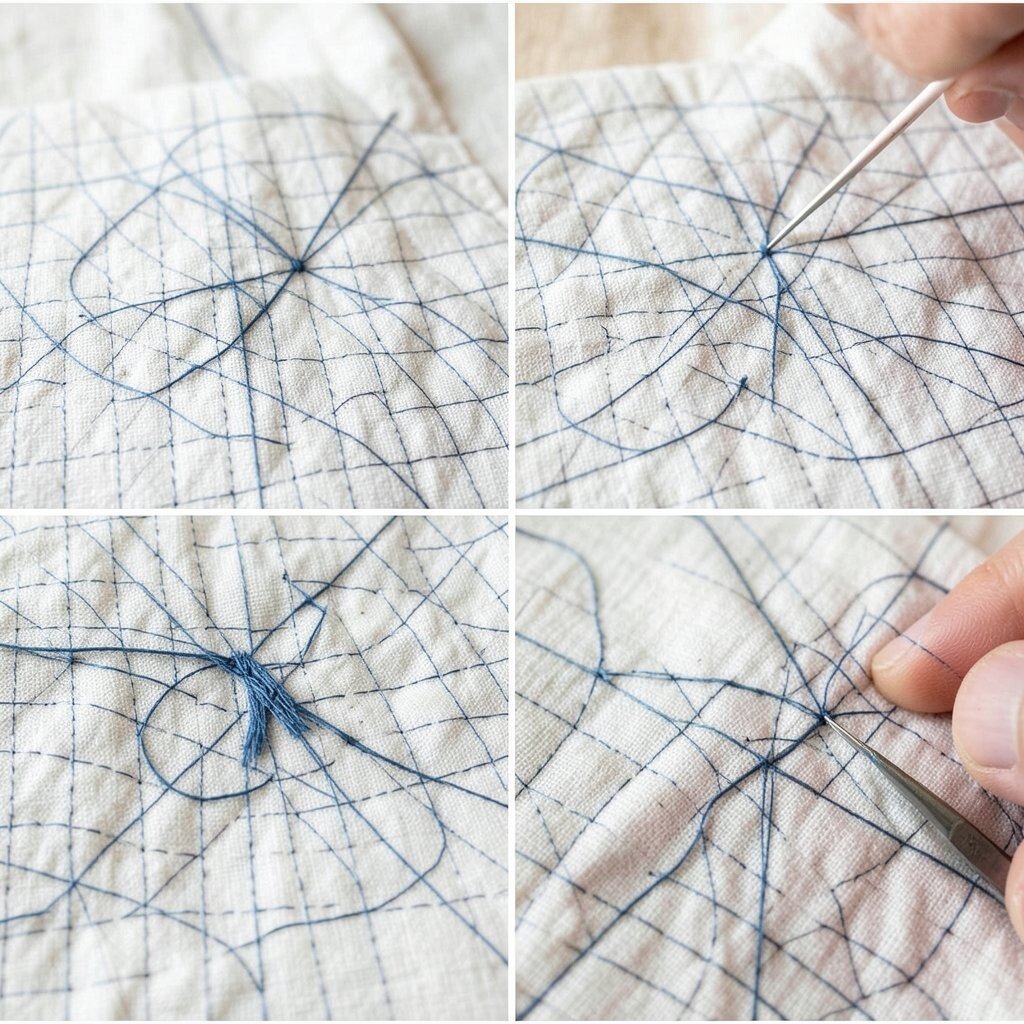
1. Straight Stitch Grid
Top Straight Stitch Grid Craft Tutorials
- 🎨 Why a Cross Stitch Grid Simplifies Your Craft from stircrazycrafter.com.
- 🗺️ Embroidery Tutorial: the grid stitch from domestika.org.
- 👓 Gridding Fabric for Cross Stitching from doodlecraftdesign.co.uk.
- 👓 Plastic Canvas 101 from herrschners.com.
- 💅 Straight Stitch Guide: Floral Details and Machine Tips from maggieframestore.com.
Before, a quilt top with plain fabric can look flat and quiet. After, a straight stitch grid gives it a clean, crisp look that feels neat and fresh.
This style works well for beginners because it is easy to guide and does not need fancy tools. It also helps hold layers together well, which means the quilt can last longer and feel sturdy.
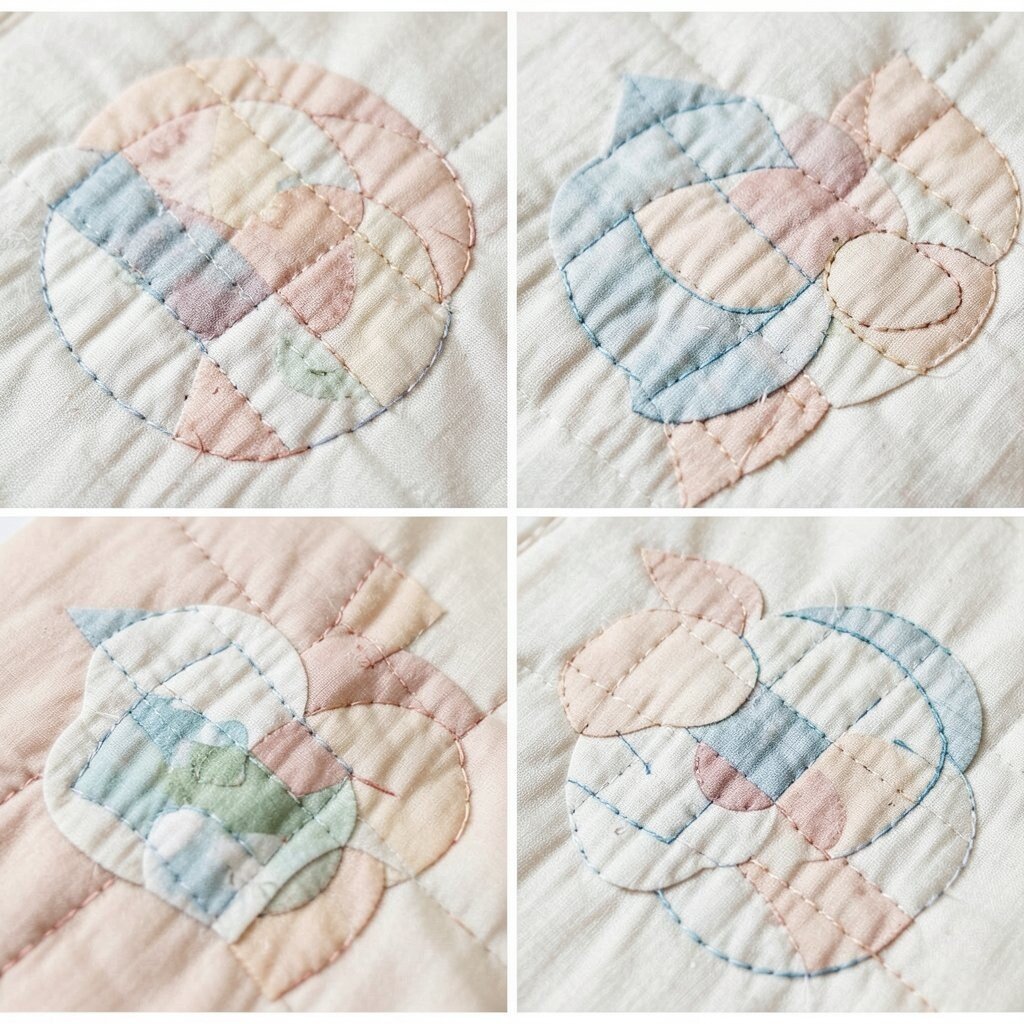
2. Echo Stitching Around Shapes
Top Echo Stitching Around Shapes Craft Tutorials
- 🖼️ I love using echo quilting! It's such an easy filler design that … from facebook.com.
- 🧑🌾 Straight-line quilting…but make it fun. 🙌 Turn every block … from facebook.com.
- 💅 Perfect Echo Quilting on Brother & Baby Lock Embroidery … from hoopingstation.com.
- 🎨 Echo quilting is one of the techniques we will talk about in … from instagram.com.
- 🍅 Free Motion Monday – Quilting Hearts 3 Variations from truebluequilts.com.
Before, a large flower or heart on a quilt may stand alone without much energy. After, echo stitching makes the shape pop by tracing around it again and again in soft rings.
The finished look feels lively and artistic, almost like ripples in water. This idea is great for adding texture without making the quilt too busy, and it can be done with a low-cost thread choice in a color that matches or gently contrasts.
Many quilters like to use this method on baby quilts, wall hangings, and home decor pieces because it adds charm fast. If you want a more personal look, try echoing around a favorite shape from nature, like a leaf or a bird.
3. Meandering Free-Motion Stitch
Top Meandering Free-Motion Stitch Craft Tutorials
- 🍅 These Simple Free-Motion Quilting Designs Are Perfect for … from craftsy.com.
- 🍅 Free Motion Meandering: 4 Simple Tips for Beginners from southernsewingco.com.
- 🖼️ A Beginners Guide to Machine Quilting by Angela Walters from ctpub.com.
- 🎄 How to Quilt a Baby Heart Meander Quilting Design from sewcanshe.com.
- 🖼️ How to Free Motion Quilt a basic meander (video tutorial) from southerncharmquilts.com.
Before, a quilt may have smooth fabric that feels a little plain. After, meandering stitches bring a soft, cloud-like texture that looks playful and full of movement.
This stitch is loved because it hides small mistakes and gives a cozy handmade feel. It is also a smart choice when you want to finish a quilt quickly without spending a lot on special supplies.
Today, many makers enjoy this relaxed style because it fits casual, modern, and cottage-inspired quilts. You can make it your own by changing the size of the loops or using bright thread for a fun surprise.
4. Crosshatch Stitching
Top Crosshatch Stitching Craft Tutorials
- 🎨 Cross Hatch Quilting Tutorial from aquiltinglife.com.
- 🎄 How to Do Cross Hatch Quilting Tutorial – using a Walking … from sewcanshe.com.
- 🎨 Guide to Crosshatch Machine Quilting – Lou Lou & Betty from loulouandbetty.com.
- 🖼️ The Crosshatch Quilt Pattern: A "Classic Beginner" Quilt from scissortailquilting.com.
- 🍂 How to add cross-hatch quilting when some of the blocks … from reddit.com.
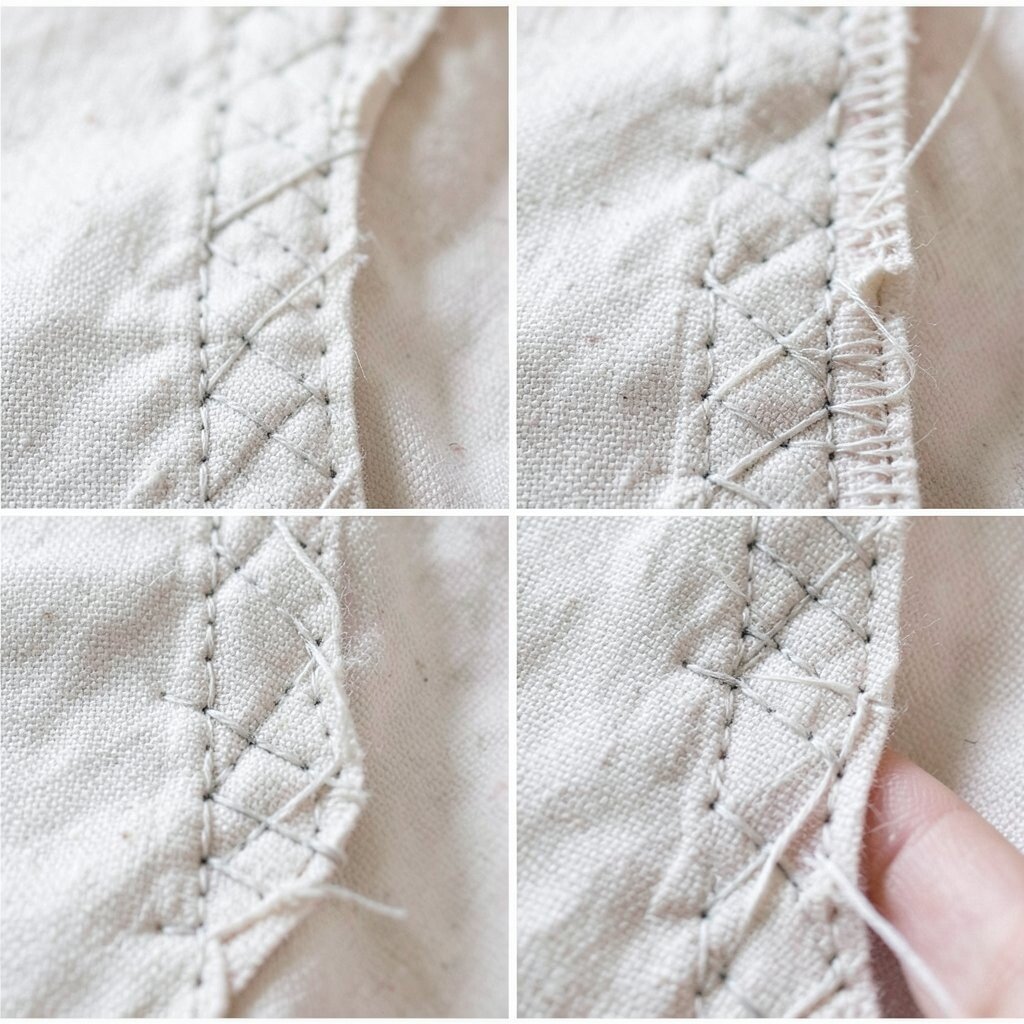
Before, a quilt with open spaces can seem calm but unfinished. After, crosshatch stitching adds a neat diamond pattern that feels classic and polished.
This look works well on both simple and fancy quilts, and it gives strong support across the whole piece. It can also be a good budget-friendly choice since straight lines use little extra planning and can be done with basic sewing tools.
5. Swirl Stitching
Top Swirl Stitching Craft Tutorials
- 🍂 lazy daisy swirl variation from cozybluehandmade.com.
- 🎨 Garden Swirl 5: Finishing the Embroidery from needlenthread.com.
- 🖼️ Quilt Free Motion Swirls Video Tutorial from joyoushome.com.
- 🎨 What is the name of the stitch pattern that … – Facebook from facebook.com.
- 🖼️ Sun Swirl from hummingbird-highway.com.
Before, a quilt with large blocks may feel stiff and boxy. After, swirl stitching softens the whole surface and makes it look like wind is moving across the fabric.
The curvy lines add a cheerful, lively mood that many people love in modern quilts. If you want a custom touch, use swirls in different sizes or place them around special fabrics so they stand out more.
This style is popular right now because it feels playful and fresh without being hard to enjoy. It can also help a quilt drape better, which is nice for lap quilts and bed quilts alike.
6. Stitch in the Ditch
Top Stitch In The Ditch Craft Tutorials
- 👓 How to Stitch in the Ditch from kimberbell.com.
- 🍂 Stitch in the Ditch Beginner Quilting Tutorial from sewnikki.com.
- 🧑🌾 Sewing the BEST Stitch in the Ditch Tutorial from wonderfil.ca.
- 🧑🌾 Tips for Stitching in the Ditch and Walking Foot Quilting from freemotionproject.com.
- 💅 Stitch in the ditch quilting tips for beginners from facebook.com.
Before, patterned quilt blocks may look busy and hard to read. After, stitch in the ditch lets the piecing shine by hiding stitches in the seams and keeping the design clear.
This method gives a tidy, calm finish that many people like for traditional quilts. It is also a smart way to save thread and keep costs low, since the stitches stay simple and close to the seam lines.
If you want a more personal result, use this technique on a quilt made from family fabrics or old clothes. The quiet stitching helps those special pieces take center stage.
7. Pebble Stitching
Top Pebble Stitching Craft Tutorials
- 🎄 The pebble stitch – Nordic Hook – Free crochet stitch tutorial from nordichook.com.
- 🎨 Crochet Pebble Stitch [Free Video Tutorial & Written Pattern!] from hookedbyrobin.com.
- 🎨 How to knit pebble stitch from lovecrafts.com.
Before, a plain border may look empty and thin. After, pebble stitching fills the space with tiny round stitches that look like little stones scattered across the quilt.
This textured style adds a soft, rich feel that makes the fabric seem fuller and more detailed. It takes more time than some other methods, so it may cost more in labor, but the fancy look can be worth it for a special project.
Many quilters use pebbling in borders, around applique, or in small background areas for a polished finish. You can make it more personal by using tiny pebbles to frame names, dates, or a favorite motif.
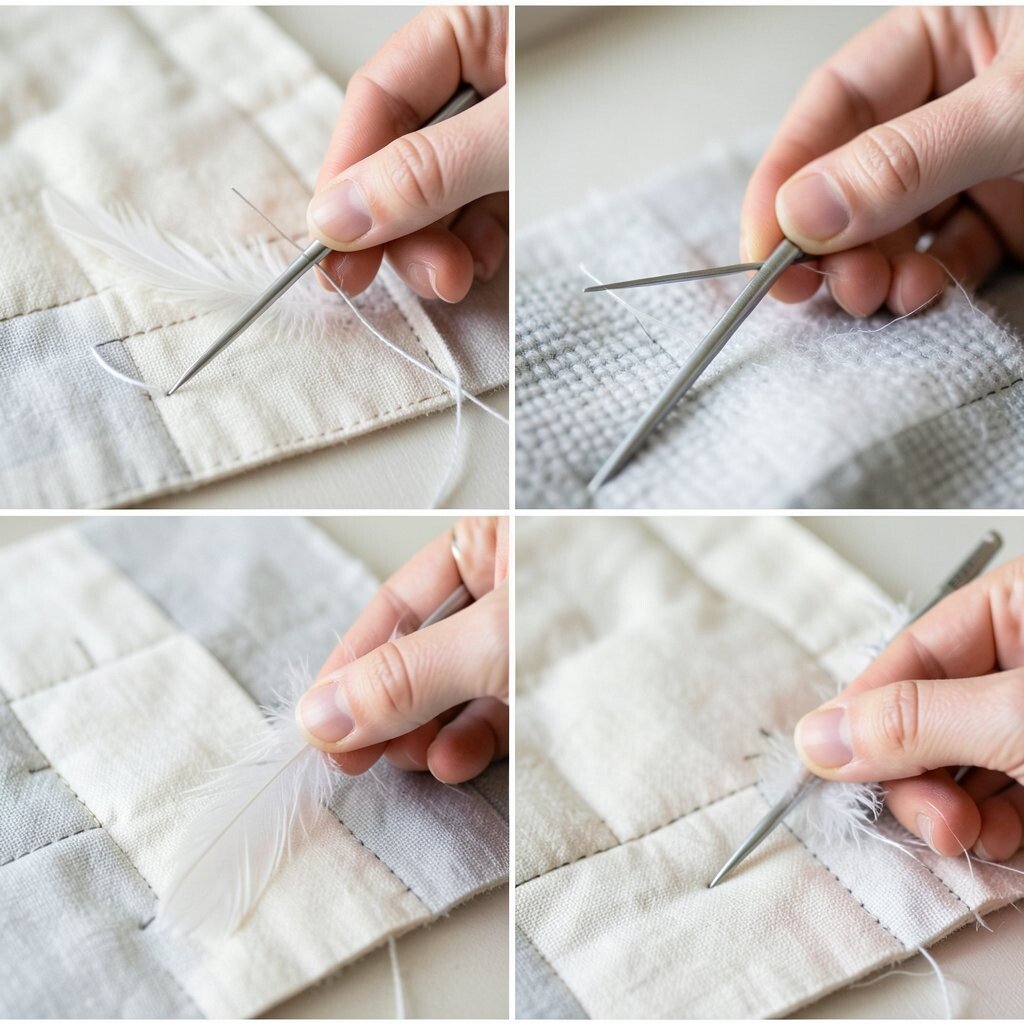
8. Feather Stitching
Top Feather Stitching Craft Tutorials
- 🎨 Feather Stitching – Enjoying a sense of peace one stitch at a … from feather-stitching.com.
- 🍅 How to do the Feather Stitch from embroidery.rocksea.org.
- 🎨 How To Embroider The Feather Stitch by Rebecca Ringquist from creativebug.com.
- 🍅 HOW TO MAKE THE FEATHER STITCH from pamashdesigns.com.
- 🧑🌾 Feather stitch- embroidery how-to, quick video, and step by … from penguinandfish.com.
Before, a formal quilt may feel plain and flat. After, feather stitching gives it a graceful, flowing look that feels elegant and timeless.
The feather shape adds a soft sense of motion that can make a quilt look more special right away. It is a lovely choice for heirloom pieces, though it may take practice and a bit more time, which can raise the cost if you hire help.
Feathers are still a favorite in many current quilt shows because they blend old beauty with modern style. For a personal touch, you can make the feathers tall, short, wide, or narrow to match the mood of your quilt.
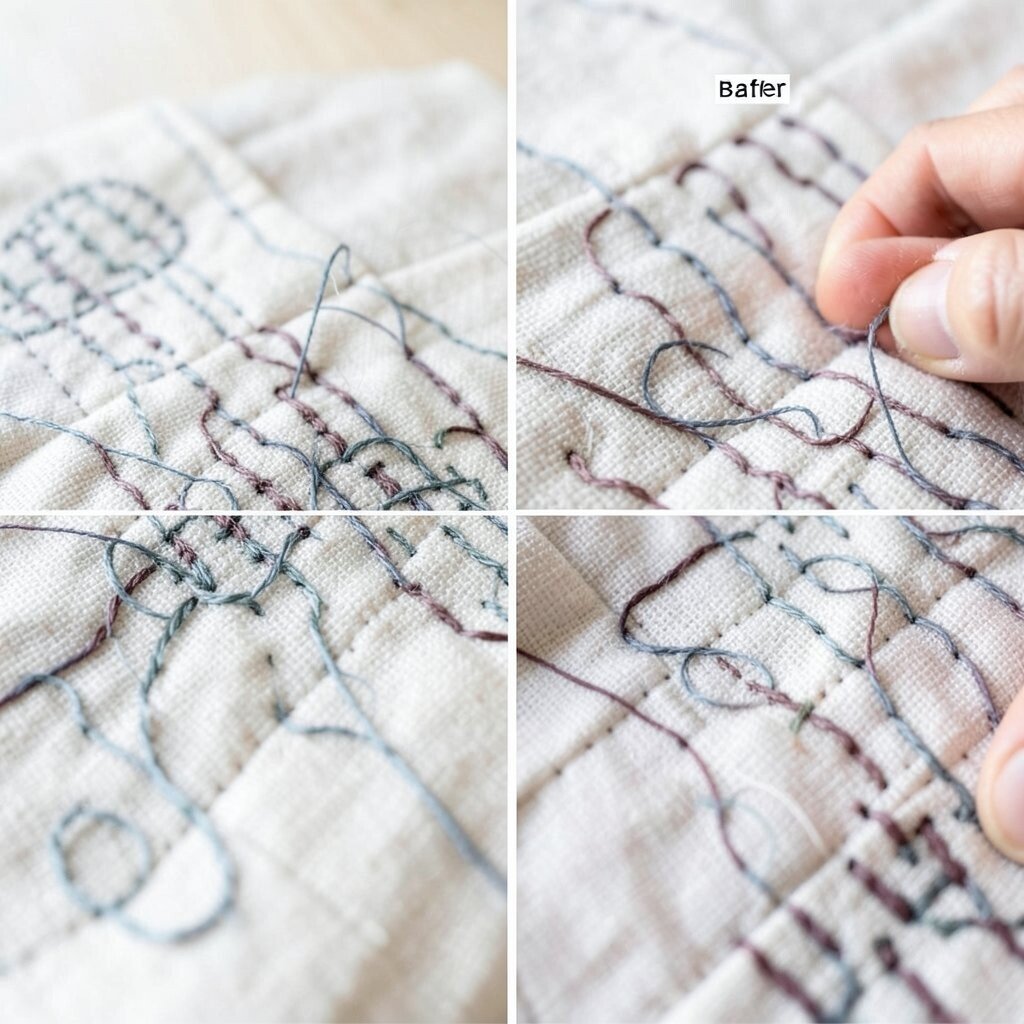
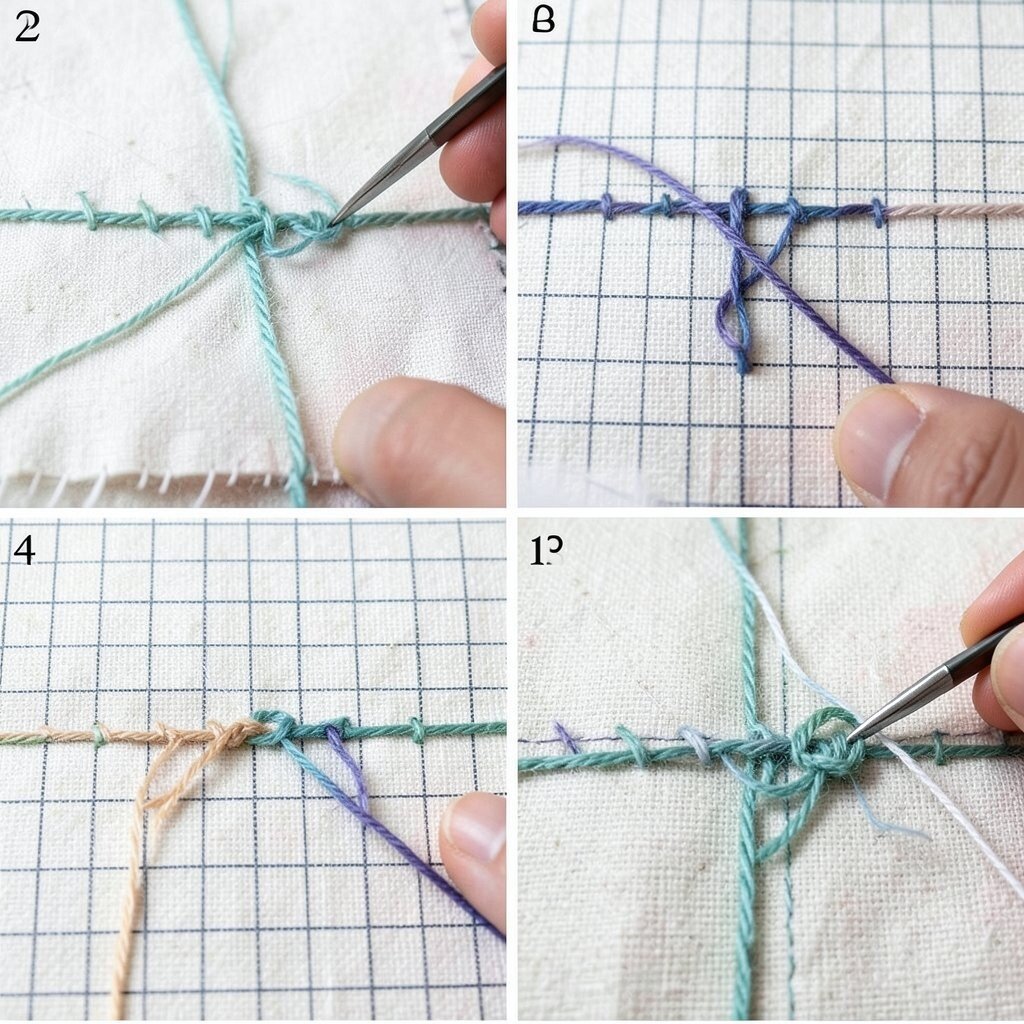
9. Grid With Decorative Knots
Top Grid With Decorative Knots Craft Tutorials
- 🧑🌾 Practical knot ideas that can be used in your daily life 🪢 from facebook.com.
- 🍂 diagrams of knotting and braiding techniques from facebook.com.
- 👓 The decorative Doubled Pyramid Knot is flat … – Instagram from instagram.com.
- 🧑🌾 How to Draw a Celtic Knot on Dotted Paper from archerandolive.com.
- 👓 How to Tie Macramé Knots to Create DIY Woven Decor from aol.com.
Before, a grid quilt can seem orderly but a little plain. After, adding decorative knots at the crossings gives the surface a sweet, charming lift.
This idea works well when you want structure with a touch of fun. It can be made with the same thread you already have, so it is a low-cost way to add detail without much extra effort.
The small knots create a dotted look that feels handmade and cheerful. You can personalize them with bright thread, soft pastels, or even a thread color that matches a room in your home.
10. Organic Wavy Lines

Top Organic Wavy Lines Craft Tutorials
- 🍁 Tutorial – Quilting Organic Wavy Lines from elmstreetquilts.com.
- 🍅 One of my classic go-to quilting motifs: organic wavy lines … from facebook.com.
- 💅 Quilting UFO with Lorna McMahon's organic wavy lines from facebook.com.
- 🎄 How to Quilt Perfect Waves with a Serpentine Stitch from diaryofaquilter.com.
- 💅 Ashley | Wavy organic lines for the win! I can't wait to take some … from instagram.com.
Before, solid fabric may feel too neat and smooth. After, organic wavy lines bring a relaxed, breezy look that feels easy and modern.
This style is great for quilts that need a casual feel, and it works well on large open areas. It is also friendly to the budget because the lines do not need perfect spacing or special marking tools.
Many makers like this look for contemporary quilts, beach themes, and kid-friendly projects. You can make it your own by changing the wave size or using thread that gives a soft contrast.
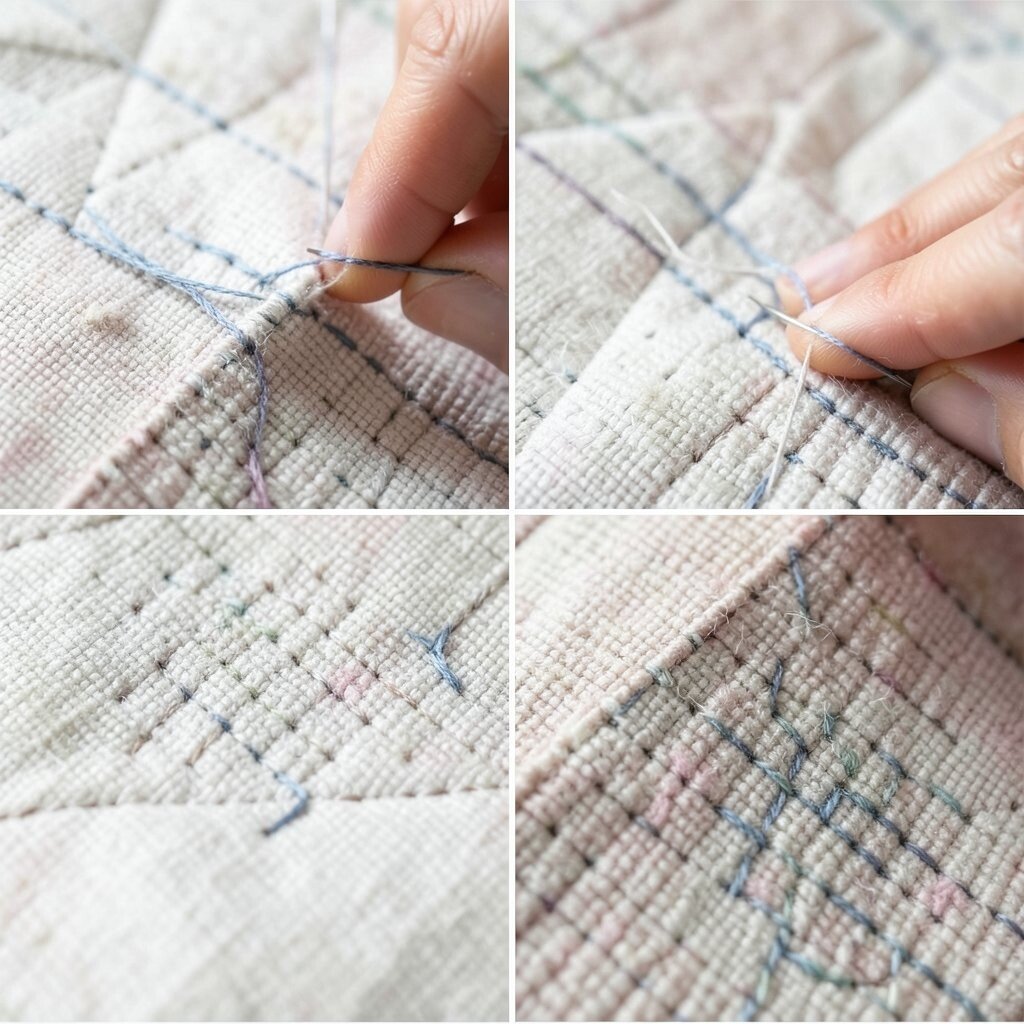
11. Dense Background Stitching

Top Dense Background Stitching Craft Tutorials
- 🗺️ Hi all, this is on that thick aida cloth #11. I am using 3 … from facebook.com.
- 🍁 54 Popular Needlepoint Stitches from thesprucecrafts.com.
- 🎄 Lots of dense little embroidery stitches here! I love the … from instagram.com.
- 🍁 Background stitch suggestions? : r/Needlepoint from reddit.com.
- 🎨 Embroidery 101: How to Embroider : 11 Steps (with Pictures) from instructables.com.
Before, applique or patchwork may sit on a plain background that feels too simple. After, dense background stitching adds deep texture and makes the main design stand out more.
This method can make a quilt look rich and full, almost like fabric sculpture. It may use more thread and time, so the cost can be a little higher, but the strong visual effect is often worth it.
Current quilting trends often favor this layered, textured style because it gives quilts more depth. You can personalize the background by changing stitch direction around different parts of the quilt.
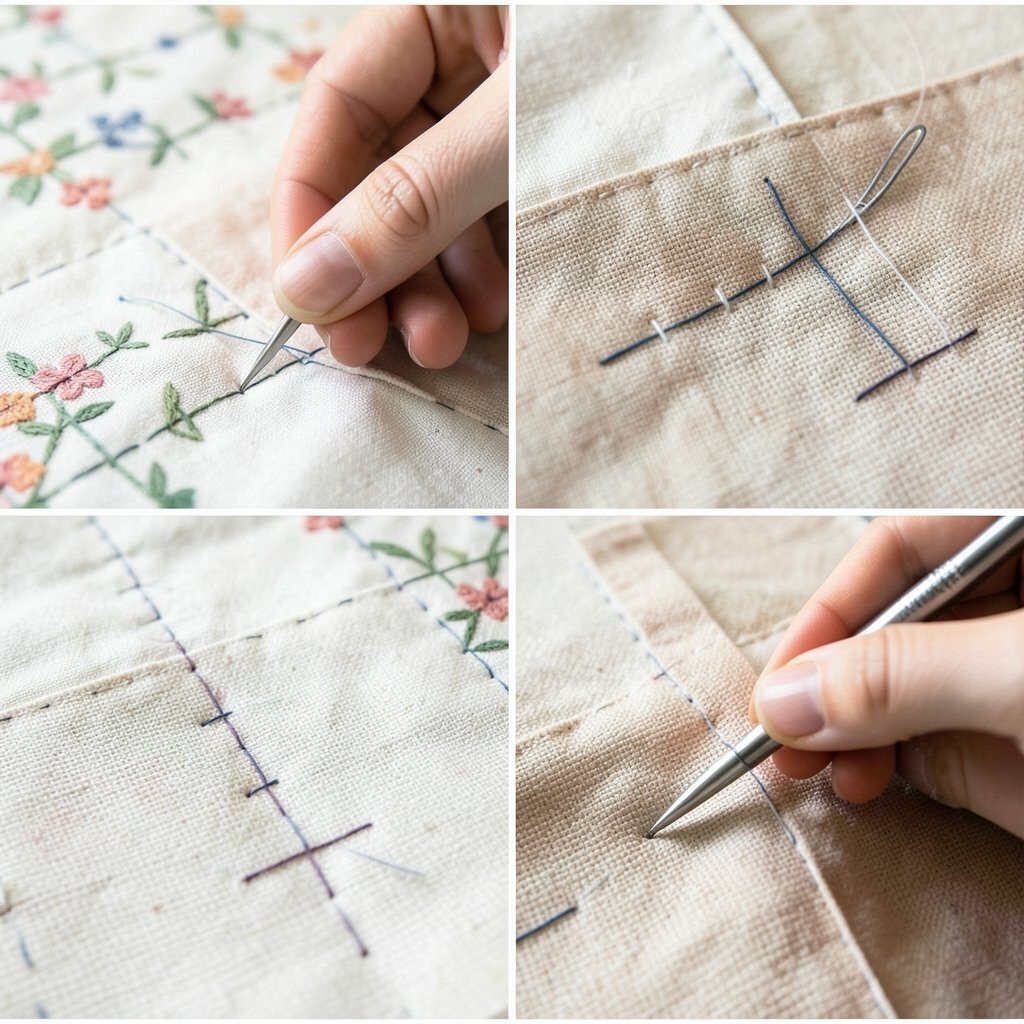
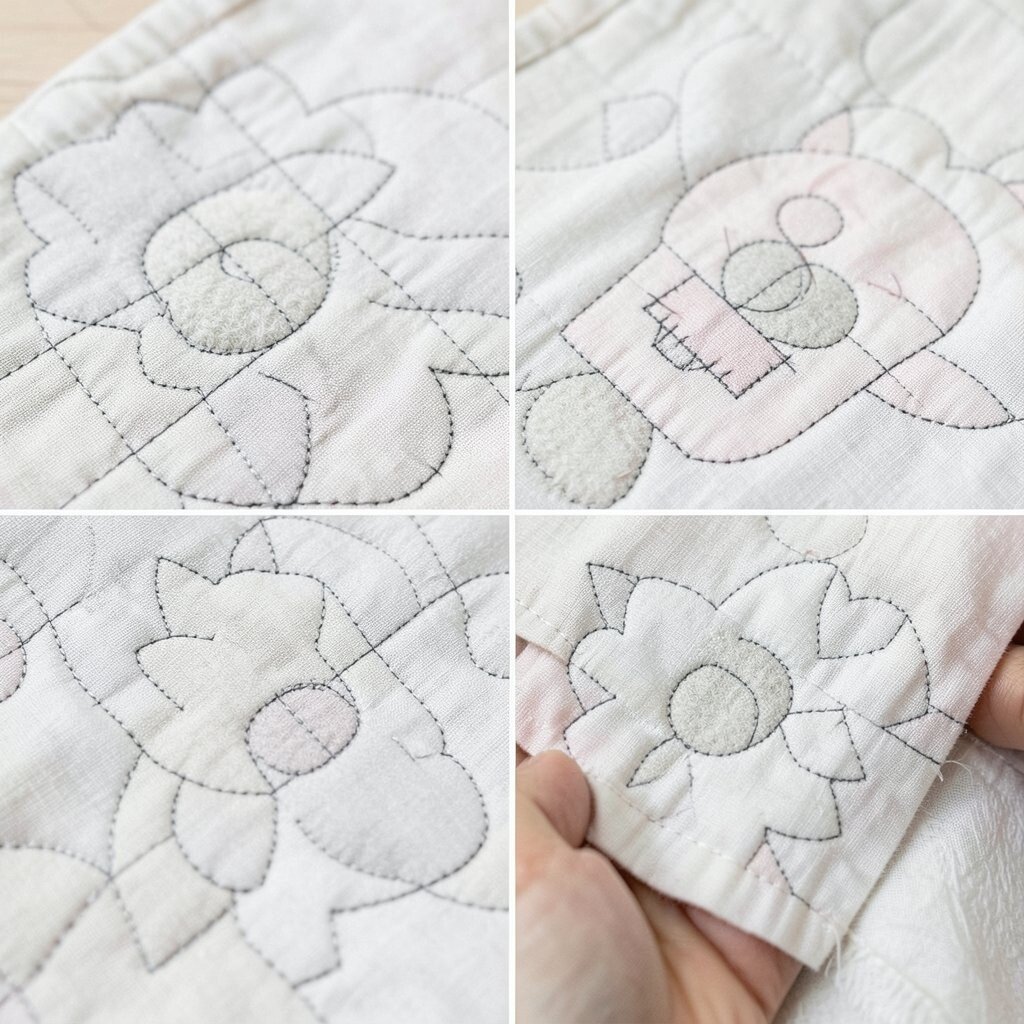
12. Outline Stitching for Applique
Top Outline Stitching For Applique Craft Tutorials
- 👓 Outline quilting for machine applique from generations-quilt-patterns.com.
- 💅 Scribbly Outlining Your Applique Pieces from shinyhappyworld.com.
- 🗺️ Hand Appliqué Tutorial: 2 Ways to Sew from internationalquiltmuseum.org.
- 🍁 Sewing Raw Edge Appliqué Using Iron Fusible Thread … from shopwonderfil.com.
- 💅 What are favorite stitches to outline appliqué in machine … from facebook.com.
Before, applique shapes can blend into the quilt top and lose their edges. After, outline stitching frames each shape clearly and makes the design look neat and finished.
This is a helpful choice for flowers, animals, letters, and storybook quilts. It is also a good way to keep the project affordable, since a simple outline uses less thread than dense fill stitching.
Outline stitching can be bold with dark thread or soft with matching thread, depending on the look you want. For a personal touch, try using a thread color that matches a favorite fabric print inside the applique.
13. Spiral Stitching

Top Spiral Stitching Craft Tutorials
- 🧑🌾 11. Spiral Stitch – Starter Circle from courses.craftschooloz.com.
- 👓 Counted Cross Stitch Patterns Embroidery Crafts Ne from countrytowngirls.com.
- 🗺️ Tips for creating a spiral stitch with Carol Busta from facebook.com.
- 🍂 Stem Stitch Curls & Spirals from needlenthread.com.
Before, a center medallion may look still and quiet. After, spiral stitching pulls the eye inward and creates a lively sense of motion.
The swirling path gives quilts a fun, modern feel that can make even simple fabric look special. It is a nice option when you want something eye-catching without spending a lot on extra materials.
Spirals are showing up in many fresh quilt designs because they feel bold and playful. You can make them tighter for a neat look or wider for a softer, more relaxed style.
14. Grid With Asymmetry
Top Grid With Asymmetry Craft Tutorials
- 🎄 Asymmetry or Symmetry? from gannetdesigns.com.
- 🧑🌾 Crease Patterns from obb.design.
- 💅 GRID LINES- A pattern or structure made from horizontal … from facebook.com.
- 💅 Making and Breaking the Grid by Timothy Samara from designopendata.wordpress.com.
- 🎨 Asymmetrical Balance: Creating dynamic compositions from thehelpfulartteacher.blogspot.com.
Before, a perfect grid can feel safe but predictable. After, an asymmetrical grid brings surprise and gives the quilt a more creative, artsy look.
This idea is great for modern quilts that want a little edge while still staying organized. It can also help you use scraps in smart ways, which may keep costs down and reduce waste.
Try spacing the lines unevenly or changing the size of the blocks to make the design feel more personal. That small shift can make a quilt look custom-made and full of character.
15. Dense Stitching on Borders
Top Dense Stitching On Borders Craft Tutorials
- 👓 How to stitch on a cross stitch sampler with dense alphabet … from facebook.com.
- 🖼️ Craftsy Class Review: Borders and Background from quiltingwemple.com.
- 🎄 @sixtyfourpackingcases revisiting free‑motion embroidery … from instagram.com.
- 🧑🌾 Quilting Archives – Colonial Needle Creative Ideas Blog from blog.colonialneedle.com.
- 🎨 You have just created a beautiful Decorative Stitch and … from facebook.com.
Before, a quilt border may frame the center but not do much else. After, dense border stitching turns the edge into a strong design feature with lots of texture and style.
This approach can make a quilt feel finished and important, almost like a picture in a frame. It may take more thread and time, but it is a smart place to spend effort because borders are easy to see.
Many quilters use this idea to highlight special prints or to balance a very simple center. You can personalize the border with repeating shapes, favorite colors, or stitches that match the theme of the quilt.
16. Combination Stitching
Top Combination Stitching Craft Tutorials
- 🧑🌾 What will I make with 16 hand-stitched scrap squares? from facebook.com.
- 🍅 Aida Cloth 16 Count The Ultimate Stitching Guide from cross-stitched.com.
- 🎨 How to stitch on 16 count fabric? from facebook.com.
- 🎨 Another favorite of mine from last year with the long stitch binding … from instagram.com.
- 💅 54 Popular Needlepoint Stitches from thesprucecrafts.com.
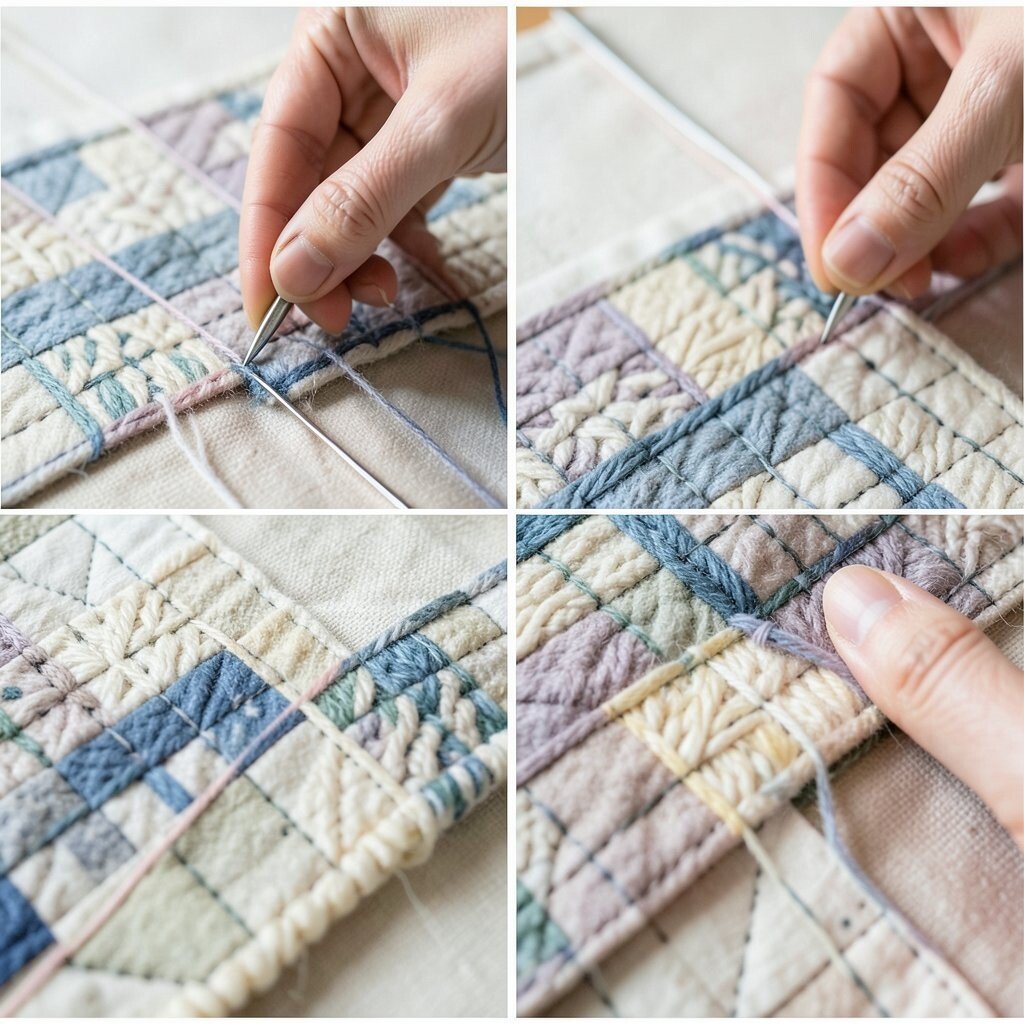
Before, a quilt may rely on one stitch style and feel a little one-note. After, combination stitching mixes different stitches to create layers of beauty, texture, and interest.
This approach gives you lots of freedom, which makes each quilt feel unique and full of personality. It can also help you use what you already have on hand, so the cost can stay friendly if you plan the design well.
Mixing straight lines, curves, pebbles, and outlines is a popular trend because it makes quilts feel rich and custom. You can personalize the whole piece by choosing one stitch for the center, another for the border, and a third for special blocks.