A plain card can feel sleepy at first glance. With a little paint, it can glow like a tiny work of art.
1. Soft Floral Wash Card
Top Soft Floral Wash Card Craft Tutorials
- 👓 Handmade floral wreath birthday card for sister from facebook.com.
- 🎨 Sometimes the simplest ideas turn into the most beautiful … from instagram.com.
- 💅 AK TRADING CO. 2 1/3" Wide x 10 Yards Ivory Floral Pattern … from franklincommunity.coop.
- 🧑🌾 it's all art for easy watercolour, soft colourful flowers and it's … from facebook.com.
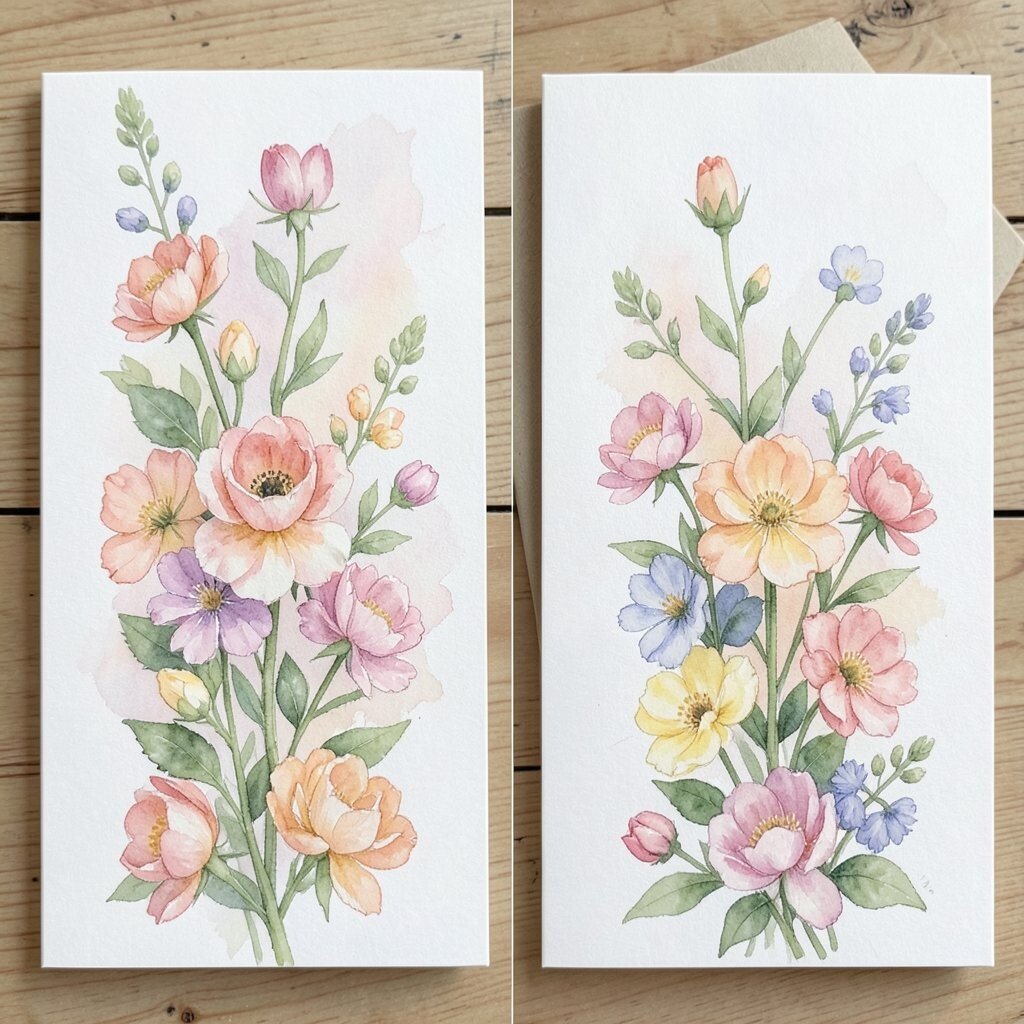
A soft floral wash card begins with a pale, loose background that looks calm and airy. After the flowers are added, the card feels warm, fresh, and full of life.
This project is great for birthdays, thank-you notes, and spring greetings. You only need a small set of paints, a brush, and card stock, so the cost stays low. Try adding names, short quotes, or a favorite flower to make each card feel personal.
2. Bold Rainbow Stripe Card
Top Bold Rainbow Stripe Card Craft Tutorials
- 🍂 Bold Rainbow Striped Cards – The Creative Sprout from thecreativesprout.com.
- 🧑🌾 watercolored rainbow, bold Thanks from Simon says … from facebook.com.
- 🍂 Split Rainbow Card Making Technique with 4 Handmade … from onygostamping.com.
- 💅 Rainbow Sunshine Card | Greeting Card | Handmade Card from facebook.com.
- 🎄 Valentine's season has officially fluttered onto my craft desk … from instagram.com.
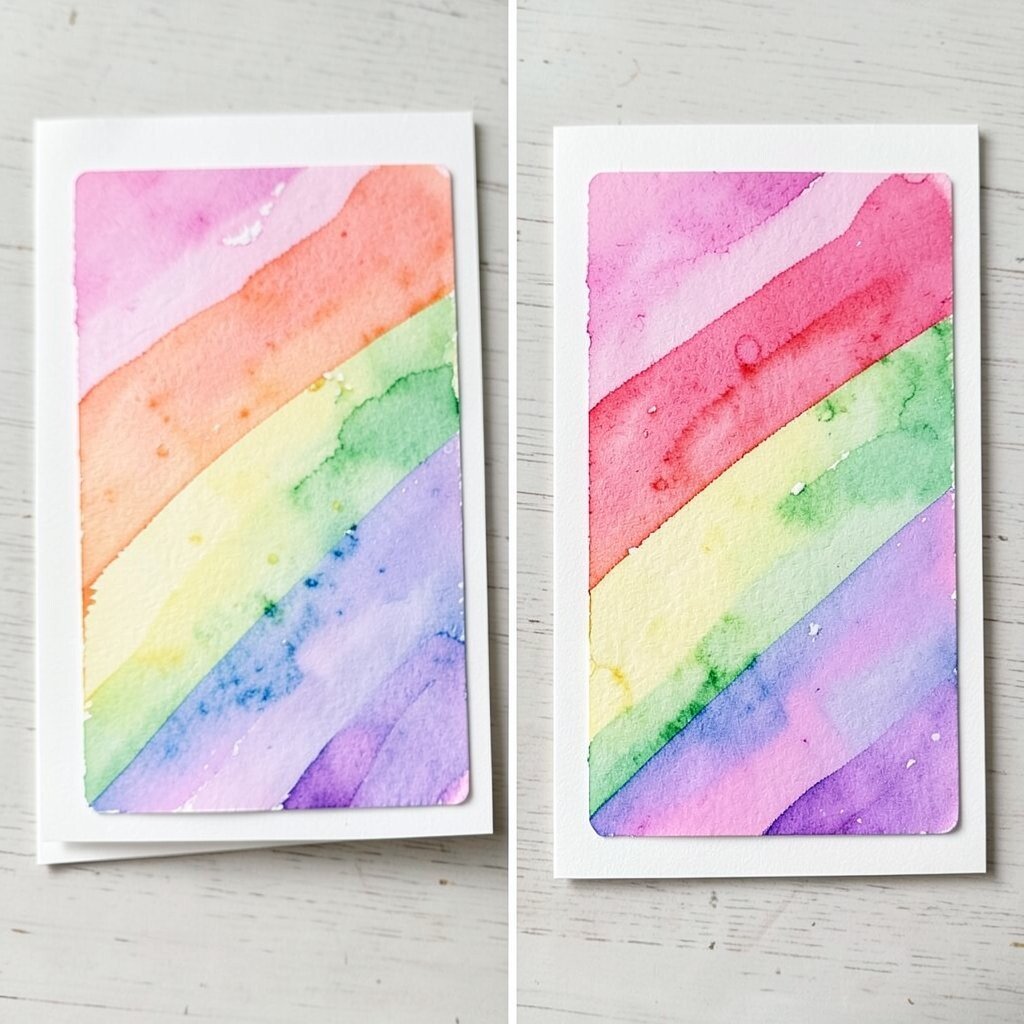
A plain white card can become bright and cheerful with a rainbow stripe design. The before look is simple and empty, while the after look feels happy enough to lift someone’s mood right away.
This is a smart choice for beginners because the shapes are easy to paint. It also works well for kids, party invites, and cheerful mail. If you want a trendy touch, use soft pastel rainbow shades or a modern color mix with one dark accent line.
Keep the stripes uneven for a hand-made feel, or use tape for neat edges. You can make the card extra special by adding a gold pen message or a tiny heart near the corner. Since the supplies are basic, this is one of the cheapest ways to make a card look fancy.
3. Night Sky Silhouette Card
Top Night Sky Silhouette Card Craft Tutorials
- 🖼️ Tutorial for night silhouette paper craft project from facebook.com.
- 🖼️ Santa Silhouette Art | A Magical Christmas Painting Idea from artycraftykids.com.
- 🎨 Starry Night Sky Art Project for Kids from buggyandbuddy.com.
- 🧑🌾 Stampin Up Rubber Stamp Crescent Moon Silhouette Night Sky … from ebay.com.
- 🎨 Ramadan Silhouette Sky Scene craft activity guide from bakerross.co.uk.
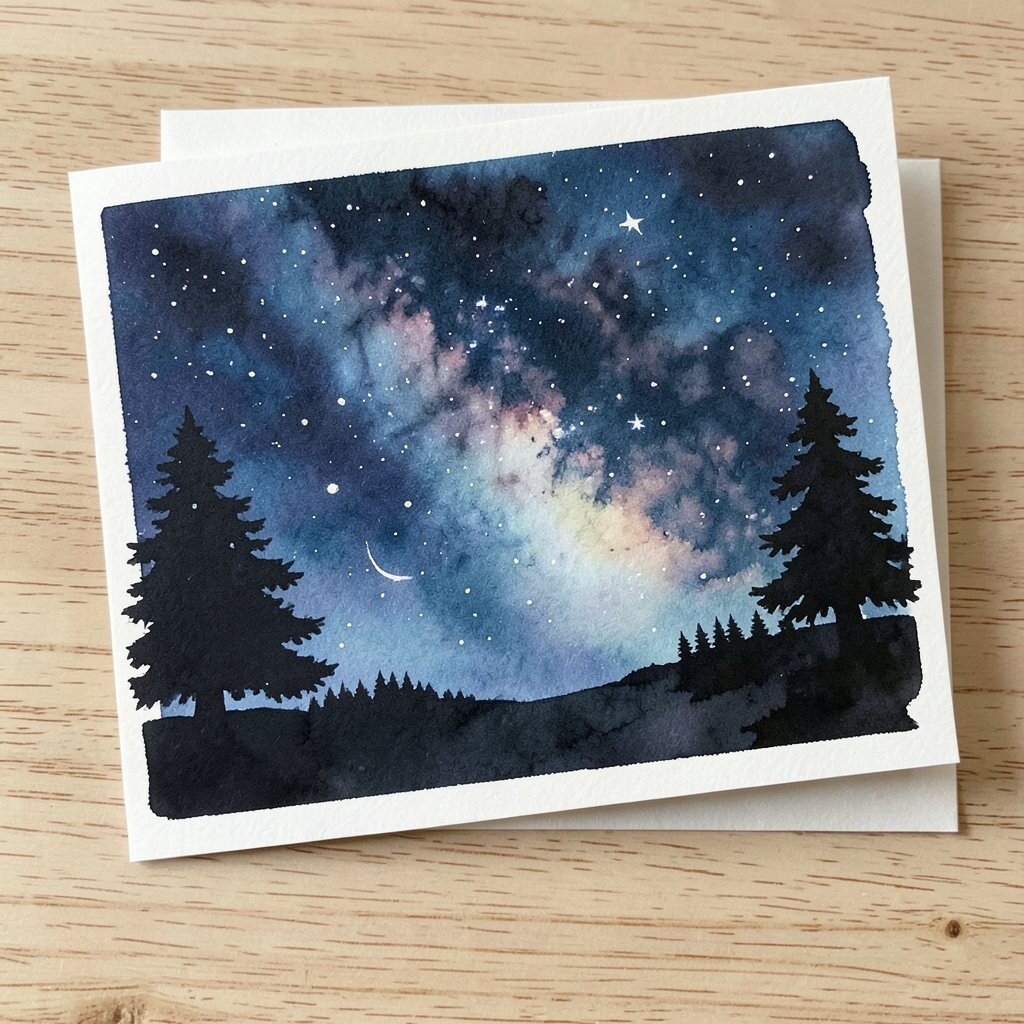
A night sky silhouette card starts with a dark wash that looks simple and quiet. After the stars and shapes are added, it turns into a dreamy scene with lots of charm.
This style works well for thank-you cards, encouragement notes, and holiday mail. It gives you a chance to practice blending blues, purples, and black without needing perfect lines. Add a tree, a mountain, or a little house silhouette to make the design feel more like your own.
For a modern twist, use tiny white ink stars or splashes of white paint. The supplies are still affordable, and the result looks much more expensive than it is. If you want a softer mood, keep the sky light and misty instead of very dark.
Use thick paper so the paint does not buckle too much. A small moon or a single shining star can give the whole card a peaceful finish.
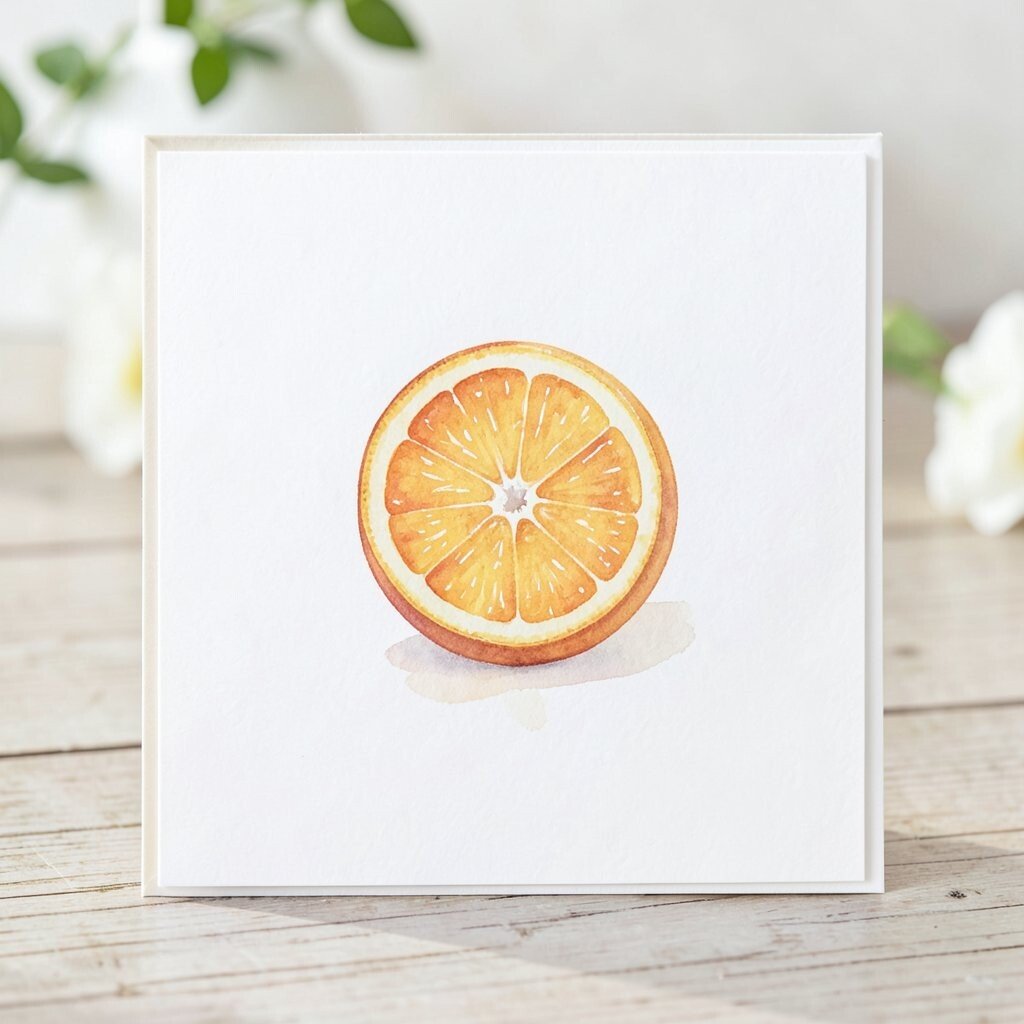
4. Fruit Slice Greeting Card
Top Fruit Slice Greeting Card Craft Tutorials
- 👓 Fruit Cards – Color-in Citrus Slices from momsandcrafters.com.
- 🍁 DIY Fruit Slice Gift Tags from diyinspired.com.
- 🍅 Make An Embossed Fruit Birthday Card! from rubberstamps.com.
- 👓 DIY Fruit Greeting Cards from kuninfelt.com.
- 👓 Bright & Festive DIY Birthday Cards: Transforming Fruit … from stampingala.com.
Fruit slice cards start with a blank space and end with bright, juicy shapes that feel playful. A lemon, orange, or watermelon slice can make the card look fresh and fun in just a few brushstrokes.
This project is wonderful for summer notes, picnic invites, and cheerful gift tags. It is also a nice way to use up leftover paint in red, yellow, and green. Add a name, a pun, or a tiny leaf to make the card feel more personal.
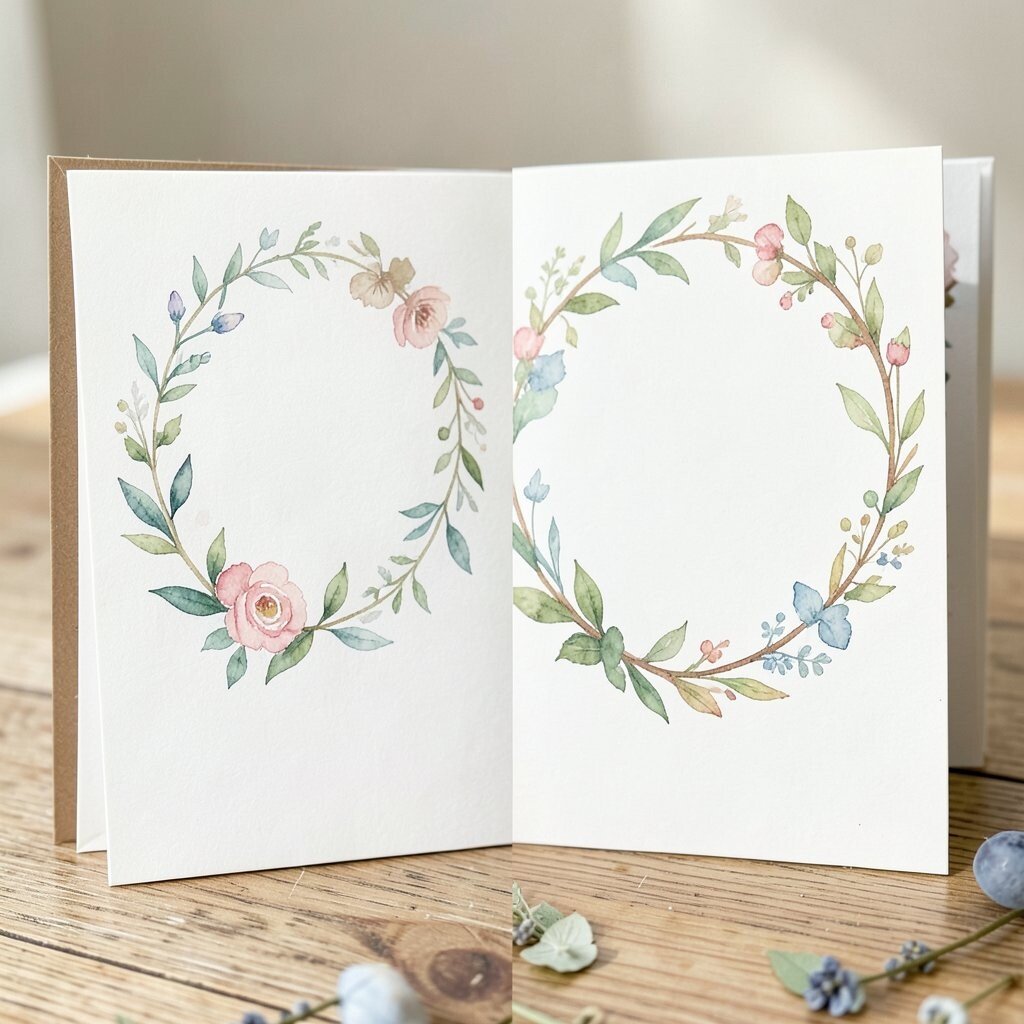
5. Loose Leaf Wreath Card
Top Loose Leaf Wreath Card Craft Tutorials
- 🍂 Just a few ways to make a simple "paper plate Christmas … from facebook.com.
- 🖼️ DIY Gorgeous Felt Leaf Wreath for Christmas from thecraftingnook.com.
- 🍂 Thanksgiving Wreath with Paper Leaves from meaningfulmama.com.
- 🎨 Loose wreath card. Tutorial by Artist Debra Lyn Rosenbach … from facebook.com.
- 👓 Easy Paper Christmas Wreath Craft for Kids (+Free Template) from thecraftaholicwitch.com.
A loose leaf wreath card begins with an open center and soft leaf marks around the edges. The after version feels graceful and natural, like a little garden on paper.
This card style is lovely for weddings, thank-you notes, and fall greetings. It uses simple leaf shapes, so it is friendly for painters who are still learning. You can keep the colors earthy or try a trendy look with dusty pink, sage, and gold.
Make the wreath fuller in some spots and lighter in others for a hand-painted feel. A short message in the center can make the design feel complete without adding much cost. If you want a more personal touch, include the recipient’s favorite leaf color or flower.
Use a fine pen for small details once the paint dries. A tiny ribbon sketch or berry dot can give the card extra charm.
6. Ocean Wave Card

Top Ocean Wave Card Craft Tutorials
- 👓 Make Waves Dimensional Pop-Up Box Card with Ocean Blue from facebook.com.
- 🍁 6 Ways To Make Waves For Handmade Cards from blog.ellenhutson.com.
- 👓 Make Waves – Ocean Birthday Card – NEW from ebay.com.
- 🎄 Waves of the Ocean = Waves Of Card Ideas! from txstampin.com.
- 🎨 Card Making Video: Rolling Waves Bundle from pattystamps.com.
An ocean wave card starts with smooth blue washes that look calm and open. After the wave line appears, the card feels alive, breezy, and full of movement.
This project is a favorite for beach lovers and summer birthdays. It also gives you a good chance to practice water blending and soft edges. Add a shell, a small fish, or a surfboard shape if you want the card to feel more playful.
For a stylish look, use teal, seafoam, and a touch of white foam. The supplies are easy to find, and even simple brush marks can look beautiful here. If you like personalization, write the message in a wave curve or tuck it into a tiny bottle sketch.
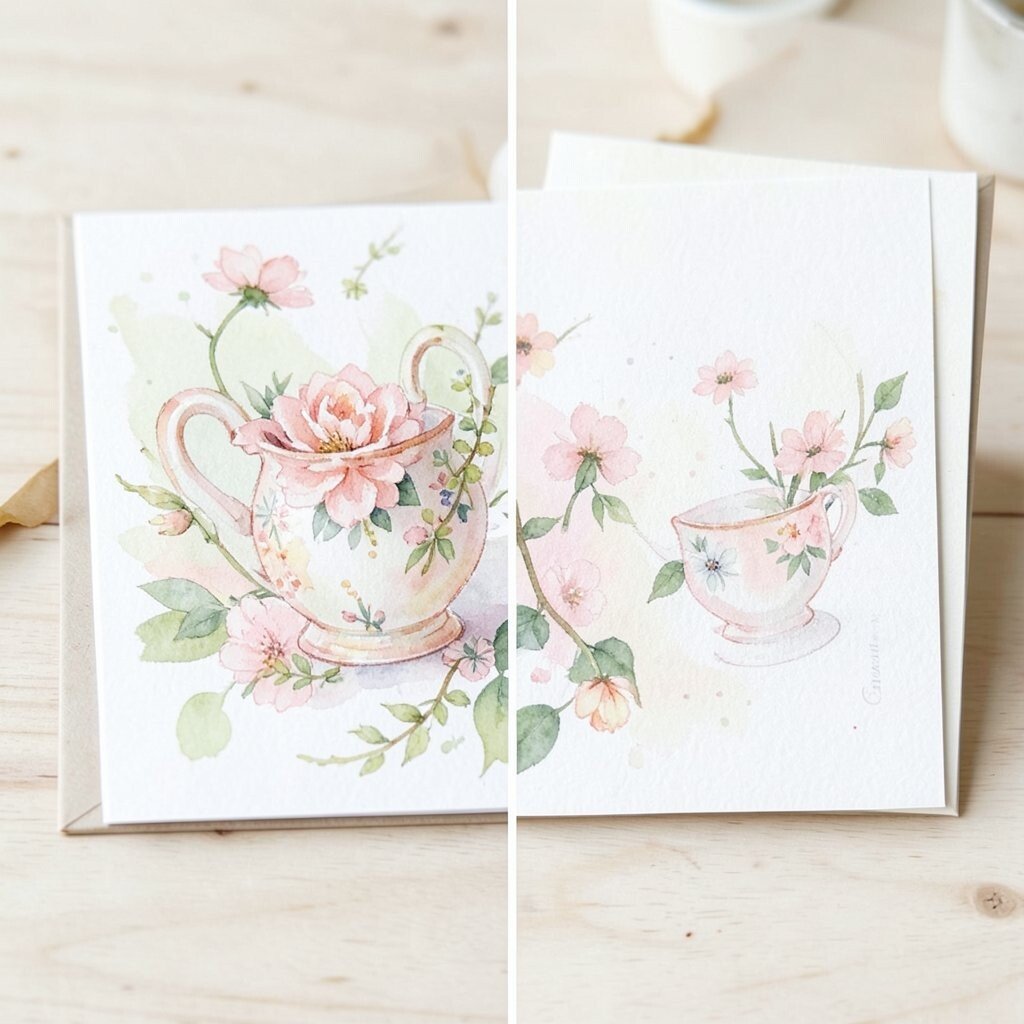
7. Tea Cup Bloom Card
Top Tea Cup Bloom Card Craft Tutorials
- 🎨 Teacup collector's card with Bountiful Bouquets dies from facebook.com.
- 🖼️ Mothers Day Teacup Card from teacherspayteachers.com.
- 🧑🌾 Hana Bloom Tea Cup Set from minzuu.com.
- 🖼️ Tea Cup Illuminated Tea Light Easel Card [Series #10] from stampwithtami.com.
- 🍂 Paper Teacup Printable & Tea Party Games from redtedart.com.
A tea cup bloom card may start as a plain cup outline with empty space above it. The after look feels cozy and sweet when flowers spill out like a small bouquet.
This design is perfect for Mother’s Day, thank-you cards, and friendship notes. It combines neat shapes with soft watercolor petals, so it looks polished without being hard to make. You can use thrifted cups, vintage patterns, or your own favorite mug shape for a personal touch.
Try soft pinks, lilacs, and greens for a gentle style. If you want a lower-cost version, sketch the cup with pencil and keep the flower shapes loose and simple. A tiny steam swirl or handwritten tea phrase can make the card feel extra warm.
8. Mountain Sunset Card

Top Mountain Sunset Card Craft Tutorials
- 🧑🌾 Finished this one tonight!🤗 Mountain Vista Sunset! from facebook.com.
- 💅 Four Ways To Use Abstract Mountain And Abstract Sunset … from blog.ellenhutson.com.
- 🎨 Greeting Card Purple Fantasy Mountain Path Sunset … from ebay.com.
- 💅 Mountain Sunset scrapbook paper: Double Sided 8.5"x … from amazon.ie.
- 🗺️ mountain sunset greeting card (blank inside) from zazzle.com.
A mountain sunset card begins with a plain horizon and a wash of warm color. After the peaks are painted in, the card feels bold, calm, and full of evening glow.
This project is great for people who like nature scenes and simple shapes. It gives a strong before-and-after change because the sky can shift from flat to dramatic so fast. Use orange, rose, and purple for a trendy sunset blend, or choose cooler tones for a quiet mood.
Add a tiny campsite, bird, or pine tree to make the scene feel more complete. The cost stays low because you only need a few colors and one good brush. If you want the card to feel personal, paint a place the recipient loves or a mountain range that means something special.
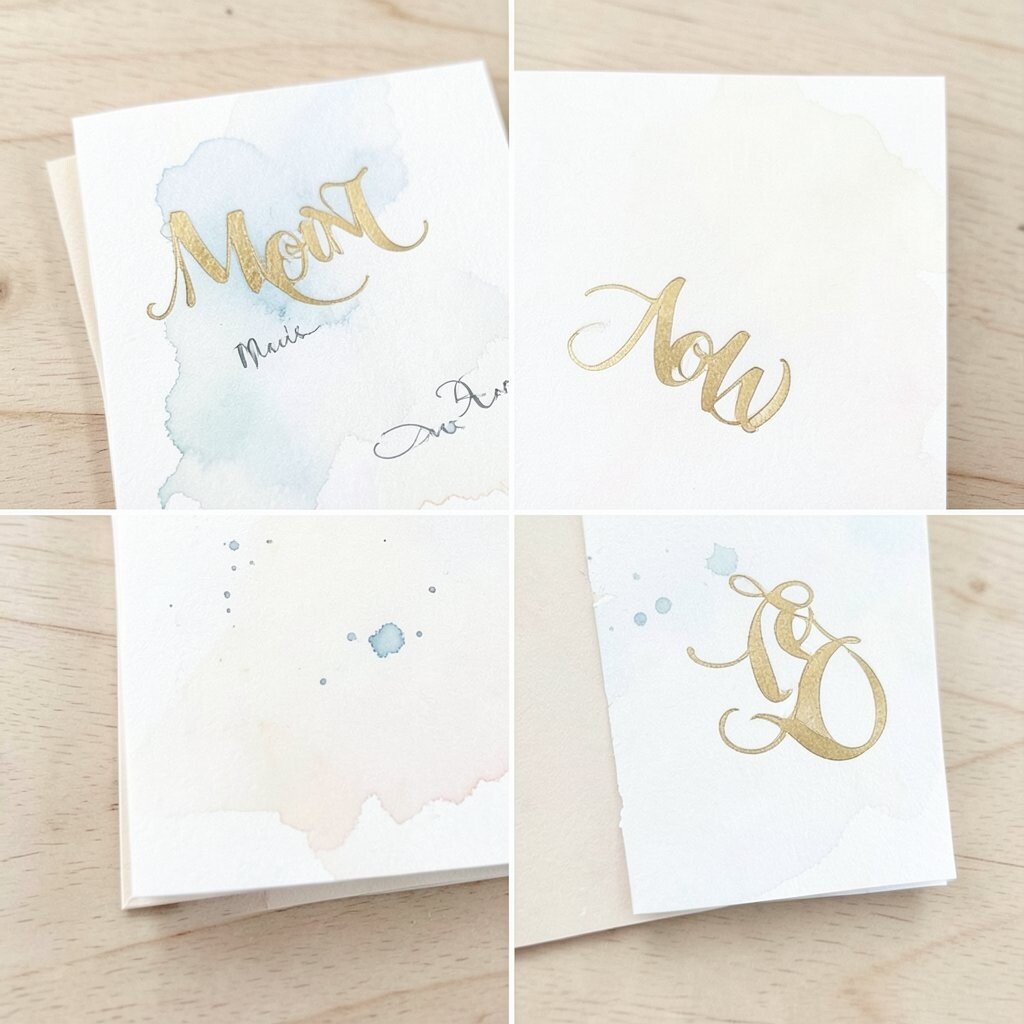
9. Monogram Splash Card
Top Monogram Splash Card Craft Tutorials
- 🍁 What message size is best for a monogram card? from facebook.com.
- 🍂 Foiled Monogram Cards with Spellbinders Every Occasion … from yanasmakula.com.
- 🖼️ Splash Park tickets do not include General Admission … from instagram.com.
- 🎄 McFarland Park Splash Pad Hours of Operation ⏰ May … from facebook.com.
- 🖼️ Monograms for the Home: The Art of Making your Mark from privatenewport.com.
A monogram splash card starts with a single letter and a lot of open space around it. The after version feels stylish and custom when colorful splashes, dots, or soft washes frame the letter.
This is a smart pick for birthdays, weddings, and gift enclosures. It looks modern and clean, and it can be made with very little paint. Choose the person’s first letter and build the whole design around their favorite colors for a stronger personal feel.
Metallic pen, tiny stars, or a neat border can make the card feel more finished. Since the materials are simple, this is a budget-friendly project that still looks special. It also fits current trends because bold initials and minimal art are popular right now.
Keep the letter crisp by letting the background dry before adding details. A soft splatter around the edges can make the card feel lively without making it messy.
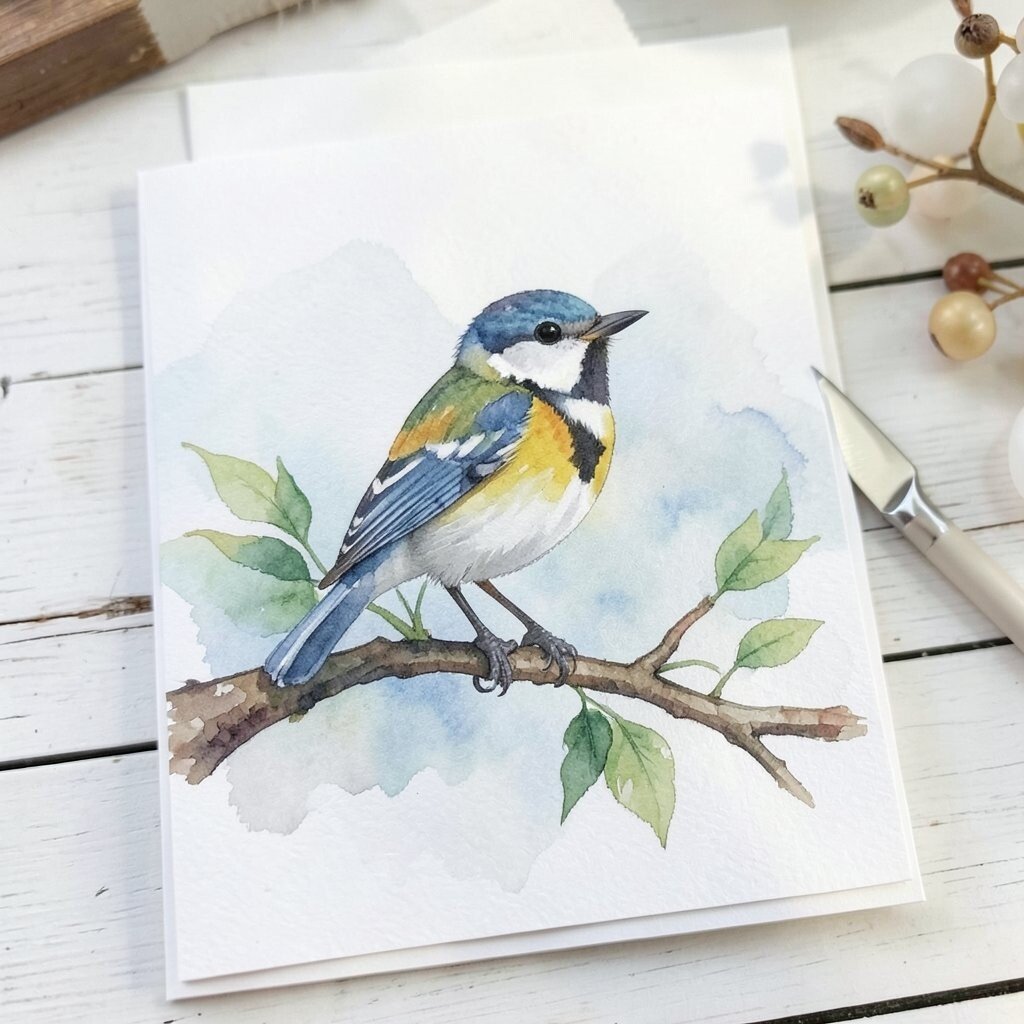
10. Bird On A Branch Card
Top Bird On A Branch Card Craft Tutorials
- 💅 Spring Bird on a Branch Craft from ourkidthings.com.
- 🎄 The birthday card I made using the Kokorosa Studios die of … from facebook.com.
- 🍂 Stampin' up! Bird Builder Punch ~ Branch Wing Card Craft … from ebay.com.
- 💅 A bird on a branch Green Card from tamarny.com.
- 🎨 New Card Making Video Scrappy Tails Layering Spring Birds from sandimaciver.com.
A bird on a branch card often starts with a bare branch and a blank sky. Once the bird is painted, the card feels sweet, peaceful, and full of story.
This style works well for sympathy notes, spring cards, and gentle hello messages. It offers a nice mix of simple shapes and soft color, so it feels calm to paint. You can make the bird realistic or playful, depending on the mood you want.
Use muted blues, browns, and warm reds for a classic look. If you want to keep costs low, paint just one bird and let the rest of the card stay open and airy. A tiny flower, berry, or song line can make the card feel more personal and thoughtful.
Try placing the branch off to one side for a more modern layout. A light wash in the background can help the bird stand out without needing many supplies.
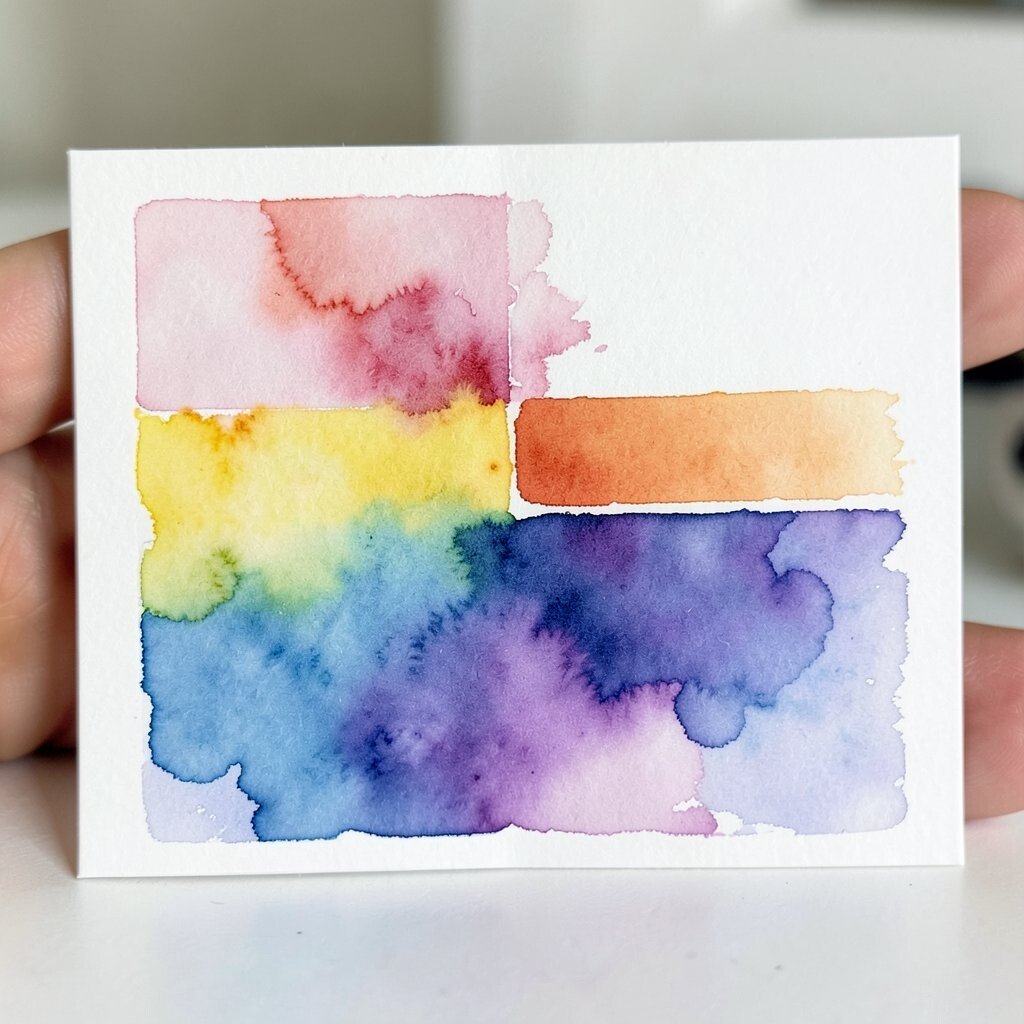
11. Abstract Color Block Card
Top Abstract Color Block Card Craft Tutorials
- 🍂 Abstract art card with Splendid Day Suite from facebook.com.
- 🍅 DIY Abstract Painting from lauren-likes.com.
- 🎨 Technique: Color Blocking from yanasmakula.com.
- 💅 Abstract Art DIY Valentine's Day Card from inspiredbycharm.com.
- 🎨 Abstract Color Block Modern Minimalist Fine Graphic Phone … from business.walmart.com.
An abstract color block card begins with empty shapes and a few soft lines. The after look becomes bold and artsy when each block fills with a different watercolor shade.
This project is great for people who like modern style and do not want to paint tiny details. It is quick, creative, and easy to change for any event. Use a favorite color mix for the recipient, or match the card to a room, outfit, or season.
Keep the blocks uneven for a handmade look, or use tape for a sharper edge. This design can be very low cost because even small paint samples work well. Add a short message in a clean font to make the card feel polished and current.
For a more personal touch, include colors that remind you of shared memories. A little gold line between blocks can make the card pop without much extra effort.
12. Butterfly Garden Card

Top Butterfly Garden Card Craft Tutorials
- 🧑🌾 Bold Butterflies With The Craft Your Life Project Kit … from altenew.com.
- 🗺️ Egg carton butterfly garden with printable flowers and … from instagram.com.
- 🍁 PALOX CRAFTS 3D Butterfly Garden Card, Floral Pop-Up … from ebay.com.
- 🍁 Printable butterfly garden craft from thecrafttrain.com.
- 🍂 Secret Butterfly Garden Vignette Box + Simon's DieCember … from ninamariedesign.com.
A butterfly garden card often starts with a soft wash and a few empty spots waiting for life. After the butterflies and flowers appear, the card feels bright, airy, and full of motion.
This is a lovely choice for birthdays, get-well notes, and spring mail. It gives you room to play with color while still keeping the design easy to read. You can make the butterflies large and bold or small and delicate, depending on the style you like.
Try using two or three colors on each wing for a pretty blended look. If you want to save money, paint simple flower shapes instead of detailed blooms. A name, date, or tiny heart tucked near the garden can make the card feel more personal and thoughtful.
Butterfly art is still trendy because it feels light and hopeful. Add a fine pen body and antennae after the paint dries for a neat finish.
13. Holiday Ornament Card

Top Holiday Ornament Card Craft Tutorials
- 💅 I made a few leftover holiday cards into ornaments! from facebook.com.
- 🖼️ DIY | Holiday Card Ornaments from carriebradshawlied.com.
- 🎨 Paper Ornament Cards from jennifermcguireink.com.
- 🖼️ 2025 Topps Holiday Babe Ruth #OO-13 Oversized Die-Cut … from ebay.com.
- 🧑🌾 DIY Christmas Craft Ornaments From Recycled Greeting … from discover.hubpages.com.
A holiday ornament card begins with a blank field and one round shape waiting to shine. After the ornament is painted, the card feels festive and ready for the season.
This project is perfect for winter greetings and handmade gift notes. It looks fancy even when the design stays simple, which makes it a good value for busy crafters. You can use red, green, silver, or icy blue, and each choice gives a different holiday mood.
Add a ribbon, snowflake, or tiny sparkle marks to make the ornament stand out. For a more personal touch, paint a pattern that matches the recipient’s style or home colors. Since the shape is easy, this card is friendly for beginners and still feels special enough to give.
Metallic watercolor or gel pen can give the ornament a bright shine. If you want a softer look, use one color in several shades and keep the background light.
14. Tiny House Scene Card

Top Tiny House Scene Card Craft Tutorials
- 👓 Tiny house neighborhood scene supplies and steps from facebook.com.
- 🍅 Tiny House Magazine – Complete 2022 set from permies.com.
- 🍅 [OC – Art] Tiny House – Home is where you make it when … from reddit.com.
- 👓 Adult Teen Craft Kit 14 Magic Bookstore Decor – Small Pirate … from liapllc.com.
- 🍁 Ma Petite Maison and the European Tiny House Scene with … from thetinyhouse.net.
A tiny house scene card starts with a simple house shape and a plain background. The after version feels cozy and inviting once the windows, roof, and little details come to life.
This card is a sweet pick for housewarmings, thank-you notes, and friendship messages. It has a warm storybook feel that many people love, and it can be made with very few supplies. You can paint a favorite style of home, add a garden path, or include a pet in the yard for a more personal touch.
Use soft earth colors for a classic look, or try trendy muted tones for a modern feel. The cost stays low because the design works with small amounts of paint and simple line work. A glowing window or tiny smoke curl can make the card feel extra cozy and memorable.
If you want the scene to feel more like the recipient, add a tree, fence, or mailbox that matches their world. A neat handwritten greeting above the roof can tie the whole card together.