Crafting can turn an ordinary day into something bright. A few simple supplies can spark a whole new mood.
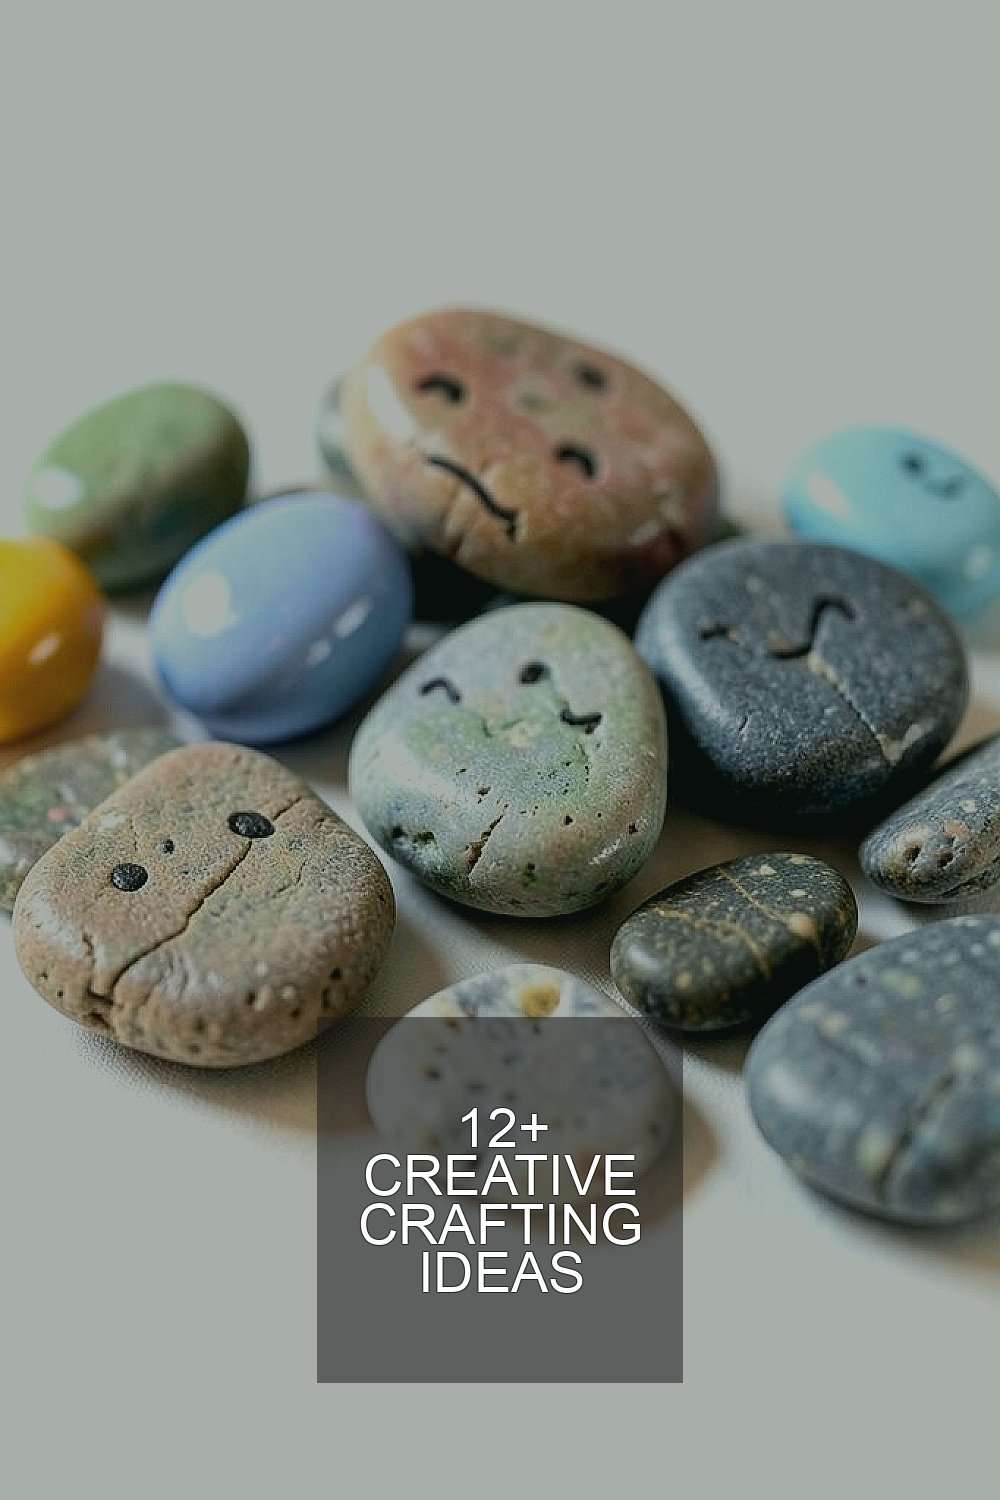
1. Paint a Set of Happy Pebbles

Top Paint A Set Of Happy Pebbles Craft Tutorials
- 🧑🌾 Awesome Pebble Painting Art Tutorial 🙂 from facebook.com.
- 👓 Easy and Fun Painted Pebble Garden Art Ideas from facebook.com.
- 🗺️ Rock Painting Complete Guide to Painted Rocks from inspirekindness.com.
- 🍂 The ultimate guide to rock painting / pebble painting. from zieler.co.uk.
- 🧑🌾 Make this Simple DIY Pebble Art in an Hour! from sustainmycrafthabit.com.
Flat stones can become tiny pieces of art with a little paint and a steady hand. They look cheerful on a shelf, in a garden, or tucked into a gift bag.
Use acrylic paint, paint pens, or even nail polish for bold color. You can make smiley faces, flowers, stars, or little words that lift the mood. This craft is low cost, easy to start, and great for kids or adults who want a calm project.
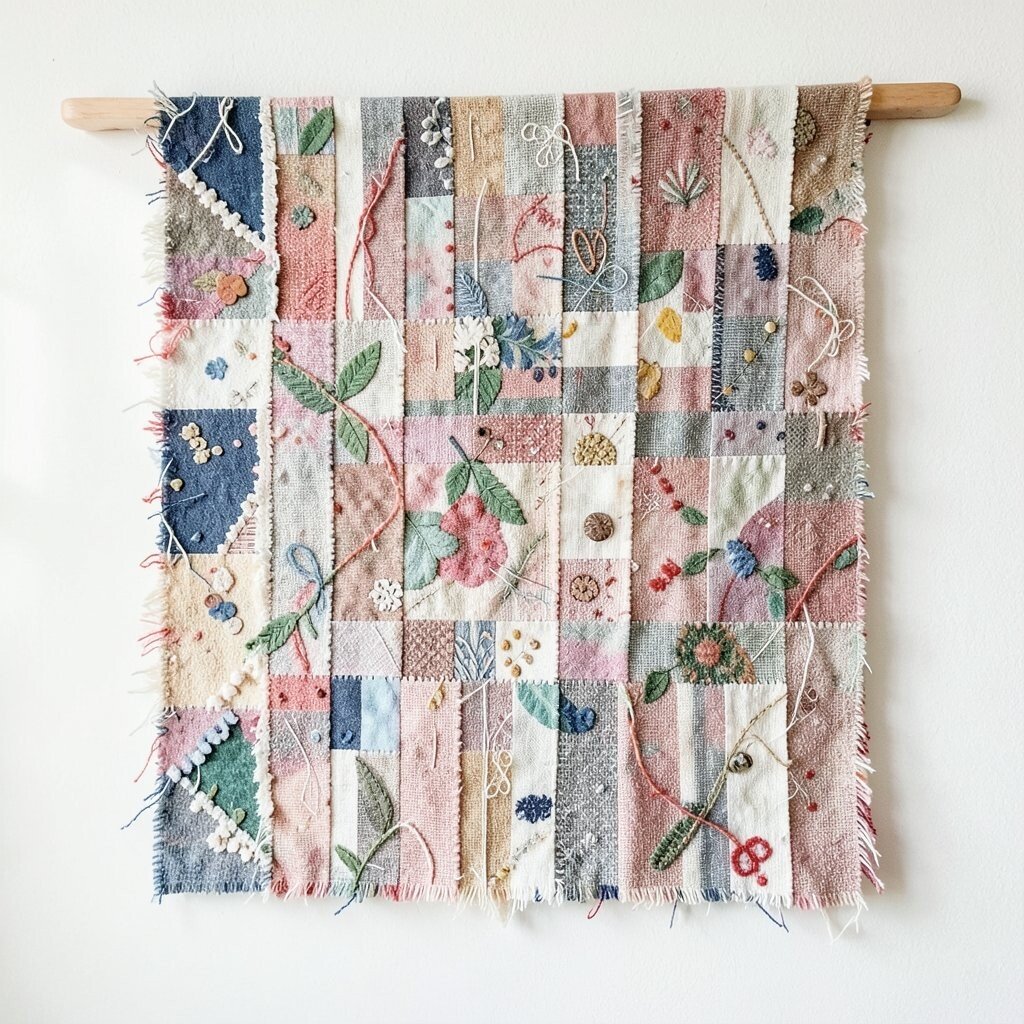
2. Make a Scrap Fabric Wall Banner
Top Make A Scrap Fabric Wall Banner Craft Tutorials
- 🍁 DIY Pennant Banner: How to Use Scraps to Make Bunting from creativelive.com.
- 🖼️ How to Make a Fabric Tie Banner {DIY Banner Tutorial} from homestoriesatoz.com.
- 🍁 DIY: Make A Fabric Banner from thedecorfix.com.
- 🍂 How to Make a Fabric Birthday Banner from quilterscandy.com.
- 🖼️ How to make themed banners with quilting scrap fabric? from facebook.com.
Old cloth scraps can turn into a soft banner full of color and texture. Hung on a wall, it adds a cozy handmade feel that store-bought decor often lacks.
Cut the fabric into strips, triangles, or little flags. Tie or glue them onto string, twine, or ribbon for a quick finish. Pick colors that match your room, or use leftover pieces from clothes, pillowcases, or sewing bins for a personal touch.
This idea fits the current love for slow decorating and reuse. It costs very little if you already have scraps at home, and it gives a fresh look without buying new decor. Try mixing lace, denim, cotton, and shiny ribbon to make the banner feel rich and special.
3. Create Mini Clay Trinket Dishes

Top Create Mini Clay Trinket Dishes Craft Tutorials
- 💅 Clay Trinket Dish from littlepinelearners.com.
- 🎄 How to Make Trinket Dishes with Air-Dry Clay + Shapes … from wellcraftedstudio.com.
- 🗺️ Anthropologie Inspired DIY Trinket Dish Tutorial: Easy Air- … from thriftyandchic.com.
- 🍅 Air Dry Clay Trinket Dish Craft for Kids from ourplayfullearningjourney.com.
- 🍁 DIY Polymer Clay Trinket Dish Set from alphes-corner.com.
Small clay dishes are useful and pretty at the same time. They can hold rings, keys, paper clips, or tiny keepsakes on a desk or dresser.
Air-dry clay works well and keeps the project simple. Press the clay into a bowl shape, smooth the edges, and add stamped patterns or finger lines for charm. You can paint the finished dish in soft pastels, bright dots, or metallic touches to match your style.
These dishes make lovely gifts because they feel handmade and thoughtful. They are also a smart way to use a little clay without needing special tools or a kiln. For a trendy look, try speckled paint, matte finishes, or pressed leaf prints for a natural feel.
If you want a more personal piece, press in initials, tiny hearts, or a favorite symbol before the clay dries. Keep a few on hand near the door, by the bed, or beside the sink so small items stay in place. The cost stays friendly, and the result looks much more polished than the price suggests.
4. Design a Recycled Magazine Collage

Top Design A Recycled Magazine Collage Craft Tutorials
- 🎄 13 Ways to Recycle Old Magazines Into New Crafts from kidsactivitiesblog.com.
- 🗺️ Rainbow Collage- Recycled Magazine Craf from teachbesideme.com.
- 🎨 Reuse Magazines To Create Works Of Art from kindergartennation.com.
- 🧑🌾 Magazine Collage (Make with Any Design!) from modpodgerocksblog.com.
- 🍅 Craft Projects with old Magazines – Sum of their Stories from sumoftheirstories.com.
Old magazines can become bright art with scissors, glue, and a little imagination. The finished collage can feel bold, playful, or calm, depending on the colors you choose.
Cut out faces, words, patterns, and textures, then layer them on paper or cardboard. You can make a mood board, a quote page, or a dreamy scene from your own mind. This craft is a fun way to reuse paper and make something that feels truly one of a kind.
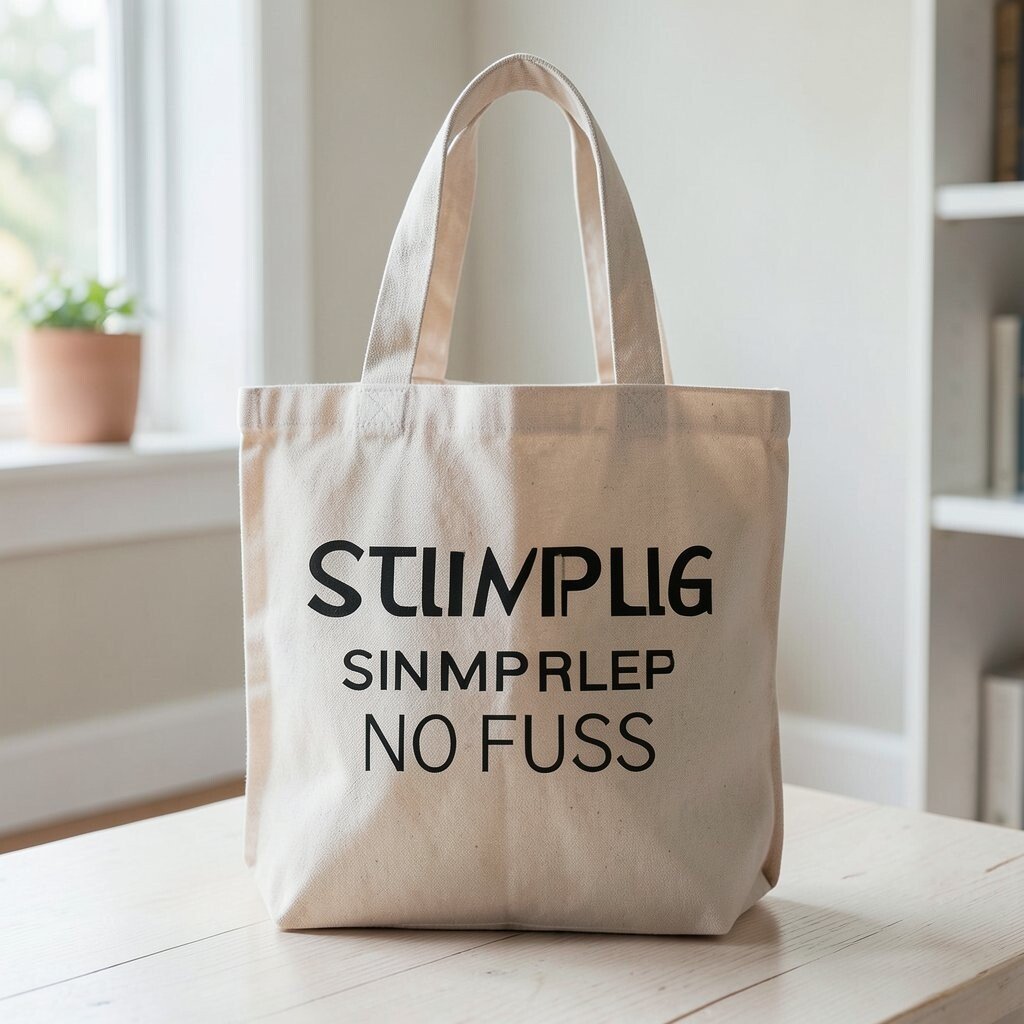
5. Sew a Simple No-Fuss Tote Bag
Top Sew A Simple No-Fuss Tote Bag Craft Tutorials
- 🗺️ Easy Tote Bag Sewing Tutorial from needleandspatula.com.
- 🗺️ 21 Free Tote Bag Sewing Patterns from craftpassion.com.
- 💅 Making little tote bags with paper and glue from facebook.com.
- 🍅 How to sew a custom tote bag in ANY size (2 styles) from sewsimplebags.com.
- 🎨 No Sew T-shirt tote bag tutorial from theseamanmom.com.
A basic tote bag can be made from sturdy fabric, an old pillowcase, or even a worn shirt. Once finished, it is handy for books, snacks, art supplies, or quick shopping trips.
Choose a plain cloth and add painted shapes, stitched lines, or fabric markers. If you want a softer style, use earth tones and simple shapes; if you want a bold style, go for bright blocks and fun patches. This project is useful, low waste, and right in step with the trend of handmade everyday bags.
It does not need to be perfect to be useful, which makes it a great beginner project. Add a pocket, a name tag, or a favorite quote to make the tote feel personal. The cost can stay very small if you use fabric from home, and the result can be used again and again.
6. Build a Beaded Plant Hanger

Top Build A Beaded Plant Hanger Craft Tutorials
- 🖼️ DIY Beaded Plant Hanger and Lantern from onelittleproject.com.
- 🍅 Make a Beaded DIY Plant Hanger from lovelyindeed.com.
- 🍁 Easy DIY Beaded Plant Hanger & Lantern Tutorial from diyjoy.com.
- 🍅 Beaded plant hangers – so pretty 😍. Use pretty plastic or … from facebook.com.
- 🎨 How To Make A DIY Wood Bead Plant Hanger from kenarry.com.
Macrame cord, yarn, or strong string can be turned into a plant hanger with a fresh handmade look. A few beads added in the right spots make it feel cheerful and modern.
This craft works well for small pots and sunny windows. Tie simple knots, leave space for beads, and finish with a loop for hanging. It gives your room a cozy, boho feel and helps plants sit at eye level where they can shine.
Pick bead colors that match your pot or room, such as wood tones for a natural look or bright glass beads for a playful style. If you are new to knotting, start with a short hanger and use a thick cord that is easy to handle. The supplies are usually affordable, and the final piece can make even a plain plant look special.
For a personal touch, choose beads from an old necklace or mix in charms that mean something to you. This idea is popular because people love adding plants to homes in stylish ways. It is also a nice way to make a small space feel warm without spending much.
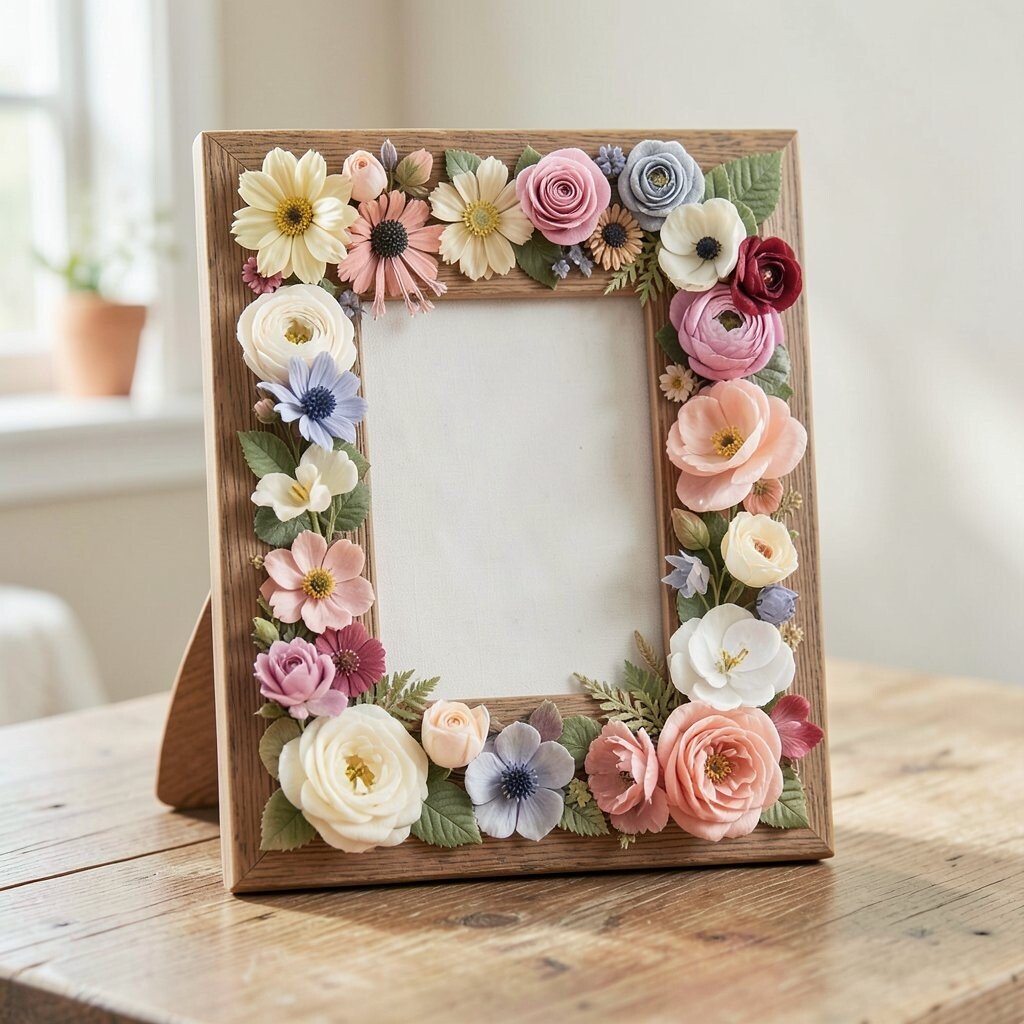
7. Craft a Pressed Flower Frame
Top Craft A Pressed Flower Frame Craft Tutorials
- 🎄 How to Make DIY Pressed Flower Wall Art from roomfortuesday.com.
- 🍅 DIY Pressed Flower Frames from craftingcheerfully.com.
- 🖼️ DIY Pressed Flower Frame from coolmomandcollected.com.
- 💅 Gorgeous Pressed Flower Wall Art: 3 Projects from firstdayofhome.com.
- 🎄 Virtual Pressed Flower Frame Craft Class from adultsandcrafts.com.
Pressed flowers can hold the beauty of a garden long after the blooms fade. Framed on a wall or shelf, they look delicate and peaceful.
Pick flowers with flat petals, place them in a heavy book, and wait until they dry. Once ready, arrange them on paper or clear glass and frame them for a soft, romantic look. This craft feels unique because no two flowers press the same way.
Use flowers from a walk, a gift bouquet, or your own yard for a personal story in each frame. You can also add handwritten notes, dates, or a short message behind the blooms. The cost is very small, especially if you gather flowers from places you already enjoy.
Try pale petals for a dreamy style or bright petals for a lively look that stands out. Pressed flower art fits current home decor trends that favor nature and gentle color. It also makes a sweet gift for birthdays, thank-yous, or room decor.
8. Make a Colorful Yarn Wall Tassel

Top Make A Colorful Yarn Wall Tassel Craft Tutorials
- 🎨 DIY Neon Tassel Wall Hanging from theneonteaparty.com.
- 🖼️ How To Make A Colorful Wall Hanging With Yarn Tassels from homedit.com.
- 🎨 Rainbow Tassel Wall Art (with Video) from sugarspiceandglitter.com.
- 🎨 How to Make Yarn Tassels in Multicolor Wools from craftymarie.com.
- 💅 DIY Rainbow Tassel Wreath – Craft My World from craftmyworld.com.
Yarn tassels bring soft texture and happy color to any wall or door knob. They are quick to make and can brighten a room in just a little time.
Wrap yarn around cardboard, tie it at the top, and cut the ends to form a tassel. Add layers, mix yarn types, or tie several tassels together for a fuller look. This craft is friendly on the wallet and easy to adjust for any room style.
Choose chunky yarn for a cozy feel or thin yarn for a lighter, airy look. You can make one in school colors, favorite shades, or even rainbow tones for a playful vibe. A handmade tassel also works well as a gift topper, bag charm, or wall accent.
For a more personal finish, stitch in beads, bells, or a tiny fabric tag with a name or word. This simple project is popular because it gives quick results without much mess. It is a great choice when you want something pretty that does not take a lot of tools or money.
9. Turn Jars into Lanterns
Top Turn Jars Into Lanterns Craft Tutorials
- 👓 How to Make Simple Mason Jar Lanterns from theboondocksblog.com.
- 🎨 Turning a plain glass jar into a stunning vintage-style … from facebook.com.
- 💅 How To: Mini Mason Jar Hanging Lanterns from ourbestbites.com.
- 🧑🌾 Turning tiny jars into magical lanterns #DIY #crafts … from facebook.com.
- 💅 Fairy Lanterns from Mason Jars from adventure-in-a-box.com.
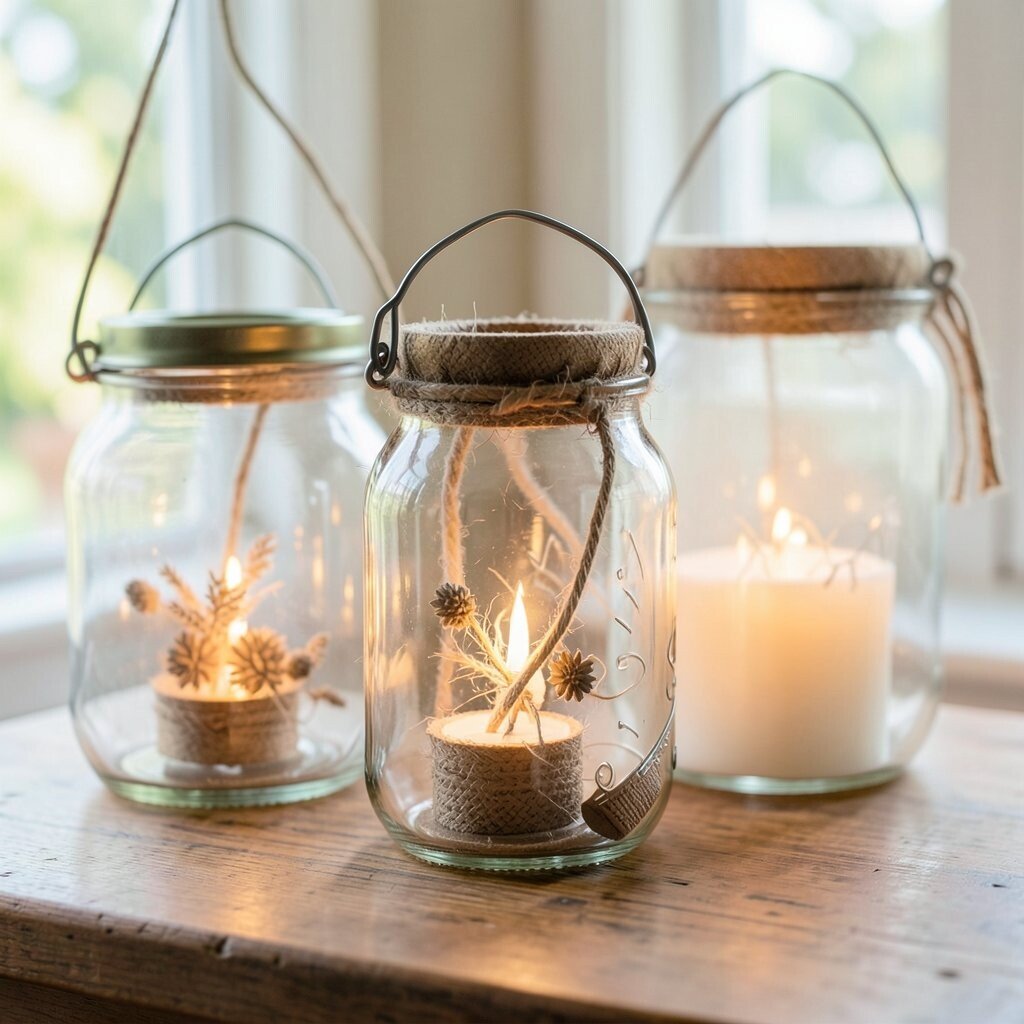
Empty jars can glow like little lanterns with paint, tissue paper, or battery candles. When lit, they cast a warm shine that feels magical on a table or patio.
Brush glue on the outside and press on colored tissue for a stained-glass look. You can also paint simple shapes, wrap the jar with wire, or tie ribbon around the top. This project is low cost and gives old jars a fresh purpose instead of sending them away.
Try soft colors for a calm glow or bold colors for a party feel. Add twine, dried flowers, or small charms to make each jar look different from the next. These lanterns fit the trend of cozy home lighting and handmade decor that feels warm and welcoming.
If you want a personal touch, write a favorite word or family name on the glass with paint. They are lovely for bedrooms, porches, or special dinners. Because the supplies are simple, you can make several without spending much at all.
10. Stitch a Pocket Bookmark

Top Stitch A Pocket Bookmark Craft Tutorials
- 🧑🌾 Made by Me Monday – The Pocket Bookmark {+Tutorial!} from threadridinghood.com.
- 🗺️ DIY Journaling Bookmarks (and pencil pocket) free sewing … from sewcanshe.com.
- 👓 Easy card-stitched bookmarks using scrapbook paper from facebook.com.
- 👓 How to Make a Fabric Bookmark with Elastic and a Pocket from sewcraftyme.com.
- 🖼️ 11 Easy DIY Bookmarks to Sew from easythingstosew.com.
A fabric bookmark with a tiny pocket is both cute and useful. It keeps your place in a book and can hold a note, sticker, or tea bag.
Cut two small pieces of fabric, sew them together, and leave a pocket on one side. Add ribbon, lace, or a button to make it feel extra special. This is a neat project for scrap fabric and a wonderful way to make reading time feel more personal.
Use bright prints for children, soft cotton for a classic look, or denim for something sturdy. You can even stitch initials or a favorite symbol onto the front. The cost stays low, and the finished bookmark makes a thoughtful gift for book lovers.
For a trendy touch, choose botanical prints, tiny checks, or muted earth colors. The pocket can hold a reading list or a small note, which makes it feel more useful than a plain bookmark. It is a sweet little craft that is easy to finish in one sitting.
11. Create a Hand-Stamped Tea Towel
Top Create A Hand-Stamped Tea Towel Craft Tutorials
- 🍁 DIY Handstamped Tea Towel from craftifymylove.com.
- 🍂 DIY Stamped Tea Towels from prettysimpleideas.com.
- 🧑🌾 How to Make DIY Fruit & Veggie Stamped Tea Towels from homesteadandchill.com.
- 🖼️ How to Make a Modern Stamped Tea Towel from hgtv.com.
- 🍂 Citrus-Stamped Tea Towels: Easy Handmade Gifts from jessicawellinginteriors.com.
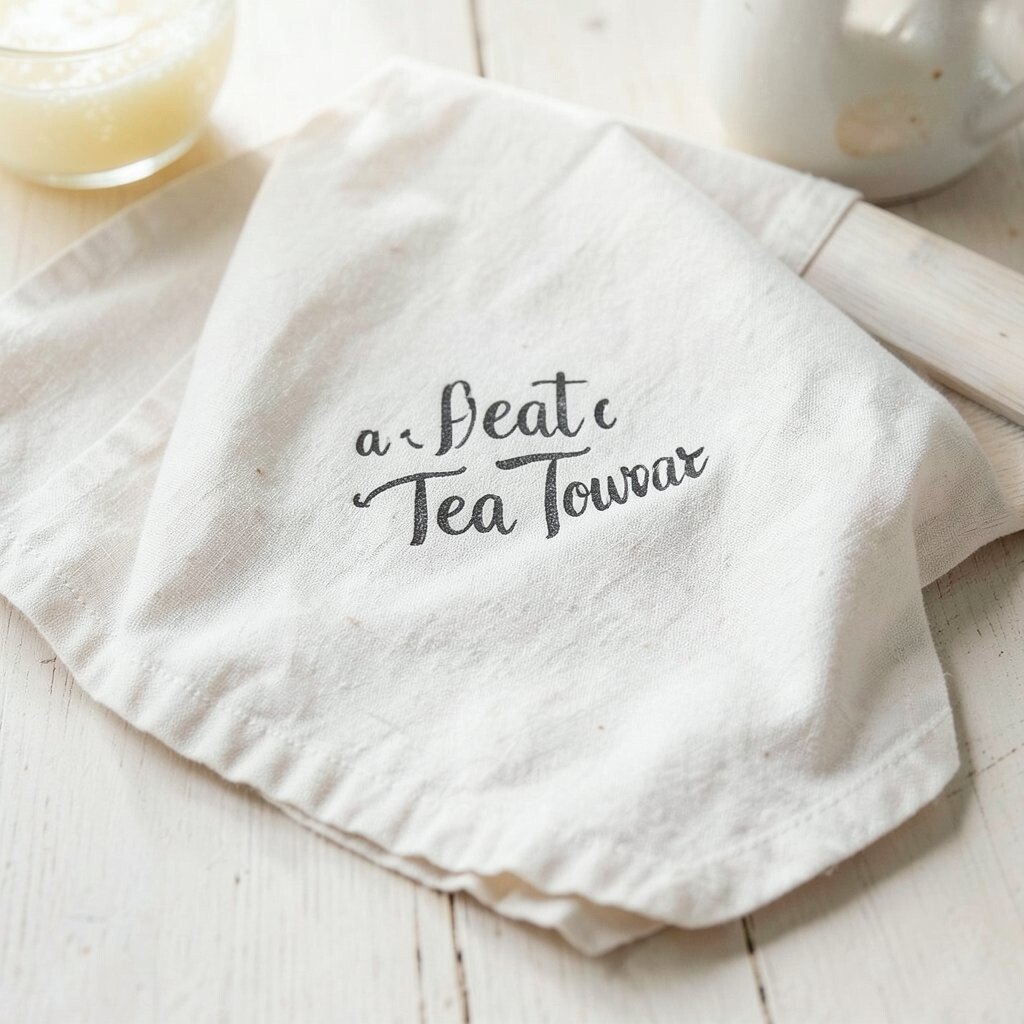
A plain tea towel can become kitchen art with simple stamps and fabric paint. The finished piece looks fresh, useful, and handmade.
Use potatoes, foam shapes, corks, or carved erasers to make stamps. Press them into fabric paint and print flowers, leaves, stars, or dots across the towel. This project is a fun way to make an everyday item feel special without a big budget.
Pick colors that match your kitchen or gift style, such as navy, sage, or sunny yellow. You can make one towel for yourself or a set for a housewarming gift. The handmade look is part of the charm, and small flaws often make the design even better.
For a personal twist, stamp a family initial, a favorite fruit, or a tiny cooking tool. This craft fits current trends that celebrate simple home goods with a custom feel. It is also a smart way to refresh old towels instead of buying new ones.
12. Build a Nature-Inspired Shadow Box

Top Build A Nature-Inspired Shadow Box Craft Tutorials
- 🎨 Creating a shadow box with forest bark and sticks from facebook.com.
- 👓 Winter Shadow Boxes: Cozy Up with Lights and Photos! from jennifermaker.com.
- 🎄 Natural Impressions Ceramic Shadow Box Collage Ideas from paintingartsncrafts.com.
- 🧑🌾 DIY Birch Shadow Box Paper Craft from apieceofrainbow.com.
- 💅 DIY Fall Leaf Shadow Boxes | Fun365 – Oriental Trading from fun365.orientaltrading.com.
A shadow box can hold small treasures from nature in a neat and beautiful way. Pinecones, shells, feathers, seeds, and tiny twigs all look lovely when arranged with care.
Start with a shallow box or frame and place your items on paper, fabric, or a painted background. Try a beach theme, forest theme, or garden theme for a story-like display. This craft is unique because it turns simple found objects into art that feels full of memory.
Choose items from a favorite walk, family trip, or local park to make the piece more meaningful. You can label each item or add the date and place where it was found. The cost is low if you gather materials from nature and use a frame you already have.
Soft neutral colors are popular right now, but bright backgrounds can make natural items stand out in a bold way. Add a tiny photo or handwritten note if you want the display to feel more personal. It is a calm, creative project that can make a room feel thoughtful and warm.
13. Assemble a Button Art Canvas
Top Assemble A Button Art Canvas Craft Tutorials
- 🍅 Sweet idea for creating art with buttons on canvas! You … from facebook.com.
- 🍅 DIY Button Art: Get 25+ Project Ideas! from modpodgerocksblog.com.
- 🗺️ Button Tree: a beautiful canvas project full of vibrant colors from craftsbyamanda.com.
- 🗺️ Another button craft. Green and red buttons glued on a … from facebook.com.
- 🗺️ 20 Things To Make With Buttons – Rustic Crafts & DIY from rustic-crafts.com.
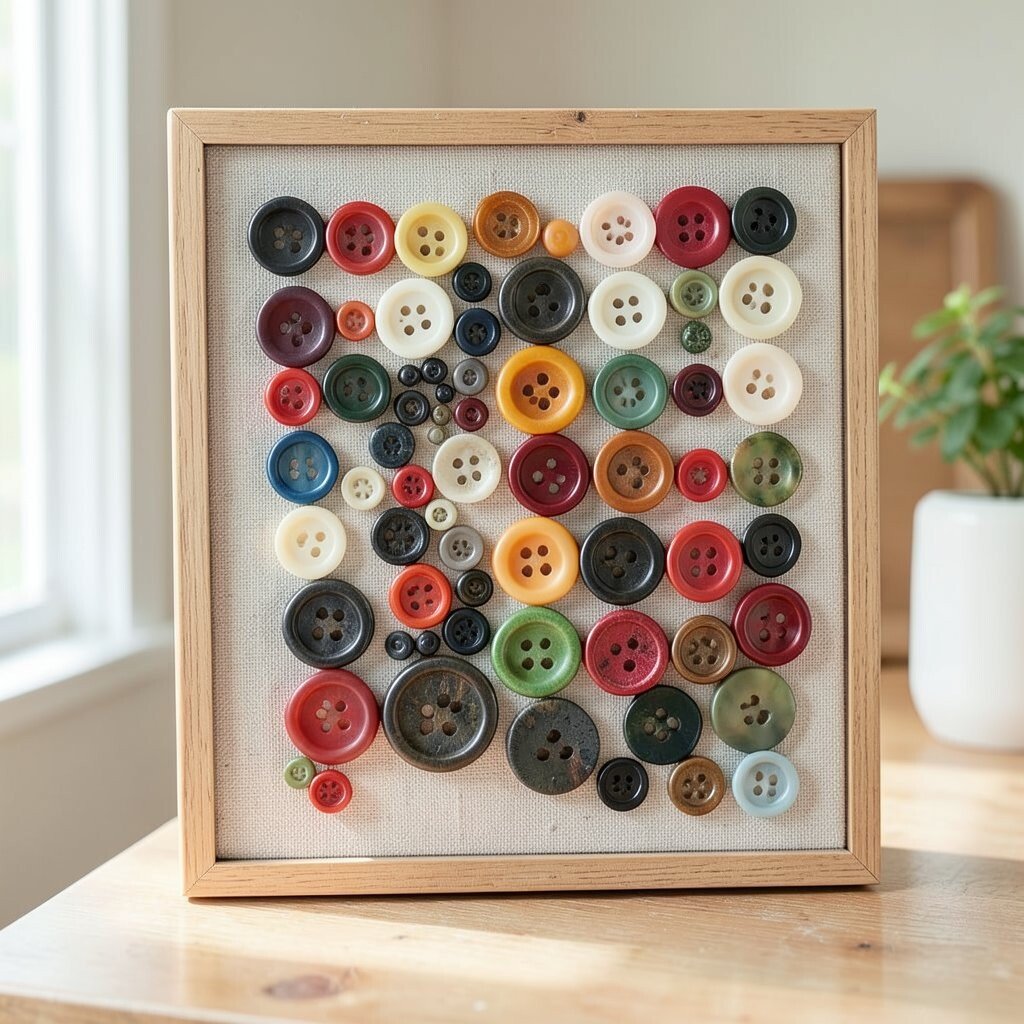
Buttons can become a bright picture when they are glued onto a canvas or thick paper. The finished art has a playful look and a nice mix of shape, color, and shine.
Sort buttons by size and color, then arrange them into flowers, hearts, animals, or abstract patterns. Glue them down one by one and let the design build slowly. This craft is budget friendly if you already have an old button jar, and it works well for kids and grown-ups alike.
Try using all one color for a clean style or many colors for a lively pop-art feel. You can outline a shape first with pencil to help guide your design. Button art is a fun way to reuse leftovers and make something that feels cheerful on a wall or shelf.
Make it personal by using buttons from old clothes, family sewing kits, or a grandparent’s collection. Current handmade decor trends love texture, and buttons give plenty of it without much effort. Add a name, date, or short word in the center to make the piece feel even more special.