The kiln is where clay becomes lasting art. A few smart habits can make every firing calmer and more rewarding.
1. Learn Your Kiln Before You Fire
Top Your Kiln Before You Fire Craft Tutorials
- 🍁 Kiln Tips for Newbies from craftychica.com.
- 🗺️ Manual Kiln Fire for Beginners from creekroadpottery.com.
- 🎨 What's one thing every beginner should know before firing … from facebook.com.
- 🍁 Learning how to use a kiln : r/Pottery from reddit.com.
- 🍅 The Basics – Kilns | Ceramic Pottery Kiln, Glass … from skutt.com.
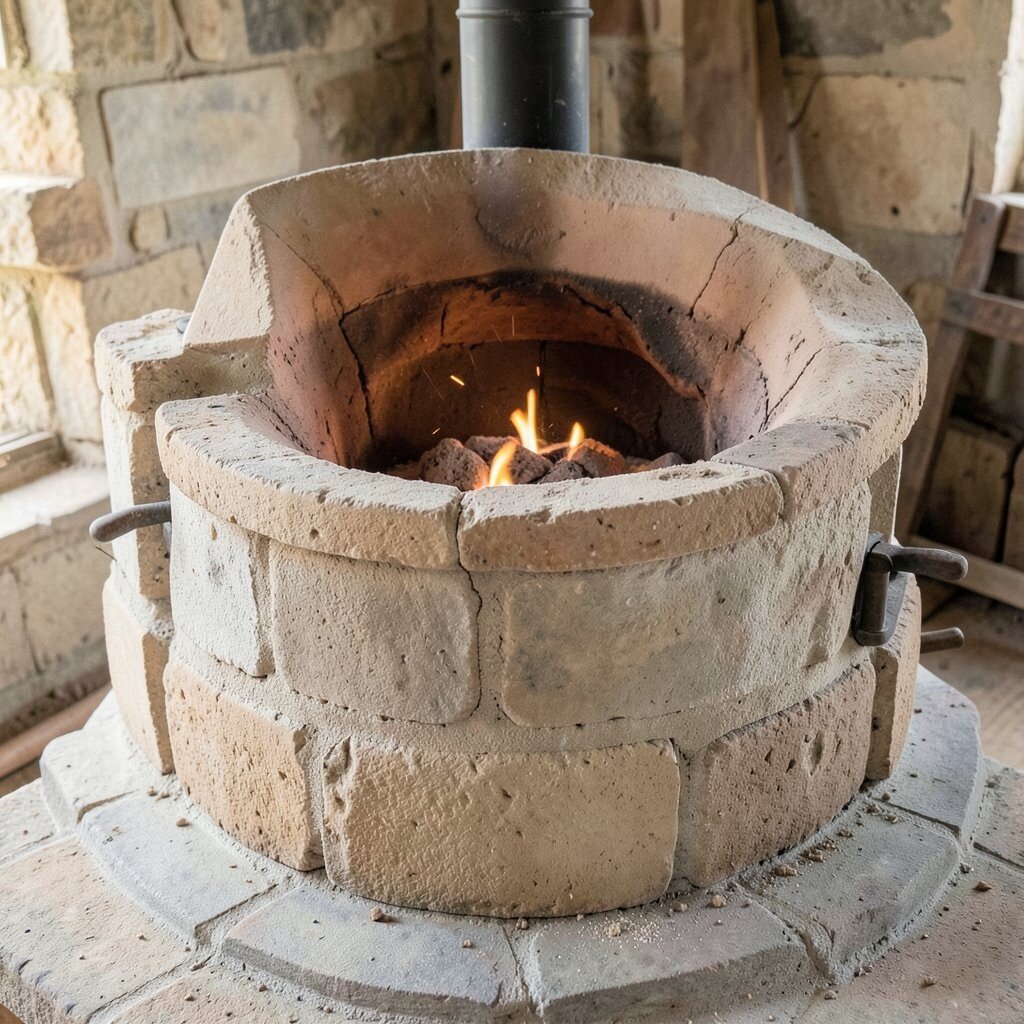
A kiln has its own personality, and it pays to get familiar with it. The shelves, coils, vents, and peep holes all tell you how heat moves inside.
Open the lid or door and look closely at the setup before each firing. Notice any worn bricks, bent elements, or dusty spots that could affect the heat. This simple check helps you avoid surprise problems and supports better results from the start.
2. Keep Your Loading Plan Simple and Smart

Top Keep Your Loading Plan Simple And Smart Craft Tutorials
- 🍅 SmartCraft Connect from mercurymarine.com.
- 🎄 Pro Tips / How To from parts.promarineusa.com.
- 🧑🌾 Mercury Smartcraft Connect setup options from facebook.com.
- 🍅 Mercury Marine – Apps on Google Play from play.google.com.
- 🎄 Mercury Marine from facebook.com.
How you place pots inside the kiln can change the whole firing. A neat load often means even heat, fewer marks, and less stress.
Leave space between pieces so the air can move around them. Put taller work where it will not block smaller forms, and keep fragile handles away from busy spots. If you make many shapes, sketch a loading map that fits your style and saves time.
Think about cost too, because a crowded load can lead to cracked work and wasted clay. Many potters now use digital photos of their shelves to plan better stacking and reduce mistakes. A personal loading system can feel like a secret recipe that makes each firing more reliable.
3. Use Kiln Wash and Shelf Care
Top Use Kiln Wash And Shelf Care Craft Tutorials
- 🍅 Tips and Tools: Before Firing from ceramicartsnetwork.org.
- 🧑🌾 Kiln Loading, Maintenance, and Care from alabamaart.com.
- 🎄 Kiln wash is a coating to protect shelves inside the kiln … from instagram.com.
- 💅 What is the one time commercial kiln shelf product? from facebook.com.
- 🖼️ How to Prime Kiln Shelves from lisajvogt.com.
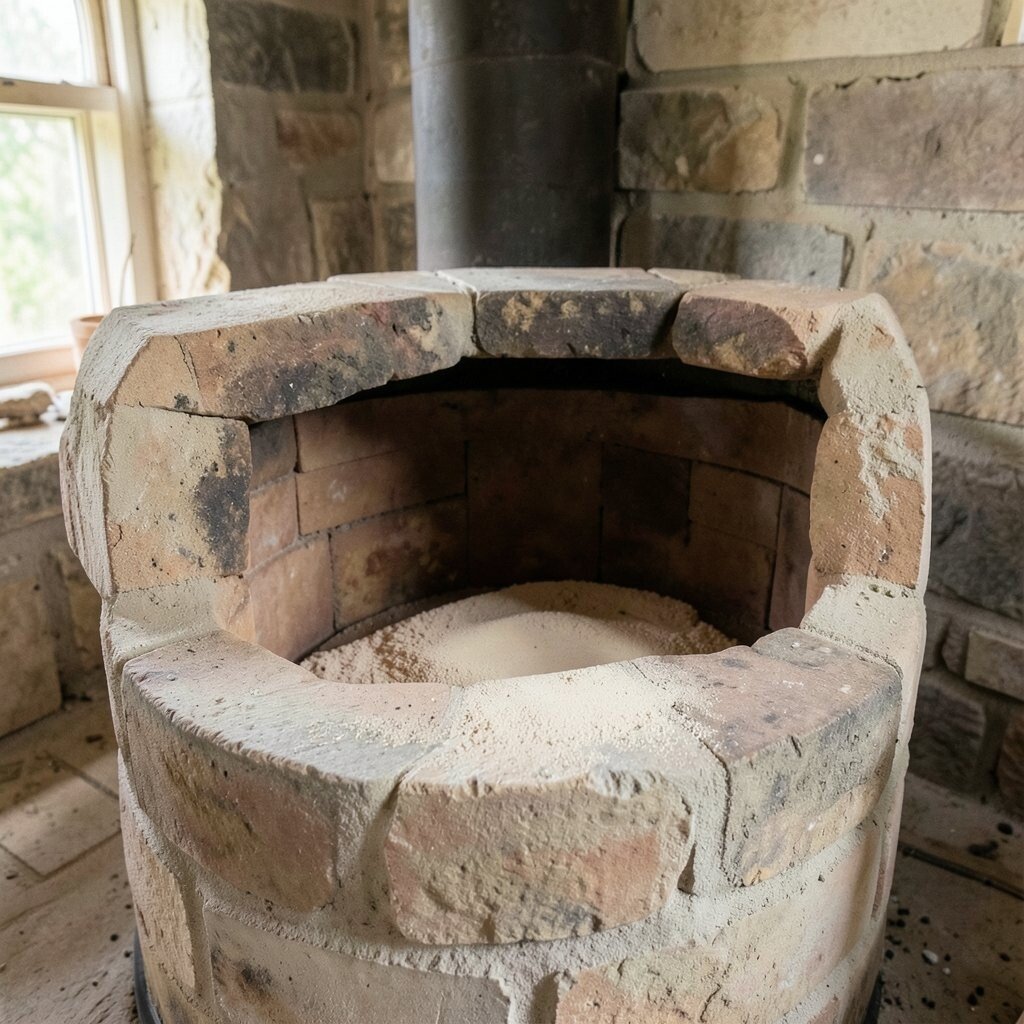
Clean shelves protect your work and your wallet. A smooth, well-kept shelf can save you from stuck glaze and broken pots.
Brush kiln wash on evenly so pieces do not fuse to the shelf. Let each coat dry well before loading, and scrape off old flaky spots when needed. Fresh shelf care also makes the kiln look tidy and ready, which gives you more confidence on firing day.
Some potters keep a shelf log to track which shelves stay hottest or coolest. That helps with personalization, since you can match certain forms to certain spots. Good shelf habits may cost a little time, but they often save much more by preventing damage.
If you enjoy a clean studio look, label shelves by size or use color marks for quick sorting. Small visual systems make a big difference when the kiln is full and your hands are busy. The more your shelves stay in shape, the easier it is to fire with peace of mind.
4. Load for Even Heat Flow
Top Load For Even Heat Flow Craft Tutorials
- 🎄 Engineering Manual from heatcraftrpd.com.
- 🍁 Heatcraft Engineering Manual 2006 from refrigerationboard.org.
- 🍅 Roomwise heating load calculation: The path to an optimal … from autarc.energy.
- 🍁 How to fix uneven heating issues with a heat press machine? from facebook.com.
- 💅 Is Brazing Still Serious Framebuilding? Some Thoughts on … from reddit.com.
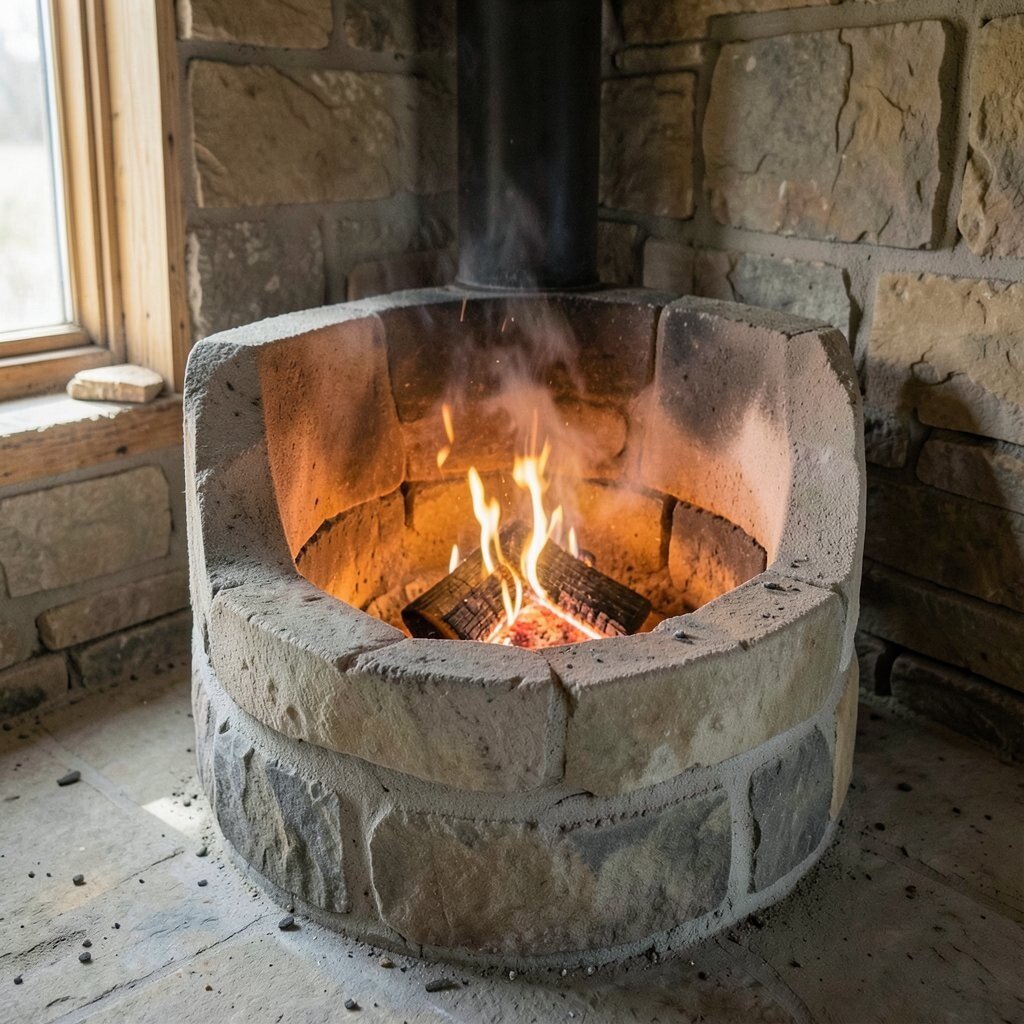
Heat likes to move in patterns, and smart loading works with those patterns. When the air can travel freely, your pieces often come out more even and bright.
Do not build tight walls of pots that block the path of heat. Place heavy stoneware where it can warm slowly and evenly, and keep delicate cups away from direct hot spots. A balanced load often gives you fewer warped forms and a better sense of control.
5. Watch Moisture Like a Hawk

Top Watch Moisture Like A Hawk Craft Tutorials
- 🍅 Making daisy balm from snapdragonlife.com.
- 👓 Red-tailed hawk painting for stress relief from facebook.com.
- 👓 Finally a solution to a major problem. Seal Craft will be … from facebook.com.
- 🗺️ Parks from auroragov.org.
- 👓 Navy Boot Camp – What to Expect from navy.com.
Wet clay and a hot kiln are a bad mix. Even a little hidden water can turn into steam and crack a pot fast.
Make sure every piece is fully dry before it goes in. Pay close attention to thick bottoms, handles, and joined parts, since they hold moisture longer than thin walls. If the weather is damp, give your work extra drying time and use a fan or warm room to help.
This tip is especially useful for makers who work in rainy places or in small home studios. It costs almost nothing, yet it can save an entire load. A dry piece also tends to fire with cleaner color and a more stable shape, which is a win for both look and function.
Some artists keep a simple touch test routine before loading. Others weigh pieces and check if the weight has stopped changing. Either way, the goal is the same: dry clay makes safer, better pottery.
6. Choose the Right Firing Schedule

Top Choose The Right Firing Schedule Craft Tutorials
- 🎄 Firing schedules for the Fuseworks craft kiln from facebook.com.
- 🗺️ Temperature vs Heatwork – Why We Use Witness Cones from suemcleodceramics.com.
- 🍁 How to craft +6 fire skills Fireflowers : r/PathOfExile2 from reddit.com.
- 🍅 Crafting | 99 Nights in the Forest Wiki – Fandom from 99-nights-in-the-forest.fandom.com.
- 🍅 Wizard101 – Crafting Guide 101 from finalbastion.com.
The firing schedule is the heartbeat of the kiln. A slow start and careful climb can protect your work from sudden stress.
Use a schedule that fits your clay body, glaze, and kiln type. If you are firing a thick sculpture, give it more time at the beginning so trapped moisture can escape. For newer glaze styles, try small test pieces before changing your full load.
Many potters now use digital controllers to save and repeat favorite programs. That makes firing feel less risky and more personal, because you can fine-tune each recipe. A good schedule may take a little planning, but it often brings more even color and stronger pots.
When in doubt, go slower rather than faster. Rushing heat can make glaze bubble, clay crack, or colors look muddy. Careful pacing is one of the easiest ways to improve results without buying new tools.
7. Make the Most of Test Tiles

Top Make The Most Of Test Tiles Craft Tutorials
- 🧑🌾 How to Make Test Tiles for Testing New Glazes from karaleighfordceramics.com.
- 🎄 What are some creative ways to make and display test tiles? from facebook.com.
- 🍅 Functional items to serve as test tiles? : r/Pottery from reddit.com.
- 🍂 Test Tile Thursdays from dowlingart.weebly.com.
- 🍅 Get more out of your test tiles > test the surface not just … from instagram.com.
Test tiles are small, but they teach big lessons. They show how glazes, slips, and firing choices really behave inside your kiln.
Hang or stand test tiles near your work so they get a similar heat path. Try different glaze thicknesses, clay bodies, or surface marks on each one. When the tiles come out, you can compare shine, color, and texture without risking your best pot.
This habit is popular because it saves money and cuts down on guesswork. It also helps you build a style that feels truly yours, since you can keep notes on what you like most. A shelf of test tiles can look like a tiny art gallery full of useful clues.
8. Pay Attention to Kiln Venting

Top Pay Attention To Kiln Venting Craft Tutorials
- 🗺️ The Basics – Kilns | Ceramic Pottery Kiln, Glass … from skutt.com.
- 🍁 A Beginner's Guide to Tabletop Glass Fusing Kilns from artglasssupplies.com.
- 🍂 First time kiln installation at home tips needed from facebook.com.
- 🎄 Bisque Firing | How to Do It, The Purpose, & Tips from kilnfrog.com.
- 🧑🌾 Clay Culture: Small Kilns from ceramicartsnetwork.org.
Good venting helps the kiln breathe. It can reduce smoke, clear fumes, and support cleaner glaze results.
Check that your vent system is working before each firing. If your kiln has a lid crack or peephole setup, use it the way the maker suggests. Strong airflow can also help protect your studio air, which is a smart choice for comfort and safety.
Venting trends are moving toward better studio health and easier cleanup. Some potters add timers or simple fans to keep things steady. The extra setup may cost a bit, but many artists feel the benefits are worth it.
You may notice that well-vented firings often smell less harsh and leave fewer clouded marks on the inside of the kiln. That cleaner look can make the whole firing process feel more polished. If you share a studio, good venting also makes the space friendlier for everyone.
9. Keep a Firing Log

Top Keep A Firing Log Craft Tutorials
- 🖼️ Cardboard rolls as fire logs from facebook.com.
- 🖼️ Fire Craft:The Art of Building a Fire. | A Rock Between The Eyes from rockbetweentheeyes.com.
- 💅 Campfire | 99 Nights in the Forest Wiki – Fandom from 99-nights-in-the-forest.fandom.com.
- 🎄 16 easy fire safety crafts for preschoolers from care.com.
- 🖼️ Survival Fire: How to Start a Fire When Your Life Depends … from graybeardedgreenberet.com.
A firing log turns guesswork into useful memory. It helps you see what worked, what failed, and what needs a change next time.
Write down the clay type, glaze name, shelf placement, and firing schedule. Add notes about color shifts, pinholes, warping, or any strange sounds from the kiln. Over time, these notes become a personal guide that fits your studio better than any one-size-fits-all chart.
Many potters use notebooks, phone apps, or simple photo albums for this job. The method does not need to be fancy, as long as you can find the details later. A good log can save money by cutting down on repeats of the same mistakes.
It also gives your work a stronger identity, because you can track which choices create your favorite surfaces. If you like a soft matte look or bright glaze breaks, your log can help you repeat those results. That kind of control feels good and makes each firing more meaningful.
10. Use Witness Pieces and Color Clues

Top Use Witness Pieces And Color Clues Craft Tutorials
- 🗺️ Solve Mysteries: Engaging Detective Crafts for Kids from imthecheftoo.com.
- 🍂 40 DIY Escape Room Ideas at Home from teachingideas.ca.
- 👓 25 Escape Room Themes for DIY Games from escaperoomgeeks.com.
- 👓 Jesus – I am the Way" Bible Crafts and Games from daniellesplace.com.
- 🖼️ Lesson Outline from education.minecraft.net.
Witness pieces are small helpers that show what the kiln did. They can reveal if the heat was right, too low, or a bit too strong.
Place them in different spots on the shelves to check how heat moves through the chamber. Some potters use cones, clay bars, or small scrap pieces with glaze to read the results. These little markers can be a simple way to spot problems before they become big ones.
They are also handy if you are trying new trends like layered glazes or textured finishes. You can see how the surface changes without risking a full batch of work. The cost stays low, and the information you get is often very rich.
Different colors on witness pieces can tell a story about airflow and temperature shifts. That story helps you place future work more wisely. It is a small habit with a very useful payoff.
11. Respect Cone Placement
Top Respect Cone Placement Craft Tutorials
- 👓 21 Ideas For Decorating With Pinecones from thistlewoodfarms.com.
- 🎨 Easy Pine Cone Flower Directions Needed from facebook.com.
- 👓 6 – Temporary Traffic Control | Ohio Department of … from transportation.ohio.gov.
- 🎨 Sweet Ice Cream Cone Craft for Kids from imthecheftoo.com.
- 💅 How to Make a Parchment Cone from cookieconnection.juliausher.com.
Cones are tiny, but they speak clearly. They show if the kiln reached the heat your clay and glaze need.
Set cones where you can see them through a peephole or after the firing ends. Place them at the right angle so they bend in a way that is easy to read. If you use digital controls, cones still give you a real-world check that can catch hidden issues.
Many artists like cones because they are affordable and dependable. They also bring a handmade feel to a modern firing setup, which appeals to potters who want both precision and craft. A few cones can save a whole load from underfiring or overfiring.
You can make cone placement part of your own studio rhythm. Some potters use the same shelf spots every time, while others place cones near special glaze tests. That personal routine builds trust in your process and makes each firing easier to understand.
12. Match Clay Body and Glaze on Purpose

Top Match Clay Body And Glaze On Purpose Craft Tutorials
- 👓 Any tips on mixing clay bodies for decorative edges? from facebook.com.
- 🍅 Understanding Glaze Basics from help.glazy.org.
- 🖼️ What clay body is suitable for mid-range or high-fire … from facebook.com.
- 🍁 A vital part of the process… test tiles give an idea of how … from facebook.com.
- 🎨 Calcination craft method for yue kiln secret colour wares from patents.google.com.
Clay and glaze need to get along. When they fit well, the surface looks lively and the pot feels strong.
Check the temperature range for both materials before loading the kiln. A low-fire glaze on a high-fire clay, or the other way around, can create trouble. Test a few pairings first so you know which combinations stay smooth, bright, and safe.
This is where personal style really shines. You might like glossy reds, crackled blues, or earthy matte browns, and each choice may need its own firing plan. The more you test, the more your work starts to carry your own look.
Cost matters here too, because mismatched materials can waste glaze and clay fast. Careful pairing helps you avoid disappointing results and keeps your studio budget in better shape. It is one of the smartest ways to raise quality without adding more tools.
13. Give Special Shapes Extra Care

Top Give Special Shapes Extra Care Craft Tutorials
- 🍂 21 Amazing Foam Shapes Craft Ideas All Year Around from hyglossproducts.com.
- 👓 We added some geometric cardboard shapes to our loose … from facebook.com.
- 🎨 Angel Shape Craft for Kids [Free Printable Template] from simpleeverydaymom.com.
- 🍂 50 Easy Crafts for Kids to Spark Their Imagination from modpodgerocksblog.com.
Thin rims, long handles, and sculpted parts need gentle handling in the kiln. These areas can cool or heat differently from the rest of the piece.
Set delicate work where it will not get bumped by other pots. Use supports, stilts, or careful spacing if the shape needs more help. A thoughtful load can keep a fancy piece looking crisp instead of warped or chipped.
Special shapes are often the ones that make your pottery stand out. That uniqueness is worth protecting, especially if you sell your work or gift it to someone special. A little extra care can make a handmade piece feel truly polished.
If you make a lot of custom work, create a firing plan just for those forms. You might place them on a lower shelf, near the center, or away from heavy ware. Small changes like this can make a big difference in how the final piece looks and feels.
14. Keep the Studio Clean Around the Kiln

Top Keep The Studio Clean Around The Kiln Craft Tutorials
- 🧑🌾 Keeping the studio clean isn't just about tidiness from instagram.com.
- 🎄 How to balance creating and cleaning a pottery studio? from facebook.com.
- 🎨 When you ask how I keep my studio space so clean from instagram.com.
- 🍂 The studio has had a thorough Spring Clean. Moved things … from instagram.com.
Dust, glaze chips, and clay crumbs can cause trouble. A clean firing area helps your kiln stay safe and your work stay neat.
Sweep the floor, wipe the shelves, and clear out stray tools before loading. Keep paper, cloth, and plastic far from hot surfaces. A tidy space also makes the studio look bright and calm, which can help you work with more focus.
15. Use Slow Cooling for Rich Surfaces

Top Use Slow Cooling For Rich Surfaces Craft Tutorials
- 🗺️ Wrought iron and heat: slow cooling process? from facebook.com.
- 🍂 Coyote : Slow Cool Glazes from theceramicshop.com.
- 🧑🌾 A Cascade of Water Over Terra Cotta Tubes Functions as a … from thisiscolossal.com.
- 🍂 Lessons from Sustainable and Vernacular Passive Cooling … from sustainability.hapres.com.
- 🖼️ Saggar Fired Pottery with Ferric Chloride: Ceramics Guide from alliancechemical.com.
Cooling matters almost as much as heating. A slower cool can bring out deeper color, softer shine, and more interesting glaze effects.
Check whether your kiln and clay can handle a controlled cool-down. Some surfaces look richer when they are not shocked by sudden cold air. If your kiln has a program for slow cooling, try it on a test batch first.
This trend has become popular because many potters love the extra depth it creates. It can make a simple glaze look more layered and special, which is great for artists who want a signature style. The process may take longer, but the visual reward can be beautiful.
16. Plan for Repairs Before They Are Urgent

Top Plan For Repairs Before They Are Urgent Craft Tutorials
- 👓 Quick Repair Tricks: Hacks You Need to Know from facebook.com.
- 🗺️ Helpful repair hacks for all your tasks from facebook.com.
- 🍅 Reliable hacks for easy repair from facebook.com.
- 💅 Budget friendly repair hacks🔩 from facebook.com.
- 🗺️ DIY Repairs to save time and money 🔧 from facebook.com.
Every kiln needs care, just like every potter does. Small fixes now can prevent larger problems later.
Look for worn elements, broken bricks, loose wires, or damaged switches. If something seems off, call a repair person or follow the maker’s advice before firing again. Setting aside a repair budget is smart, since kiln parts can be pricey and waiting too long may cost even more.
Some makers keep a simple maintenance calendar to track service dates. Others store spare peephole plugs, shelves, or kiln posts so they are ready when needed. This kind of planning keeps the studio running smoothly and helps your kiln stay dependable.
A well-maintained kiln also gives you more confidence to try new surfaces and firing ideas. When the machine is healthy, you can focus on your art instead of worrying about surprise breakdowns. That freedom can make the whole pottery process feel more joyful.
17. Make Each Firing Part of Your Style

Top Make Each Firing Part Of Your Style Craft Tutorials
- 🗺️ Tips on firing ceramics, drying multiple pieces together? from facebook.com.
- 🍅 ✨🔥✨Lustered mugs going in the kiln! You can learn how to … from facebook.com.
- 🎄 Wood Firing at Spring Valley 🔥 Getting a closer look … from instagram.com.
- 🧑🌾 Temperature vs Heatwork – Why We Use Witness Cones from suemcleodceramics.com.
Your kiln work can be more than a technical task. It can be part of your creative voice.
Choose loading habits, glaze tests, and firing notes that match the kind of pottery you love to make. Maybe you want bright modern colors, soft natural tones, or rustic surfaces with texture and depth. Personal choices like these give your work a clear look and help people remember it.
Current pottery trends often mix careful control with handmade charm. That means you can use modern tools while still keeping a warm, personal touch in every load. A firing style that fits your art can make the process feel less like a chore and more like a favorite studio ritual.
Think about the little things that make your work feel like yours, from the way you stack shelves to the way you read cone bends. Those details build a signature over time. When your firing choices match your creative taste, the kiln becomes a partner in making pottery that feels alive and unique.