
Imagine a world where colors swirl and dance across a canvas, creating mesmerizing patterns and textures. Fluid art is a playful, captivating art form that lets you express yourself in ways you’ve never imagined. Get ready to be enchanted by some of the most exciting fluid art ideas that will spark your creativity.
1. Acrylic Pouring on Canvas
Top Acrylic Pouring On Canvas Craft Tutorials
- 👓 How To Do Acrylic Pouring from stepbysteppainting.net.
- 🖼️ Acrylic pouring on craft paper from facebook.com.
- 🎨 How To Do Acrylic Paint Pouring-For Beginners from jenniferrizzo.com.
- 🍅 My First Stretched Canvas Pour with Floetrol + Silicone Oil … from kbecca.com.
- 🍁 Acrylic Pouring : 9 Steps (with Pictures) from instructables.com.
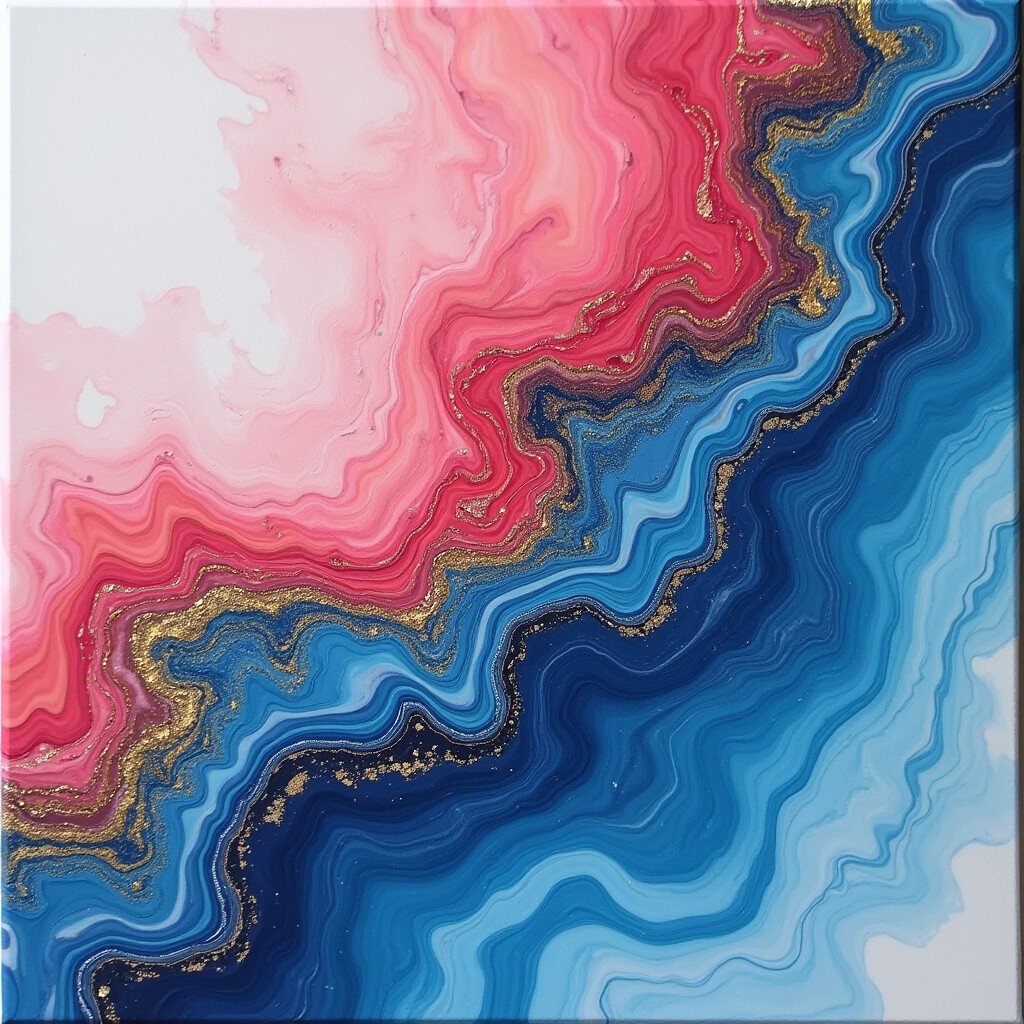
Acrylic pouring is like magic! You pour paint onto a canvas and watch it flow, creating beautiful, unpredictable designs. This technique is perfect for anyone who loves surprises.
One of the best parts is that no two pieces are ever the same. You can try different colors and pouring methods to make each artwork unique. It’s a great way to unwind and let your creativity run wild.
Start with a small canvas to keep costs low. As you gain confidence, you can experiment with larger pieces. Add metallic paints for a touch of glam, and remember to have fun!
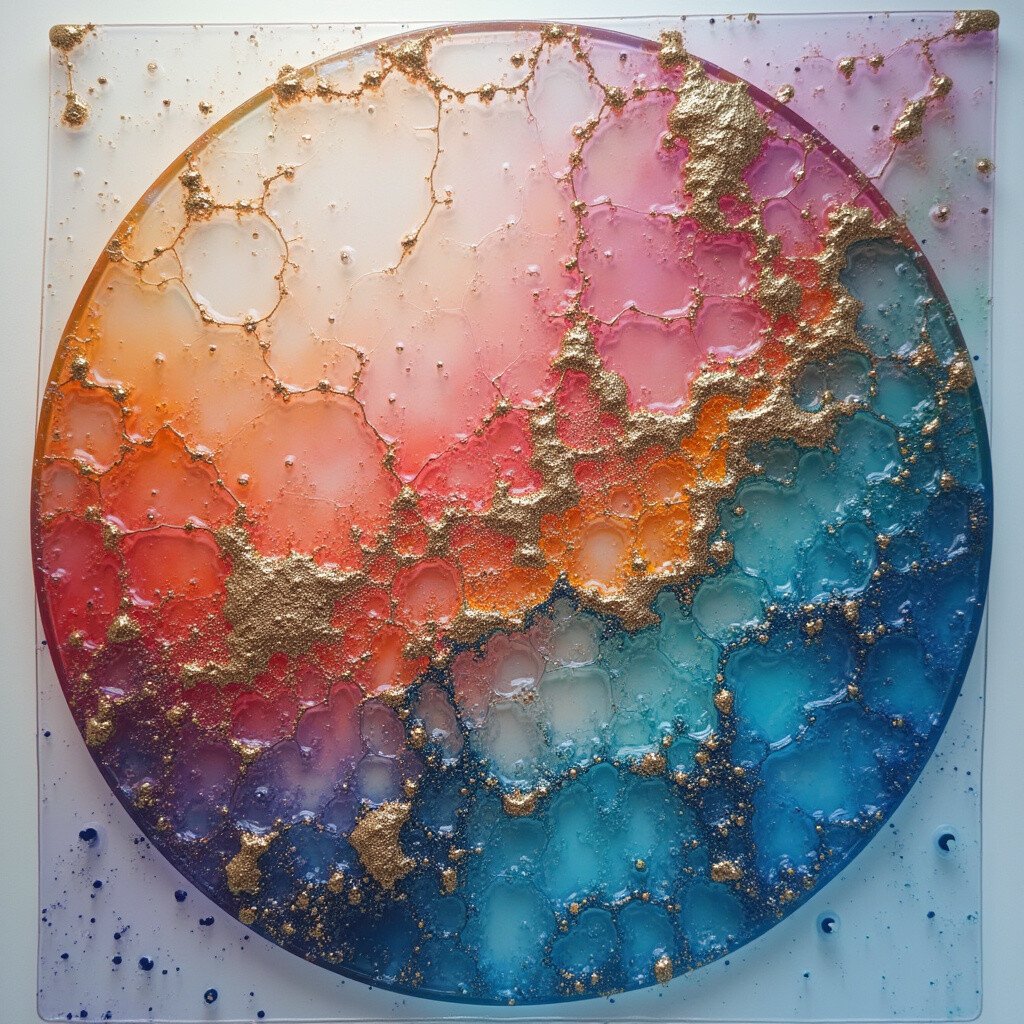
2. Resin Geode Art
Top Resin Geode Art Craft Tutorials
- 🍂 Resin Geode Art from 2lilowls.com.
- 🧑🌾 Geode art with epoxy resin and stones from facebook.com.
- 🎨 Resin Geode Pour on Canvas with Glitter from resincraftsblog.com.
- 💅 How to make epoxy geode art from bestbartopepoxy.com.
- 🧑🌾 Resin Geode Tutorials from youtube.com.
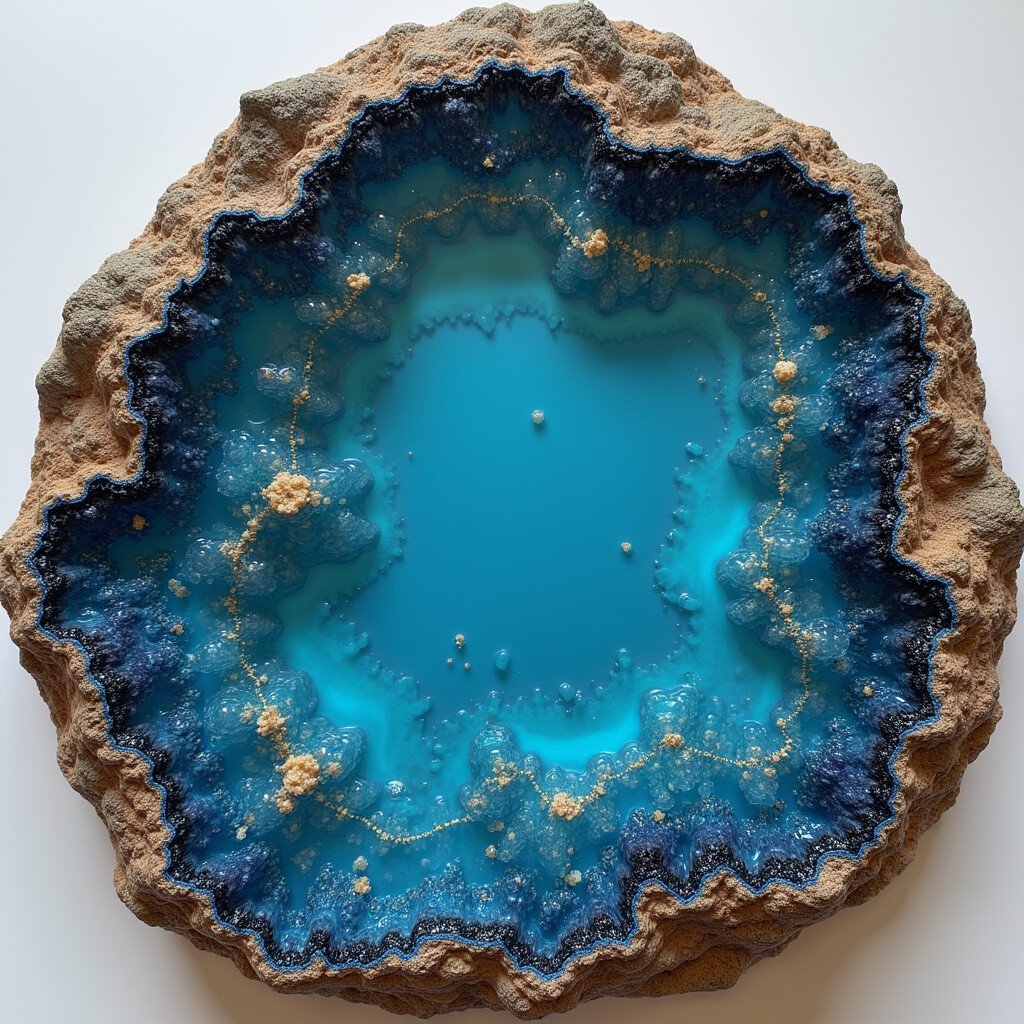
Resin geode art will make you feel like a geologist creating your own stunning gemstones. It’s about layering colors and adding shiny elements like glitter and crystals.
These pieces look like treasure from nature, perfect for adding a touch of luxury to your home. You can personalize your geode art by choosing your favorite colors and embellishments.
While resin can be a bit pricey, start with small projects to master the technique. Ensure proper ventilation and use gloves for safety. The end result will be worth every penny.
3. Swipe Technique on Tiles
Top Swipe Technique On Tiles Craft Tutorials
- 🍂 Fluid Art Swipe Technique for you! : 3 Stunning Coasters … from facebook.com.
- 🎨 Acrylic Pour Swipe Technique in 6 Easy Steps from leftbrainedartist.com.
- 🖼️ Easy ceramic tile coaster pouring for beginners from facebook.com.
Swipe technique on tiles is a delightful way to create mini masterpieces. By using a swipe tool, you can spread colors across the tile, creating a cascade of hues.
This method is not just fun but also quick, making it perfect for those who love instant gratification. The tiles can be used as coasters or decorative pieces around your home.
Experiment with different swipe tools like spatulas or paper towels. Each will give a unique effect. Tiles are affordable, so you can try as many variations as you like.
4. String Pull Art
Top String Pull Art Craft Tutorials
- 👓 String pull art made by my campers ages 9-11 from facebook.com.
- 🧑🌾 Easy String Art Painting Experiment with Kids from tinkerlab.com.
- 🎨 Easy String Pull Painting with Watercolors from artycraftykids.com.
- 🗺️ Pull String Canvas Painting DIY | Crafts from crayola.com.
- 🎨 String Pull Painting – Easy Art Project from ronyestech.com.
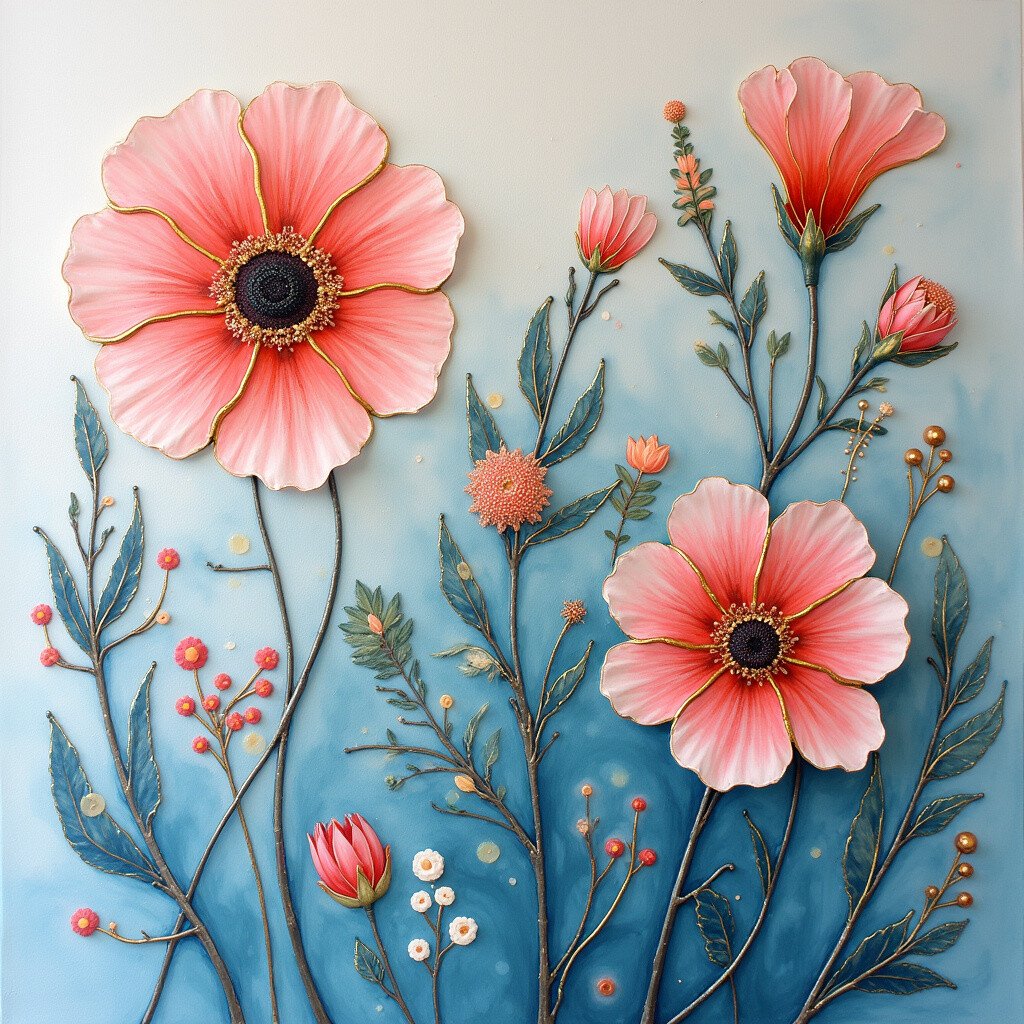
String pull art is like creating magic with a piece of string. By dipping a string in paint and pulling it across the canvas, you create delicate, feather-like patterns.
This technique is perfect for creating floral designs without any drawing skills. You can use different string lengths and thicknesses for varied effects.
Try using metallic paints for a shimmering finish. String pull art is budget-friendly, as it requires minimal materials. It’s a wonderful way to spend a rainy afternoon indoors.
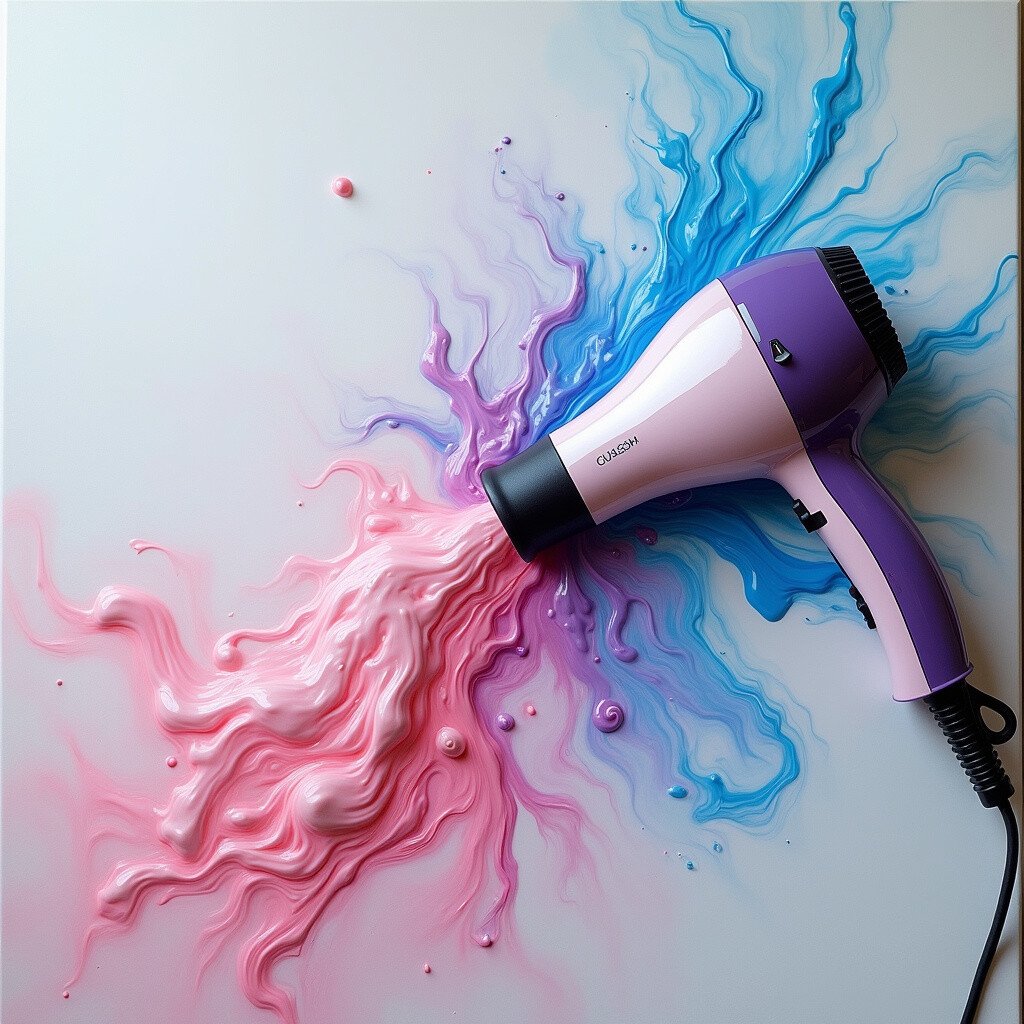
5. Dutch Pour with a Hairdryer
Top Dutch Pour With A Hairdryer Craft Tutorials
- 🍂 Fluid art painting ~ Acrylic pouring ~ Dutch pour – Fiona Art from fionaart.medium.com.
- 👓 Dutch pour recipe with hair dryer from facebook.com.
- 🍁 Acrylic pouring with Hair dryer ~ Abstract Ocean painting from fionaart.medium.com.
The Dutch pour technique uses a hairdryer to blow paint across the canvas, creating a dreamy, wispy effect. It’s like watching clouds form right before your eyes.
This method allows you to control the flow and direction of the paint, resulting in ethereal designs. It’s perfect for those who enjoy a bit of control with their creativity.
Use a limited color palette for a sophisticated look, or go wild with bright colors. A hairdryer is a tool you likely already have, making this a cost-effective option.
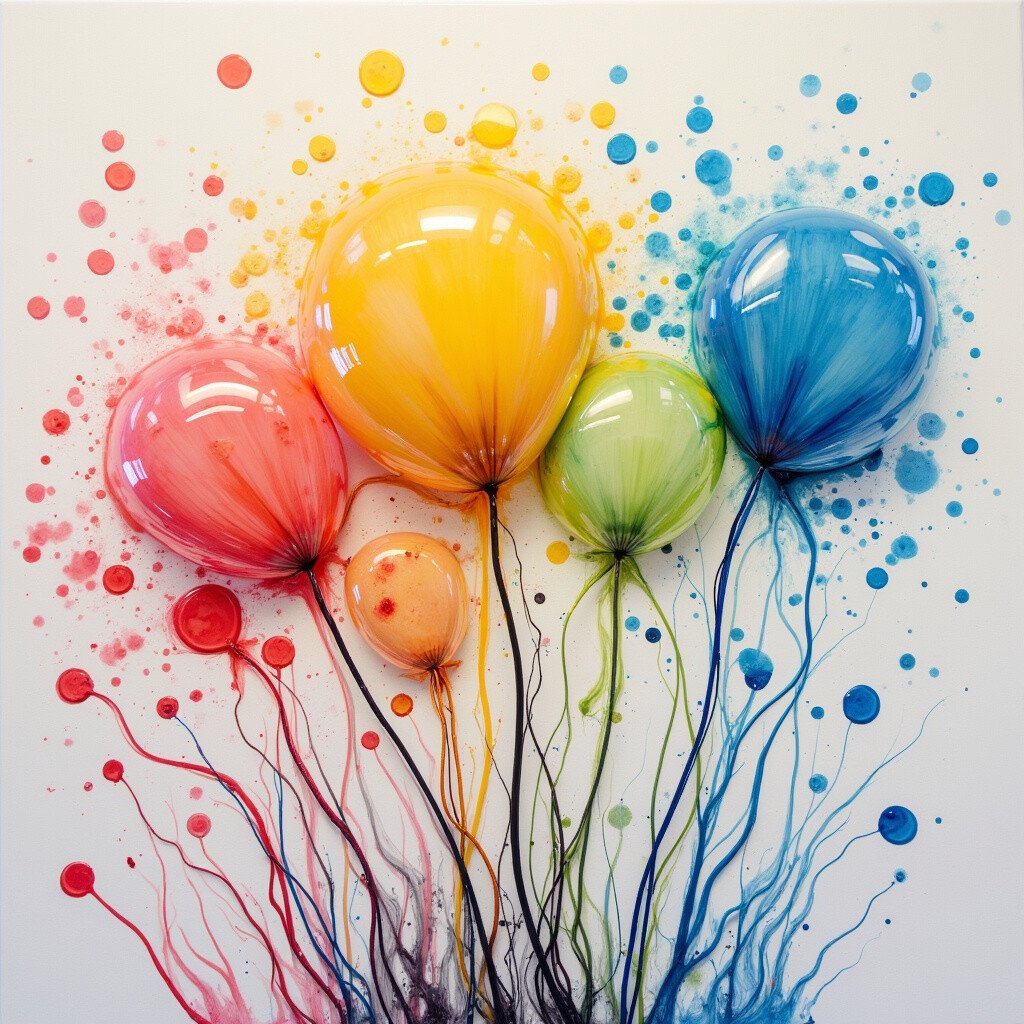
6. Balloon Kiss Technique
Top Balloon Kiss Technique Craft Tutorials
- 🍅 Balloon kiss technique for beginners from facebook.com.
- 🎨 6×6 tile, water balloon kiss technique. Sealed with Resin. from facebook.com.
- 🎄 Awesome Acrylic balloon kiss and mini blow technique ocean … from youtube.com.
- 💅 Have you ever painted using a Water Balloon?! 😮 . . Join us for … from instagram.com.
The balloon kiss technique is all about fun and playfulness. By pressing a balloon onto a canvas covered in paint, you create whimsical, flower-like shapes.
This technique is great for kids and adults alike, offering a delightful tactile experience. It’s a fantastic way to add some joy to your space.
Balloons are inexpensive, so you can experiment as much as you like. Try different sizes for varied effects. It’s an excellent way to bond with family and friends over art.
7. Puddle Pour on Glass
Top Puddle Pour On Glass Craft Tutorials
- 🎄 Acrylic Pour Painting on Glass: The Complete Guide from leftbrainedartist.com.
- 🍁 💖Valentine Pouring Glass🍷 The instructions are on … from facebook.com.
- 🗺️ Decorate Your Home With Acrylic Pour Paintings: 8 Ideas and … from homebodyhall.com.
- 🎄 Question for those who pour on glass… : r/PourPainting from reddit.com.
- 🍁 DIY Acrylic Pour Ceramic Coasters from gigglesgalore.net.
Puddle pour on glass creates stunning, translucent designs that catch the light beautifully. You pour paint in puddles and let them merge, creating intricate patterns.
This method is perfect for creating unique décor pieces, like glass panels or sun catchers. The final result is elegant and eye-catching.
Use glass from old picture frames to keep costs low. Add a touch of sparkle with glitter or metallic paints for extra shine. It’s a brilliant way to upcycle and create art.
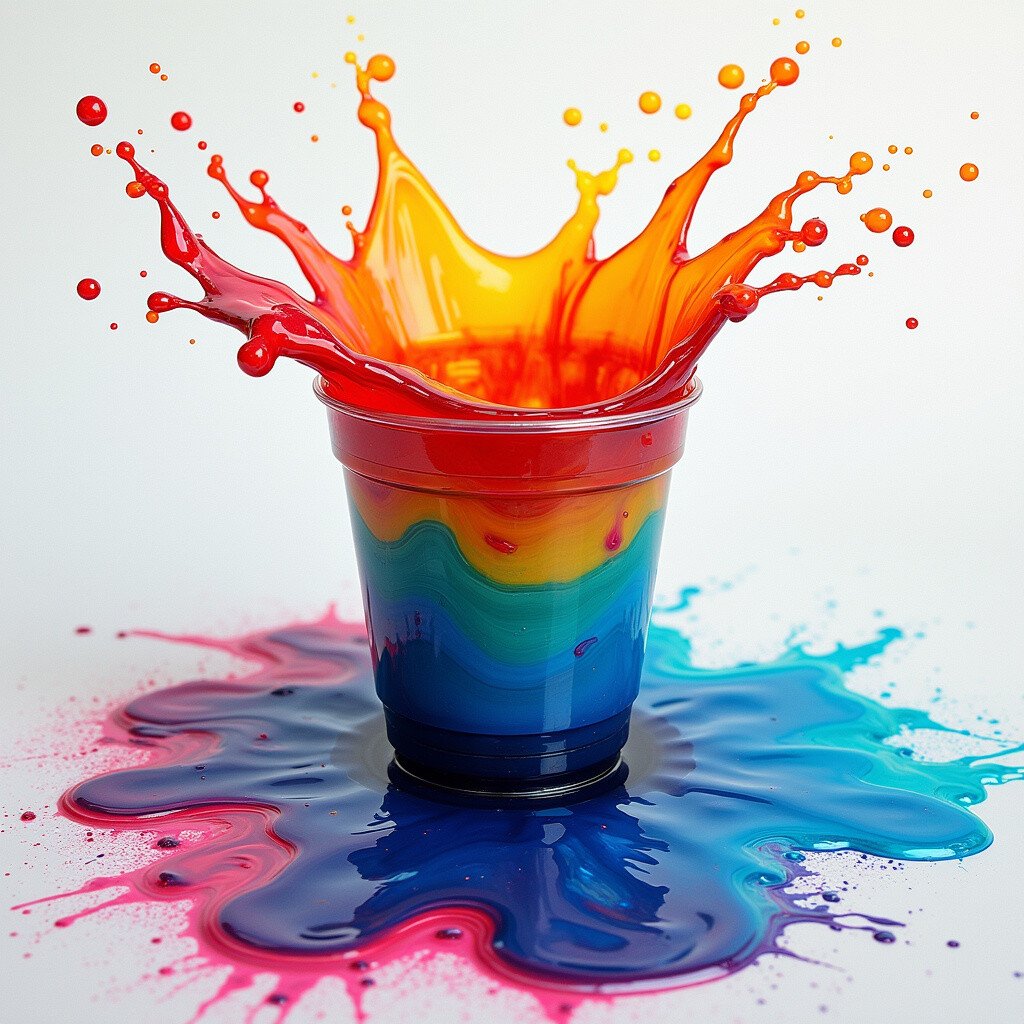
8. Flip Cup Technique
Top Flip Cup Technique Craft Tutorials
- 🍁 Flip Cup Painting : 5 Steps (with Pictures) from instructables.com.
- 🍂 Flip Cup Technique from youtube.com.
- 🎨 Dirty Flip Cup Pour Painting Tutorial with Video for Beginners from loveacrylicpainting.com.
- 🍅 Acrylic Pour Painting for Beginners, Dirty Pour Flip Cup … from kbecca.com.
- 🍅 Gorgeous FLIP CUP and MARBLE acrylic pour – Fiona Art from fionaart.medium.com.
The flip cup technique is all about excitement and anticipation. You fill a cup with layers of paint, then flip it onto the canvas to release a burst of color.
This technique is unpredictable and thrilling, making each creation a surprise. It’s perfect for those who love a bit of adventure in their art.
Try using silicone oil to create beautiful cells in the paint. With affordable supplies, this technique is accessible to everyone. It’s an exciting way to experiment with colors.
9. Tree Ring Pour
Top Tree Ring Pour Craft Tutorials
- 🧑🌾 Five Simple Steps to do a Tree Ring Pour from acrylicpouring.com.
- 🖼️ Excellent EXAMPLE of a Tree Ring Pour from facebook.com.
- 🎄 Acrylic glow paint tree ring pour art with dragon from facebook.com.
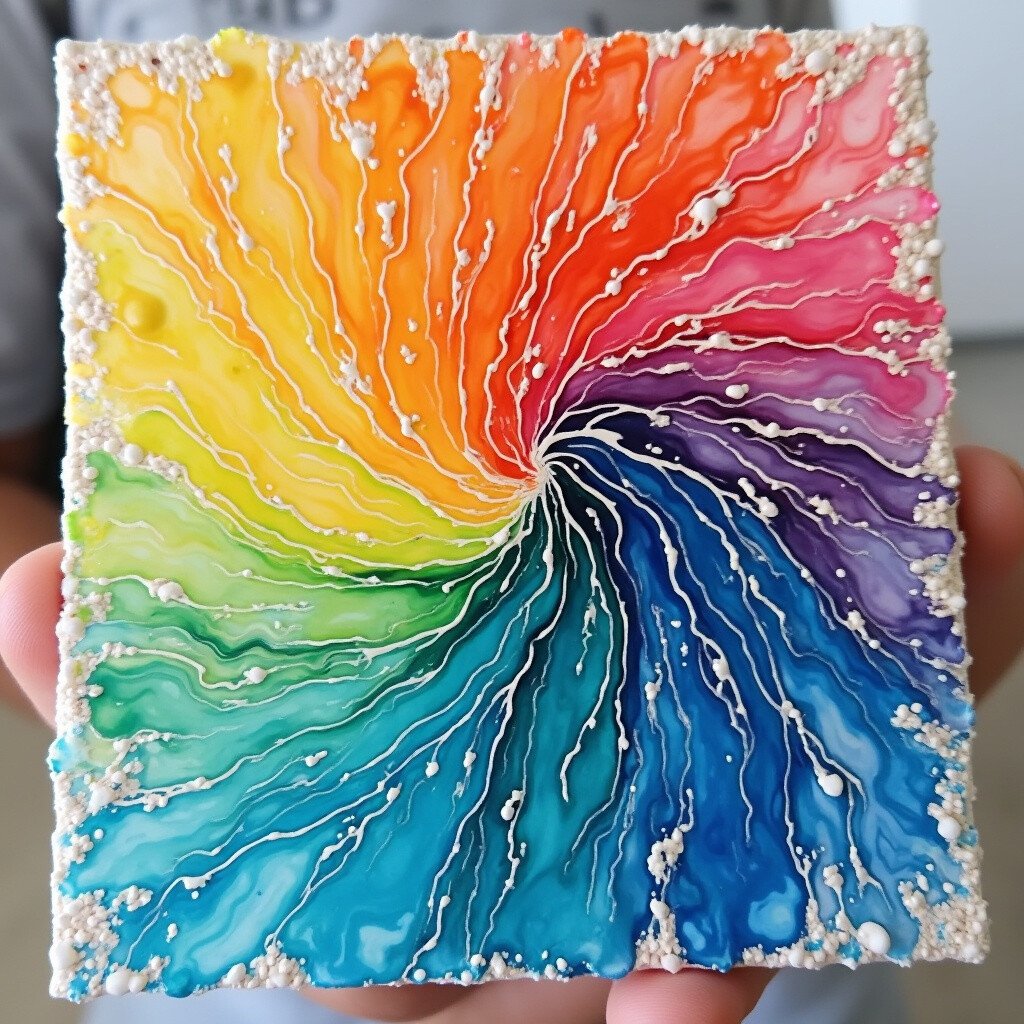
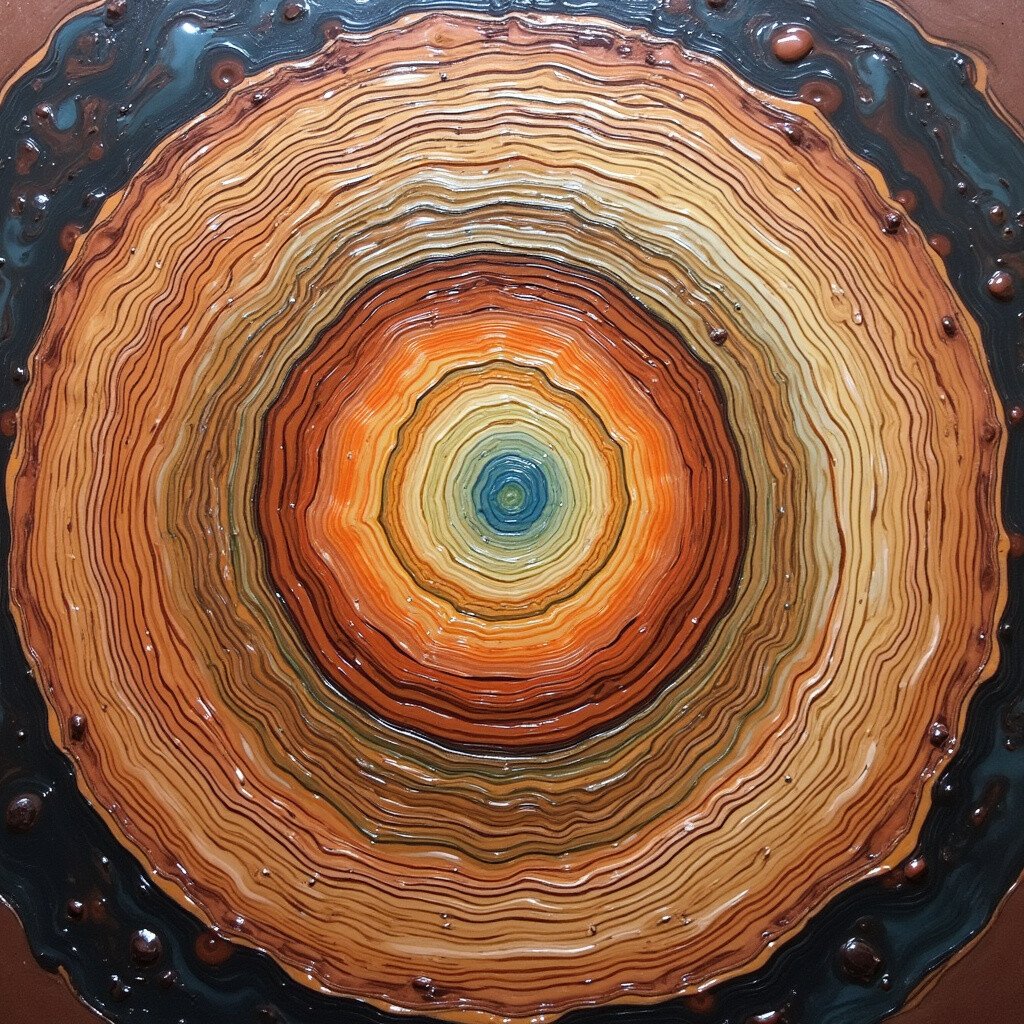
Tree ring pour is a technique that creates stunning, concentric patterns resembling tree rings. By slowly pouring paint in a circular motion, you achieve a harmonious design.
This method is meditative and calming, perfect for relaxation. It’s an excellent choice for creating art with a natural, organic feel.
Choose earthy tones for a serene look or bright colors for a more vibrant effect. You can use affordable acrylic paints, making it a budget-friendly option.
10. Split Cup Pour
Top Split Cup Pour Craft Tutorials
- 🗺️ 10oz Split Cup for Acrylic Pouring – The Original No Drip … from michaels.com.
- 🗺️ Acrylic Pouring Split Cups from youtube.com.
- 💅 Acrylic Pouring Plastic Split Cup 10, 16, or 32 oz from mixedmediagirl.com.
- 🍅 Clearance DIY Silicone Mould under $10 Split Cup For … from walmart.com.
- 🗺️ Split Cup Acrylic Pouring ~ Fluid Art Technique to create … from reddit.com.
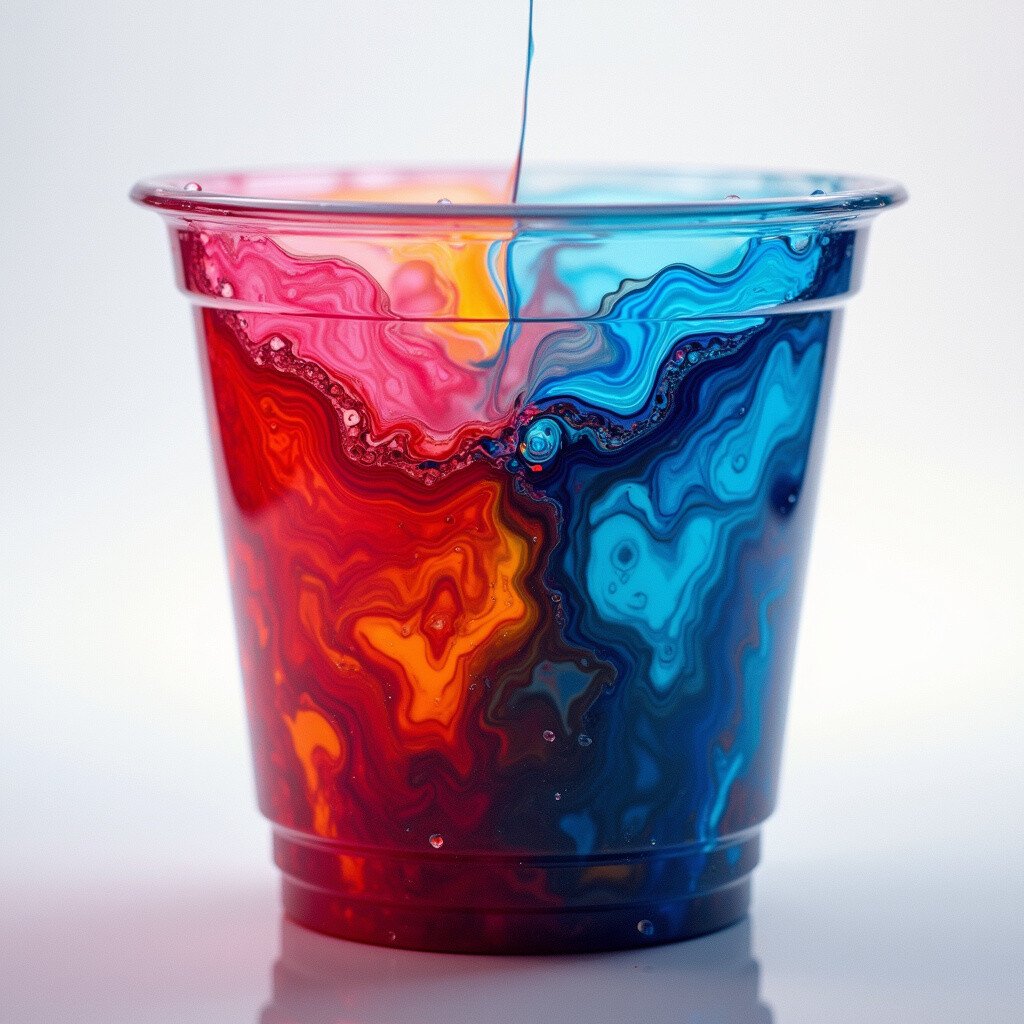
Split cup pour is a fascinating way to blend colors seamlessly. By using a divided cup, you pour multiple colors at once, resulting in a captivating fusion.
This technique allows for endless color combinations and is perfect for those who love experimenting. It’s a unique way to create art that feels alive.
Make your own split cup using a plastic cup and some cardboard dividers. This keeps costs down while allowing you to focus on creativity. The results are truly mesmerizing.
11. Negative Space Technique

Top Negative Space Technique Craft Tutorials
- 🖼️ Negative space art techniques in sketching from facebook.com.
- 🎨 Negative Space Fall Handprint Art from fun-a-day.com.
- 👓 Art activities for kids : Easy Negative Space Art from funlittles.com.
- 🍅 Space: Positive and Negative from kapundahigh.weebly.com.
- 🗺️ Creative Negative Space String Art: A DIY Handmade … from lemon8-app.com.
The negative space technique is all about contrast and balance. By leaving parts of the canvas unpainted, you create striking, minimalist designs.
This method is perfect for creating art that feels modern and sophisticated. It’s an excellent way to highlight specific areas of your artwork.
Use masking tape to create clean lines and shapes. This technique requires minimal paint, making it cost-effective. It’s a fantastic way to make a bold statement.
12. Feather Pour Technique
Top Feather Pour Technique Craft Tutorials
- 🍂 Cells, no silicone – Swipe technique – Blue feather (12) from m.youtube.com.
- 🍂 Acrylic pouring practice with feathers and ring pours from facebook.com.
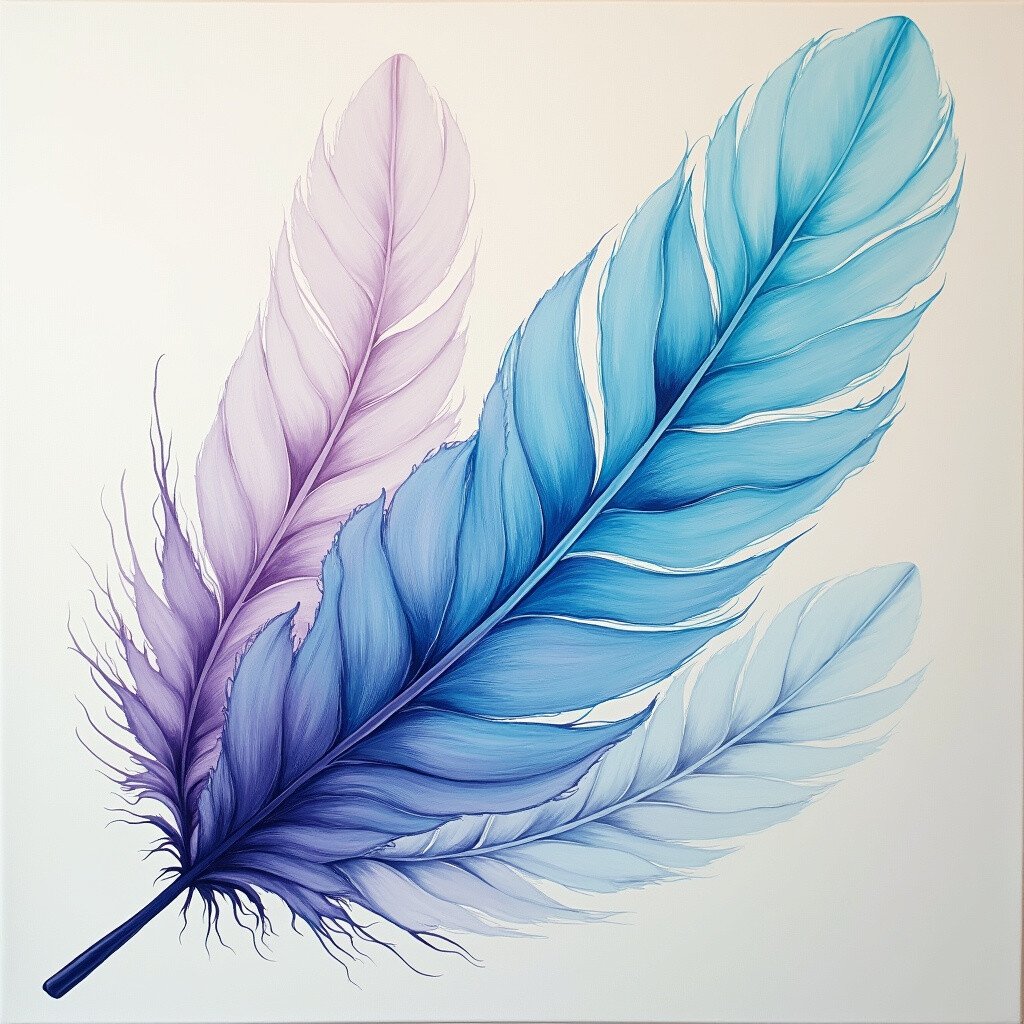
The feather pour technique is delicate and graceful. By tilting the canvas, you create feather-like patterns that are both intricate and elegant.
This method is perfect for adding a touch of softness to your art. It’s great for those who appreciate the finer details in their creations.
Try using a palette knife to refine the feather shapes. With affordable materials, this technique is accessible to all. It’s a wonderful way to express your creativity.