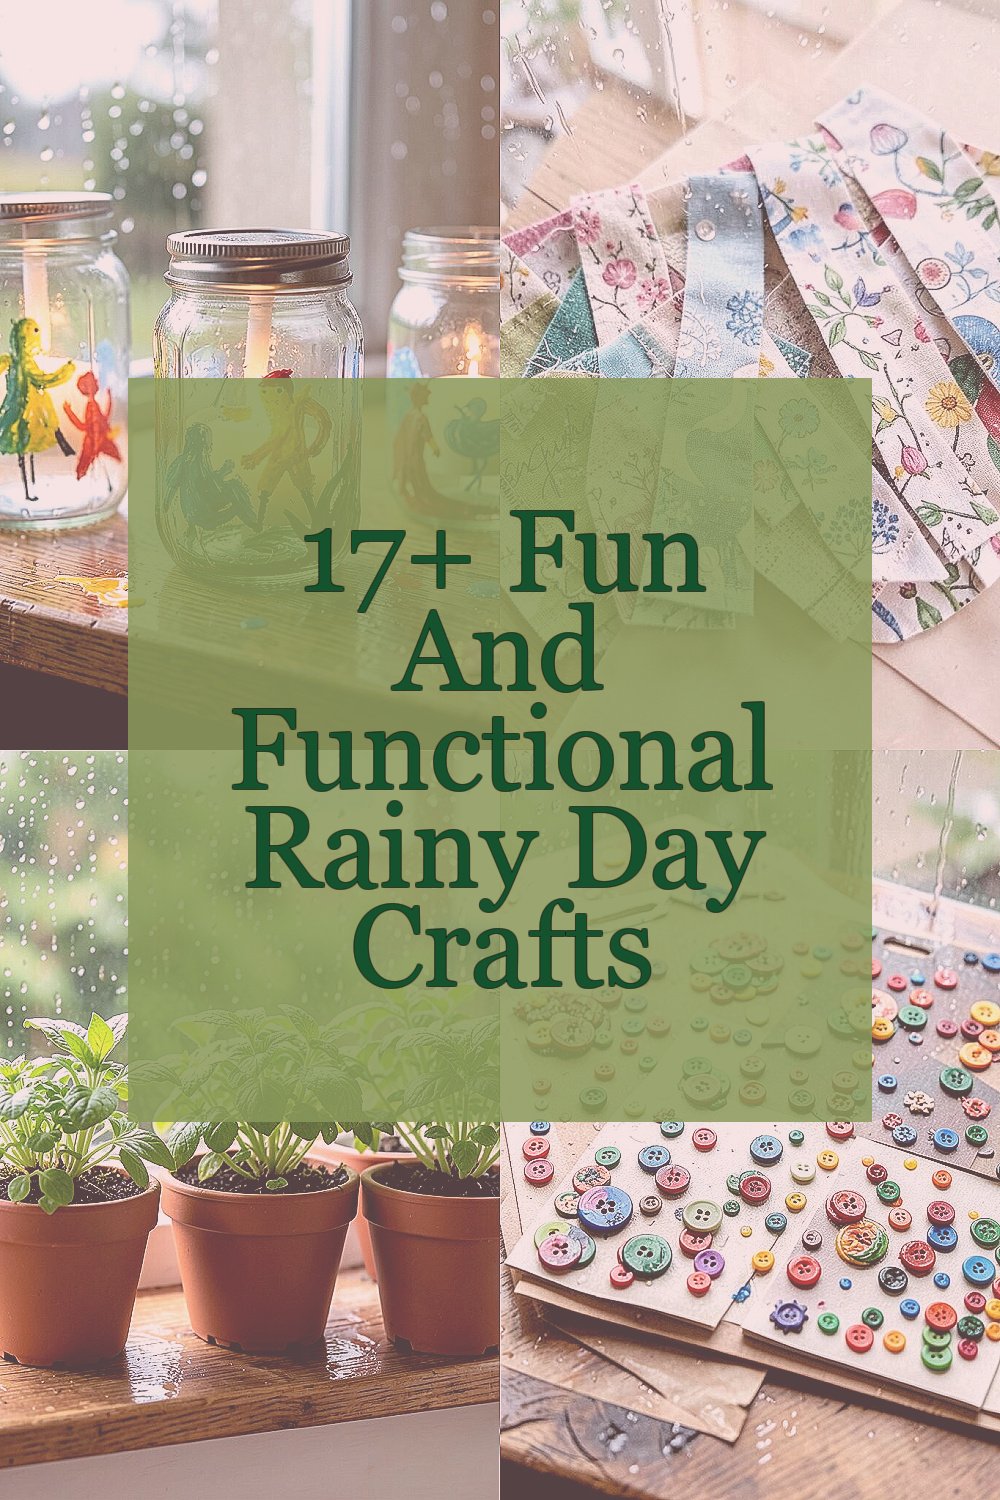
Rain taps the windows, and the whole house feels a little slower. That is the perfect time to make something useful and bright.
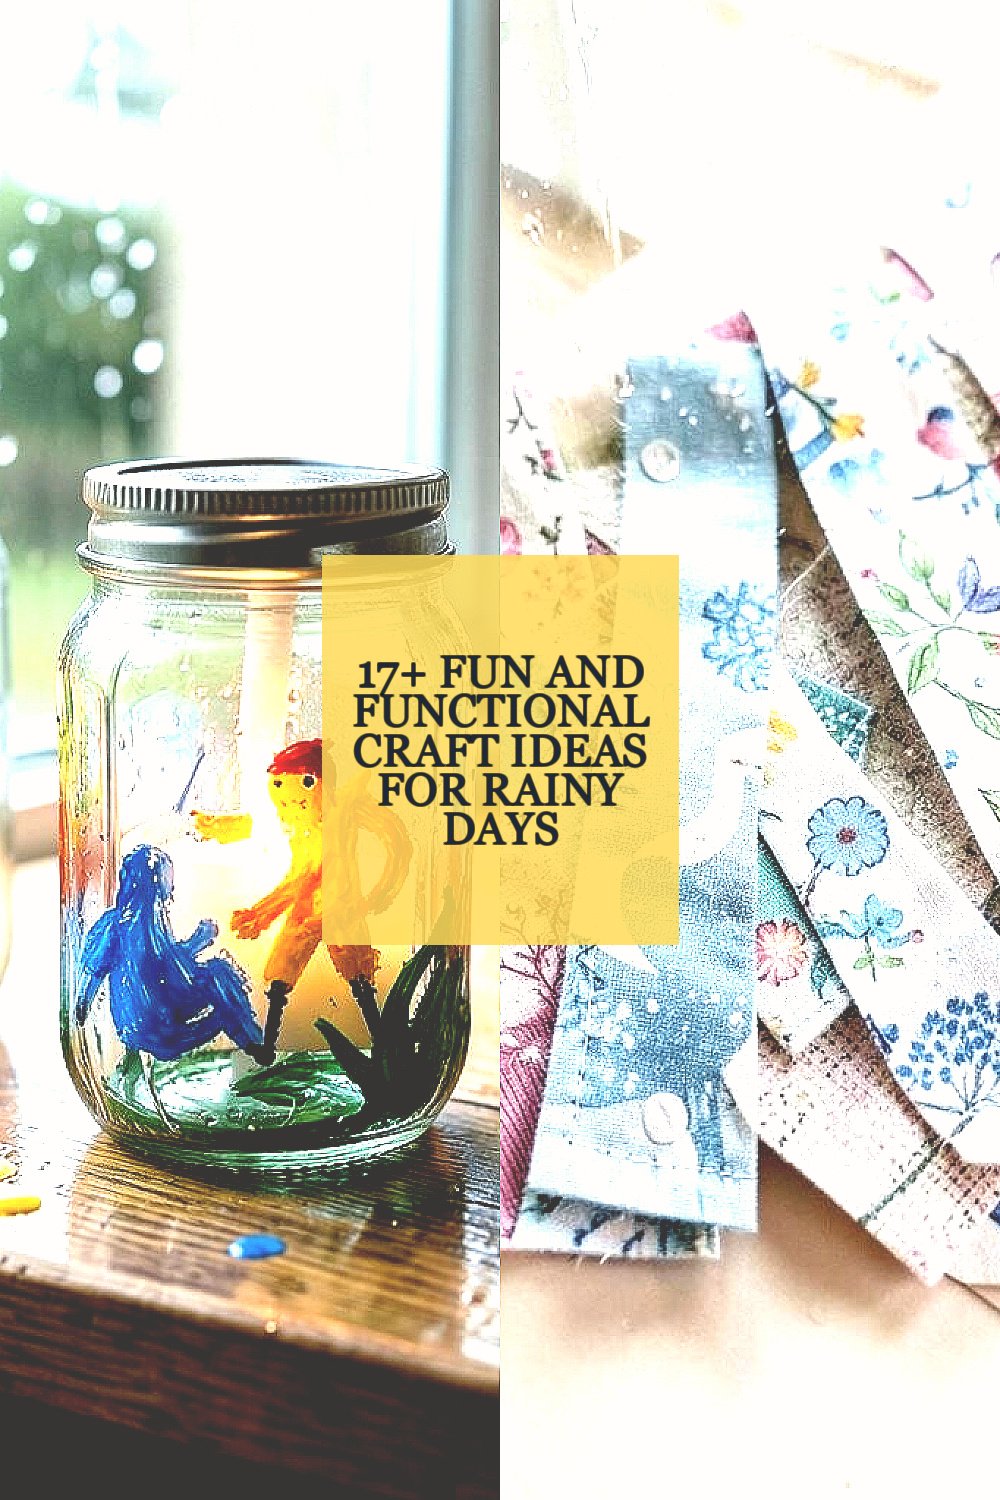
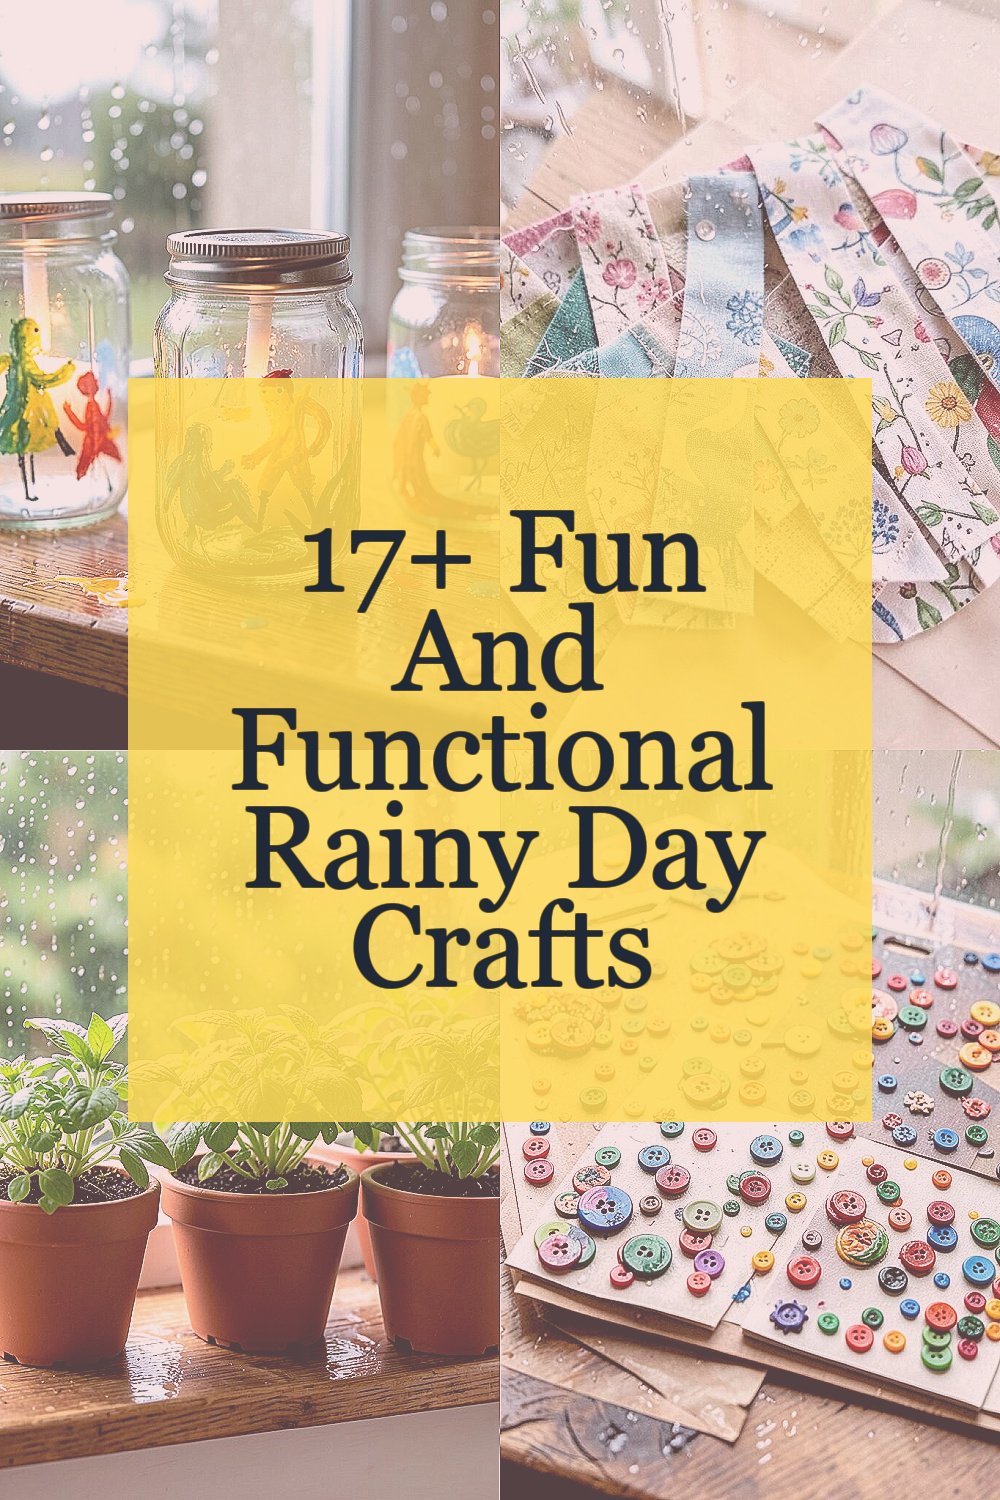
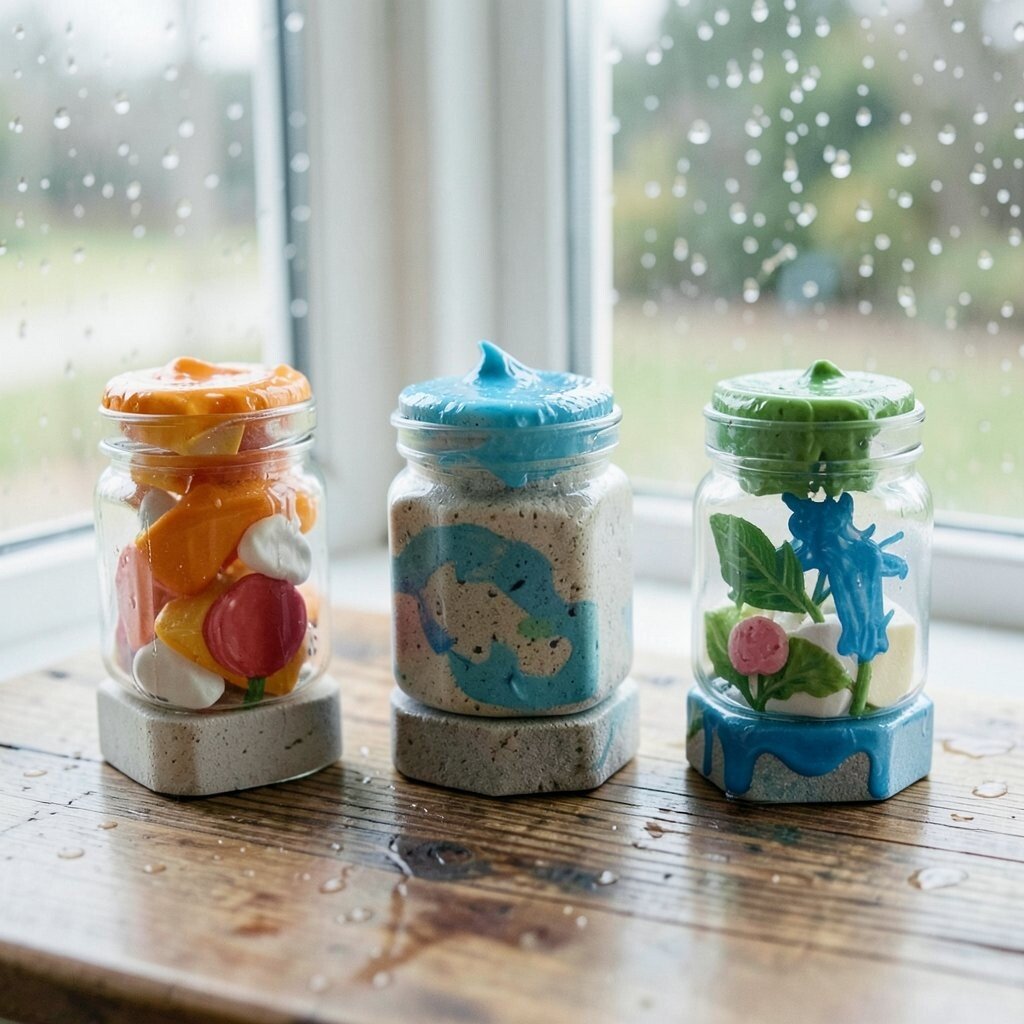
1. Painted Jar Lanterns

Top Painted Jar Lanterns Craft Tutorials
- 👓 Crafty Kids: DIY Mason Jar Lanterns – Suburble from suburble.com.
- 🗺️ Colourful Mason Jar Lanterns for Kids to Make from happyhooligans.ca.
- 💅 Crafty in the Kitchen: Mason Jar Lanterns from ourbestbites.com.
- 🍂 🎄🫙A super easy Christmas lantern idea using a jar and … from facebook.com.
- 🍂 Romantic Evening Mason Jar Lanterns from adventure-in-a-box.com.
Clear jars can turn into glowing little lanterns with a few brushes of paint and a tea light. They look soft and magical on a rainy afternoon.
Use glass jars, acrylic paint, and a small brush for easy color blocks or tiny patterns. This craft is low-cost, and it works well with jars you already have at home. Try adding names, hearts, stars, or even a simple rainbow to make each lantern feel personal.
2. Fabric Scrap Bookmarks

Top Fabric Scrap Bookmarks Craft Tutorials
- 👓 Easy Fabric Bookmarks (Beginner Sewing Project with … from scatteredthoughtsofacraftymom.com.
- 🧑🌾 Scrap Fabric Bookmarks From Tiny Trimmings : 8 Steps from instructables.com.
- 🍅 How To Make Quick & Easy Fabric Book Marks from quilterscandy.com.
- 🗺️ DIY– shabby fabric scrap bookmarks from shabbyartboutique.com.
- 🎨 Scrap Buster: Fabric Bookmarks from untitledthoughts.com.
Old cloth pieces can become sturdy bookmarks that look neat and cheerful. They are handy for school books, story time, and quiet reading corners.
Cut fabric scraps into strips or shapes, then glue or sew them onto cardstock for strength. This idea is great because it uses leftovers, so it saves money and cuts waste. You can match the colors to a favorite book, add buttons, or stitch a name for a custom touch.
Many people like simple handmade items right now, and these bookmarks fit that cozy style. They also make sweet gifts for classmates, family, or teachers. If you want a cleaner look, use pinking shears or seal the edges with glue.
3. Mini Indoor Herb Planters

Top Mini Indoor Herb Planters Craft Tutorials
- 🍅 10 DIY Indoor Herb Garden Ideas and Planters [They're Easy … from honeyandlime.co.
- 💅 How To Make A DIY Indoor Herb Garden Kit For Your … from heartfilledspaces.com.
- 🎨 How to make an indoor herb garden in 3 steps from chatelaine.com.
- 👓 DIY Indoor Herb Garden Planter Box from averageinspired.com.
- 🎄 Tight on space, but want a garden? With this clever DIY … from facebook.com.
Small pots on a sunny windowsill can bring life to a gray day. Fresh green leaves also make a room feel calm and lively.
Paint tin cans, yogurt cups, or clay pots in bright colors before planting herbs like basil, mint, or parsley. The plants are useful for cooking, and they give kids a chance to watch something grow. Add labels, stickers, or tiny drawings so each pot feels special.
This craft can stay cheap if you reuse containers and start with seeds instead of grown plants. It also fits the current love for home gardens and fresh-from-the-window herbs. Keep the soil slightly damp and place the pots near light for the best results.
If you want a family project, let each person choose a different herb and decorate one pot. The mix of shapes and colors makes the windowsill look happy and full. It is a craft that keeps giving long after the rain stops.
4. Button Art Boards

Top Button Art Boards Craft Tutorials
- 🍁 I made this today out of cardboard and 4 buttons. from facebook.com.
- 🖼️ DIY Button Art 29 Projects to Explore! from thecottagemarket.com.
- 🎨 Creating Button Art from bettesmakes.com.
- 🧑🌾 30 Fun & Free Button Crafts: Rainy Day Activities for Kids from sewcanshe.com.
- 👓 Button Canvas Art: the Easiest You'll Ever Make! from modpodgerocksblog.com.
Buttons can make bright pictures that feel playful and polished at the same time. A plain board turns into a frame-worthy design with just a little glue.
Sort buttons by color, then arrange them into flowers, balloons, animals, or even a simple heart. This craft is useful for using up old sewing supplies, so it costs very little. Choose a theme that matches your room, and use a pencil sketch first if you want cleaner lines.
5. Paper Plate Wall Masks

Top Paper Plate Wall Masks Craft Tutorials
- 🎨 Paper Plate Animals | Kids' Crafts | Fun Craft Ideas from firstpalette.com.
- 🗺️ Paper Plate Mask from teacherspayteachers.com.
- 👓 Paper plate crafts for DIY masks from facebook.com.
- 💅 5 Simple Paper Plate Crafts Kids Will Love from craftwarehouse.com.
- 🎨 Paper Plate Craft for Kids: Emoji Masks – Jessica Etcetera from jessicaetcetera.com.
Paper plates can become wild animal masks, silly faces, or storybook characters. They look bold and fun when hung on a wall or worn for pretend play.
Cut eye holes, add paint, and glue on yarn, feathers, or paper pieces for hair and details. This project is easy on the wallet because paper plates are cheap and supplies are simple. Kids can make a lion, fox, butterfly, or superhero mask based on what they love most.
For a more modern look, try calm color sets like cream, gold, and soft blue. For a louder style, use bright markers and mixed textures. A ribbon or craft stick handle makes the mask easier to hold during play.
These masks are great for rainy-day games because they spark stories and movement. They also help build fine motor skills while keeping little hands busy. Hang the finished masks in a row for a colorful hallway display.
6. Woven Cardboard Coasters

Top Woven Cardboard Coasters Craft Tutorials
- 🧑🌾 Cardboard Loom Coasters from simplylivingwell.com.
- 🧑🌾 DIY Woven Coasters from prettyprudent.com.
- 🎄 Woven Coasters from annarborartcenter.org.
- 🎄 Colorful Woven Coasters DIY from zoomyummy.com.
- 🍂 DIY Woven Coaster Set Tutorial | Weaving Projects for … from fibersanddesign.com.
Thin cardboard can become small woven coasters that protect tables from cups and mugs. They have a neat, handmade look that feels cozy on wet, cold days.
Cut a cardboard circle or square, then snip small notches around the edge for yarn weaving. Use leftover yarn or string in soft or bold colors, depending on the mood you want. This craft is budget-friendly and gives new life to packing boxes or cereal cartons.
You can make each coaster match a room by choosing colors from pillows or curtains. A striped pattern feels classic, while random color changes feel playful and modern. If the yarn slips, a little tape on the back can help hold it in place.
These coasters are useful, which makes them feel extra rewarding to make. They also teach patience and pattern skills in a calm, low-pressure way. Stack them in a basket and keep them ready for hot drinks or juice glasses.
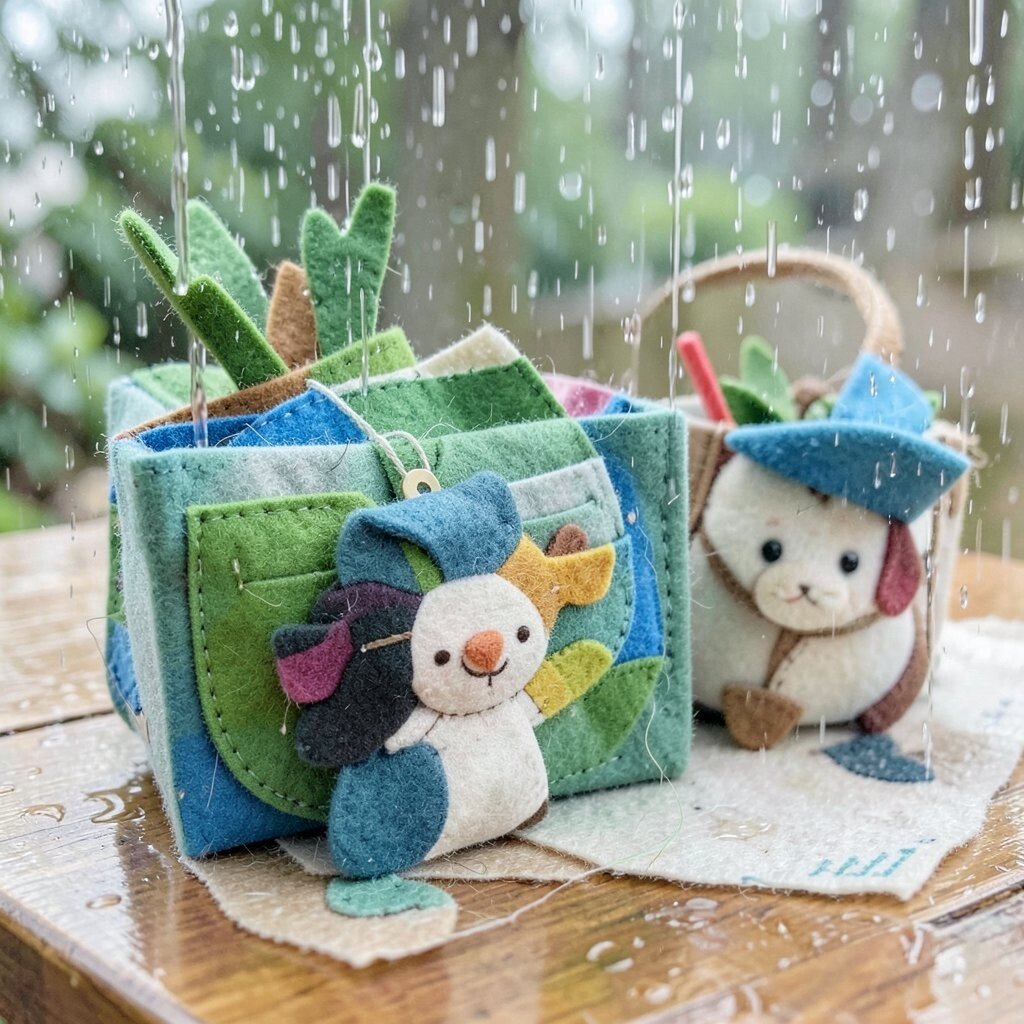
7. Felt Story Pockets
Top Felt Story Pockets Craft Tutorials
- 🍅 Kid Craft: Hand Sewn Felt Pouches from scatteredthoughtsofacraftymom.com.
- 🖼️ Handmade Alphabet Chart with Felt Pockets for Baby … from facebook.com.
- 🗺️ DIY Pockets for Walkers as Service Project from meandmyinklings.com.
- 👓 Craft a Felt Duckling and Egg Pocket from bellalunatoys.com.
- 🗺️ Ultimate Felt Ideas Page – Making Art Possible from makingartpossible.org.
Soft felt pieces can be turned into little story pockets that hold characters, shapes, or scene parts. They are bright, touchable, and perfect for quiet play indoors.
Sew or glue felt onto a larger base, then add small pockets for paper or felt pieces. Children can move the pieces around to make new stories again and again. This idea may cost a bit more than paper crafts, but felt lasts longer and feels nice to handle.
Personalize the pockets with names, favorite animals, or simple themes like space, farm, or ocean. The current trend of screen-free play makes this craft especially useful for rainy afternoons. Keep the shapes large enough for small hands to grab easily.
You can also make the base into a travel board for car rides or quiet time. A pocket set can grow over time as you add new pieces. That makes it feel fresh without needing a whole new project.
8. Recycled Magazine Collage Trays

Top Recycled Magazine Collage Trays Craft Tutorials
- 💅 For “earth week” we cut up old magazines to make a … from facebook.com.
- 🍁 Tried something new and made a collage tray! From old … from facebook.com.
- 🎨 they've turned into mini drawers for collage goodies, tools … from instagram.com.
- 🎄 Mixed Media Collage with Tinker Trays from mericherry.com.
- 🧑🌾 ♻️ Collage with Recycled Paper ✨ A fun, eco-friendly craft … from facebook.com.
Old magazines can become bright collage trays that hold pencils, snacks, or craft supplies. The finished look is bold and shiny, with lots of color and texture.
Cut out pictures, words, and patterns, then glue them onto a plain tray or shallow box. This project is a smart way to reuse paper that might otherwise be thrown away. It is also easy to personalize with favorite colors, animals, sports, or dream places.
If you want a smoother finish, add a clear coat of glue or craft sealant on top. That helps the tray last longer and gives it a polished shine. The mix-and-match style fits the current love for handmade home decor with a personal story.
Use the tray for markers, remote controls, or tiny toys once the glue dries. It is both pretty and practical, which makes it a strong rainy-day choice. A child can make one for their own desk and another as a gift.
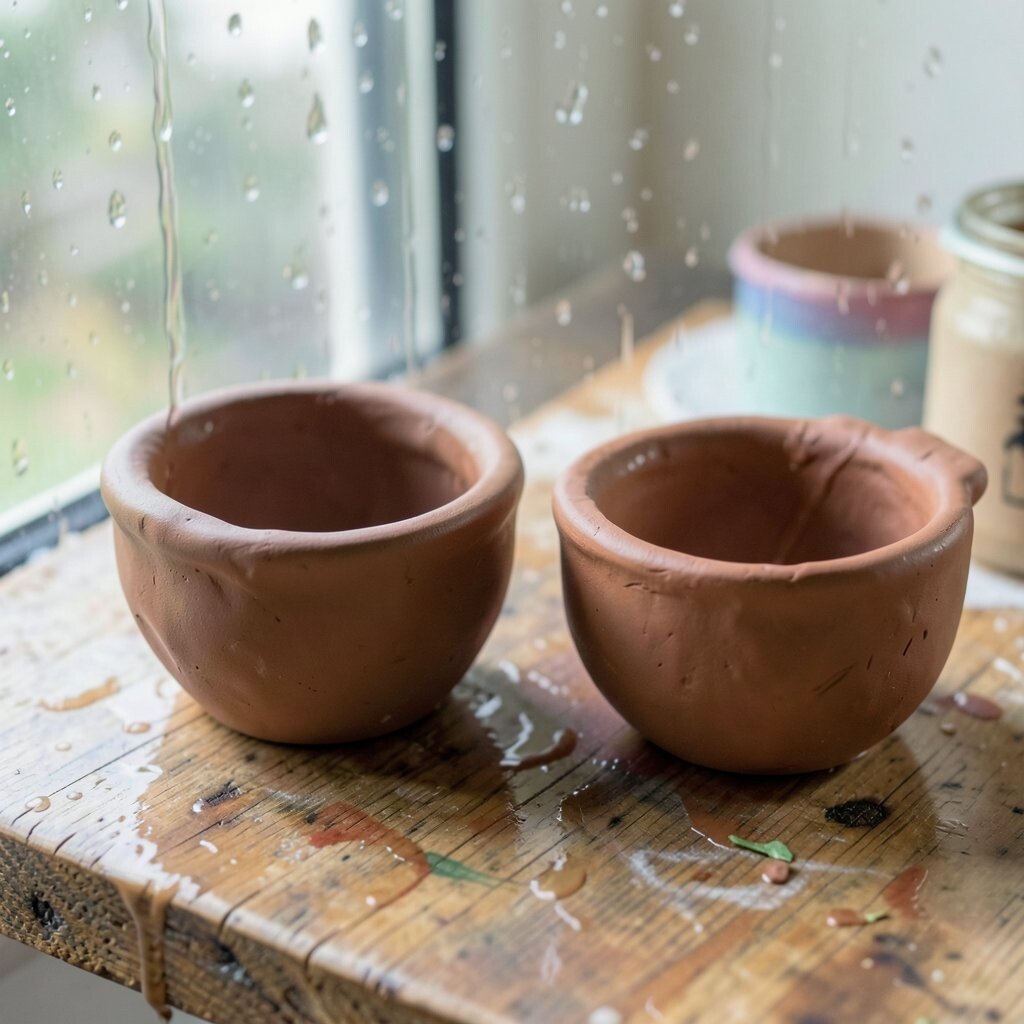
9. Clay Pinch Pot Trinket Bowls
Top Clay Pinch Pot Trinket Bowls Craft Tutorials
- 🍂 DIY Clay Bowl – Homey Oh My from homeyohmy.com.
- 🎨 Pinch pots made from air drying clay from incredibusy.com.
- 🗺️ Learning to make trinket dish with craft clay from facebook.com.
- 🖼️ Air-dry clay Rolling pin Water bowl Brushes & acrylic paints … from instagram.com.
Small pinch pots are simple to shape and fun to hold in your hands. They can be tiny bowls for rings, clips, or desk treasures.
Use air-dry clay and pinch the sides to form a little bowl, then smooth the rim with a damp finger. This craft is not very expensive, and one pack of clay can make several bowls. Add leaf prints, dots, or names before the clay dries for a personal finish.
After drying, paint the bowls in glossy or matte colors to match a room or gift theme. Earth tones feel modern and calm, while rainbow colors feel cheerful and bold. Be sure to keep the walls even so the bowl dries without cracks.
These bowls are useful for loose change, hair ties, or tiny toys. They also give kids a sense of pride because the finished piece feels real and lasting. Place a set near the front door or on a bedside table for daily use.
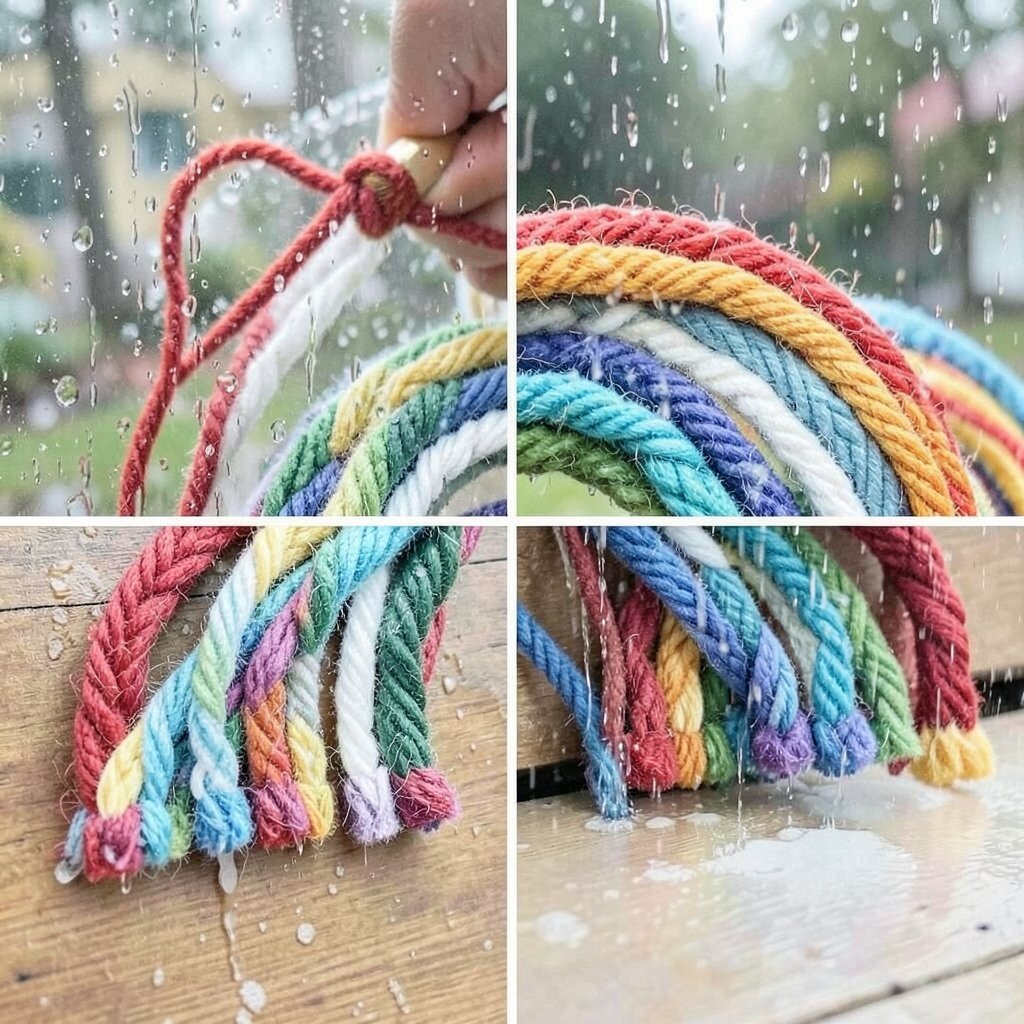
10. Yarn Wrapped Rainbows
Top Yarn Wrapped Rainbows Craft Tutorials
- 🧑🌾 Yarn Wrapped Cloud Rainbows & Pom Poms from redtedart.com.
- 🍅 Mini Yarn Rainbow Keychain or Wall Hanging (Video) from gluesticksblog.com.
- 🎨 Mini Macrame Yarn Rainbows from darngoodyarn.com.
- 🎨 Easy Yarn Wrapped Rainbow Craft from schooltimesnippets.com.
- 🍅 How to Make a Wrapped Fiber Rainbow from studio5.ksl.com.
Rainy weather and rainbow crafts go together in the best way. A wrapped rainbow adds a bright splash of color to a dull day.
Cut a rainbow shape from cardboard, then wrap it with yarn in wide bands of color. The texture looks soft and full, and the finished piece feels warm and cheerful. This is a low-cost craft if you use yarn scraps from old projects.
Children can choose pastel shades for a gentle look or vivid colors for a louder style. Add cotton clouds, glitter stars, or a small name tag to make it more personal. Many homes now favor cozy wall art, and this craft fits that trend without much effort.
Hang the rainbow in a bedroom, playroom, or hallway to brighten the space. It also makes a sweet project for siblings, since each person can wrap one color. The simple motion of wrapping can feel calming and steady.
11. Stamped Tea Towels

Top Stamped Tea Towels Craft Tutorials
- 🎄 DIY Stamped Tea Towels from prettysimpleideas.com.
- 🧑🌾 How to Make DIY Fruit & Veggie Stamped Tea Towels from homesteadandchill.com.
- 🍁 DIY Handstamped Tea Towel from craftifymylove.com.
- 🎨 How to Make a Modern Stamped Tea Towel from hgtv.com.
- 🗺️ DIY Christmas Gift Idea–Potato Stamped Tea Towels from makeanddocrew.com.
Plain tea towels can become lovely kitchen pieces with homemade stamps. The finished cloth looks neat, useful, and a little bit fancy.
Use potato stamps, foam shapes, or rubber stamps with fabric paint to make patterns on cotton towels. This craft is useful because it gives you something that can be used every day. It can also be low-cost if you start with plain towels from a discount store.
Try lemons, leaves, stars, or simple dots for a fresh look that feels current. You can make one towel for drying dishes and another for lining a bread basket. Let each person in the family choose a stamp so the set feels personal.
Heat-setting the paint helps the design last through washing. That makes the towel both pretty and practical, which is a great rainy-day win. Fold the towels neatly and tie them with string if you want to give them as gifts.
12. Bead and Pipe Cleaner Sculptures

Top Bead And Pipe Cleaner Sculptures Craft Tutorials
- 👓 Pipe Cleaner and Bead People… this little craft is so fun for … from facebook.com.
- 🗺️ Beaded Pipe Cleaner Butterflies from onelittleproject.com.
- 🎨 Bead and Pipe Cleaner Ornaments from happyhooligans.ca.
- 🖼️ 50 Clever Pipe Cleaner Crafts and Learning Activities from weareteachers.com.
- 👓 Twist, Bend, Create: 50+ Awesome Pipe Cleaner Crafts for … from modpodgerocksblog.com.
Pipe cleaners and beads can turn into tiny sculptures that twist, bend, and sparkle. They are bright, light, and very easy to shape.
Thread beads onto pipe cleaners, then twist them into flowers, bugs, crowns, or abstract shapes. This craft is simple and low-cost, and it works well with leftover bead mixes. Kids can make one shape at a time and build up a whole little collection.
The finished pieces can sit on a shelf, hang from a string, or decorate a desk. Choose a color theme for a tidy look, or mix everything for a lively style. If you want extra strength, twist two pipe cleaners together before adding beads.
These sculptures are great for hands that like to fidget and create at the same time. They also support fine motor skills in a playful way. A small tray keeps the beads from rolling away during the craft session.
13. Upcycled T-Shirt Tote Bags

Top Upcycled T-Shirt Tote Bags Craft Tutorials
- 🎄 Decorating Tote Bags with Upcycled T-Shirts! from craftingcheerfully.com.
- 🍅 Did you know you can turn a t-shirt into a tote bag? … from facebook.com.
- 🎨 Upcycled T-Shirt Tote Bag from diyshowoff.com.
- 👓 Upcycled Tshirt Market Bag (Easy and Super Low Sew!) from instructables.com.
- 🧑🌾 👕✂️ No-Sew T-Shirt Bag Give an old shirt new life! Join us … from instagram.com.
An old T-shirt can become a soft tote bag without much sewing. It feels useful right away, which makes the craft extra satisfying.
Cut the sleeves and neckline, then tie or stitch the bottom shut to form a bag. This is one of the cheapest crafts around because it uses clothing that might already be worn out. Decorate it with fabric markers, patches, or iron-on shapes to give it a fresh look.
Personal touches make each bag feel special, like initials, favorite animals, or a simple quote. The tote can carry library books, snack packs, or art supplies. Reuse is a strong trend right now, and this project fits that idea in a simple, friendly way.
Choose a shirt with a fun print for a bag that already has character. If the fabric is thin, double it or line it with another shirt piece. That makes the bag sturdier and better for everyday use.
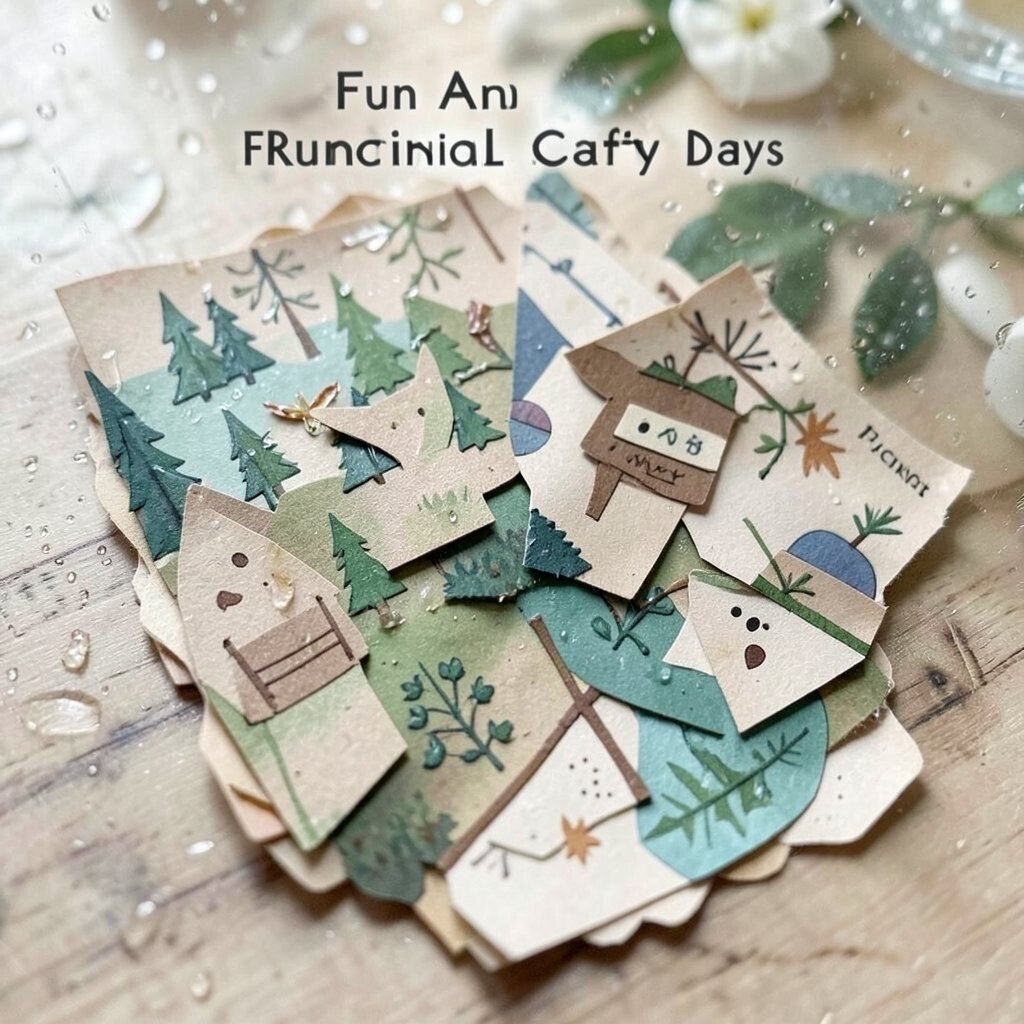
14. Nature Pressed Bookmark Sets
Top Nature Pressed Bookmark Sets Craft Tutorials
- 👓 Nature bookmarks! Beautiful, fun to make and useful 😊 from facebook.com.
- 🧑🌾 Day 14 of Merry Maker Mingle is here!!🎉🎄 Pressed flower … from instagram.com.
- 🎨 DIY Dried Flower Bookmark Kit, Transparent PET Bookmark Set … from walmart.com.
- 🧑🌾 60 Pcs Kraft Paper Blank Bookmarks, DIY Pressed Flower … from ebay.com.
- 🗺️ Bookmark Craft for Kids Using Pressed Flowers and Leaves from buggyandbuddy.com.
Leaves and petals can be pressed into flat bookmarks that look delicate and pretty. They bring a little outdoor feeling into a rainy indoor day.
Gather small leaves or flowers, press them between heavy books, and glue them onto cardstock or laminate them once dry. This craft is nearly free if you use items from the yard or a walk. The finished bookmarks look elegant and make reading feel extra special.
For personalization, add a ribbon, a name, or a favorite quote on the back. Soft green, gold, and cream colors are especially popular in calm home decor right now. Be sure to use dry plant pieces so the bookmark stays neat over time.
These bookmarks work well as gifts for book lovers of any age. They also create a nice memory of a walk, even on days when the weather keeps you inside. A small envelope or box keeps them flat and safe.
15. Painted Stone Paperweights
Top Painted Stone Paperweights Craft Tutorials
- 🍁 Decorating rocks as paperweights for a unique touch from facebook.com.
- 🎄 Painted Rock Pumpkin and Black Cat Paperweight Crafts from artsymomma.com.
- 🍁 Chalk Rock Paper Weight Craft for Kids from happyhooligans.ca.
- 🍅 Painted Rock Crafts for Kids | Painted Rock Ideas from mommymusings.com.
- 🍁 Stone Painting craft ideas | Craft guides & templates from bakerross.co.uk.
Flat stones can become cheerful paperweights for desks, shelves, or art corners. They are smooth, sturdy, and fun to decorate.
Wash the stones, let them dry, and paint them with patterns like ladybugs, moons, flowers, or simple words. This craft is low-cost if you collect stones outside or buy a small bag from a craft store. The finished stones are useful for holding papers, notes, or recipes in place.
Kids can use bold colors for a playful feel or soft tones for a calmer look. A little varnish helps the paint stay bright and adds a polished shine. You can also write names or tiny messages on the stones for a personal touch.
Because each stone is different, every paperweight feels one of a kind. That uniqueness makes the project feel special without needing fancy supplies. Line them up on a windowsill for a little art display before moving them to a desk.
16. Felt Food Play Set
Top Felt Food Play Set Craft Tutorials
- 🗺️ 16 Free Felt Vegetable Patterns & Sewing Tutorials from theyellowbirdhouse.com.
- 🍂 Handmade Play Set for Kids with Felt Food and 3D Printed … from facebook.com.
- 🍅 DIY Recycled Cardboard Play Food Sandwich: Toast … from mindymakes.com.
- 👓 Felt Food | DIY for Beginners from kiwico.com.
- 🖼️ Children's Gift Idea: Felt Food Play Sets from athoughtfulplaceblog.com.
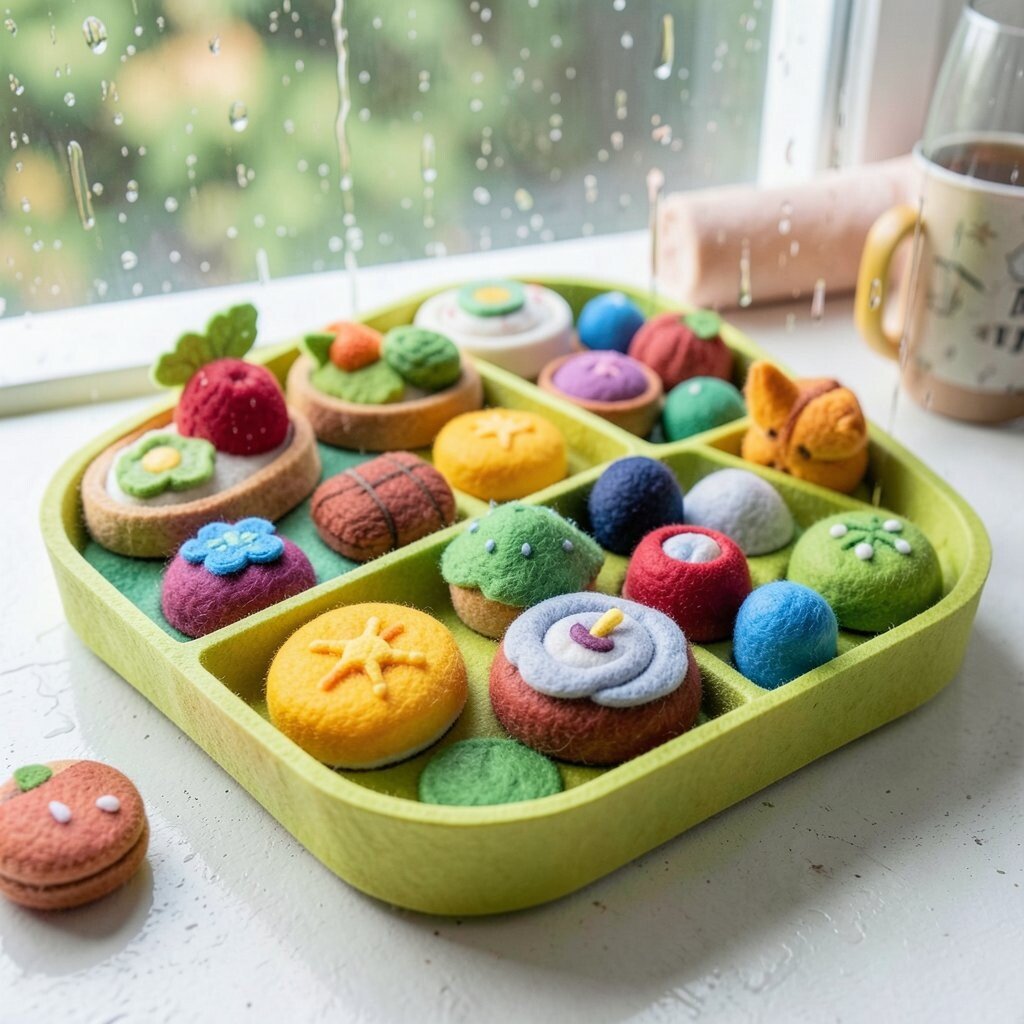
Soft felt can become pretend fruit, pizza slices, cookies, and sandwich pieces. The colors look cheerful, and the shapes are fun to stack and sort.
Cut felt into simple shapes, then glue or stitch the layers together for a play food set. This project can cost more than paper crafts, but the pieces last longer and get used again and again. Children can make a favorite meal, a picnic set, or a pretend bakery to match their own play style.
Personalize the set with favorite foods, family recipes, or bright labels. The current interest in screen-free pretend play makes felt food a smart choice for rainy afternoons. Keep the shapes large enough so they are easy to handle and store.
A basket or cloth bag makes cleanup simple after playtime ends. The set can also help with counting, sorting, and sharing games. That makes it both fun and useful in a home or classroom.
17. Decorative String Light Bottles
Top Decorative String Light Bottles Craft Tutorials
- 🖼️ Over on eHow: DIY Wine Bottle Christmas Lights from 17apart.com.
- 🎨 Can anyone post some hanging bottle lights they have … from facebook.com.
- 🎄 Turning simple glass bottles into dreamy Christmas light … from instagram.com.
- 🎄 DIY: Lighted Wine Bottles – My Florida Life from myenchantingfloridalife.com.
- 🎨 Hanging Bottle Lights from walmart.com.
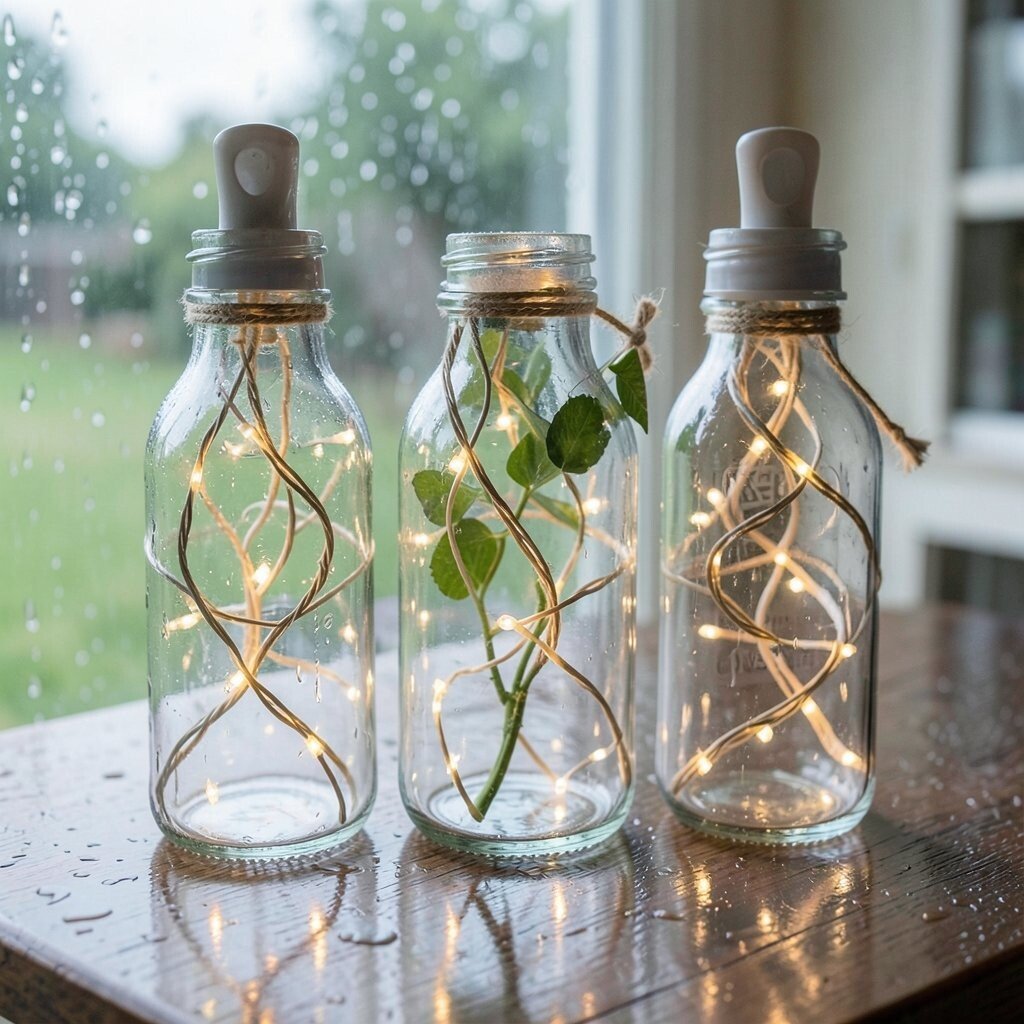
Empty bottles can glow softly when filled with tiny string lights. The effect is warm and dreamy, like a little night sky on a shelf.
Clean a bottle, add lights, and decorate the outside with paint, ribbon, or frosted tape. This idea can be low-cost if you reuse bottles and buy one small strand of lights. It works well as room decor, a reading nook light, or a gentle bedside glow.
Try clear bottles for a crisp look or tinted bottles for a softer shine. A label, charm, or painted design can make each bottle feel personal. This kind of cozy lighting is very popular right now in bedrooms and creative spaces.
Be sure to use battery lights that stay cool and safe for indoor crafting. You can group several bottles together for a stronger display. The finished piece looks fancy, but the steps stay simple enough for a rainy afternoon.
18. Handmade Calendar Boards

Top Handmade Calendar Boards Craft Tutorials
- 👓 Easy DIY Acrylic Wall Calendar with a Cricut from thehomesihavemade.com.
- 🎄 DIY perpetual wall calendar and it's just made out of … from facebook.com.
- 🍁 DIY Personalized Whiteboard Calendar with Print & Cut … from jennifermaker.com.
- 🍅 How to Make a Birthday Board Calendar (DIY Products … from sugarbeecrafts.com.
A handmade calendar board can bring order to a cloudy week. It looks neat on the wall and helps everyone keep track of plans.
Use cardboard, cork, or a wooden board, then add pockets, labels, or movable date cards. This craft is useful for family schedules, homework plans, or fun events. It can be made on a small budget if you use scraps, clips, and paper pieces from home.
Personalize it with colors that match the room, stickers, or a favorite theme like animals or stars. Many people like simple wall organizers right now because they blend style with daily use. A dry-erase pen or clothespins can make updates quick and easy.
Let each family member add their own color or symbol so the board is simple to read. The finished piece feels both creative and helpful, which is a great mix for rainy days. Place it near the kitchen or entryway where everyone can see it.