Small details can change the whole feel of a project. Tiny touches often create the biggest wow factor.
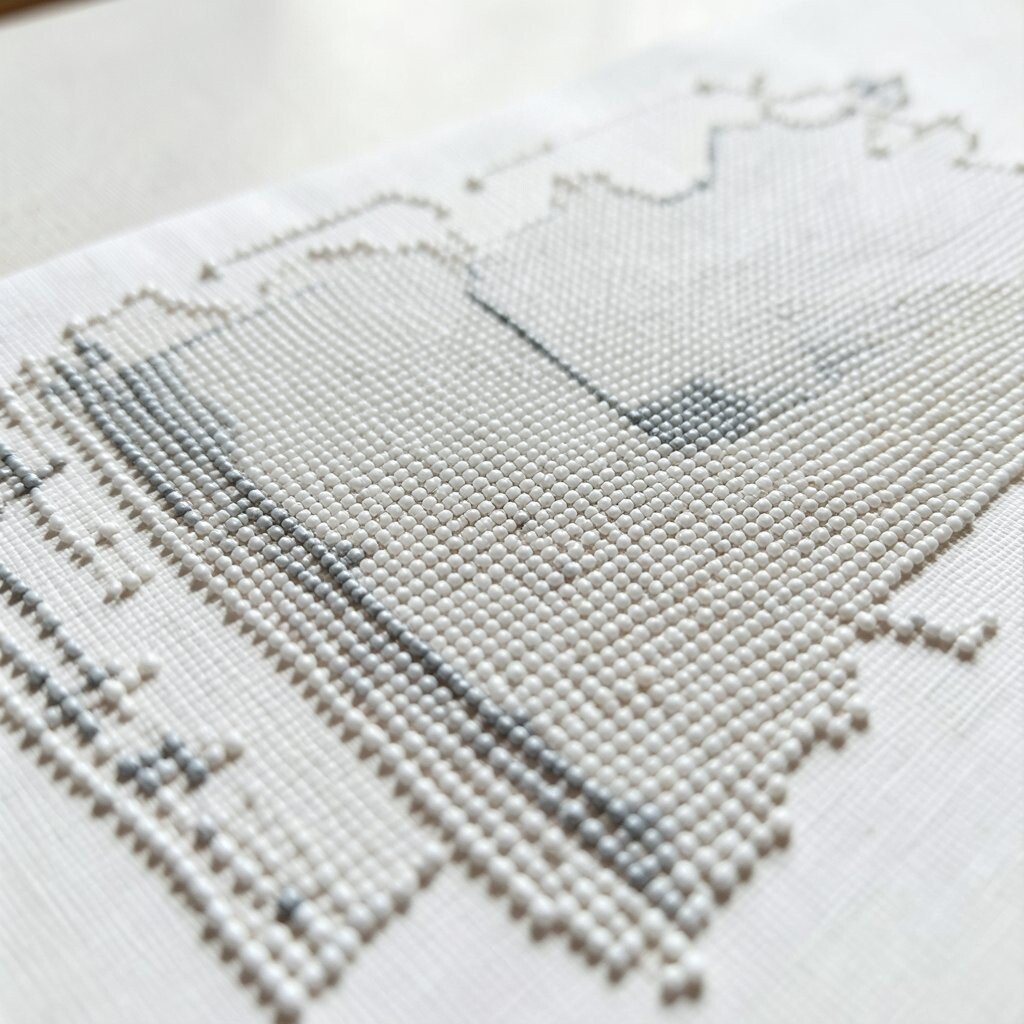
1. Layered Edge Painting
Top Layered Edge Painting Craft Tutorials
- 🍅 Simple Layered Painting Tutorial from downredbuddrive.com.
- 👓 Master the Art of Layering Techniques in Painting from nancyreyner.com.
- 🖼️ Easy-going Layered Art Journaling with Pencil & Acrylic from tinkerlab.com.
- 💅 How to layer paint for complex book edges? from facebook.com.
- 🖼️ Layering Paint for Depth (A Tutorial) from lilblueboo.com.
Layered edge painting gives flat surfaces a crisp, polished look. It works well on frames, boxes, furniture, and craft pieces.
Use a base shade first, then add a lighter or darker line along the edges. That extra band makes corners stand out and adds depth without much effort. It is a low-cost trick because a small paint set and a fine brush can do a lot.
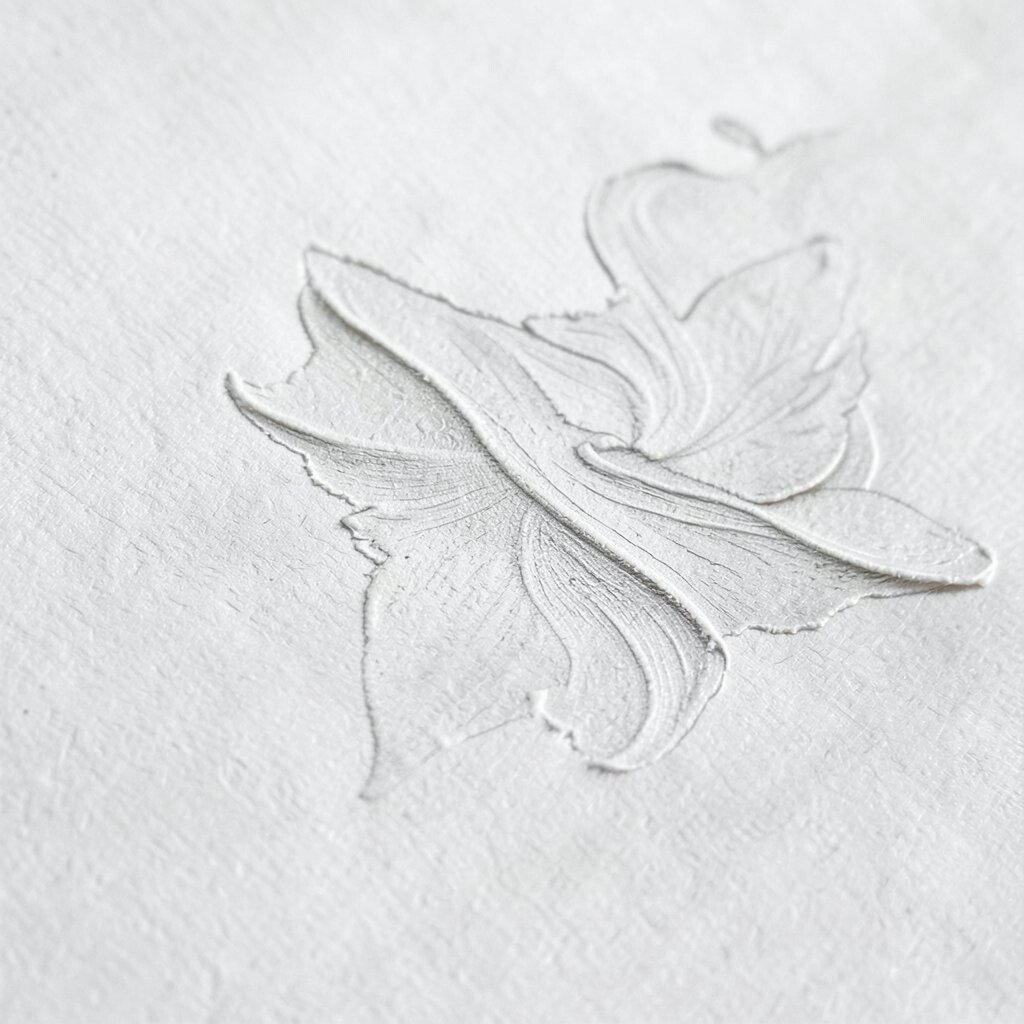
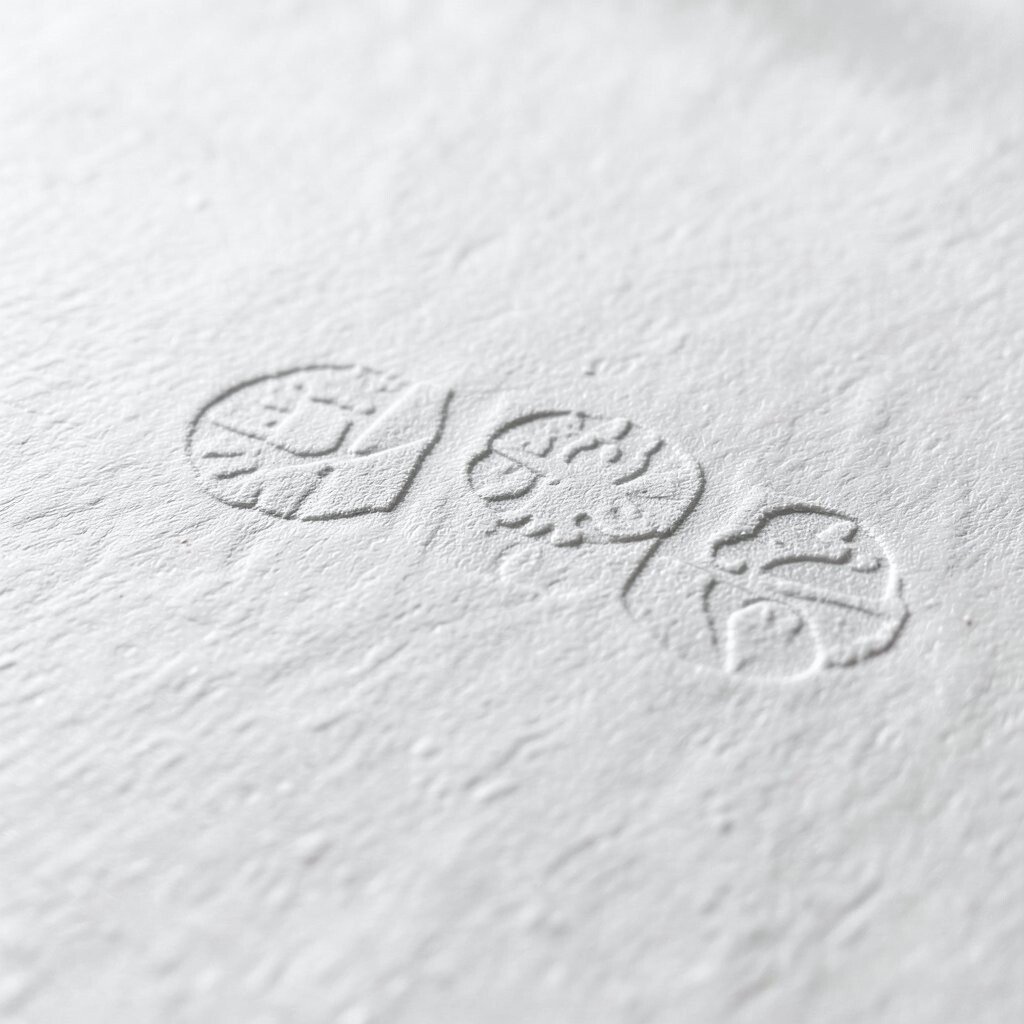
2. Micro-Texture Stamping
Top Micro-Texture Stamping Craft Tutorials
- 🎨 How to Make Custom Polymer Clay Texture Stamps from bysandracallander.com.
- 🍁 Stamping in mixed media – Creativityreignited.com from creativityreignited.com.
- 🍁 Lisa Pavelka Texture Stamps – Page 1 from polyclayplay.com.
- 🖼️ Texture stamps and wire armature techniques from facebook.com.
- 🍂 Add instant texture, rhythm, and personality to your artwork … from instagram.com.
Micro-texture stamping adds tiny patterns that catch the eye up close. The surface looks rich and handmade instead of plain.
Press soft stamps, textured pads, or carved tools into clay, paper, or paint while the material is still workable. This can give your piece a custom feel that store-bought items often miss. Try repeating one small motif for a modern look, or mix several for a more playful style.
People like this technique because it hides small flaws and makes the finish feel intentional. It is also budget-friendly if you make your own stamps from foam, cork, or old erasers. For a fresh trend, pair tiny textures with simple shapes so the design feels clean and current.
3. Mixed-Metal Accents
Top Mixed-Metal Accents Craft Tutorials
- 🧑🌾 Mixing Metallic Accents and Textures on a Handmade Card! from blog.altenew.com.
- 🍂 Mixed Metals Meet Fall Layers: Jewelry Styling Tips for the … from diamondsonwabash.com.
- 🍂 Tips for Mixing Metals: Foxlane Homes Design Experts from foxlanehomes.com.
- 🗺️ Mixing Metals: How to Achieve a High End Look with … from vogtindustries.com.
- 🍂 3 Mixed Metal Bathroom Design Combinations from maisondepax.com.
Mixed-metal accents bring shine and contrast to a project. Gold, silver, copper, and black can all sit together in a way that feels bold and stylish.
Use metal leaf, metallic paint, or small hardware pieces to build the look. Even a thin line of shine can make a plain object feel special. If you want a softer result, keep one metal as the main tone and use the others in small spots.
This method works well on lamps, trays, jewelry, and decor pieces. It gives a rich finish without needing a full makeover, so the cost stays under control. Right now, mixed metals are popular because they make spaces feel layered and lived-in.
Personal touches matter here, too. You can match the metals to your room, your outfit style, or even the colors you use most often.
4. Hand-Drawn Linework
Top Hand-Drawn Linework Craft Tutorials
- 💅 Line Art Lesson Ideas: Elements of Art Projects from artwithtrista.com.
- 🍂 Hand drawn charting practice and foundation basics from facebook.com.
- 🎨 9 Line Art Drawing Ideas Perfect for Beginners from skillshare.com.
- 🍅 Create a 3D Hand Drawing: An Easy & Fun Art Guide from pinwheelcrafts.com.
Hand-drawn linework brings a human touch to any surface. It looks simple at first glance, but the tiny marks create real charm.
Use pens, paint markers, or thin brushes to draw stripes, dots, waves, or tiny borders. The best part is that no two pieces need to look the same. A few wobbles can even make the work feel more honest and warm.
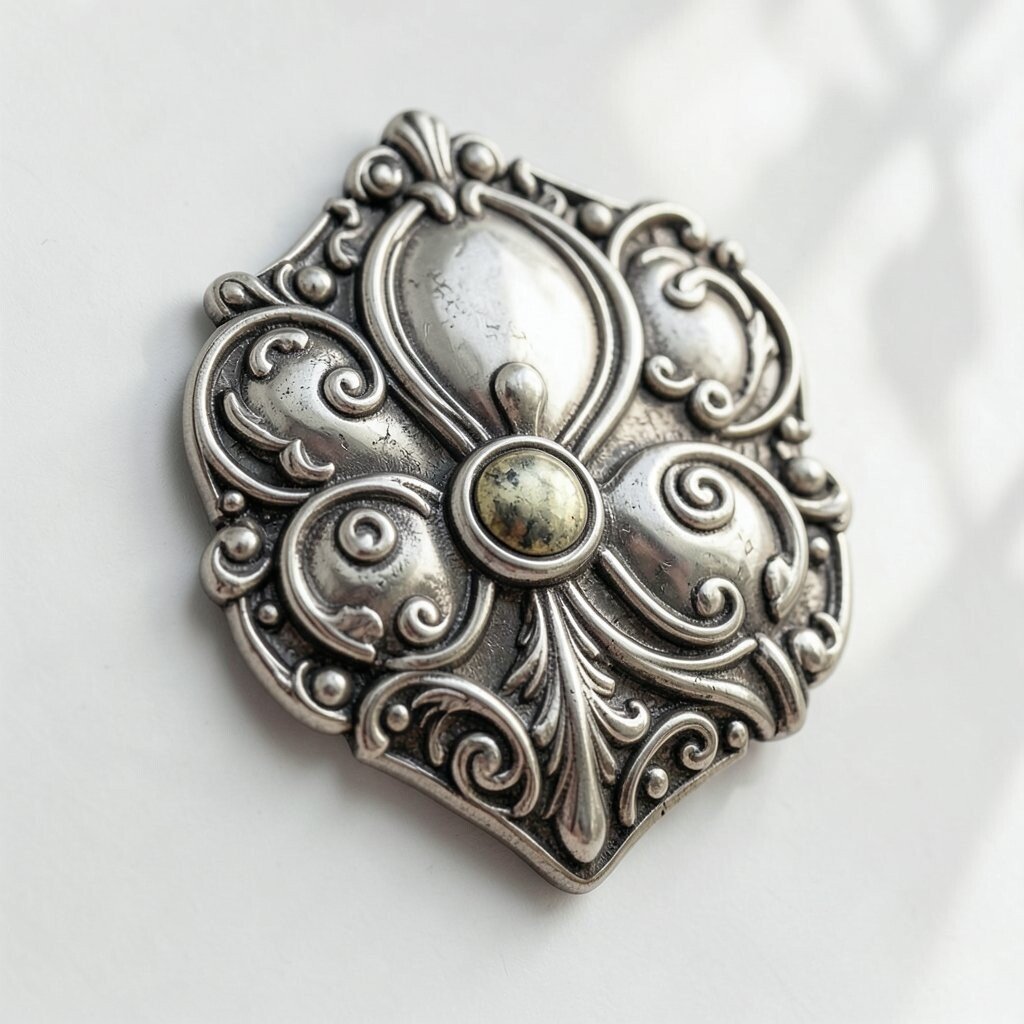
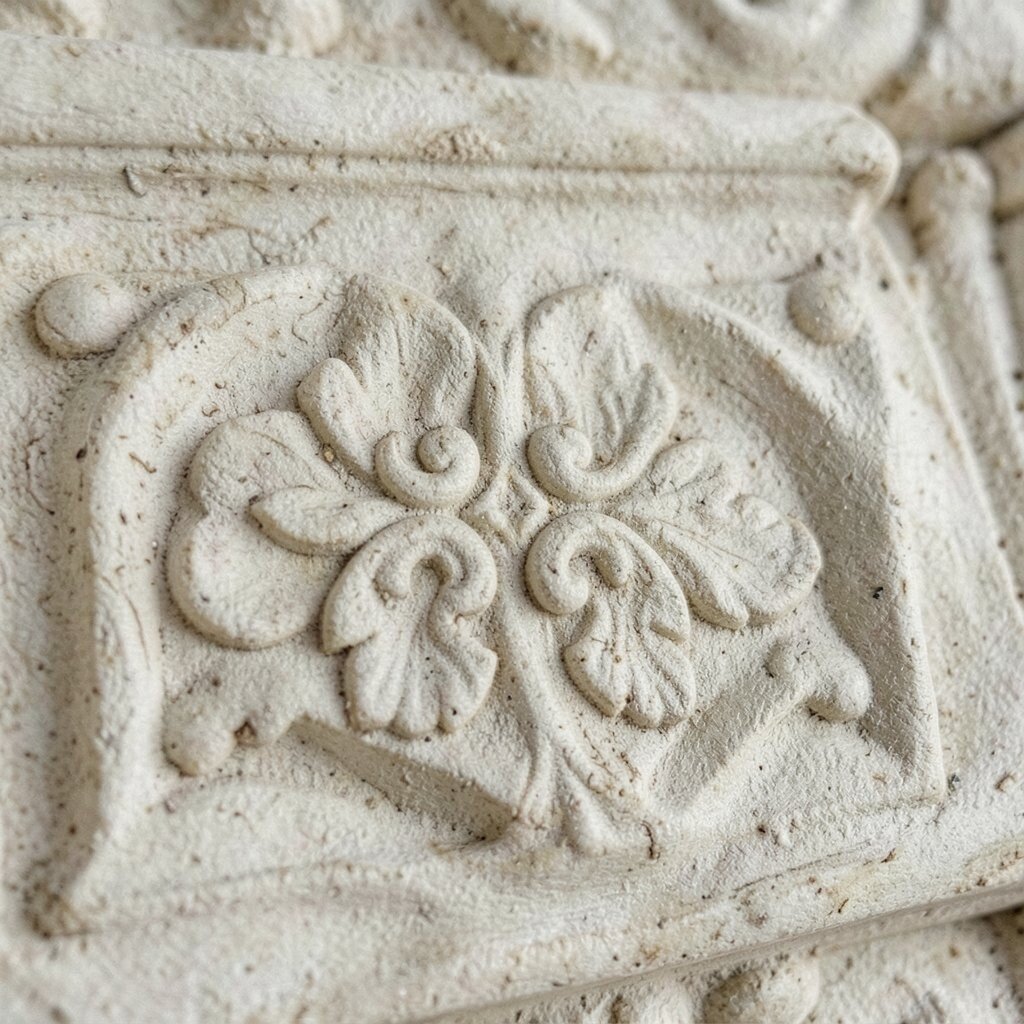
5. Raised Detail Embellishment
Top Raised Detail Embellishment Craft Tutorials
- 🍁 Best Early Season Crafted Gear & Embellishments for All … from wowhead.com.
- 💅 Crafting in S4: Sparks of Awakening, Embellishments and … from reddit.com.
- 🖼️ Types of Embellishment in Paper Crafting – A Complete … from altenew.com.
- 🎨 Crafted Gear in Midnight from askmrrobot.com.
- 🎨 Quick embellishment ideas for cardstock projects from facebook.com.
Raised detail embellishment adds touchable shapes that stand off the surface. The result feels rich, layered, and full of craft.
Try puff paint, fabric paste, clay appliqués, or glue lines that dry into raised patterns. This can turn a simple item into something that begs to be touched. It also helps create shadows, which makes the design look deeper and more complex.
For a personal twist, choose shapes that mean something to you, like leaves, stars, initials, or tiny symbols. The cost can stay low if you use leftover materials or basic craft supplies. Raised details are especially trendy in handmade decor and custom fashion because they make pieces feel one of a kind.
6. Hidden Contrast Pockets
Top Hidden Contrast Pockets Craft Tutorials
- 🎄 Mood DIY: How to Add Invisible Pockets to a Dress from blog.moodfabrics.com.
- 🗺️ 10 Easy Junk Journal Pockets: Ideas & Tutorials from houseofmahalo.com.
- 🍂 Sewing Glossary: How To Sew Inseam Pockets Tutorial from blog.fabrics-store.com.
- 🍂 What are your top tips for adding pockets to garments? from facebook.com.
- 🍁 Labor of love – Instagram from instagram.com.
Hidden contrast pockets add surprise in a smart, subtle way. From the outside, the item can look plain, but inside it feels fresh and special.
Line the inside of a bag, drawer, jacket, or box with a bold print or bright color. That little burst of pattern gives a happy feeling every time it is opened. It is also a practical choice because it can help you find items faster.
Choose colors that fit your style, from soft pastels to loud neon tones. This technique does not need a big budget, since small scraps of fabric or paper can do the job. It fits today’s trend for personal details that feel private and thoughtful.
7. Fine Shadow Framing
Top Fine Shadow Framing Craft Tutorials
- 💅 Creating a 7 layer shadow box with fine details from facebook.com.
- 🎄 Make Your Own Holiday Shadow Boxes from framedestination.com.
- 🍁 01/22/26 A very simple way to make a SHADOW BOX . I … from facebook.com.
- 🎄 4 Pack 5" x 7" Gray Shadow Boxes by Studio Décor® from michaels.com.
- 🧑🌾 Shadow Box Frames as Fine Art – Exploring Dioramas from blog.frameusa.com.
Fine shadow framing adds a soft halo around an object or design. It gives the eye a place to rest and makes the main feature pop.
Paint or draw a thin shadow line just off the edge of letters, artwork, mirrors, or labels. The effect can make a flat design look lifted and more finished. Keep the line light for a gentle look, or deepen it for a stronger style.
This method is easy to personalize with color choice and line thickness. It works on cheap materials just as well as on fancy ones, which makes it a smart option for many budgets. Shadow framing is also popular in modern decor because it feels neat and clean.
For a fresh take, try matching the shadow to the room light or the background color. That small choice can change the mood a lot.
8. Tiny Bead Mapping
Top Tiny Bead Mapping Craft Tutorials
- 🗺️ Printable Seed Bead Graph Paper (FREE Designer … from artbeads.com.
- 🎄 Pixel-Beads – Convert pictures into fuse bead patterns for free from pixel-beads.net.
- 🍁 Day 8 of my Christmas series! Today we did a simple bead … from instagram.com.
- 👓 My Pearler Bead Creations: Easy Patterns & DIY Ideas! from lemon8-app.com.
- 🍂 Learning beaded peyote stitch crafting from facebook.com.
Tiny bead mapping creates patterns that sparkle in a careful, controlled way. The surface becomes lively without looking crowded.
Place beads in rows, curves, or clusters to outline shapes and add texture. A small amount can go a long way, so this is a nice choice when you want detail without a heavy look. It works well on clothing, accessories, cards, and decorative panels.
Use clear thread, glue, or stitching depending on the material. If your budget is tight, mix a few beads with painted dots to stretch your supplies. Many makers now use tiny bead work to add a soft shine that feels current and elegant.
9. Cutout Layer Windows
Top Cutout Layer Windows Craft Tutorials
- 🗺️ Cricut Maker user creates 9-layer shadow box inspired by … from facebook.com.
- 🗺️ Layered Paper Stained Glass Window Art: EASY How-To! from jennifermaker.com.
- 💅 CCC 2024 Day 09: "Stained Glass" Nativity Windows from craftwithsarah.com.
- 🧑🌾 TISSUE PAPER STAINED GLASS CRAFT from messestomemories.com.
- 🖼️ ✨ Learn how to create a gorgeous layered paper stained … from facebook.com.
Cutout layer windows make depth easy to see. The open spaces let one color or pattern peek through another.
Cut shapes into a top layer so the lower layer shows through in a planned way. This can look bold with sharp geometric openings or gentle with curved shapes like petals and arches. It is a strong choice for cards, wall art, packaging, and handmade books.
Try using a craft knife, punch tool, or laser-cut service if the project is more advanced. The cost can range from very low to higher, depending on the tools you choose. To make the piece feel personal, use cutouts that reflect a hobby, favorite place, or family symbol.
This style is very appealing right now because it feels modern and airy. It also gives a clean finish without needing lots of extra decoration.
10. Soft Wash Aging
Top Soft Wash Aging Craft Tutorials
- 💅 LEARN YOUR CRAFT | Pressure Washing | Soft Washing from youtube.com.
- 🧑🌾 The Ins and Outs of Making Soft Wash from softwashing.uk.
- 👓 A method for cheap and forgiving washes https://youtu.be/ … from facebook.com.
- 👓 Pressure Washing Business Starter Course: From Zero to Profit! from cigarcitysoftwash.com.
Soft wash aging gives new pieces a calm, lived-in look. It adds character without making the item seem old or worn out.
Brush on a watered-down stain, paint wash, or ink wash, then wipe back some of the color. The light and dark areas create gentle depth, like sunlight and shadow on a surface. This works well on wood, paper, fabric, and clay pieces.
Keep the wash thin if you want a subtle effect, or layer it for a richer tone. The cost is usually low because you only need a small amount of product. Many people like this finish because it feels cozy, handmade, and easy to style in modern homes.
To make it yours, choose a wash color that matches your room or wardrobe. Warm brown, soft gray, and dusty blue are all nice options.
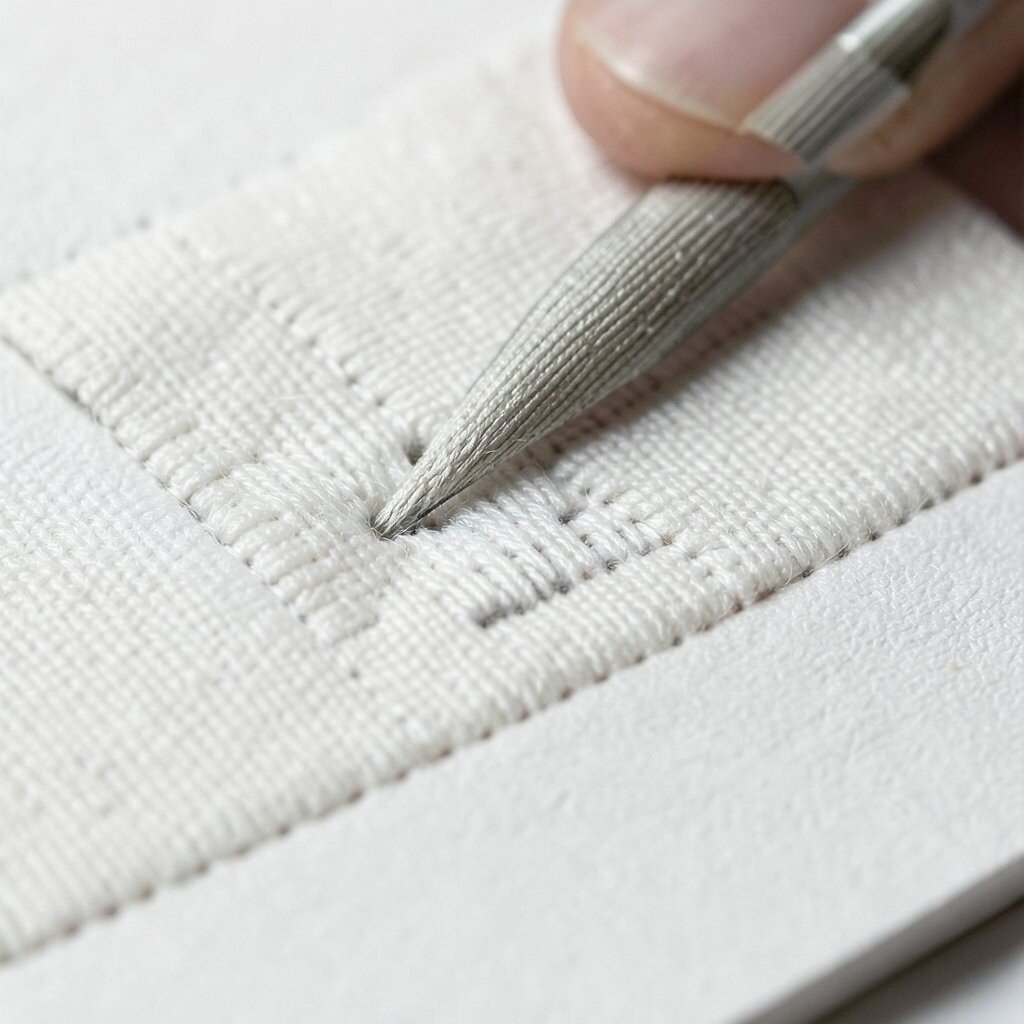
11. Precision Thread Detailing
Top Precision Thread Detailing Craft Tutorials
- 🍂 DETAILING Where structure meets air. In every piece, what … from instagram.com.
- 🍂 Thread portrait art on board completed from facebook.com.
- 💅 String art FAQs: nail and thread answers 2026 from lrcrafts.it.
- 🧑🌾 intricate jaali embroidery, delicately framed with floral … from instagram.com.
- 🧑🌾 SYBON Wool Buffing Pads: Precision Detailing Solutions … from sybonbest.com.
Precision thread detailing adds neat lines and tiny shapes with a soft, fabric-friendly look. It can make simple cloth feel carefully made and special.
Use embroidery floss, thin yarn, or sewing thread to trace borders, outlines, or small motifs. The fine lines can brighten a plain pillow, shirt, tote, or wall hanging. It is a great way to add color while keeping the overall design tidy.
Pick thread shades that echo your favorite colors or the room around the piece. This method can be very affordable if you use leftover thread from other projects. Right now, small embroidered details are popular because they feel thoughtful and personal.
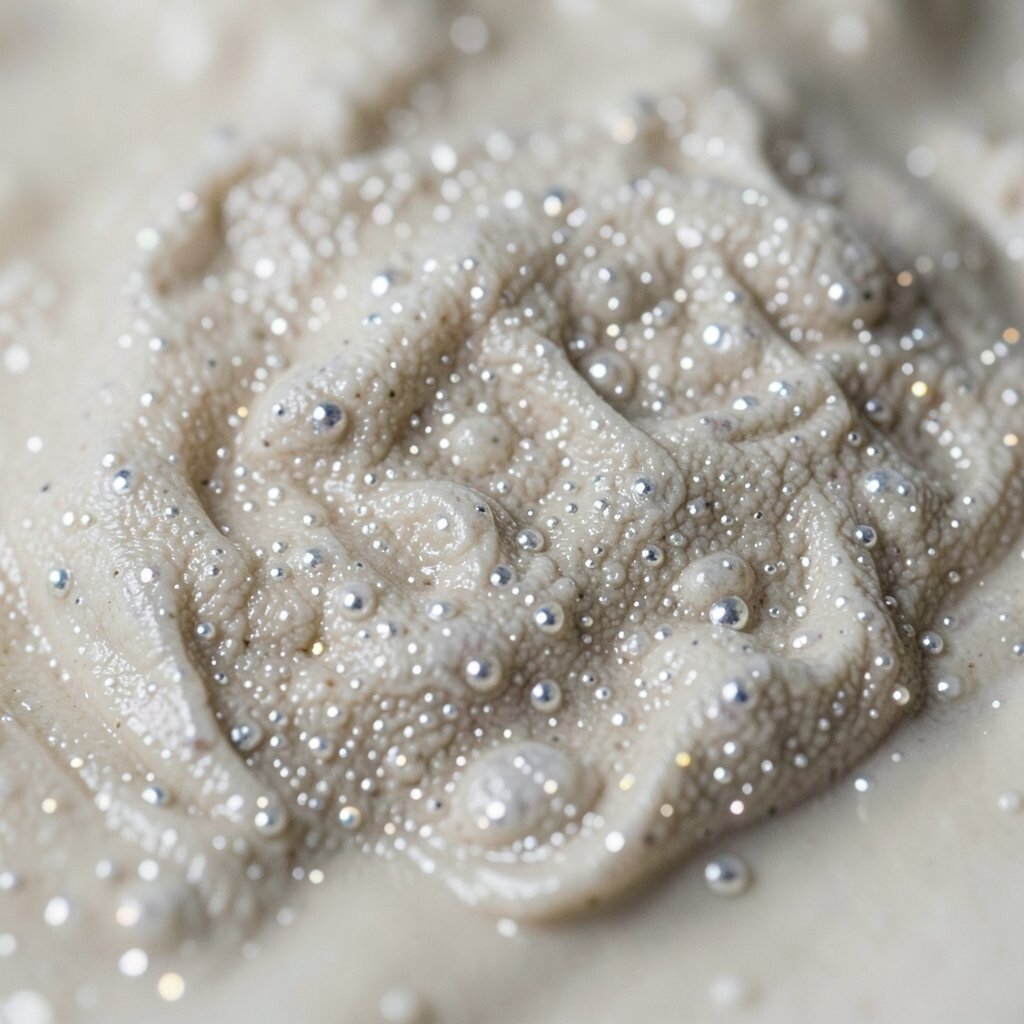
12. Reflective Pinpoint Highlights
Top Reflective Pinpoint Highlights Craft Tutorials
- 🍅 Shot Craft: Using Specular Reflections from theasc.com.
- 🍂 Highlighting Without Wrecking Comprehension: A Calm, … from sparkl.me.
- 🍁 Buy Reflections Pens Ideal for Nighttime Visibility from alibaba.com.
- 🎨 Derwent Metallic Paint and Pencils contain shimmering … from instagram.com.
- 🍁 The Sigma 12mm F1.4 DC Contemporary Lens Brings … from blog.sigmaphoto.com.
Reflective pinpoint highlights add tiny flashes that catch light at just the right moment. The effect feels lively, almost like a secret sparkle hidden in the design.
Place small dots of reflective paint, foil, glass glitter, or shiny ink in key spots such as corners, eyes, petals, or letter strokes. The highlights guide the viewer’s gaze and make the whole piece feel more alive. Use them sparingly so the shine feels elegant rather than loud.
This technique works well on art, decor, nails, accessories, and paper goods. It can be done on a tight budget if you use tiny amounts of material and focus on a few key spots. Personalize the look by following the light in your room or matching the sparkle to your style.
Current trends favor small shine over heavy glitter, so this approach feels fresh and easy to wear. It gives a polished finish while still leaving room for your own creative touch.