
Imagine stepping into your craft room and finding a vibrant wall where every ribbon is neatly in place. A pegboard can be your canvas for creativity, turning a simple organizing tool into a masterpiece of color and function. As we explore these ideas, you’ll find ways to bring order and beauty to your crafting space.
1. Color-Coded Rows

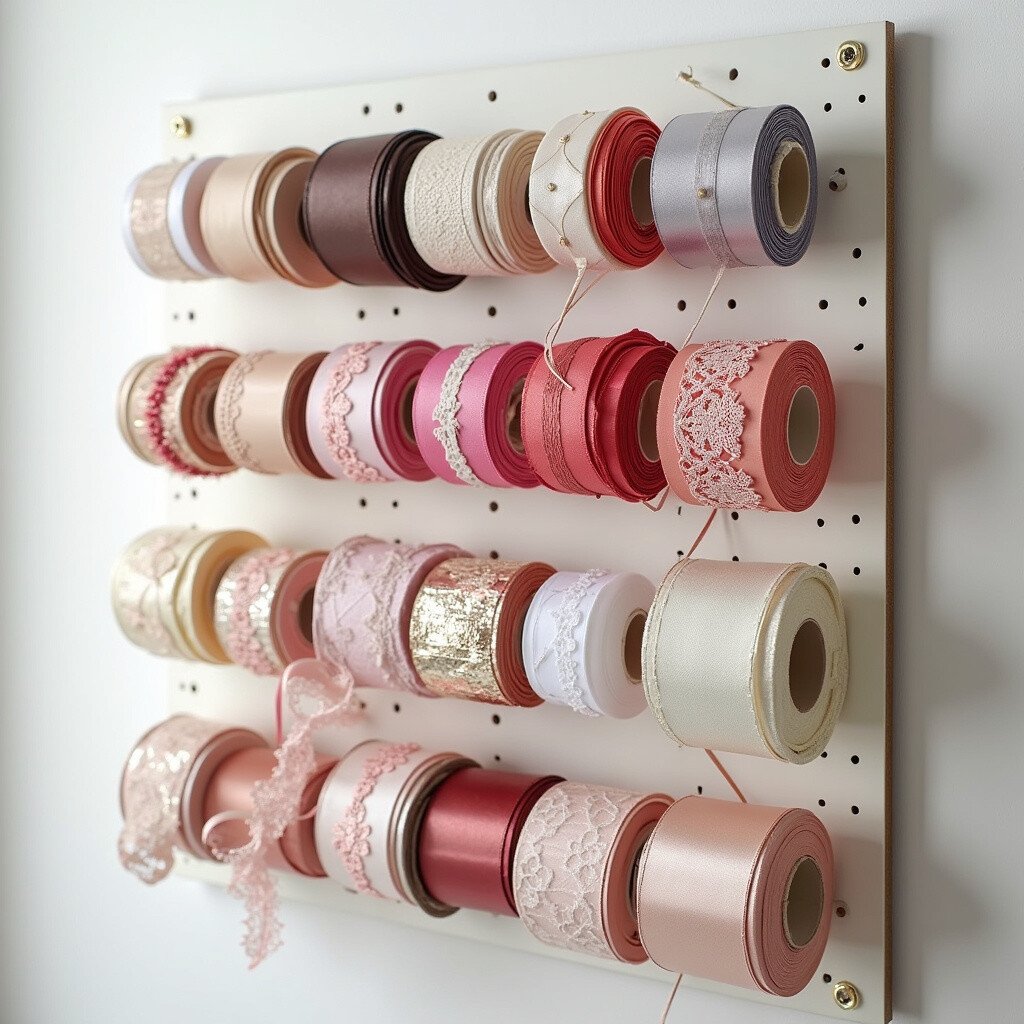
Organizing ribbons by color brings a splash of hue to your pegboard, creating a visual feast for the eyes. By grouping ribbons into color-coded rows, you not only make it easy to find the perfect shade but also add a rainbow effect to your wall. This method is particularly useful if you have a large collection of ribbons.
Using simple hooks or dowels, you can hang ribbons in order of the spectrum. Imagine the time saved when you can quickly grab that exact shade of blue or pink you need for your project! Plus, this method is budget-friendly, requiring minimal investment.
2. Layered Ribbon Towers
Creating towers of ribbons on your pegboard can add depth and dimension to your setup. By stacking different widths and textures of ribbons, you create a multi-layered look that’s both functional and stylish. This approach adds personality and flair.
Mixing satin, grosgrain, and lace ribbons in one tower can give a unique texture. And the best part? It’s super easy to personalize with your favorite ribbon types. It’s like having a mini ribbon boutique right in your craft room!
3. Pegboard Ribbon Shelves

Using small shelves on your pegboard offers an elegant way to organize ribbons. Small wooden or acrylic shelves can hold ribbons upright, making them easy to access and display. This not only keeps your ribbons tidy but also gives your workspace a chic look.
Think of these shelves as little stages, where each ribbon gets its time to shine. You can even paint the shelves to match your craft room decor. It’s a stylish solution that doubles as decor.
4. Ribbon Spool Pegs
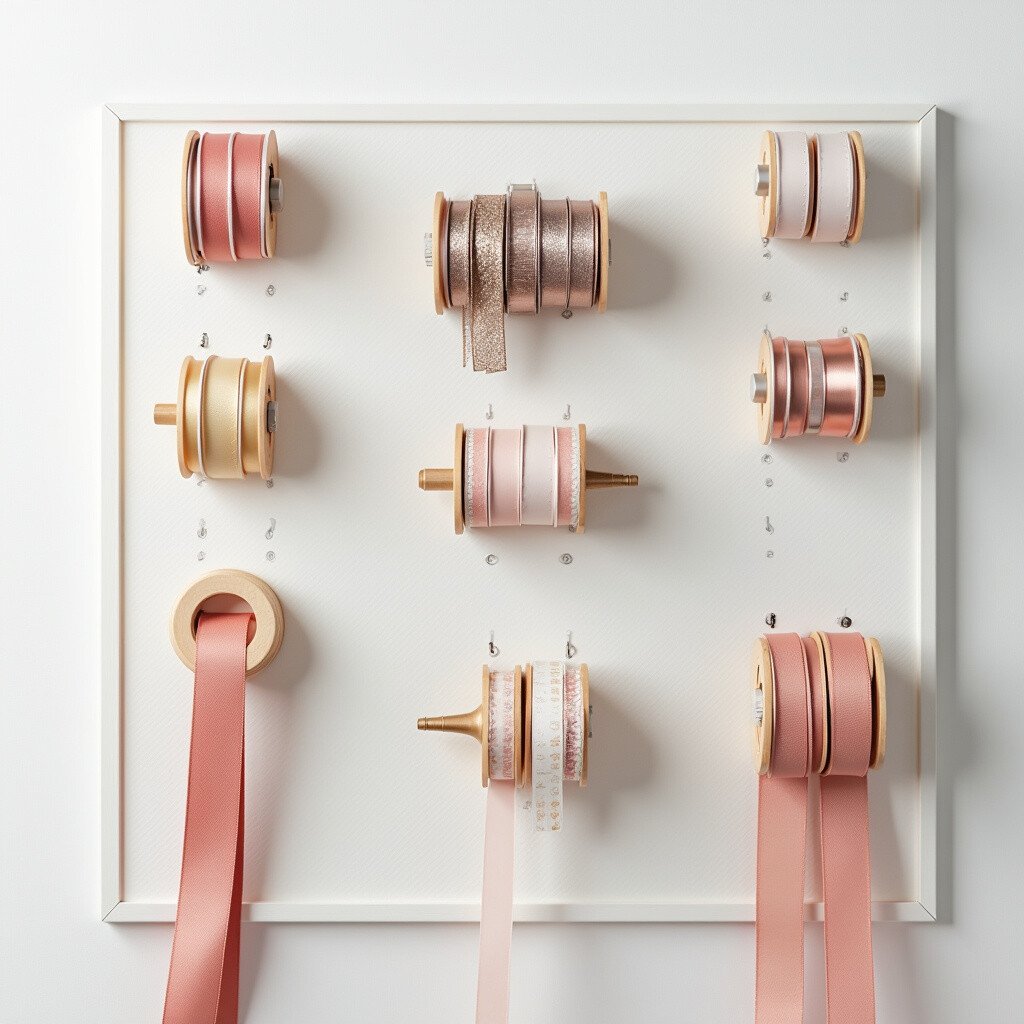
Spool pegs are a classic way to organize ribbons on a pegboard. By placing pegs at different heights, you can create a dynamic display that keeps your ribbons accessible. It’s a straightforward method that makes finding and using ribbons a breeze.
This approach works wonderfully for those who love simplicity and function. It’s easy to swap out ribbons as needed, making it a flexible and cost-effective option. Plus, it provides an immediate view of your ribbon stock.
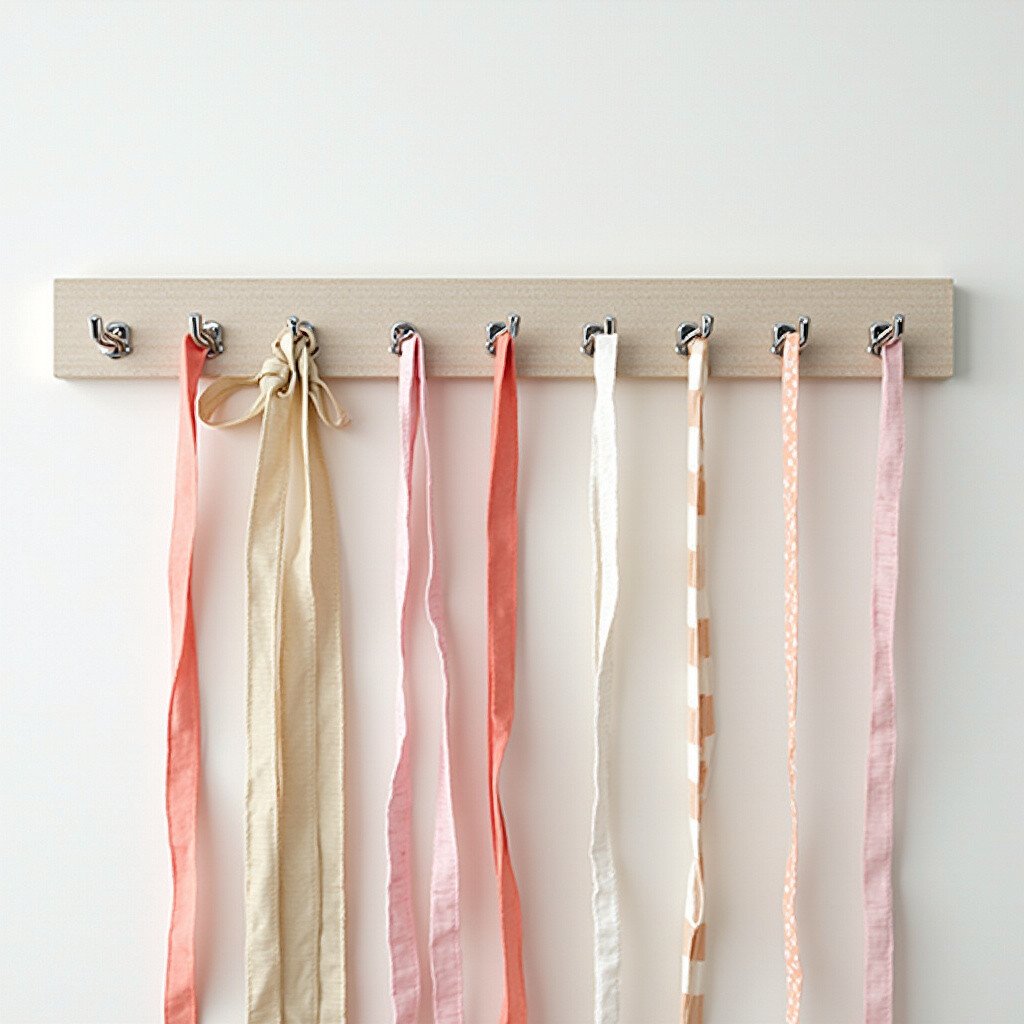
5. Decorative Hooks with Charm

Why settle for plain hooks when you can have decorative ones? Choose hooks with charming shapes or colors to hold your ribbons, adding an extra dose of personality to your pegboard. This method blends organization with art.
Whether you opt for floral, geometric, or whimsical shapes, these hooks can reflect your style. They’re a delightful addition that makes your pegboard feel special. Personalize your space without breaking the bank.
6. Ribbon Clip Boards

Clipboards aren’t just for paper! Attaching clipboards to your pegboard can provide a flat surface to clip ribbons. This is perfect for keeping small pieces or samples visible and tidy.
Imagine having all your favorite ribbon samples right at eye level, ready for inspiration. This setup is easy to rearrange and update, making it ideal for those who frequently change their crafts. Plus, it’s a unique twist on traditional ribbon storage.
7. DIY Pegboard Ribbon Dispenser
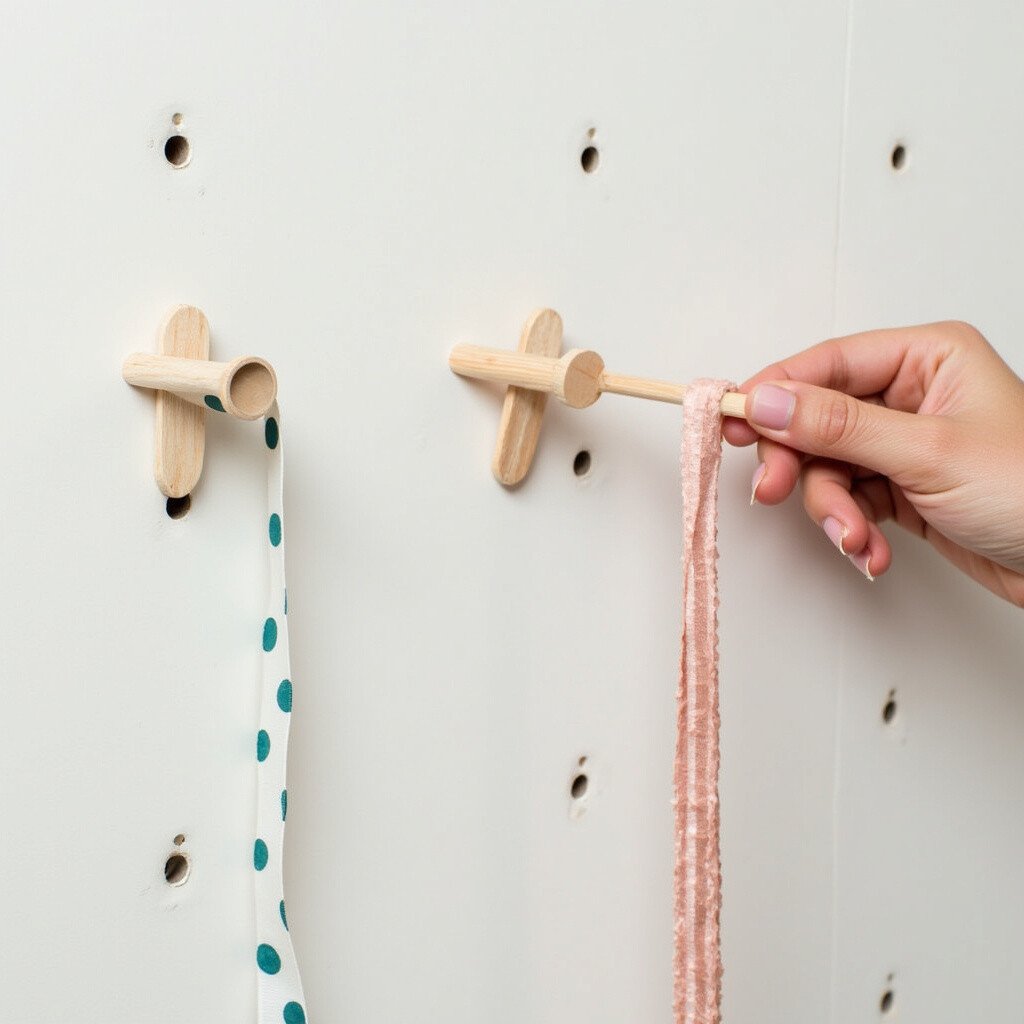
Create a ribbon dispenser with a simple dowel rod threaded through the pegboard holes. This lets you pull and cut ribbons directly from the board, adding convenience to creativity. It’s a great way to keep your ribbons organized and ready to use.
This method is fantastic for those who love hands-on projects. You can paint or decorate the dowel to match your craft space. It’s functional, fun, and a conversation starter!
8. Tiered Pegboard Ribbon Racks

Constructing tiered racks on your pegboard can maximize space and organization. By using a stepped design, you can store more ribbons in less space, keeping them all visible and within reach.
This is perfect for crafters with limited space who still want a grand display. The layered look adds depth and makes your ribbon collection a central feature. Explore this option for a neat and compact setup.
9. Pegboard Ribbon Cubbies
Transform your pegboard into a series of cubbies to hold ribbons. Small boxes or baskets can be hung on the board, providing a cozy home for your ribbons. This method is perfect for quirky or mixed collections.
You can sort ribbons by theme or occasion, making it easy to grab what you need for birthdays, holidays, or everyday projects. Customize each cubby with labels or decorations. It’s like having a mini library of ribbons!
10. Sliding Ribbon Rails

Install sliding rails on your pegboard for an innovative ribbon storage solution. These rails can hold ribbons securely while allowing easy access. It’s a sleek, modern way to keep your ribbons neat.
Perfect for those who prefer a minimalist look, sliding rails keep ribbons off your work surface. This setup is ideal if you love clean lines and a clutter-free space. It’s a high-end solution that’s surprisingly affordable.
11. Vertical Ribbon Slats
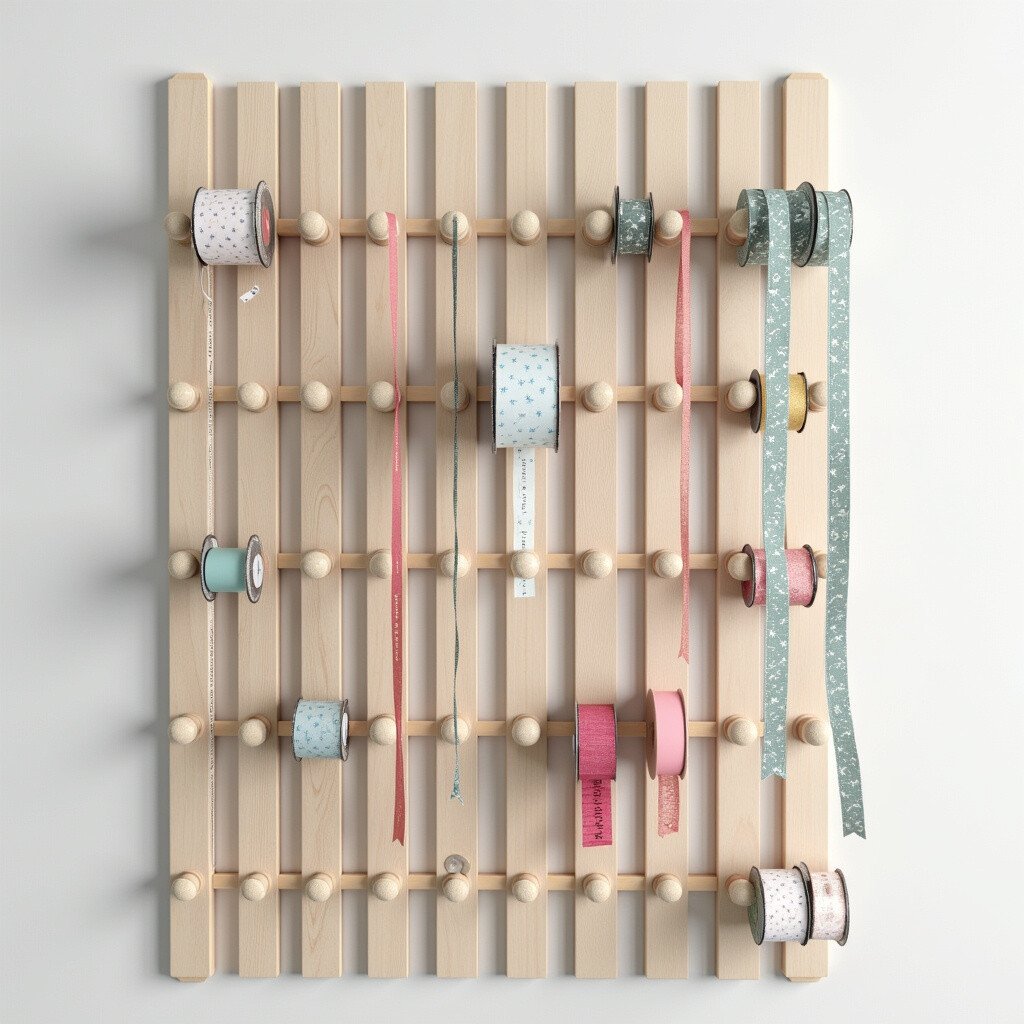
Vertical slats can add elegance and order to your pegboard. By spacing slats just wide enough for ribbon spools, you create a vertical display that’s both functional and beautiful.
This idea turns your ribbons into a focal point, drawing attention to their colors and patterns. It’s perfect for those who appreciate a tidy, gallery-style arrangement. Plus, it’s easy to adjust as your collection grows.
12. Pegboard Ribbon Hoops
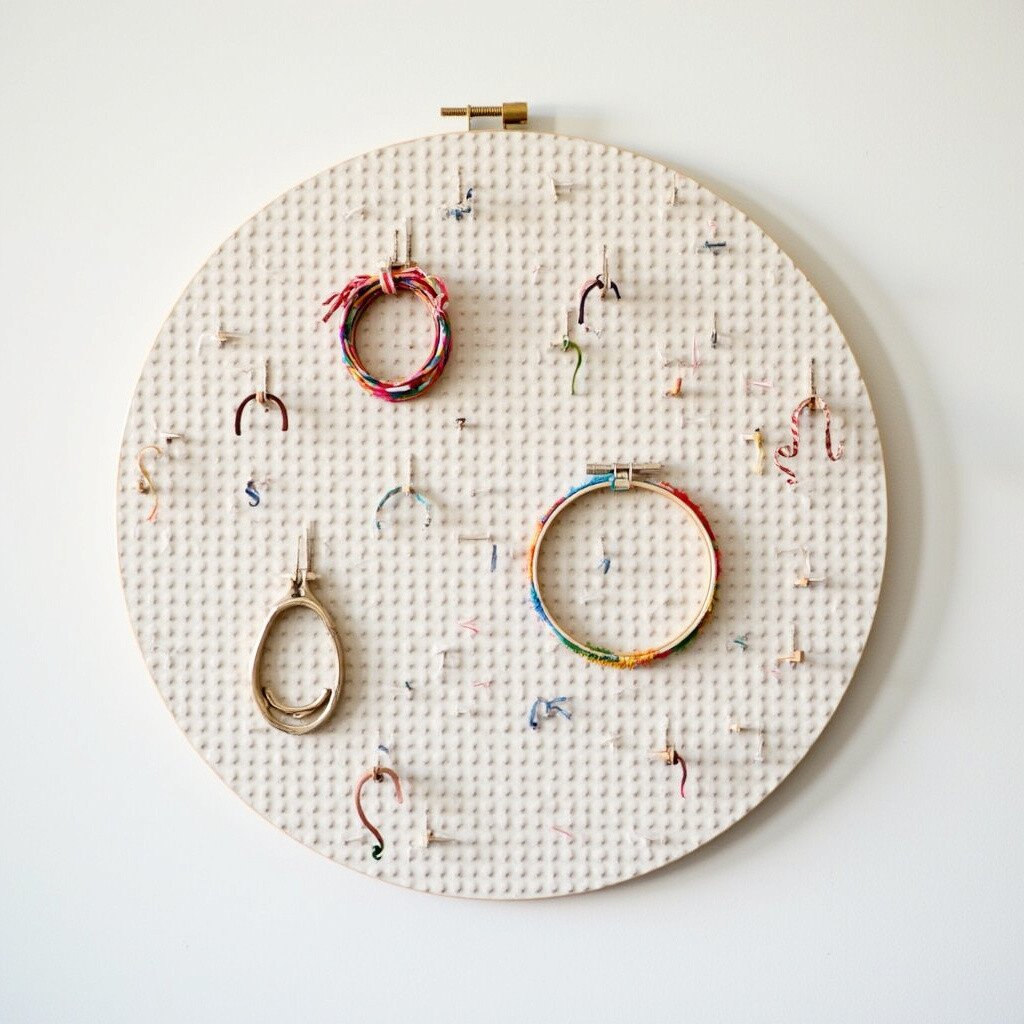
Using embroidery hoops on your pegboard offers a circular, artistic way to store ribbons. The hoops keep ribbons secure while adding a creative flair to your wall.
Simply wrap ribbons around the hoops, turning them into colorful circles of creativity. It’s a playful method that’s sure to catch the eye. Perfect for those who love to blend art with organization.
13. Ribbon Streamers

Create a cascade of ribbons by attaching them to the top of your pegboard and letting them hang down. This method creates a waterfall effect that’s both dramatic and practical.
It’s an ideal way to keep long ribbons wrinkle-free and ready for use. The flowing ribbons can also enhance the overall aesthetic of your craft room. It’s a stunning solution for those who love a touch of drama.
14. Pegboard Ribbon Chains
Form chains of ribbons by connecting them with small hooks or rings along your pegboard. This method turns your ribbons into a decorative chain that’s easy to access and rearrange.
Chains add movement and interest to your display, making your ribbons part of a dynamic art piece. It’s a creative way to keep your collection fresh and exciting. Personalize your chain with different hook styles.
15. Magnetic Ribbon Strips

Attach magnetic strips to your pegboard and use magnets to hold ribbons in place. This method is perfect for a clean, modern look that’s easy to update.
Magnetic strips allow for quick changes and adjustments, making it simple to reorganize or add new ribbons. It’s a versatile and sleek option for those who love a bit of innovation in their organization.