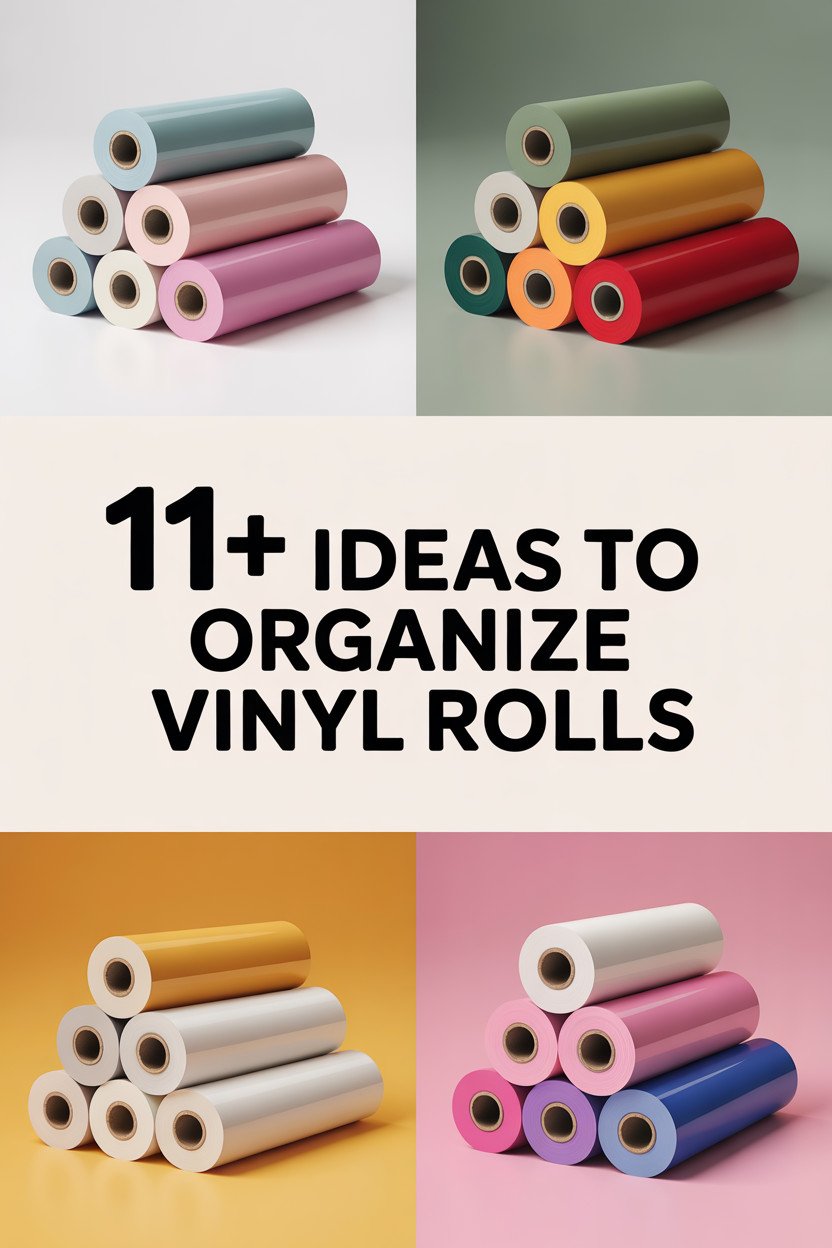
Vinyl rolls can be a vibrant addition to any craft room, but they often end up in a tangled mess. Imagine turning chaos into a delightful display that sparks creativity. Here are some ideas to make your vinyl storage not only practical but also a visual treat.
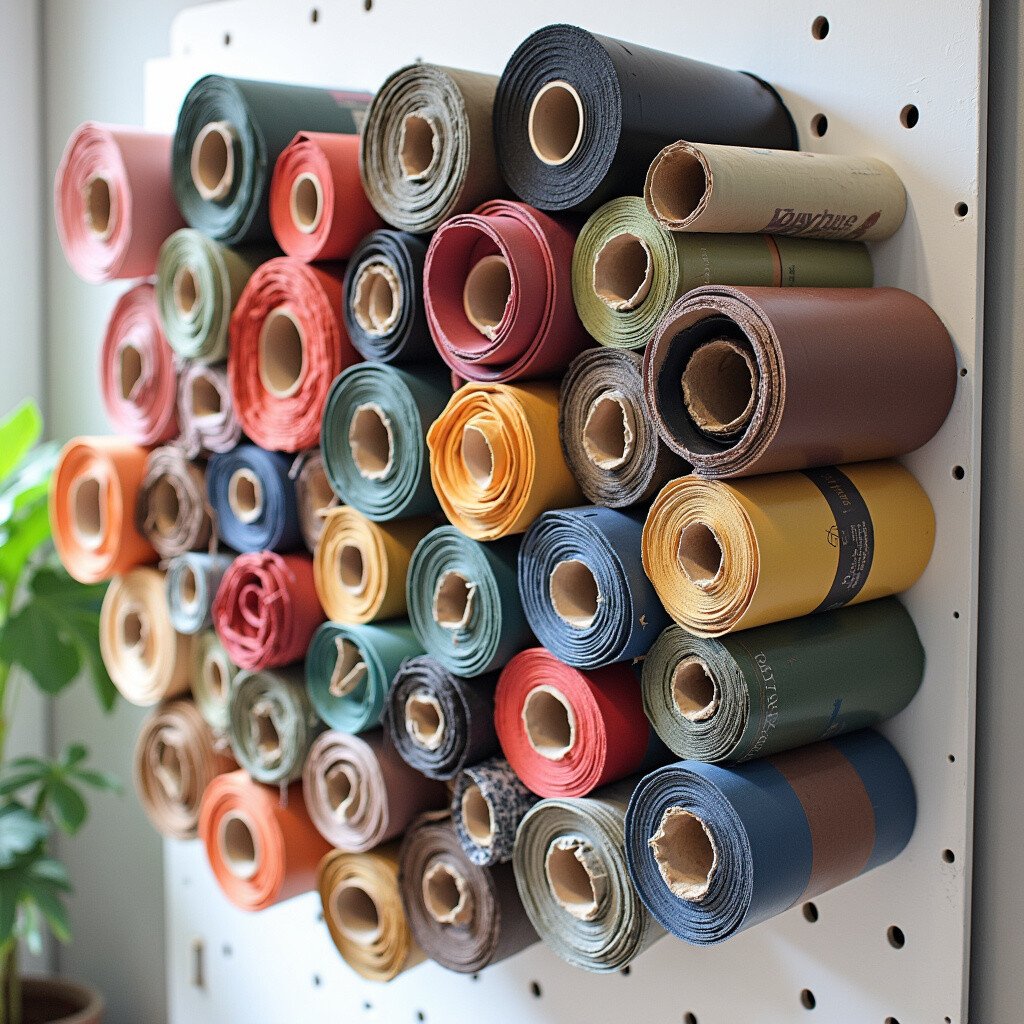
1. Rainbow Rows
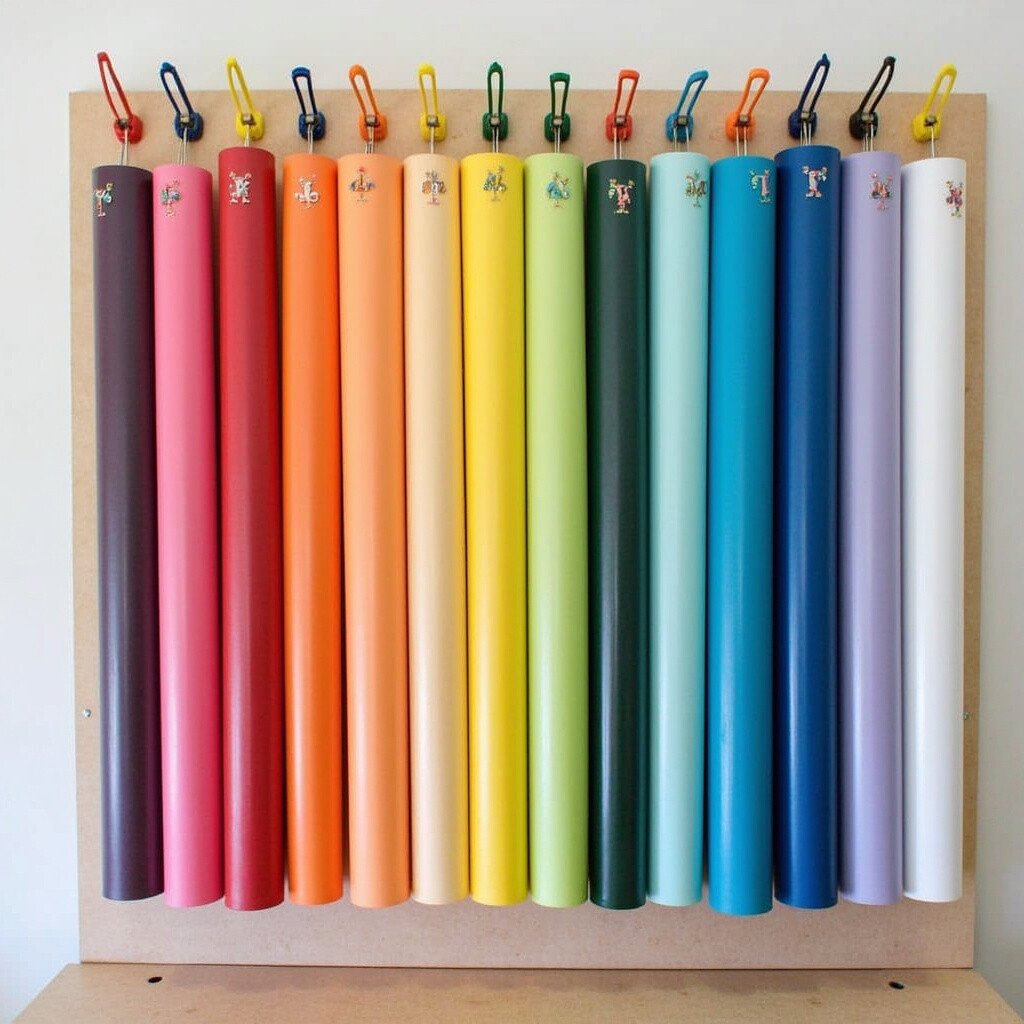
Organize your vinyl rolls in a rainbow sequence on the pegboard, creating a stunning visual effect. This not only makes your craft area look beautiful but also helps you quickly find the color you need. Use colorful pegs to add an extra pop of color.
Choose bright or pastel rolls for a different vibe. Label each section with color names using small stickers for an added touch of personalization. This method is budget-friendly, especially if you already have an assortment of vinyl colors.
2. Pegboard Pockets
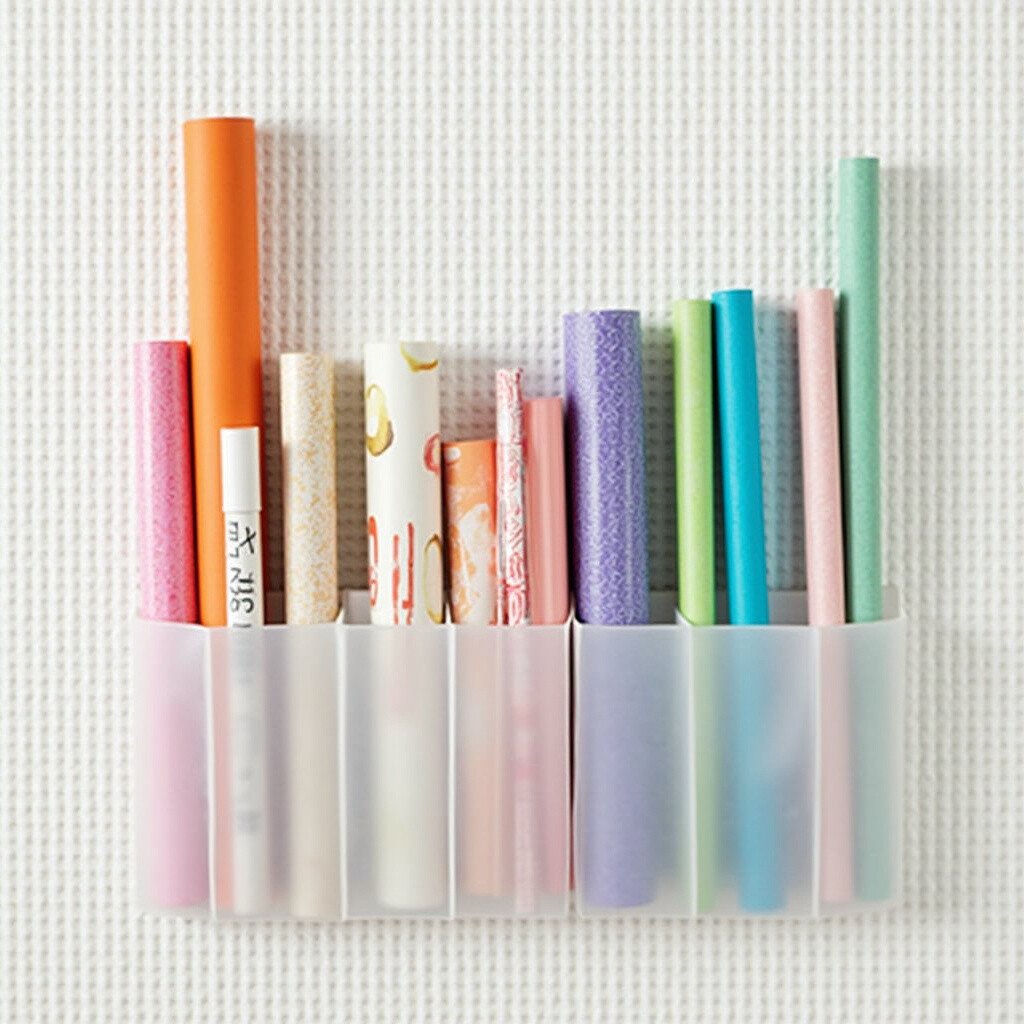
Try using clear pockets attached to your pegboard to hold each vinyl roll. This keeps the rolls neatly in place while still allowing you to see all your colors at a glance. It’s like having a mini gallery of your vinyl collection!
Pockets can be made from inexpensive clear plastic or repurposed from old plastic files. They add a sleek and modern look to your craft space. You can even decorate the pockets with washi tape for a personalized touch.
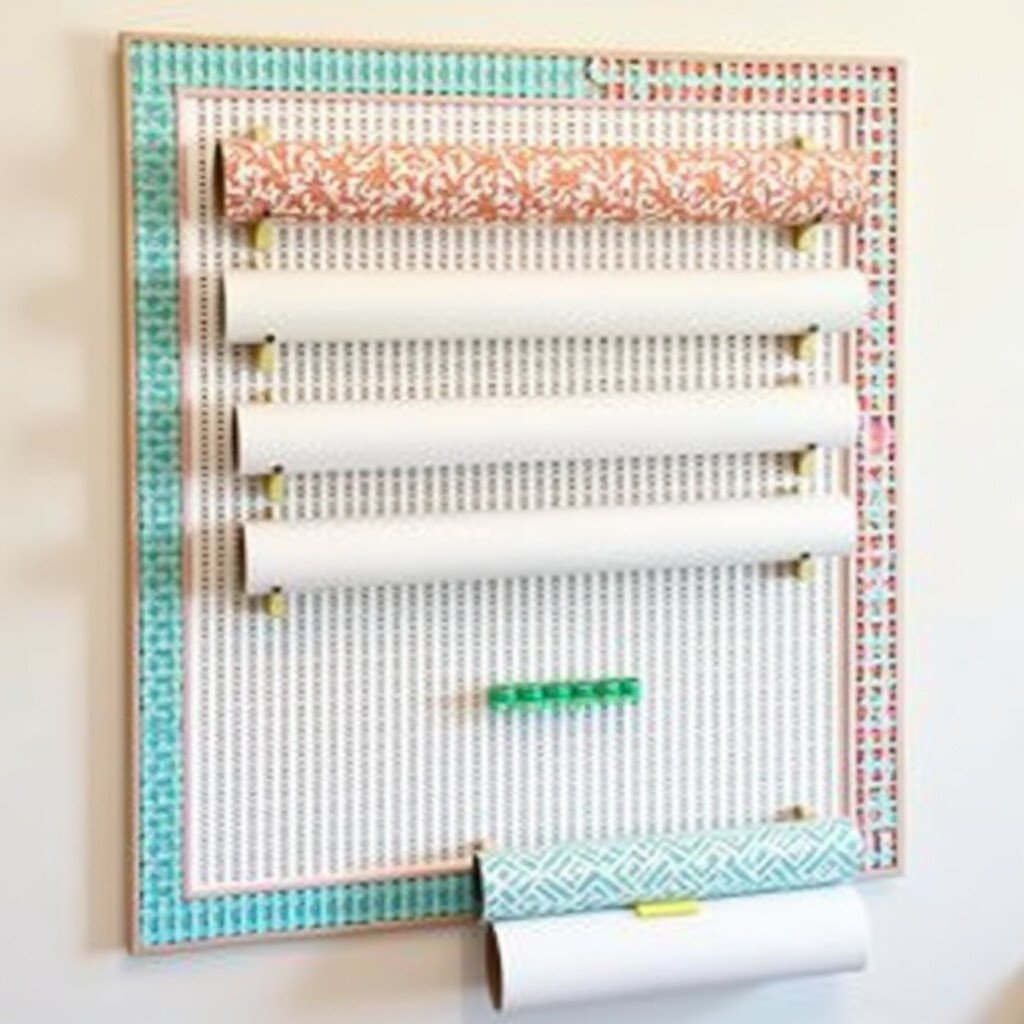
3. Floating Shelves
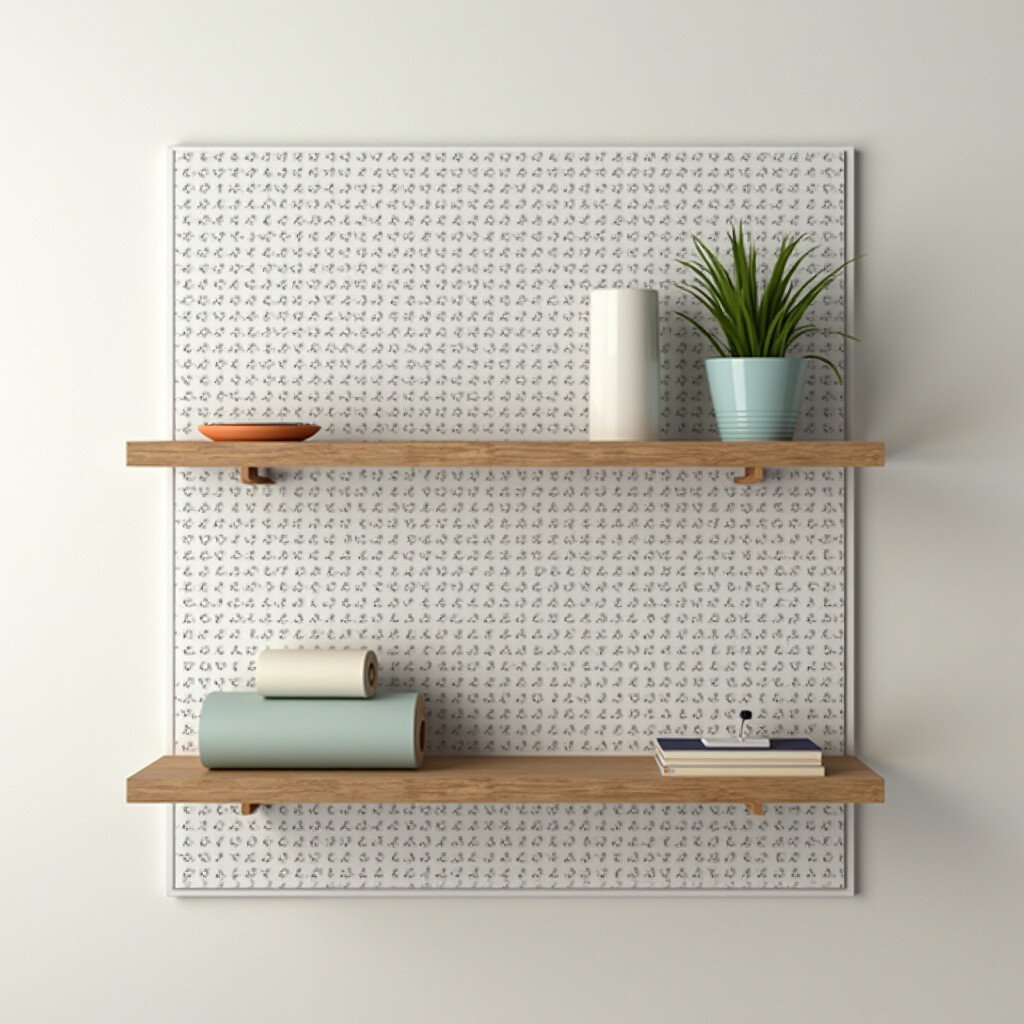
Install small floating shelves on your pegboard to hold vinyl rolls. This method adds depth and dimension to your wall, creating a layered effect. It’s perfect for those who love a bit of 3D art in their space.
Choose shelves that match your room’s decor for a cohesive look. These can be found at craft stores or made from lightweight wood scraps. Stack rolls vertically or horizontally for variety.
4. Hook and Hang
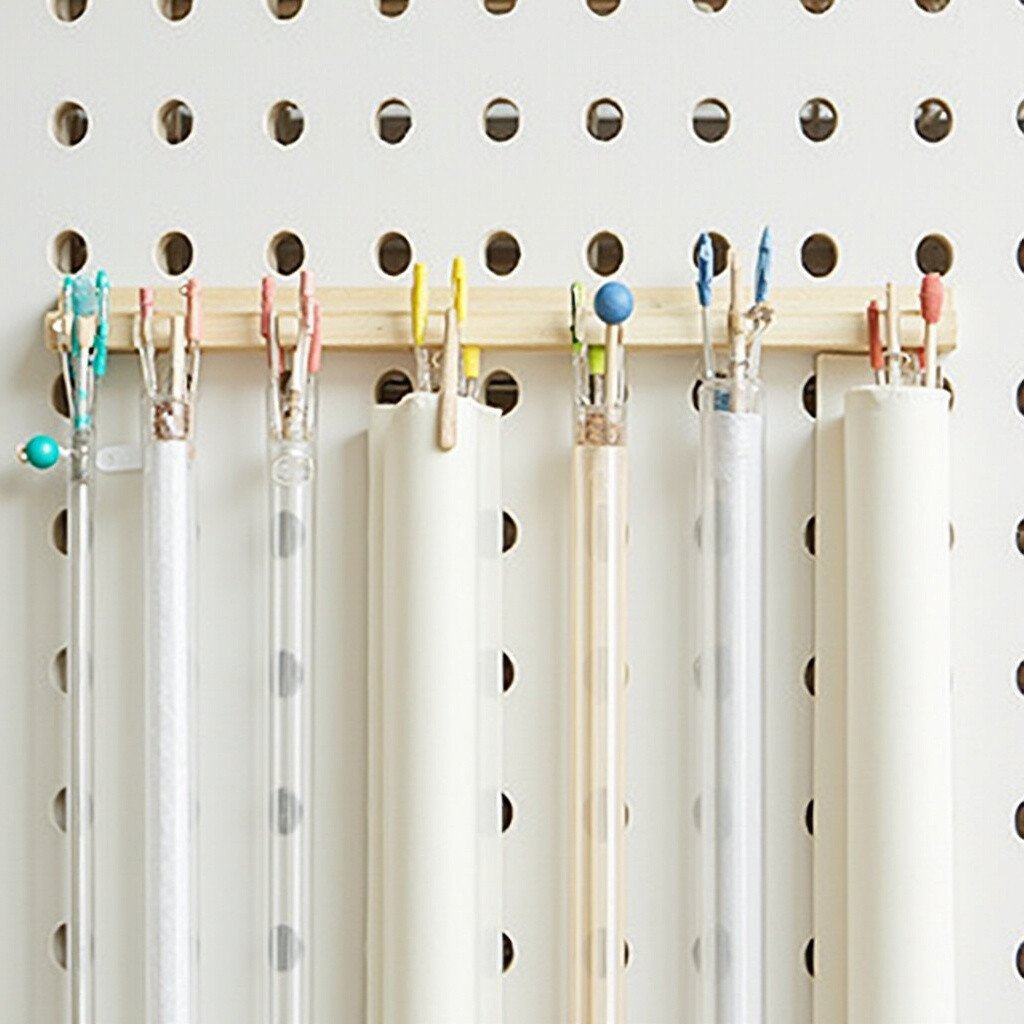
Use hooks to hang vinyl rolls by threading a dowel through the center of each roll. This method makes it easy to remove and replace rolls as needed. It’s also a great way to maximize space on your pegboard.
Dowels can be painted to match or contrast with the pegboard for added flair. This setup is super cost-effective since you only need basic hooks and dowels. It’s perfect for crafters who like to switch things up often.
5. Color Block Sections

Divide your pegboard into color zones and place all similar hues together. This creates a chic, organized look that’s both functional and aesthetically pleasing. It’s like having a personal color chart right in front of you.
Use washi tape to demarcate sections, adding a fun and unique touch. This idea is great for those who love symmetry and order. Plus, it helps in quickly locating the exact shade you want to use.
6. Vertical Stacking
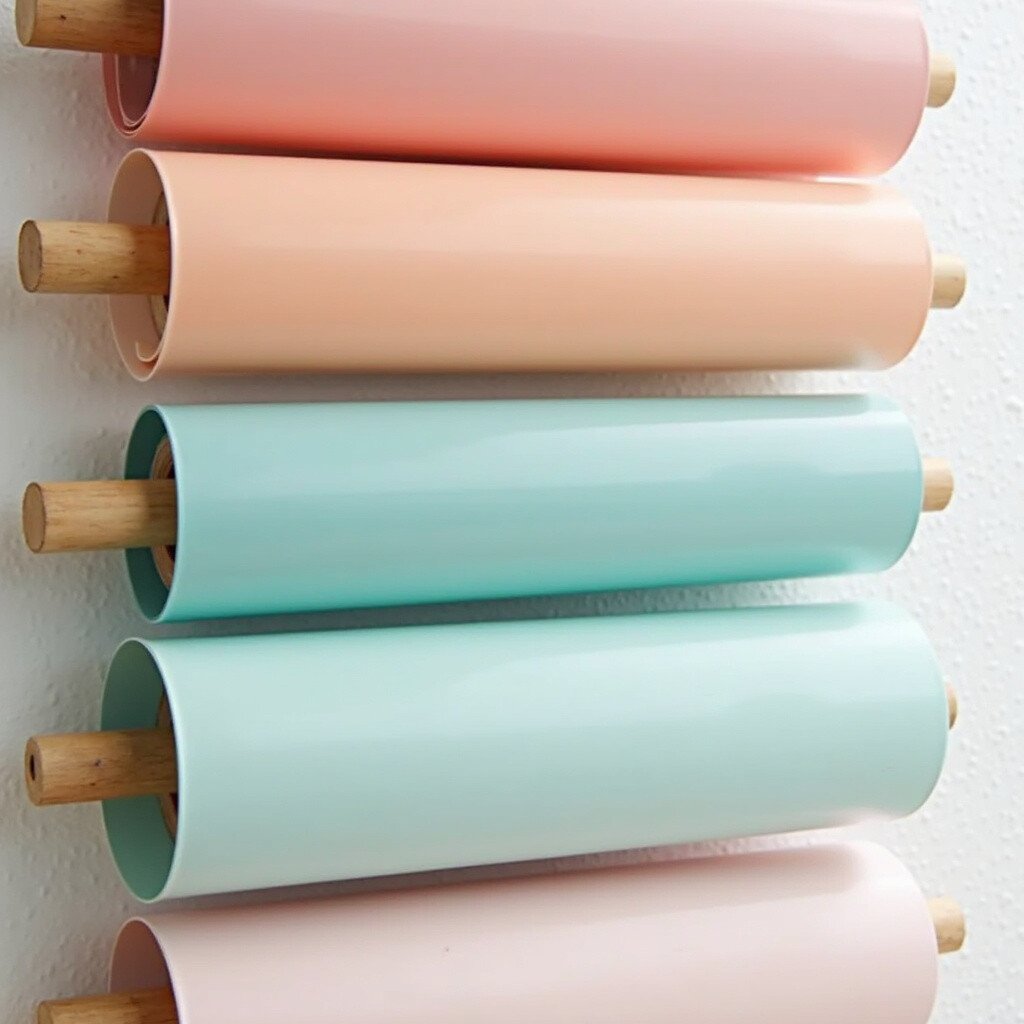
For a minimalist approach, stack vinyl rolls vertically one above the other using long pegs. This method saves space and keeps your pegboard looking clean and uncluttered. It’s ideal for small craft rooms.
Long pegs are easy to find and affordable. This system also allows you to add more rolls as your collection grows. Keeping the rolls in a single line helps in maintaining order effortlessly.
7. Pegboard Baskets
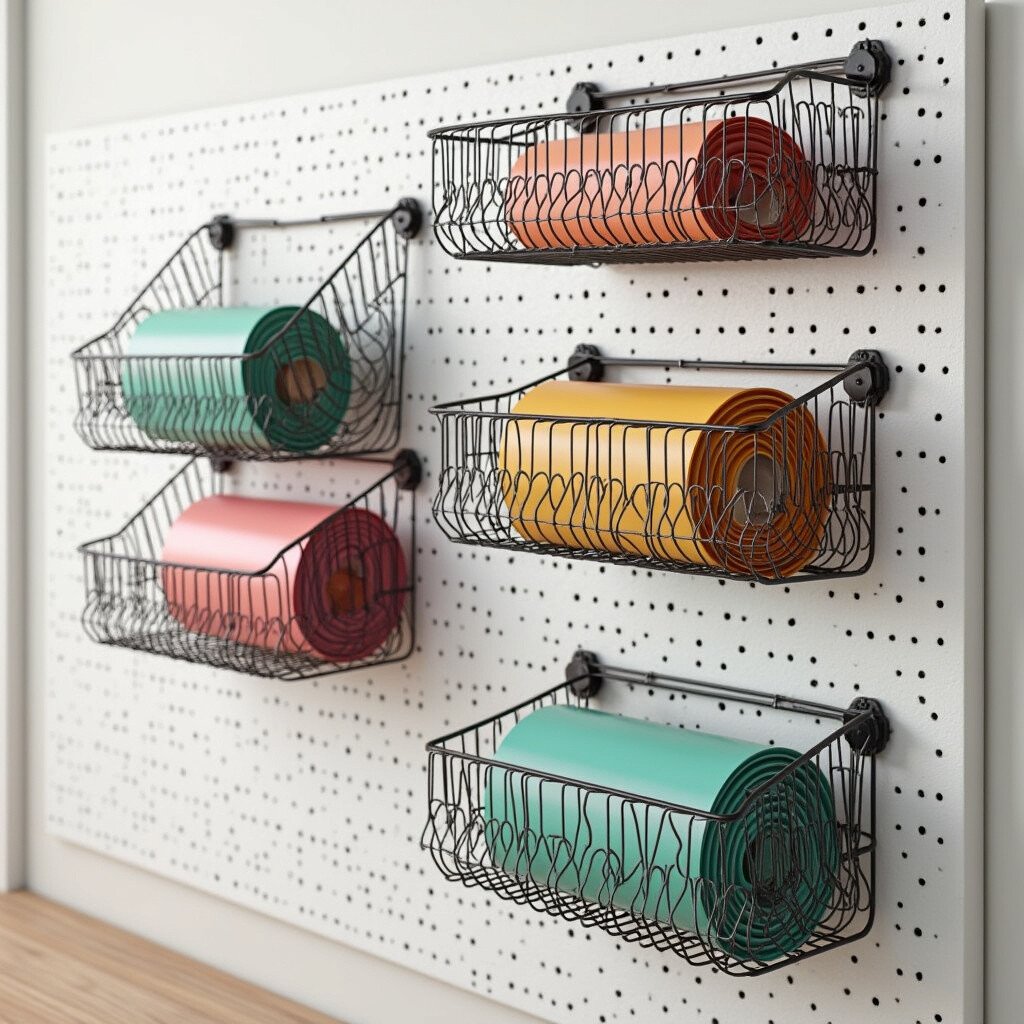
Attach wire baskets to your pegboard to hold groups of vinyl rolls. This makes it easy to grab a bunch of rolls at once without having to remove them individually. It’s practical and adds a rustic charm to your space.
Wire baskets can be spray-painted in fun colors to match your decor. This approach is perfect for those with a large vinyl collection. It’s also a great way to incorporate industrial elements into your craft room.
8. Clip and Display
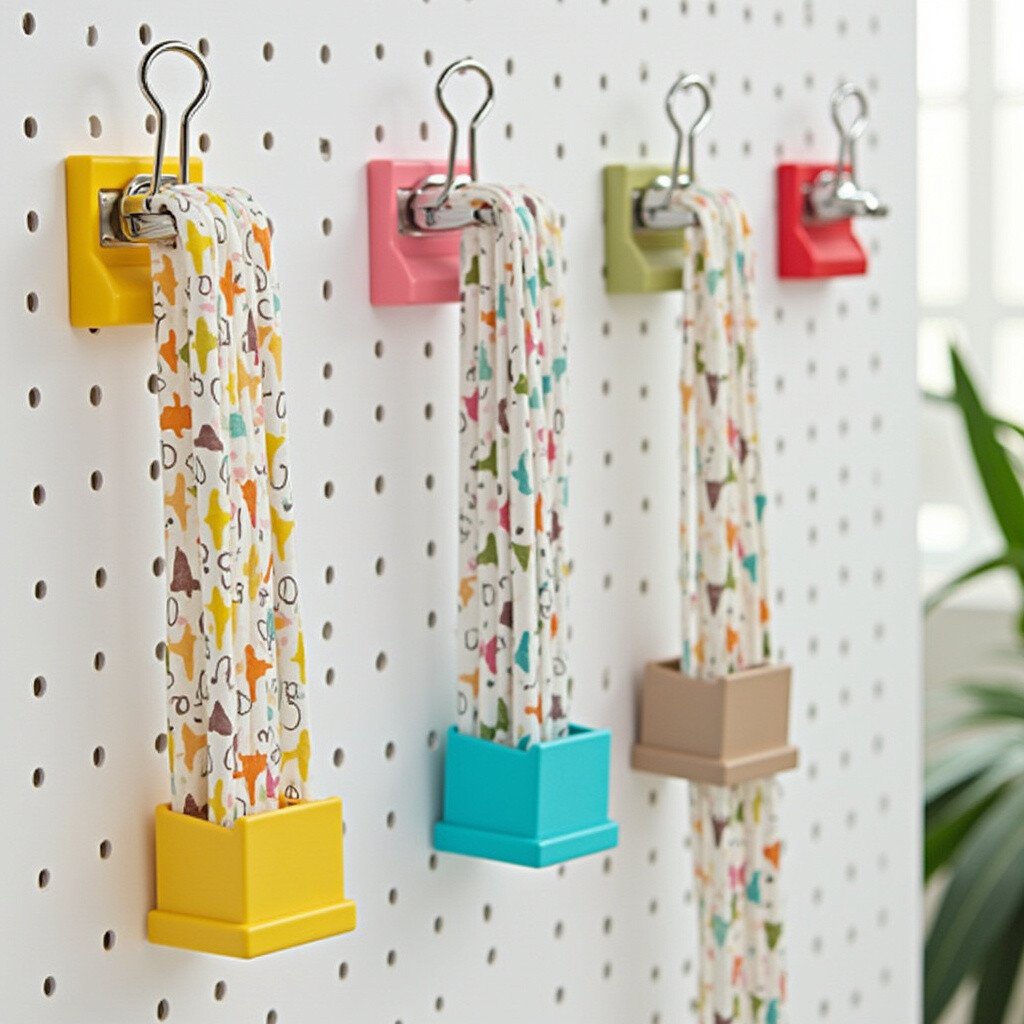
Use large binder clips to hang vinyl rolls. Attach the clips to hooks on the pegboard, allowing rolls to dangle freely. It’s a quirky, creative way to organize and display your collection.
This method is very budget-friendly and easy to rearrange. Clips come in various colors and sizes, so you can mix and match for a playful look. It’s a fun way to showcase your personality through your craft storage.
9. Spiral Display
Arrange your rolls in a spiral pattern on the pegboard for an eye-catching display. This unique arrangement turns your vinyl storage into an art piece. It’s perfect for those who love a bit of whimsy in their decor.
Start with a central color and spiral outwards with complementary shades. This method is great for showcasing special edition or patterned vinyl. It turns a basic storage solution into a conversation starter.
10. Pegboard Palettes

Group vinyl rolls to create color palettes that inspire your projects. This method not only keeps your rolls organized but also provides inspiration for your next craft. It’s like having a mood board right on your wall.
Change palettes according to seasons or upcoming holidays for a fresh look. This idea is perfect for those who love planning their projects in advance. It’s a dynamic way to keep your creativity flowing.
11. Custom Pegboard Pegs
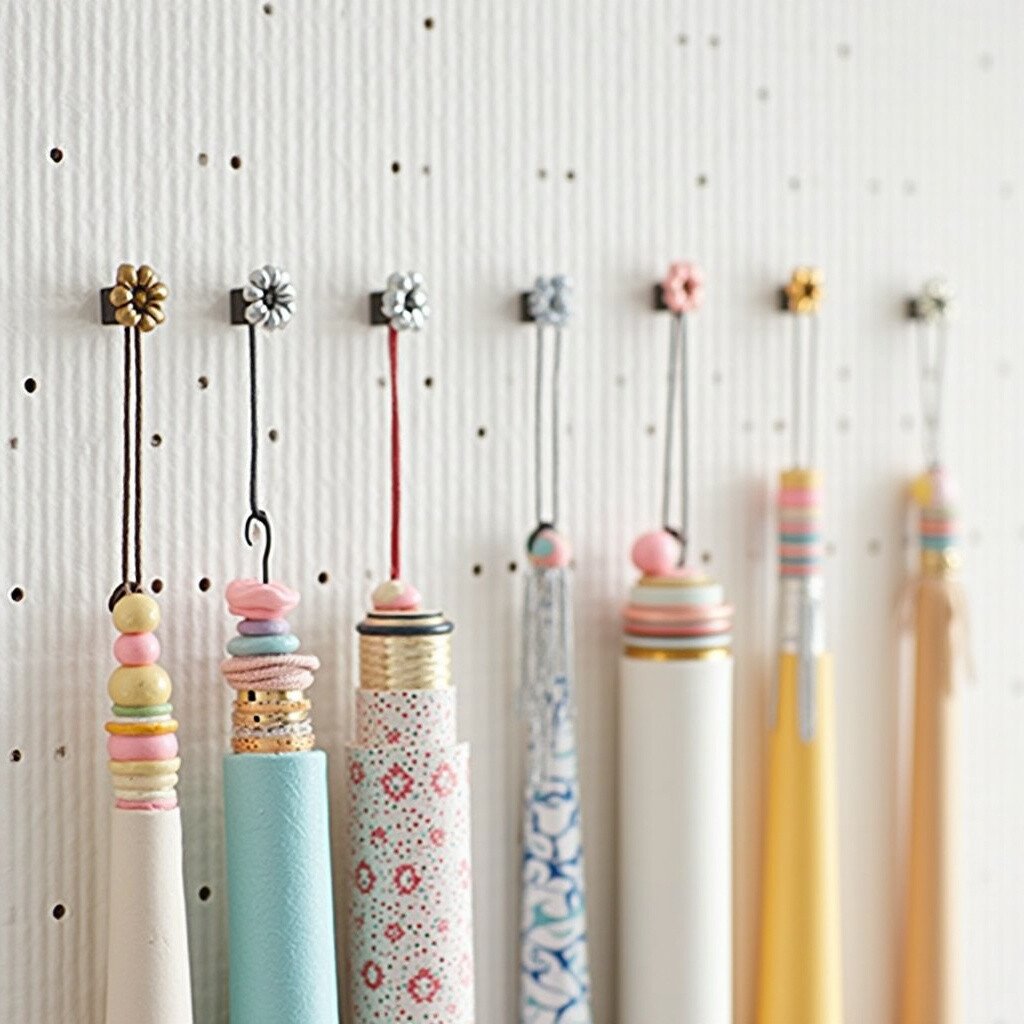
Create custom pegs with decorative tops to hang your vinyl rolls. This adds a personal touch and makes your storage solution truly one-of-a-kind. It’s a small detail that can make a big impact.
Paint the peg tops or add decorative elements like beads or charms. This DIY approach is perfect for those who love to personalize their space. It’s an easy way to incorporate your style into your craft room.
12. Pegboard Borders
Frame your pegboard with colorful borders to create a defined space for your vinyl rolls. This adds structure and a pop of color to your wall. It’s a neat way to make your storage area stand out.
Use materials like washi tape, ribbon, or painted wood strips for the border. This idea is great for those who want to add a finishing touch to their craft room decor. It’s a simple yet effective way to highlight your vinyl collection.