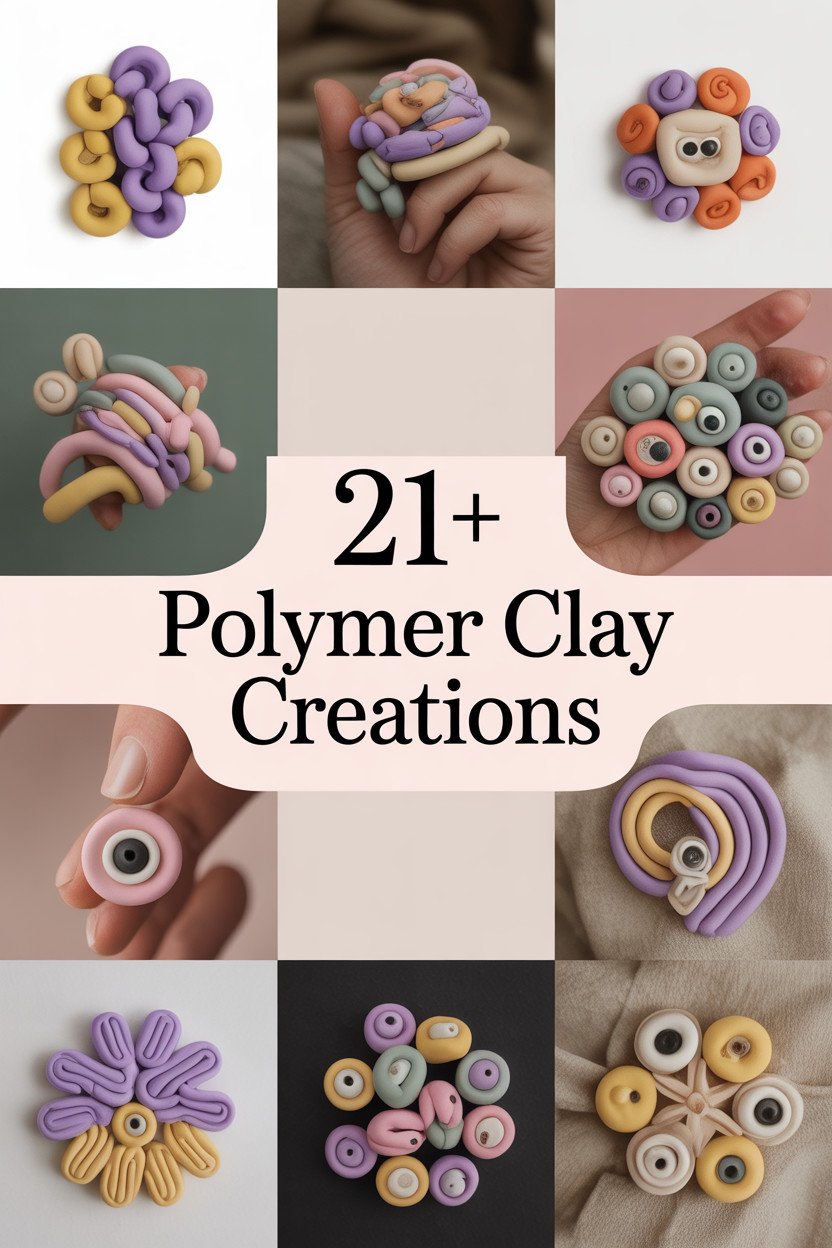
Polymer clay is like magic in your hands. It can be shaped, twisted, and turned into the most beautiful creations. Ready to be amazed?
1. Cute Animal Planters
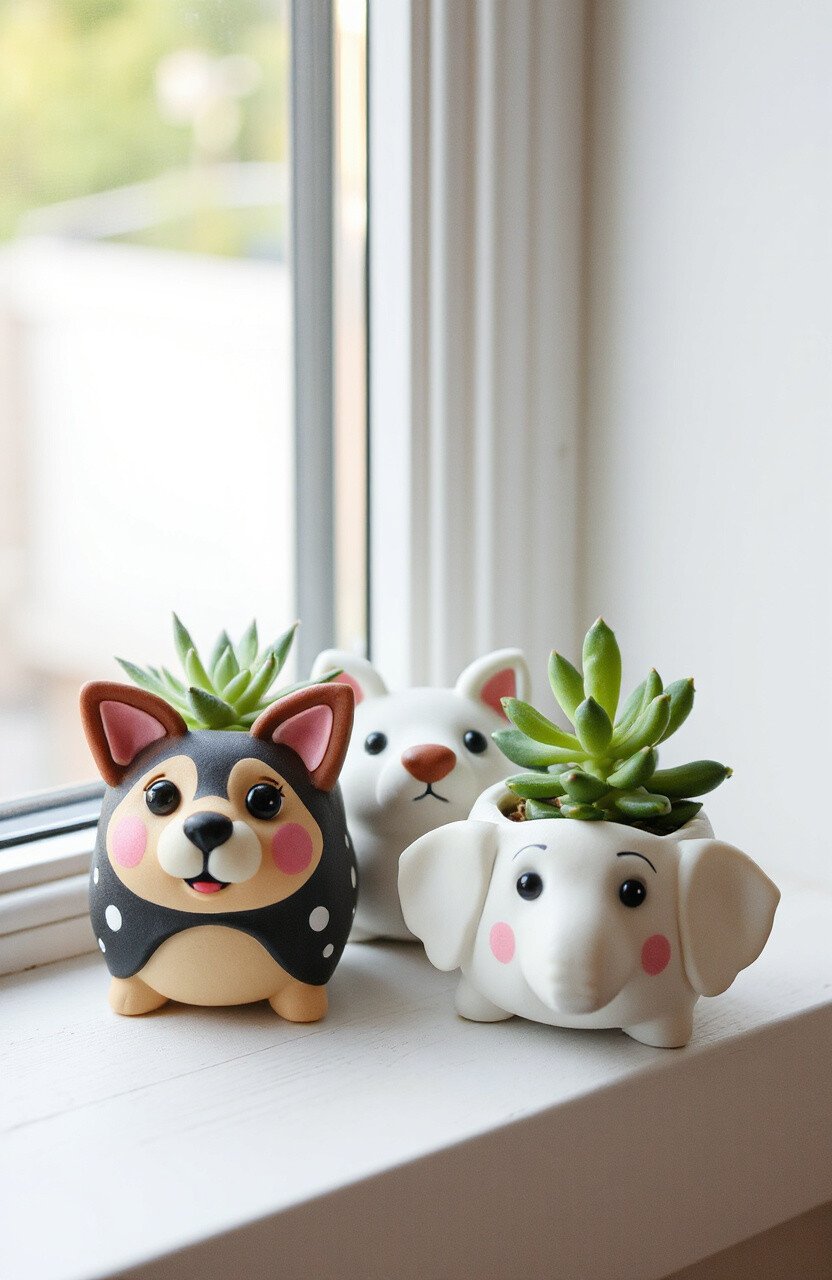
Imagine tiny little animal faces holding your favorite plants. These planters can be shaped into adorable cats, dogs, or even little elephants. They’re not just functional but also an eye-catching decoration for your home. A small bag of clay and some basic tools are all you need, making this a cost-effective project.
Personalize these planters with different colors and patterns. Try adding polka dots or stripes! These planters are great for succulents and can brighten any windowsill. It’s a perfect project for those who love gardening and cute things.
2. Whimsical Fairy Doors

Create a magical world with mini fairy doors. Place them at the base of trees or in your garden to invite fairies to visit. These tiny doors are full of personality and charm.
Use bright colors and add tiny details like handles or windows. This creation is a delightful way to engage kids in storytelling and imaginative play. Plus, they make for an enchanting garden decoration.
3. Statement Necklaces
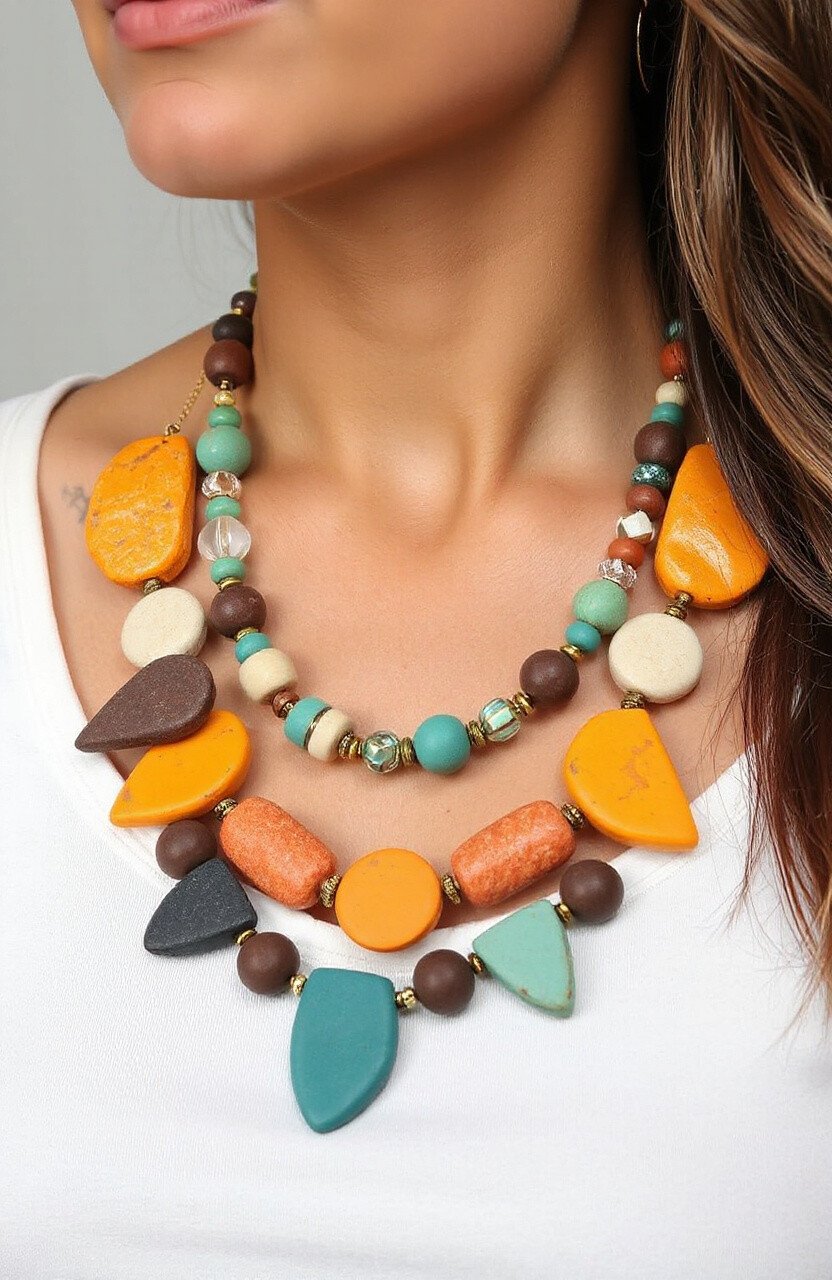
Be the star of the show with a bold statement necklace. Polymer clay can be molded into beads of different shapes and sizes. Mix various colors to make a necklace that stands out.
These necklaces are lightweight, making them comfortable to wear all day. You can create geometric designs or go wild with abstract patterns. It’s a fantastic way to express your personality and style.
4. Personalized Keychains
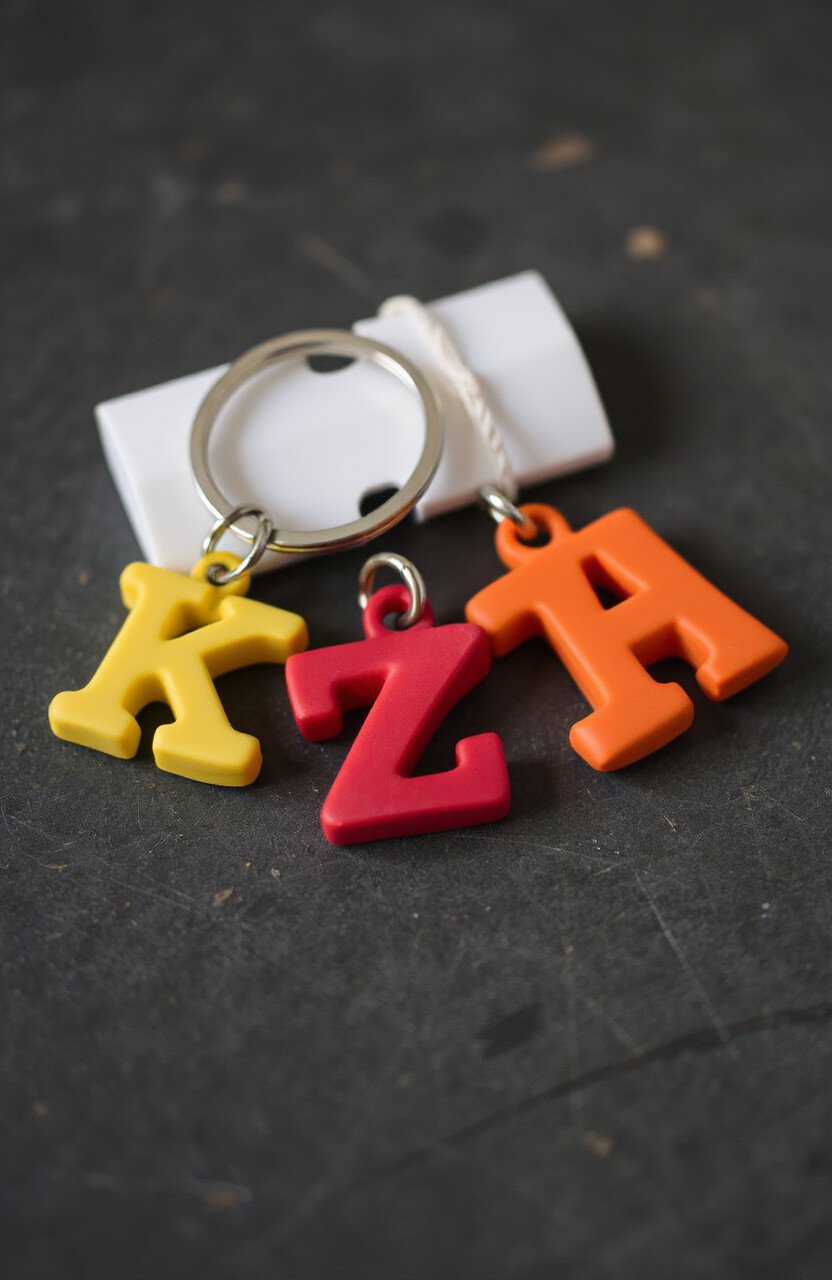
Never lose your keys again with a personalized keychain. Mold your initials or favorite shapes using polymer clay. It’s a practical yet stylish accessory.
These keychains make for great gifts. Customize them with the recipient’s favorite colors or symbols for a personal touch. Affordable and easy to craft, they’re perfect for quick, thoughtful presents.
5. Miniature Food Charms
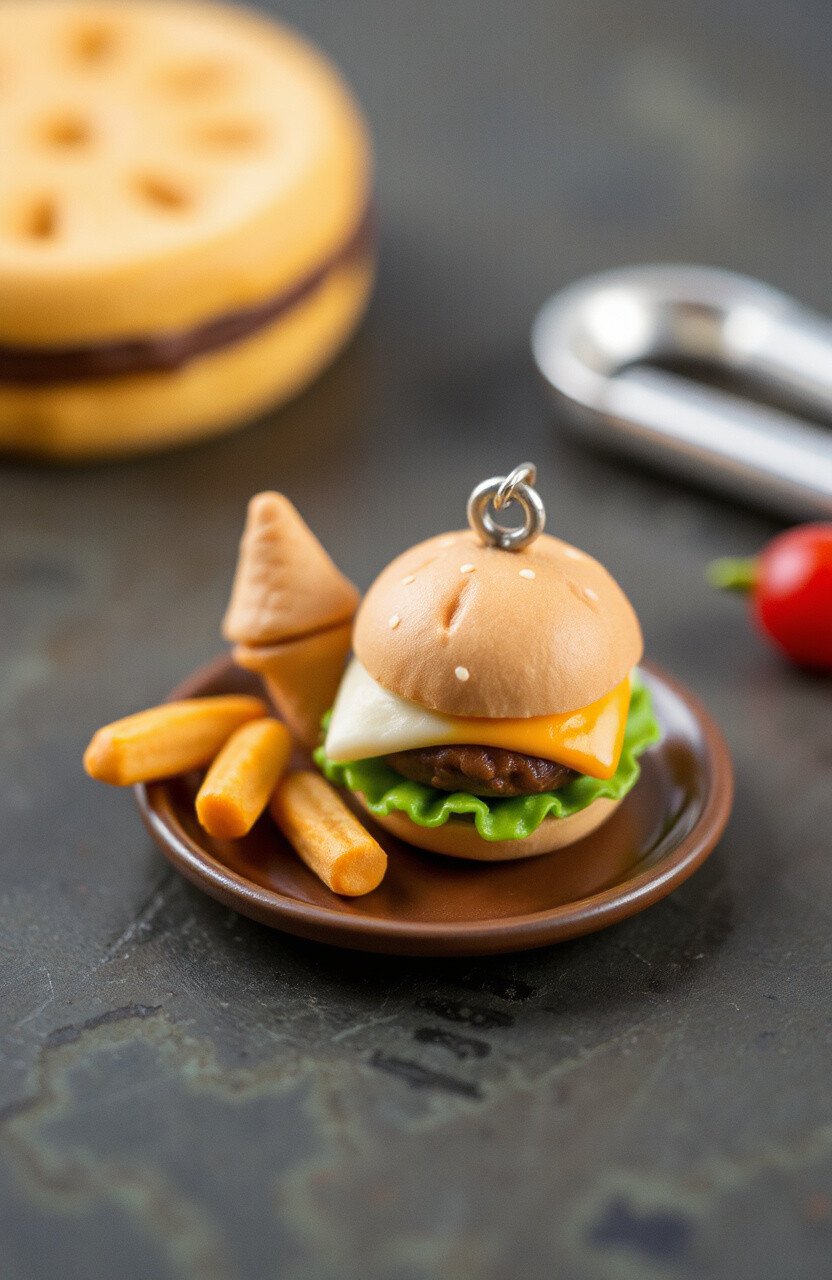
Ever wanted a tiny burger or a mini ice cream cone? Miniature food charms are cute and fun to create. They look almost good enough to eat!
These charms can be used for jewelry, phone accessories, or just as collectibles. Experiment with different food items and serve them on a tiny platter for added fun. They’re especially trendy among food lovers.
6. Elegant Candle Holders

Set the mood with elegant candle holders. Use polymer clay to create intricate designs and patterns. These holders can transform any dinner table into a romantic setting.
Choose neutral colors for a classic look, or go vibrant for a modern twist. They’re not only beautiful but also functional, keeping candles secure and adding a touch of sophistication to your home.
7. Decorative Bowls
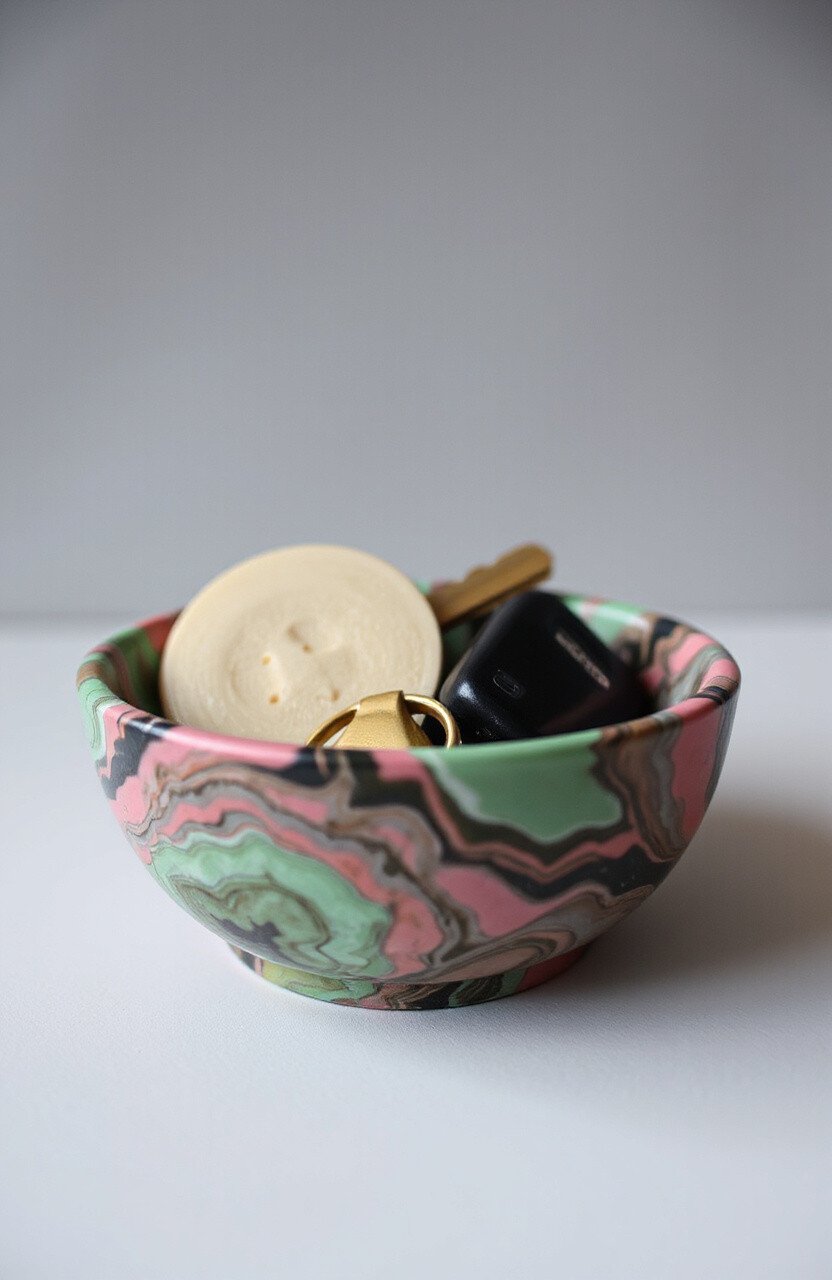
Keep your trinkets and keys in a stylish decorative bowl. These bowls can be crafted in different shapes and sizes to fit your needs. They’re perfect for organizing small items.
Use marbled clay for a unique design. These bowls are both practical and decorative, making them a great addition to your living space. They add a splash of color and style to any room.
8. Playful Magnets
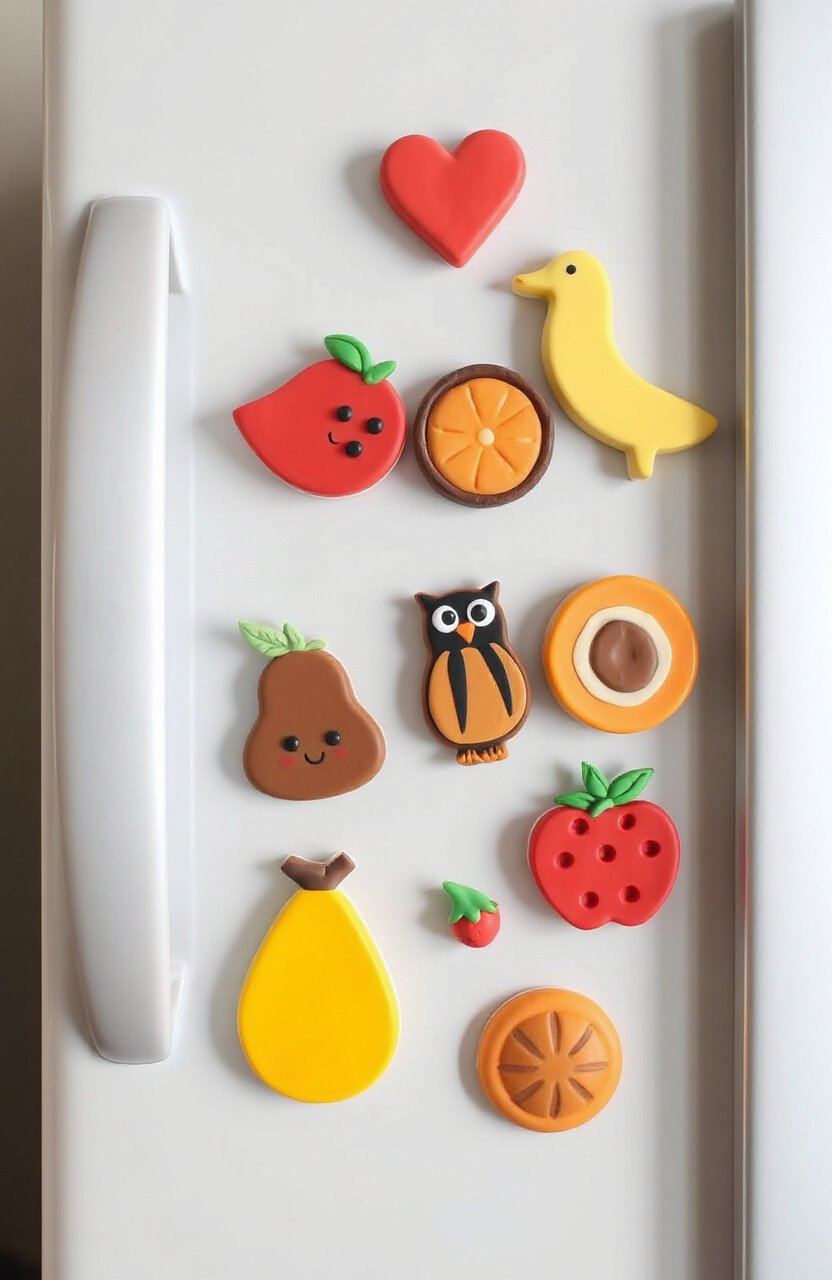
Brighten up your fridge with playful magnets. Mold fun shapes like fruits, animals, or abstract designs. They’re sure to make you smile every time you see them.
These magnets are easy to make and can be personalized with your favorite colors. They’re a quick project that adds a touch of joy to your kitchen. Plus, they make excellent gifts for friends and family.
9. Intricate Sculptures
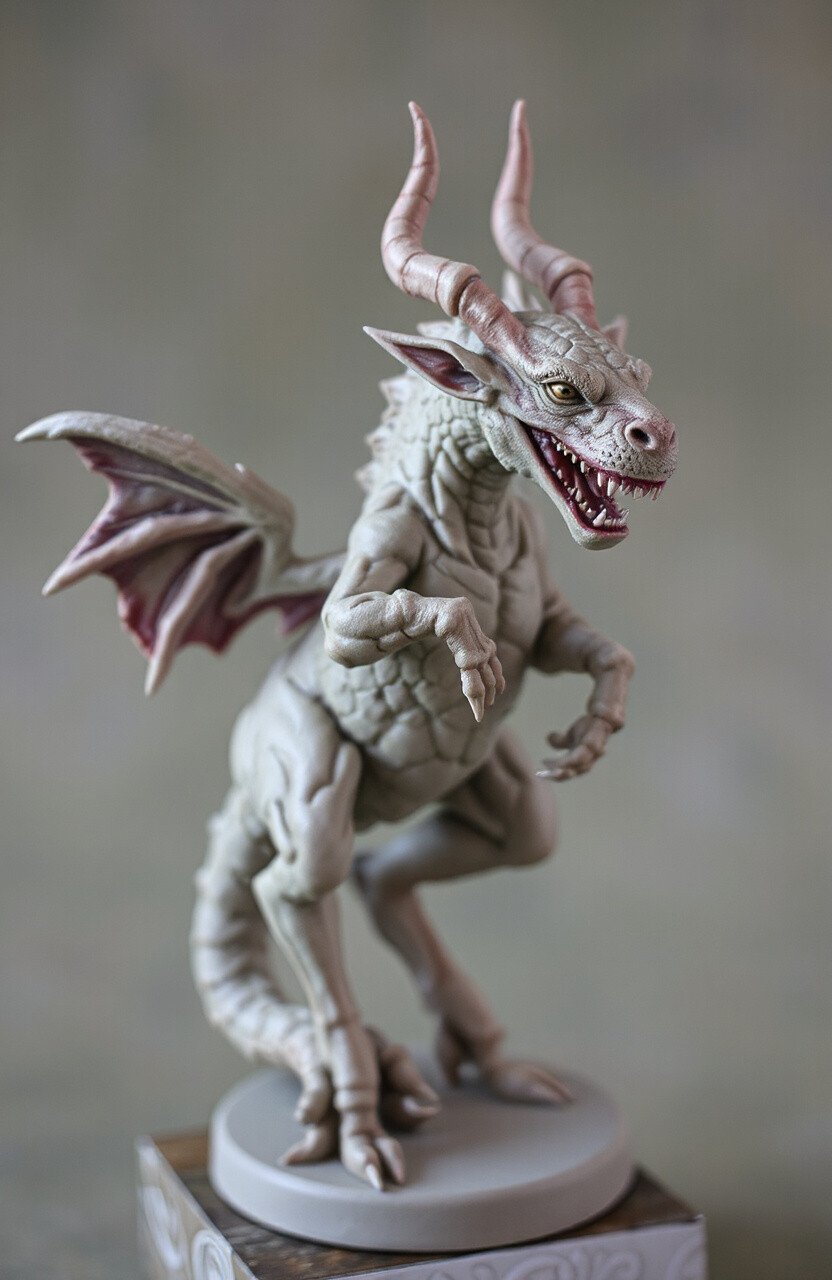
Unleash your inner artist with intricate sculptures. From mythical creatures to abstract forms, the possibilities are endless. Sculpting with polymer clay allows for detailed and expressive designs.
These sculptures can be painted or left in their natural clay color for a classic look. They’re a wonderful way to showcase your artistic skills and add a unique piece to your collection.
10. Charming Earrings
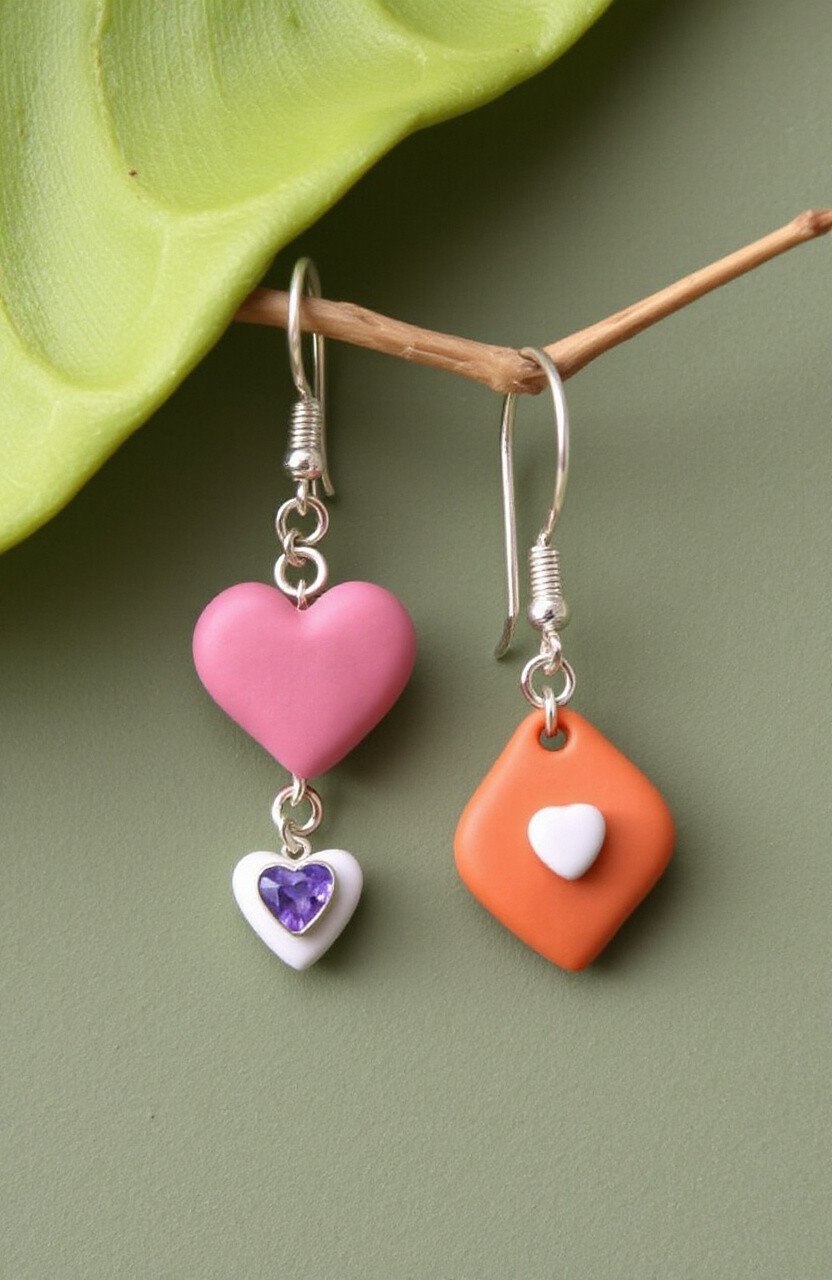
Craft charming earrings to match any outfit. Use polymer clay to form cute shapes like hearts, stars, or even tiny animals. Lightweight and versatile, they’re perfect for everyday wear.
Mix and match colors to create a set for every occasion. These earrings are easy to personalize, making them a favorite project for fashion enthusiasts. They’re elegant, fun, and always in trend.
11. Personalized Phone Cases
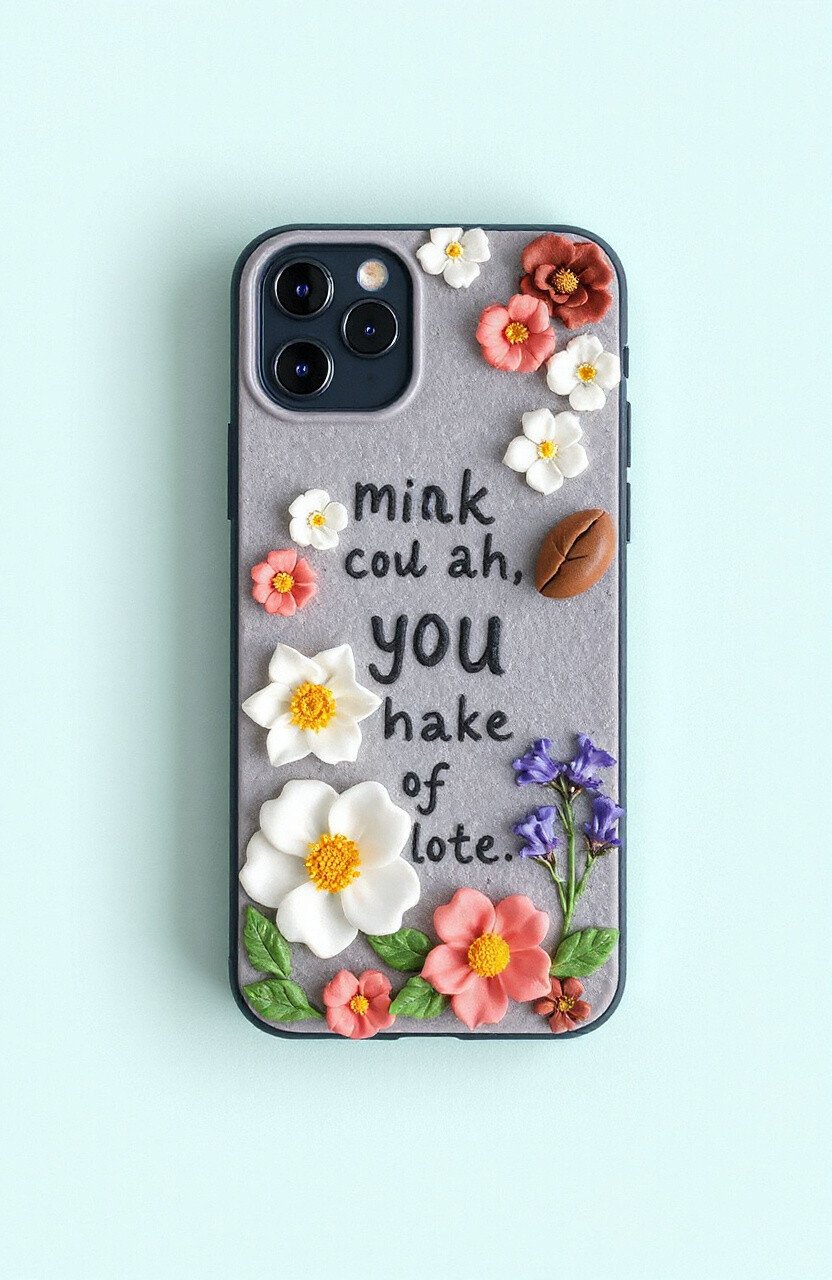
Give your phone a makeover with a personalized case. Mold clay into designs that reflect your style, like flowers, abstract patterns, or even your favorite quotes.
These cases are durable and can protect your phone while looking fabulous. It’s a fun way to carry a piece of art with you wherever you go. Plus, it’s a unique accessory that stands out.
12. Festive Ornaments
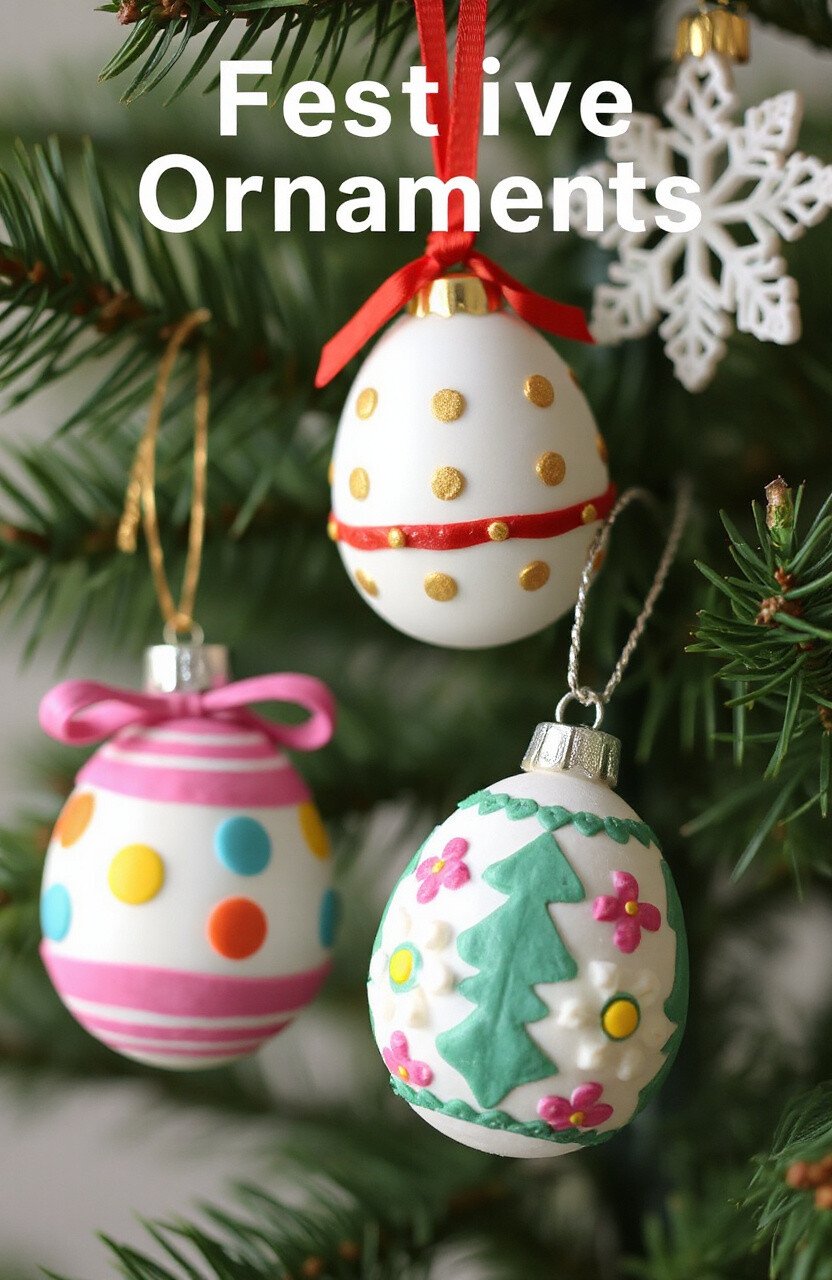
Celebrate any season with festive ornaments. Whether it’s Christmas trees or Easter eggs, polymer clay can bring your holiday decorations to life.
Add glitter for extra sparkle or paint them in cheerful colors. These ornaments are a delightful way to bring joy and festivity into your home. They’re perfect for hanging on trees or decorating a mantel.
13. Stylish Brooches
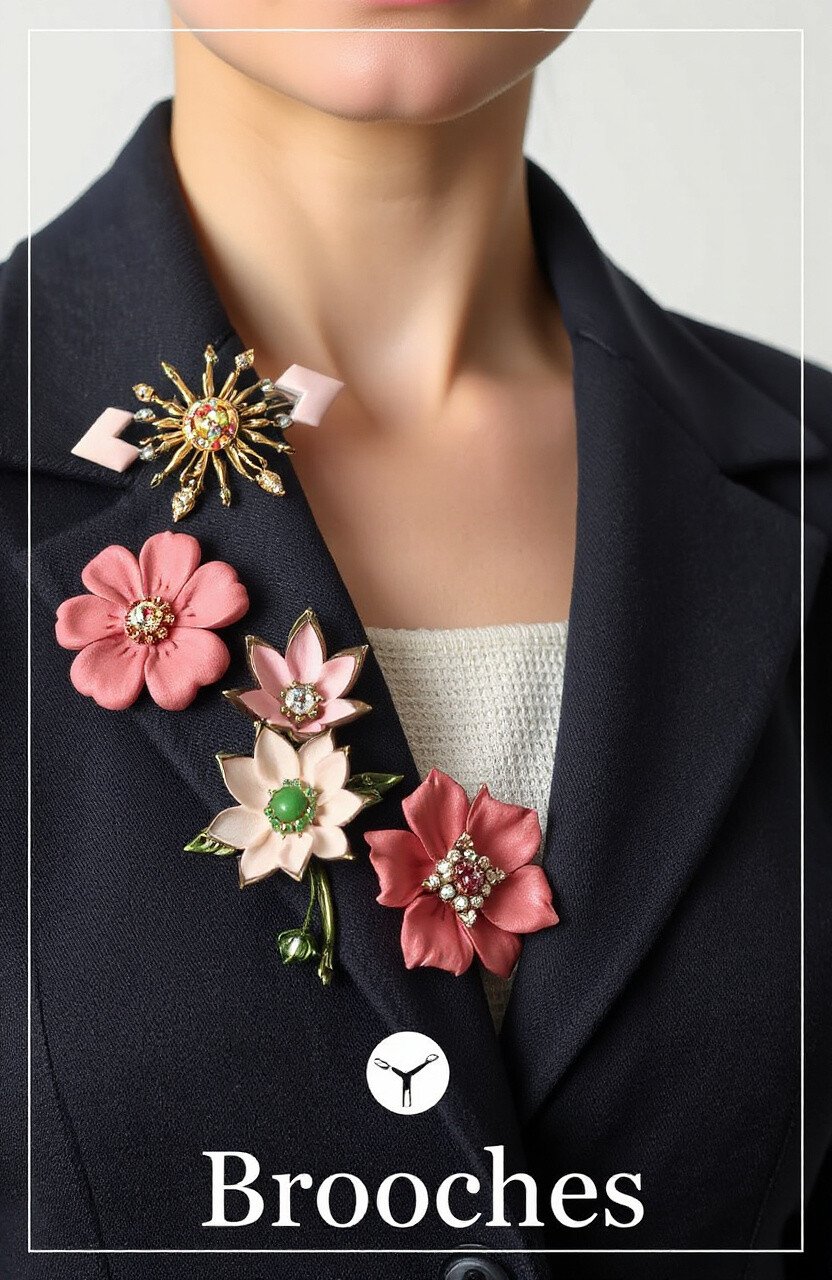
Make a fashion statement with a stylish brooch. Create floral designs, geometric patterns, or whimsical shapes to pin on your favorite jacket.
Brooches can be both functional and decorative. They’re a sophisticated way to accessorize and express your individual style. These pieces are timeless and always in vogue.
14. Cute Pencil Toppers
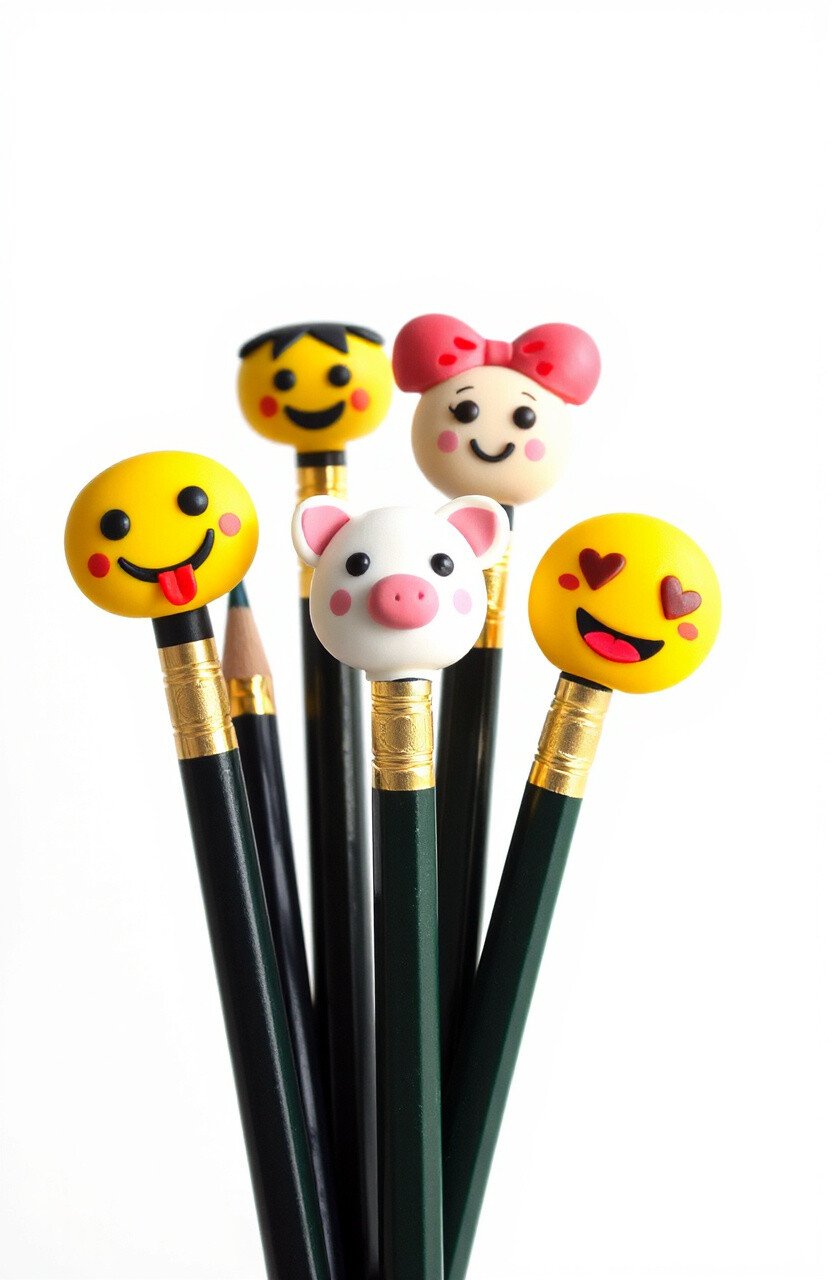
Turn ordinary pencils into something special with cute toppers. Mold animals, emojis, or any fun shape that inspires you.
These toppers are a hit in classrooms and make studying more enjoyable. They’re easy to make and can be customized with bright colors. It’s a fun way to personalize your school supplies.
15. Elegant Bookmarks
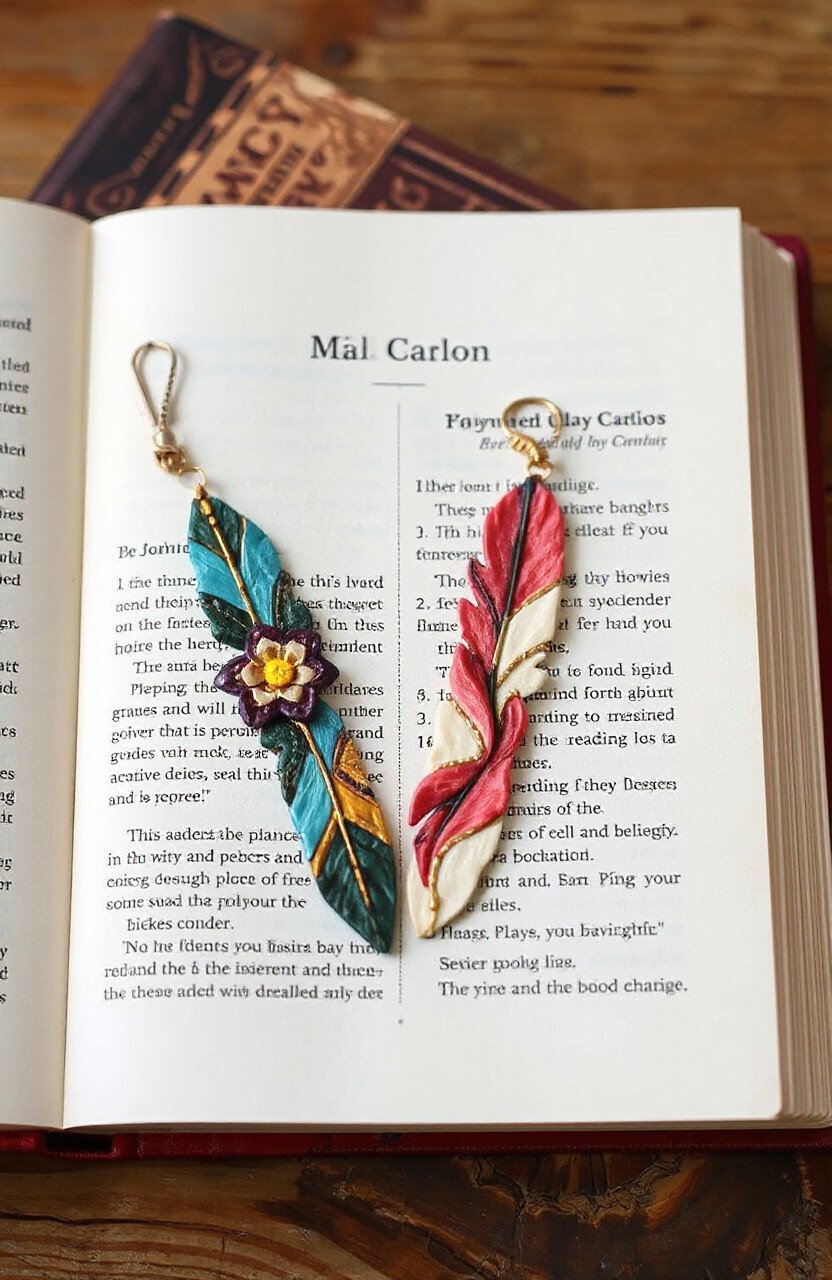
Keep your place in style with an elegant bookmark. Create designs like feathers, flowers, or abstract shapes. These bookmarks make reading even more enjoyable.
They’re a thoughtful gift for book lovers and can be personalized with initials or favorite colors. Lightweight and durable, they’re perfect for keeping your books neat and organized.
16. Decorative Wall Art
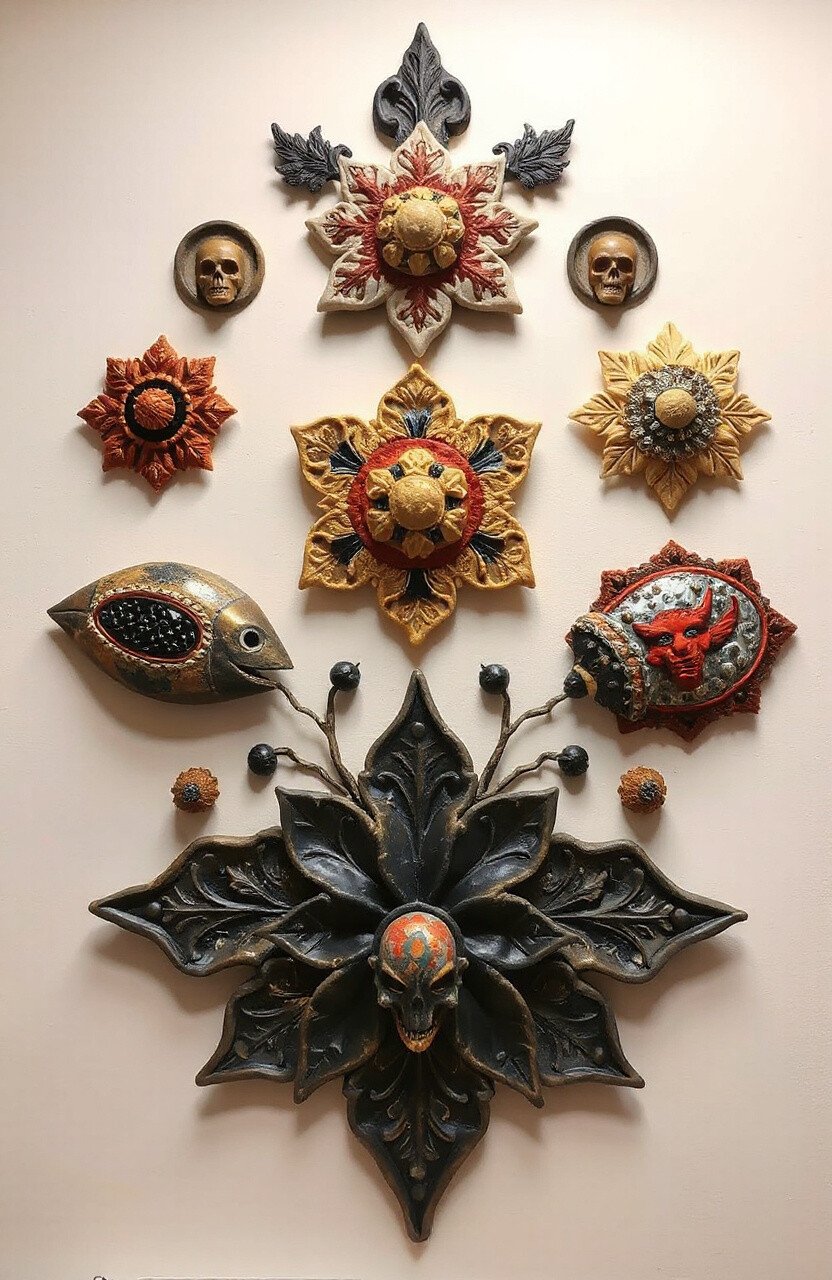
Transform your walls with decorative art. Use clay to create stunning wall hangings in various shapes and colors. They’re a beautiful way to add personality to any room.
Mix different textures and patterns for a unique look. These pieces are eye-catching and can be a focal point in your home. They’re an excellent way to showcase your creativity.
17. Funky Shoe Charms
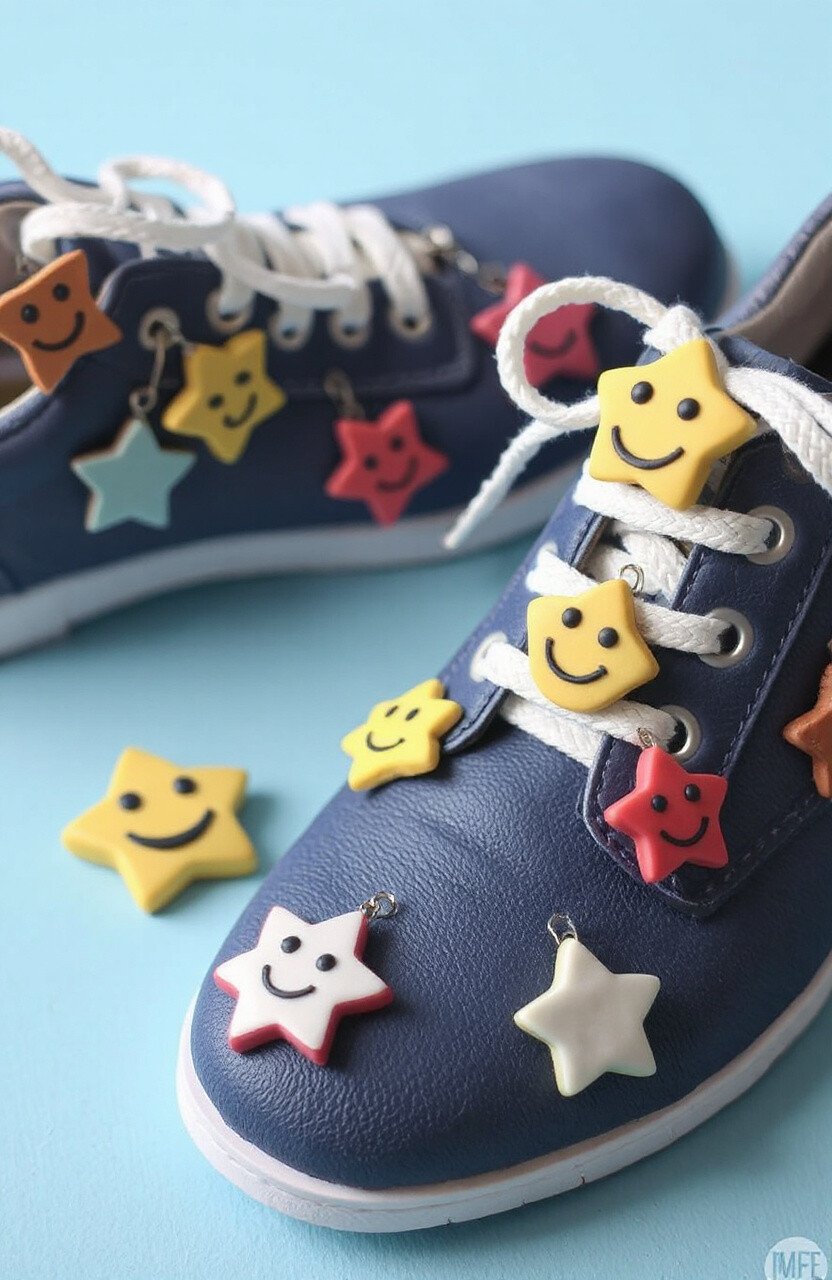
Jazz up your footwear with funky shoe charms. Mold clay into fun shapes like stars, smiley faces, or tiny animals. They’re a trendy way to accessorize your shoes.
These charms can be attached to laces or straps, adding a playful touch to your attire. They’re easy to make and can be customized to match your outfit. A perfect project for fashion-forward individuals.
18. Handy Cable Organizers
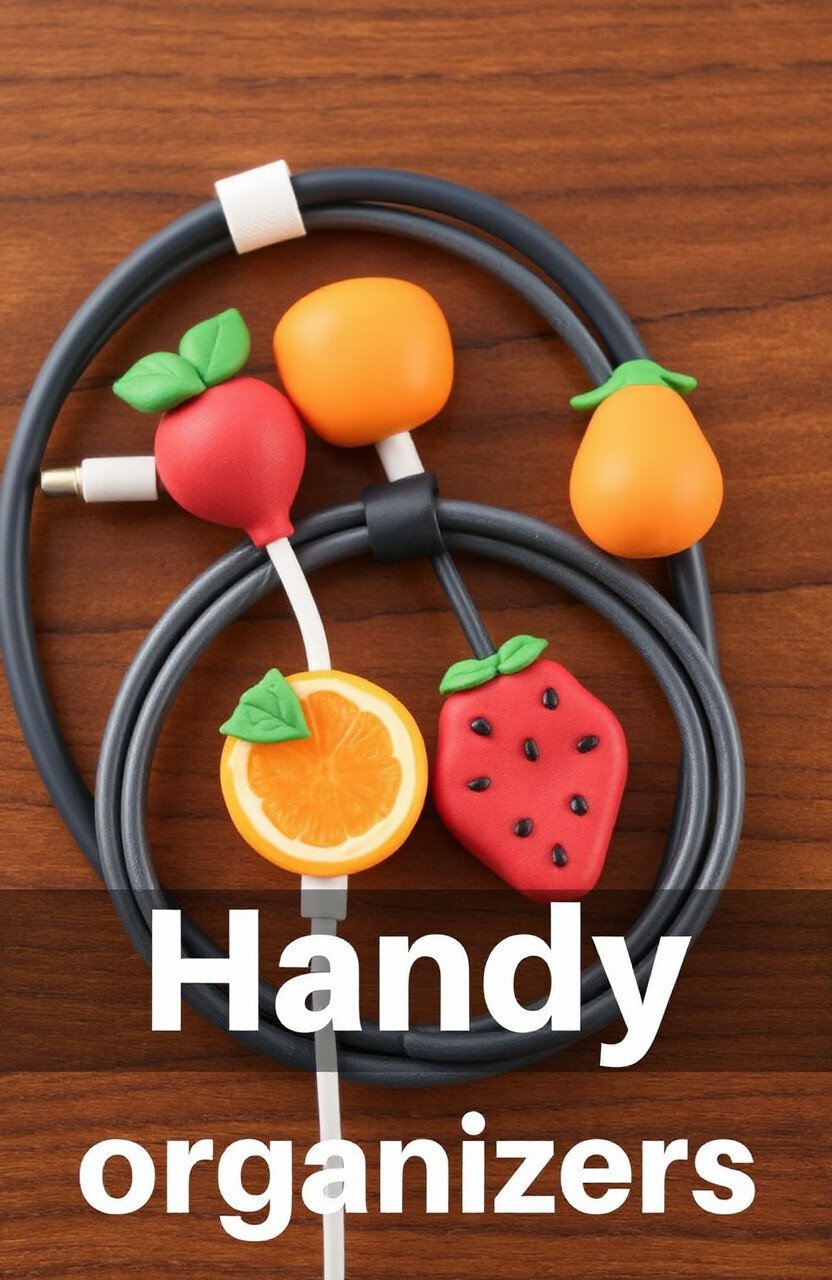
Keep your cords tidy with handy cable organizers. Create cute shapes like animals or fruit to wrap around your cables.
These organizers are both functional and fun, making them perfect for home or office use. They’re easy to craft and can be customized with your favorite colors. A practical and creative solution to tangled cords.
19. Personalized Coasters
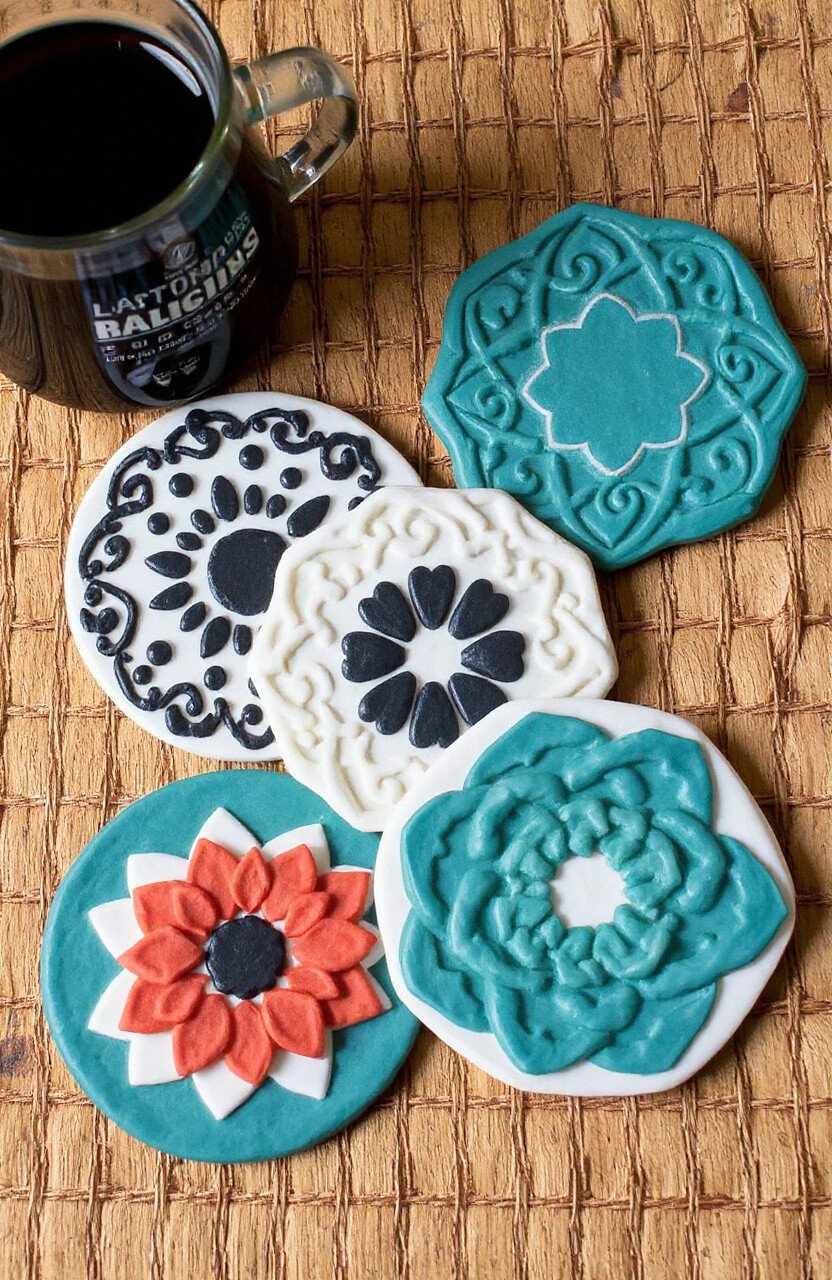
Protect your surfaces with personalized coasters. Use clay to create designs that match your home decor, like geometric patterns or floral motifs.
These coasters are not only practical but also add a touch of style to your table setting. They’re easy to clean and can be customized to fit any theme. A great way to combine functionality and art.
20. Creative Garden Markers
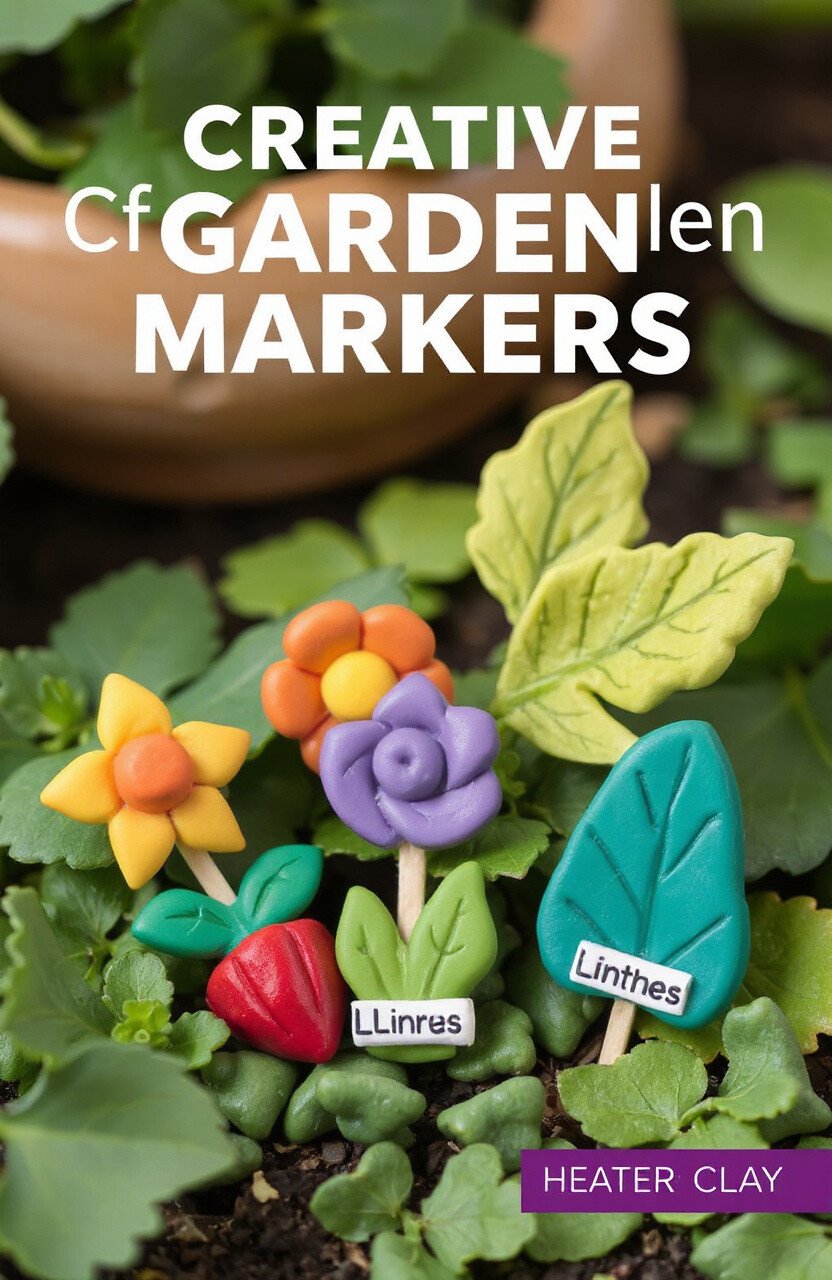
Identify your plants with creative garden markers. Mold clay into shapes like leaves, flowers, or vegetables and label them with plant names.
These markers are a charming addition to any garden and help keep your plants organized. They’re durable and weather-resistant, making them perfect for outdoor use. A delightful project for gardening enthusiasts.
21. Charming Wind Chimes
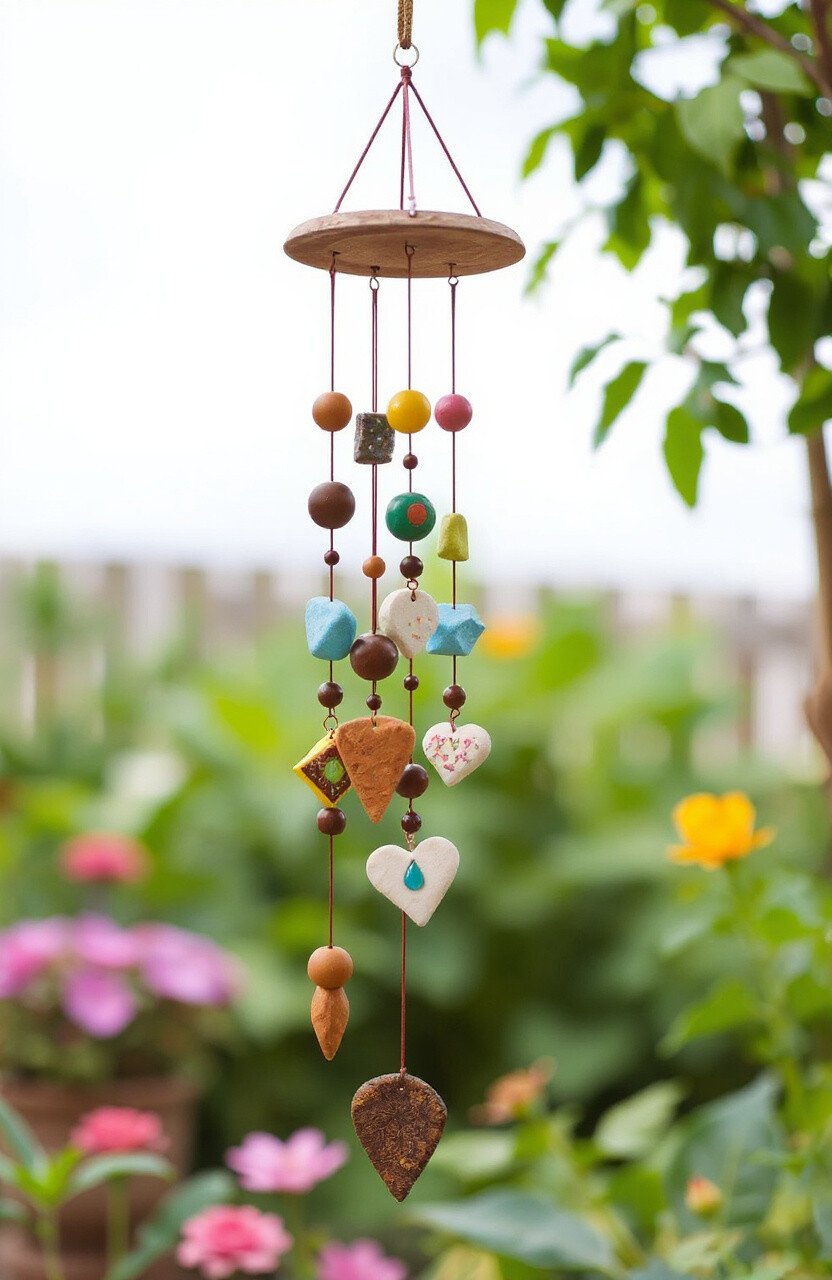
Add music to your garden with charming wind chimes. Create clay pieces in various shapes and sizes, then string them together to make a melodic decoration.
These chimes are not just beautiful but also soothing, creating a relaxing ambiance in your outdoor space. Customize them with colors that complement your garden. They’re a lovely way to add harmony to your home.
22. Funky Ring Holders
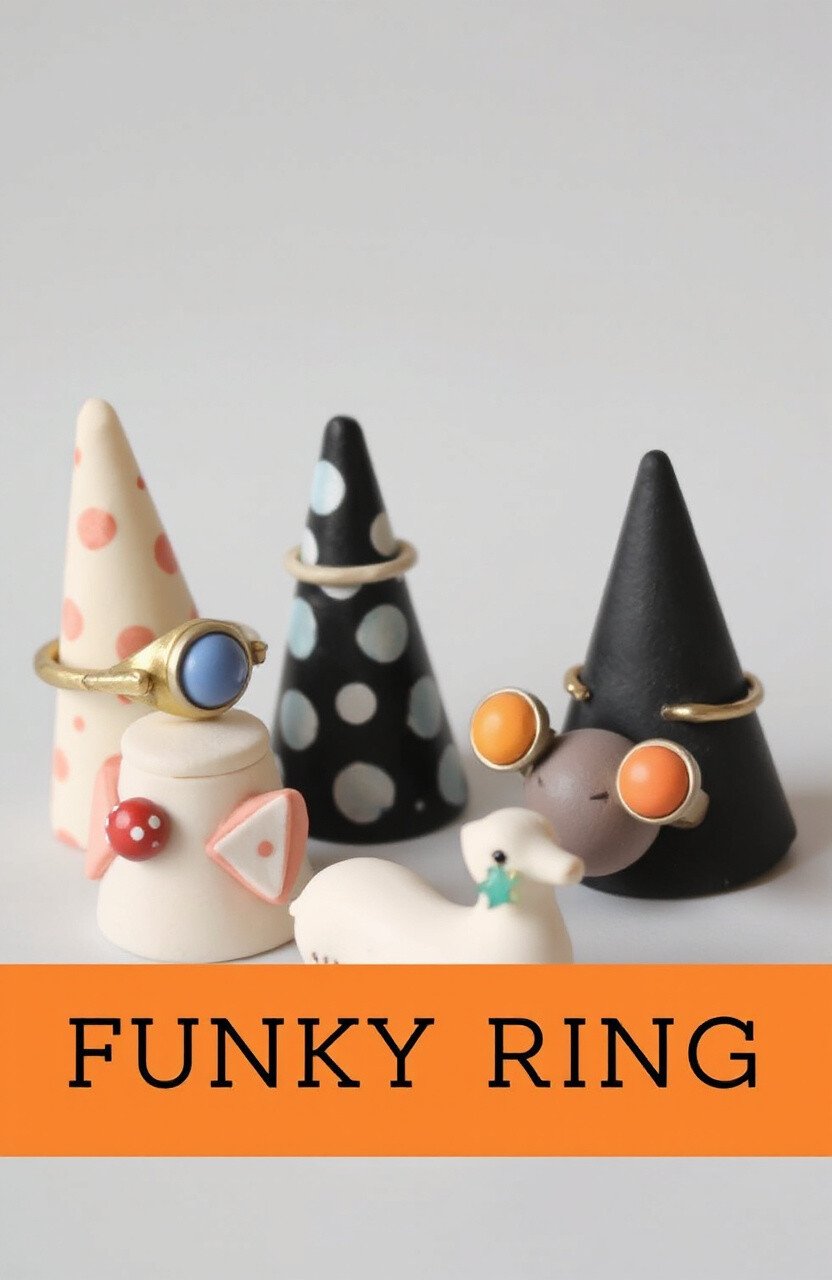
Keep your rings organized with funky holders. Mold clay into shapes like cones, animals, or abstract designs to hold your jewelry.
These holders are not only practical but also a fun addition to your dresser. Customize them with patterns and colors to match your decor. A stylish solution for jewelry lovers.