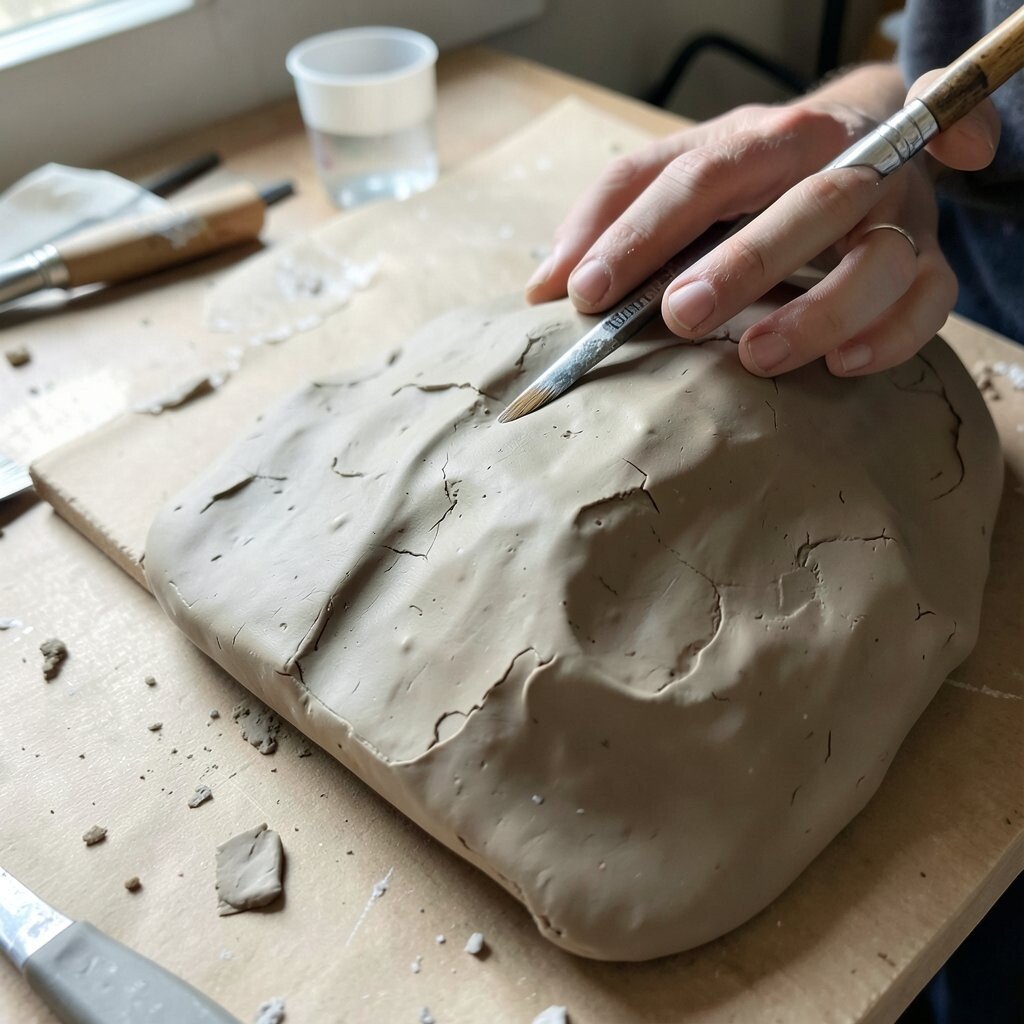
Clay can turn plain surfaces into something full of life. With the right touch, even simple objects can feel like gallery pieces.
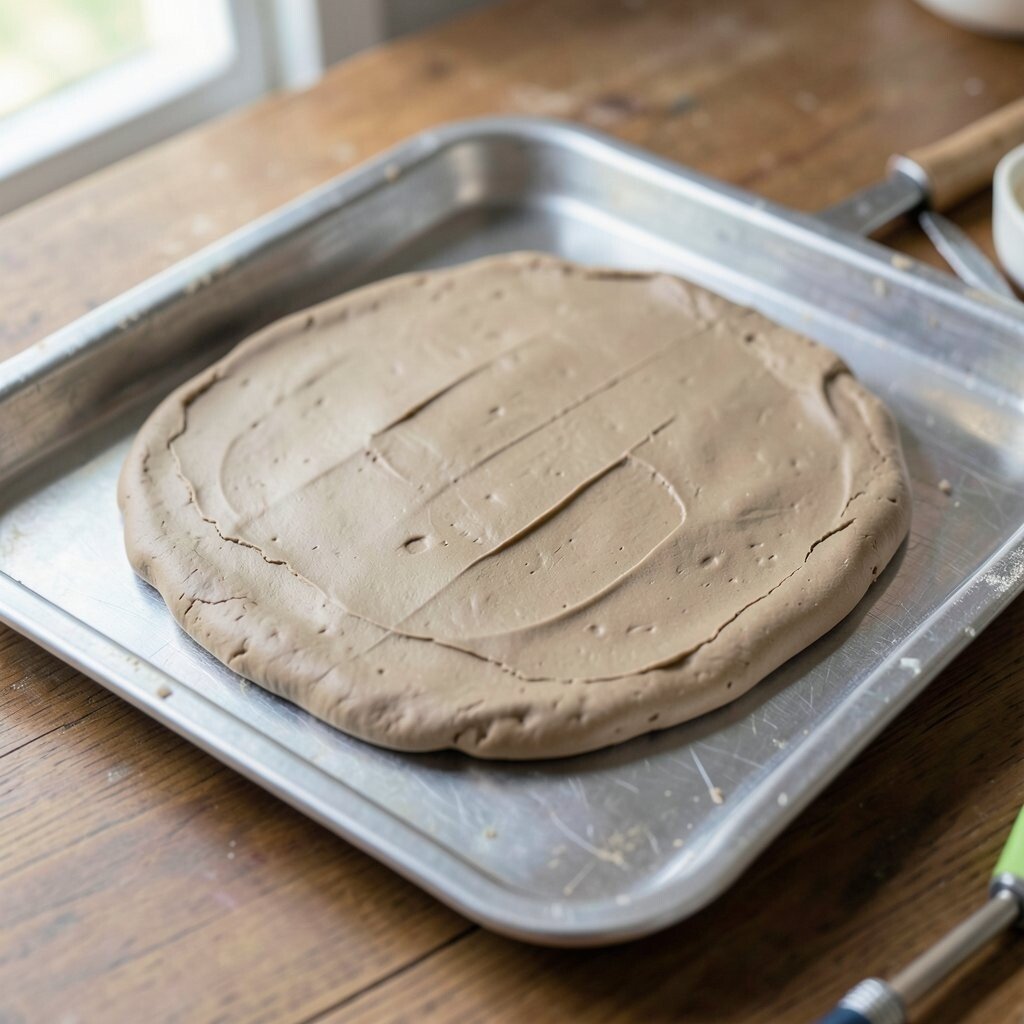
1. Wrap Clay Around a Wooden Bowl
Top Wrap Clay Around A Wooden Bowl Craft Tutorials
- 🗺️ A Pinterest Party: DIY Clay Bowls – Elle & Jay from elleandjay.com.
- 🎨 How to wrap a bowl with modelled clay? from facebook.com.
- 🖼️ DIY Vintage Paper Mache Bowls: $150 Decor for $5 from apieceofrainbow.com.
- 🖼️ DIY Air Dry Clay Jewelry Bowls from aliceandlois.com.
- 🍁 How to make a Clay Bowl – DIY Air Dry … from thediydreamer.com.
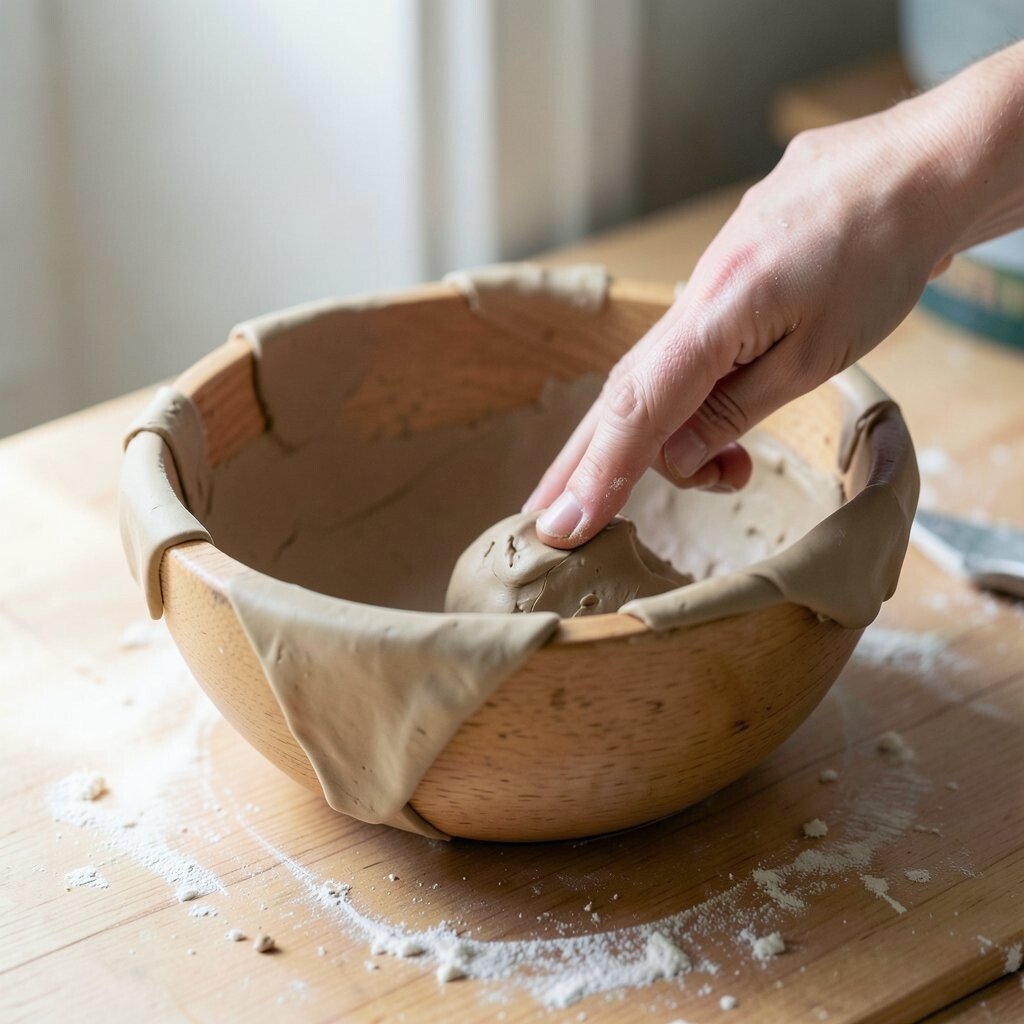
A wooden bowl covered with clay can look earthy, warm, and handmade. The mix of smooth wood and shaped clay gives the piece a rich, natural feel.
This idea works well for fruit bowls, centerpieces, or display art. You can press in leaf marks, swirl lines, or tiny dots to make it personal. It is also a smart project if you want a low-cost base, since thrifted bowls often work just fine.
2. Add Clay Relief to a Canvas
Top Add Clay Relief To A Canvas Craft Tutorials
- 👓 Mod podge art on canvas with air drying clay from facebook.com.
- 💅 15+ Fresh Clay Relief Sculpture Ideas for DIY Wall Art from clayelle.com.
- 🍅 CONTEMPORARY ART | 🔥How to Create a Painting with … from instagram.com.
- 💅 Easy Clay Relief Tile Art Lesson from craftyartideas.com.
- 🍂 Make a Clay Relief Sculpture | Online class – ClassBento from classbento.com.
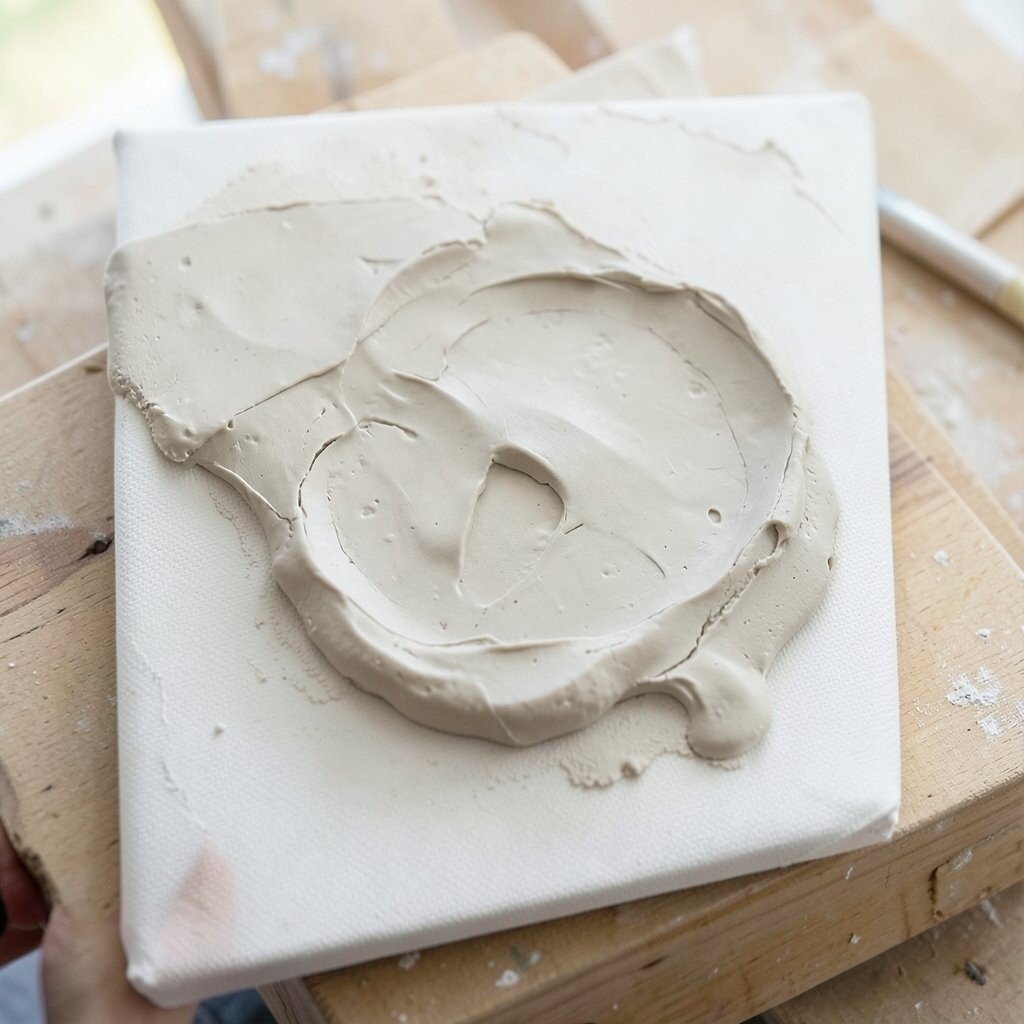
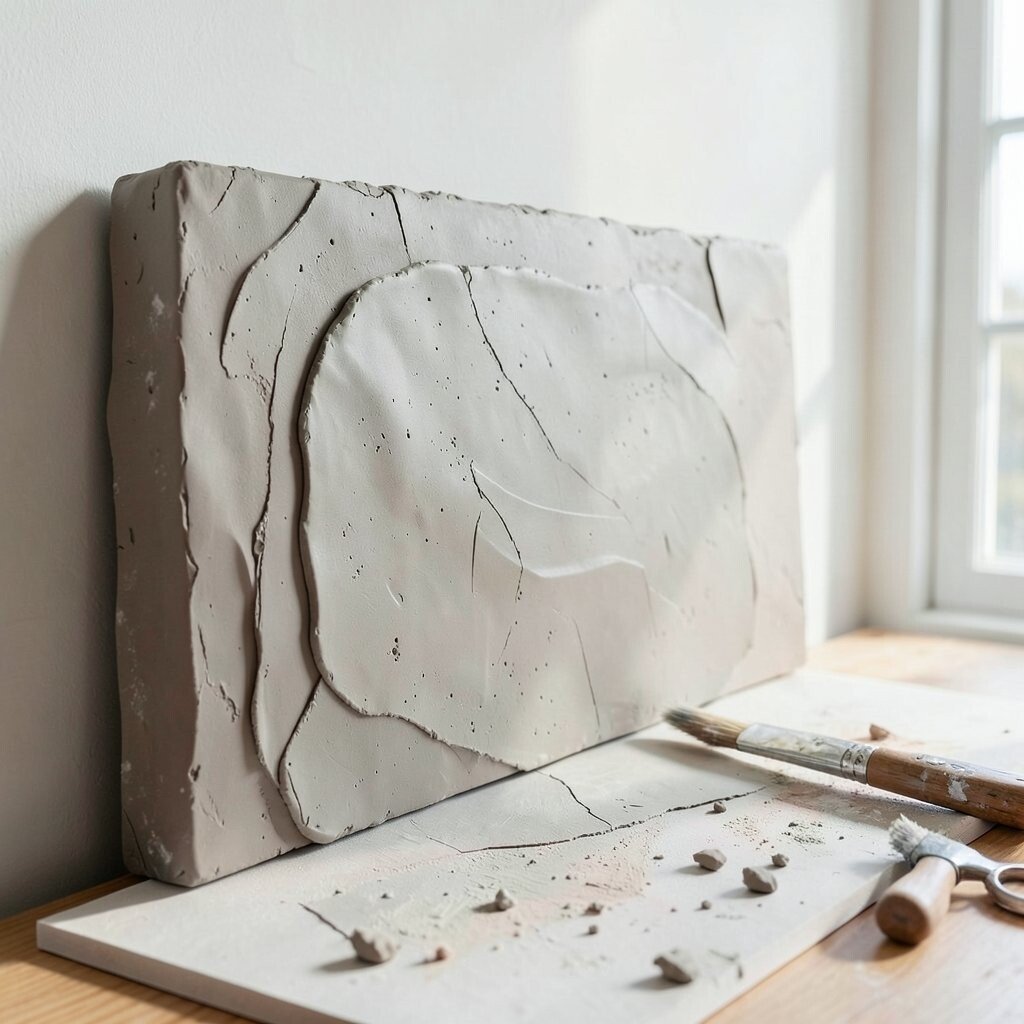
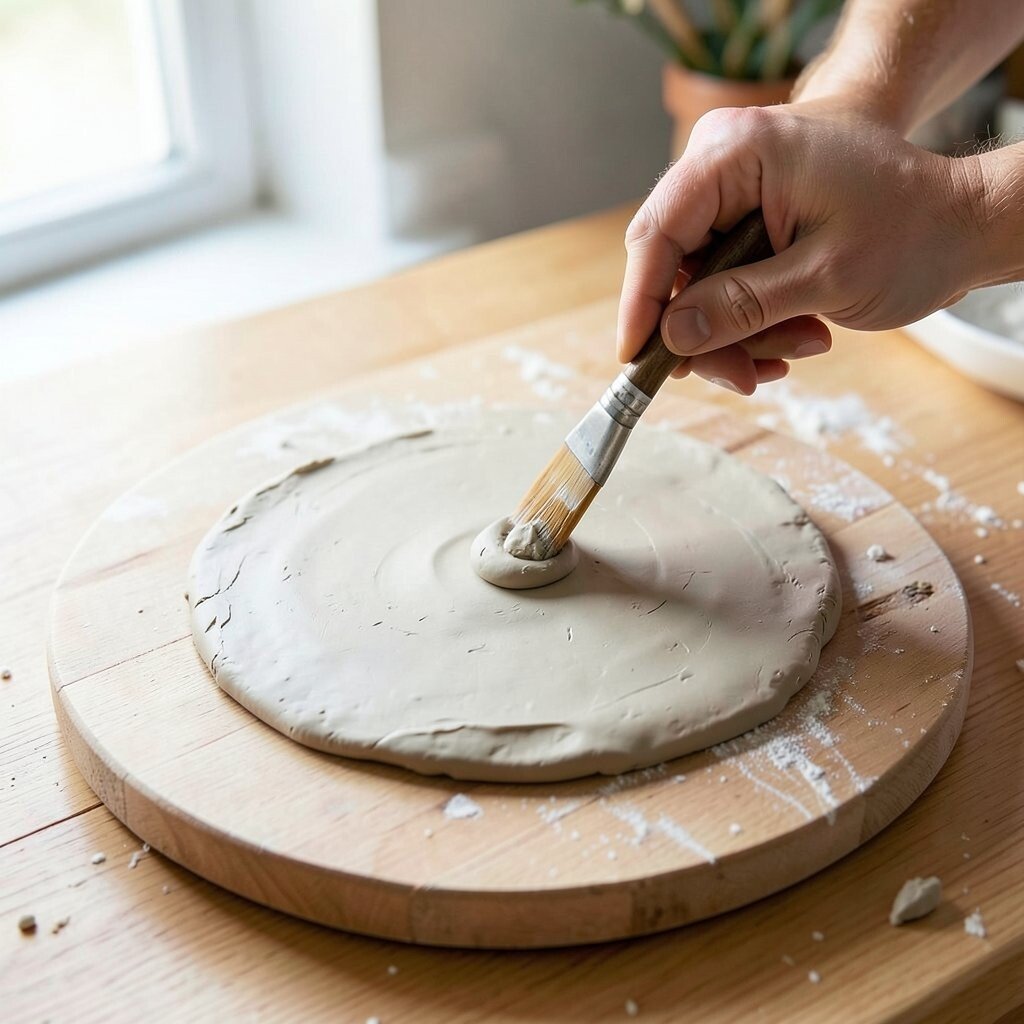
Flat canvas becomes much more exciting when clay rises from the surface. The shapes cast soft shadows and make the artwork feel alive.
You can build flowers, waves, faces, or abstract forms right on the fabric. Lightweight clay or air-dry clay can keep costs down and make the project easier to handle. Many artists like this style because it fits modern wall art trends while still leaving room for your own style.
Try painting the canvas first, then adding clay on top for a layered look. Soft pastels create calm art, while bold colors make the raised details stand out. If you want a personal touch, use shapes that remind you of a favorite place, pet, or memory.
3. Sculpt Clay Over a Glass Jar
Top Sculpt Clay Over A Glass Jar Craft Tutorials
- 🗺️ Want to make cute clay projects in little glass bottles … from reddit.com.
- 🗺️ Covering tin cans and glass jars is one of my favourite … from facebook.com.
- 🧑🌾 How to Make A Sculpture with A Glass Jar from tiktok.com.
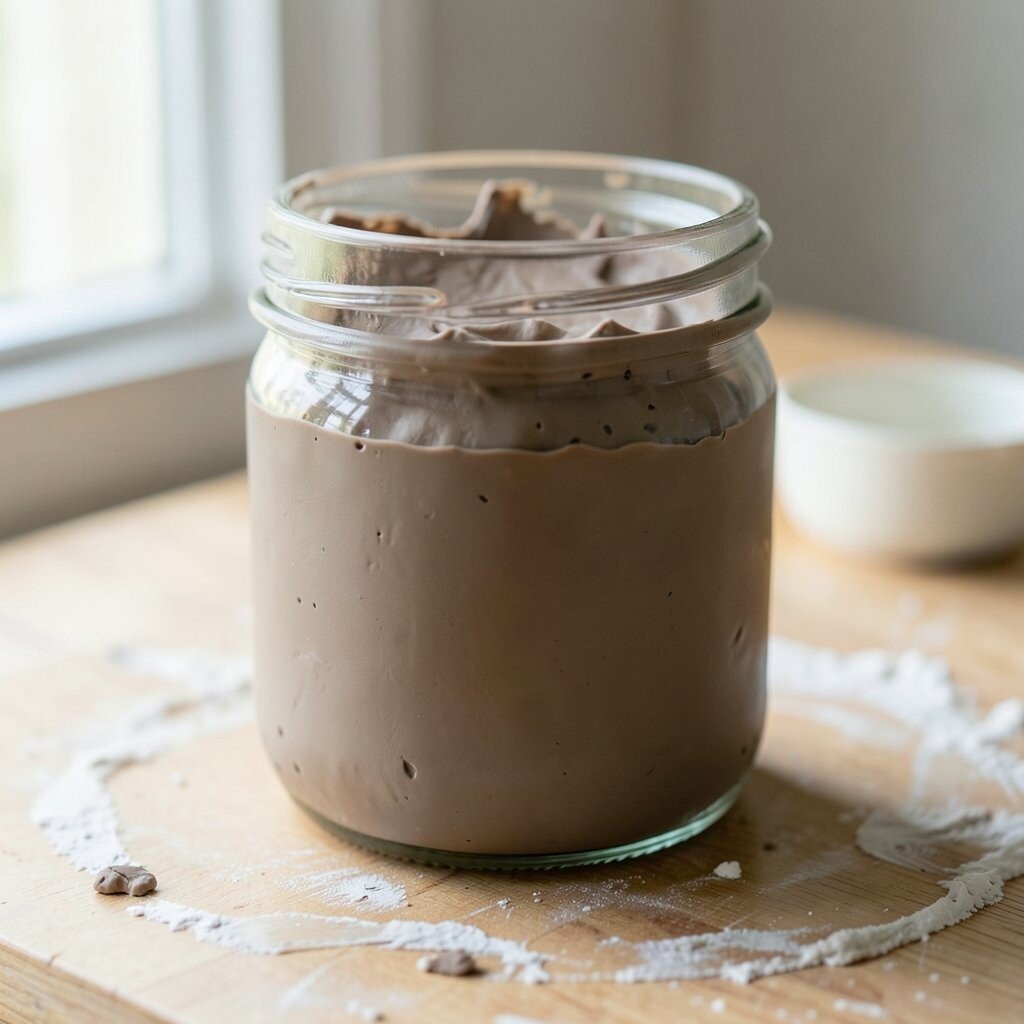
A plain glass jar can turn into a glowing art piece with clay details on the outside. Light shines through the glass and makes the clay shapes feel even more special.
Small flowers, vines, or moons can wrap nicely around the jar. This is a budget-friendly idea because old jars are easy to find and reuse. It is also a nice way to make custom candle holders, pencil cups, or gift containers.
For a cleaner finish, keep the clay design thin and smooth. If you like a more playful look, add bumps, tiny faces, or little stars. Many people enjoy this project because it feels useful and artistic at the same time.
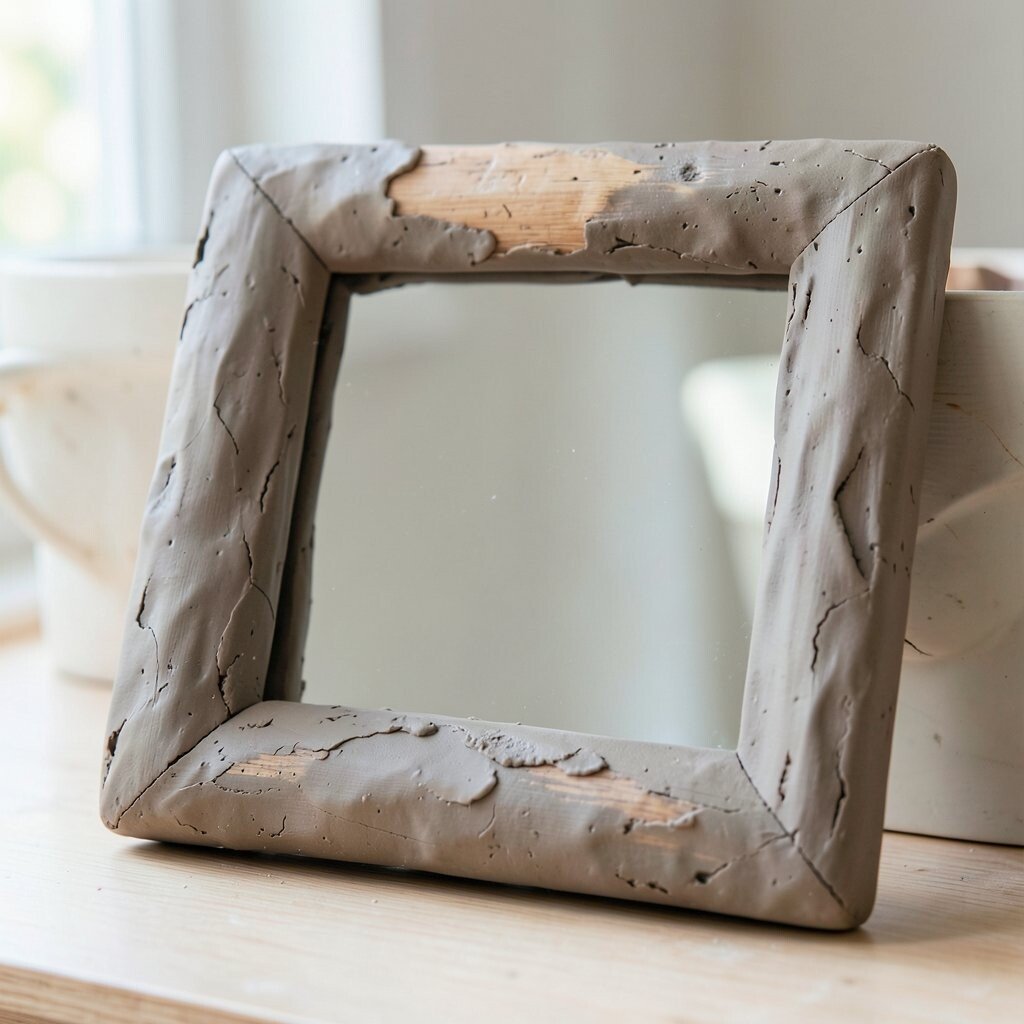
4. Create Clay Texture on a Mirror Frame
Top Create Clay Texture On A Mirror Frame Craft Tutorials
- 👓 Air dry clay frame ideas for old compact mirror from facebook.com.
- 🍅 Class Project for Auction: Clay Mosaic Mirrors – from artisbasic.com.
A mirror frame with clay detail can make a room feel fancy and handmade. The raised edges catch the eye before the mirror even reflects anything.
You can shape shells, petals, beads, or flowing curves around the frame. This is a great way to update an old mirror instead of buying a new one, which helps save money. The result can match boho, vintage, or modern home styles depending on your choices.
5. Build Clay Over a Stone Surface
Top Build Clay Over A Stone Surface Craft Tutorials
- 🧑🌾 Faux Stone Mayan Sculpture Made With DIY Air Dry Clay from ultimatepapermache.com.
- 🍁 Finding and Processing Your Own Natural Clay from instructables.com.
- 🍂 How to make a stone wall using air clay? from facebook.com.
- 🗺️ DAS Stone Air Dry Clay – an In-Depth Review from colorfulcraftcorner.com.
- 🍅 Cute Clay Projects for Kids from sculpey.com.
Clay on stone has a strong, ancient look. The rough base and soft clay together create a bold contrast that feels full of character.
Flat stones, garden rocks, and smooth pebbles can all work well. You can make tiny scenes, animal shapes, or simple raised patterns. This is a low-cost craft because nature often gives you the main material for free.
Try sealing the finished piece if it will sit outdoors. Earth tones look beautiful here, but bright paint can make the design pop too. People often like this style for garden art because it looks both natural and unique.
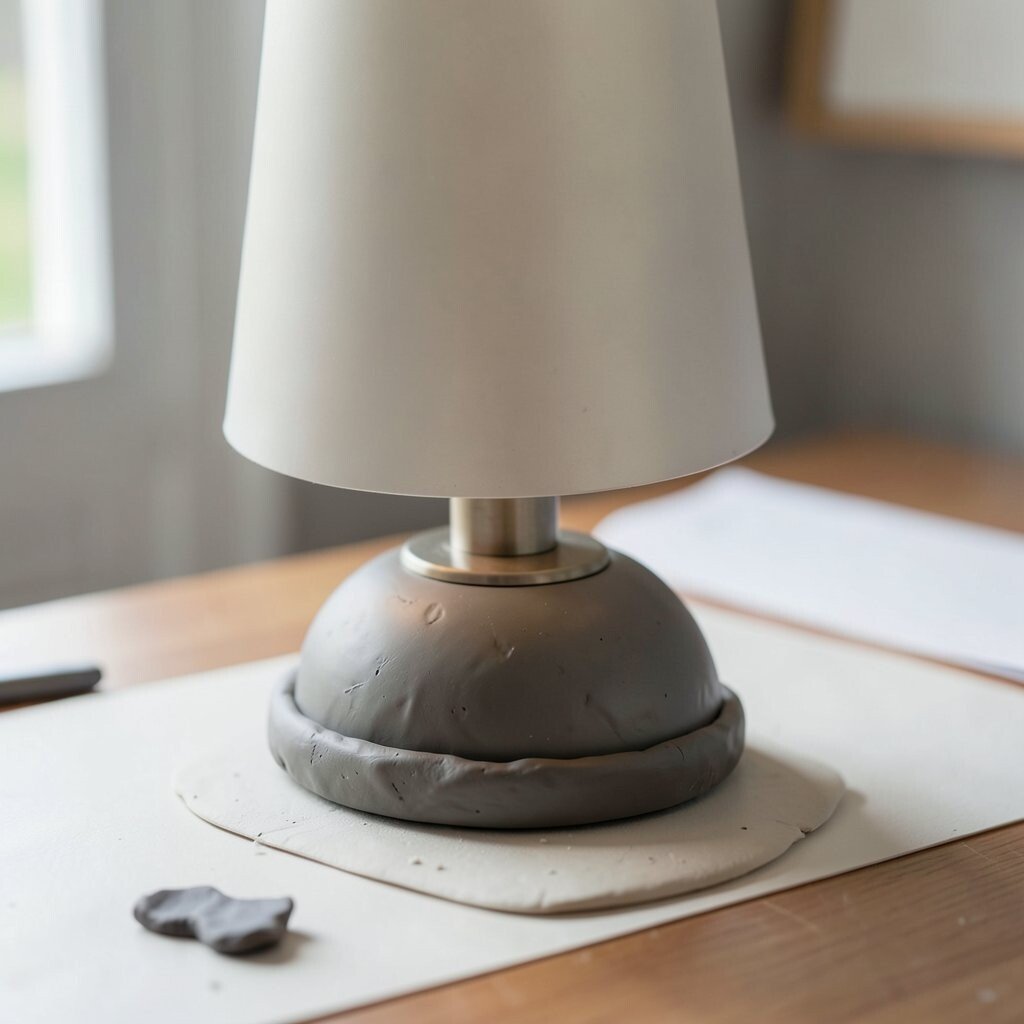
6. Shape Clay Around a Lamp Base
Top Shape Clay Around A Lamp Base Craft Tutorials
- 🍁 30 DIY Clay Lamp Ideas That Transform Handmade … from wonderfuldiy.com.
- 🍅 a simple lamp post made with air-dry clay can be this … from facebook.com.
- 🎄 How to Make a Ceramic Lamp with Pottery or Vase from hirosarts.com.
- 🗺️ Simple Things to Make With Clay from facebook.com.
- 💅 Making a Pottery Table Lamp – curious meredith from curiousmeredith.com.
A lamp base covered with clay can turn ordinary lighting into a statement piece. When the lamp is on, the shadows around the clay details can look magical.
Swirls, ridges, and floral bands work especially well on round bases. You can keep the design simple for a clean look or go big for a dramatic one. This project may cost less than buying a designer lamp and gives you much more personal style.
Use smooth clay lines if you want a sleek finish. If you like cozy cottage style, add tiny leaves or hand-pressed patterns. Trendy home decor often mixes useful items with art, and this idea fits that look very well.
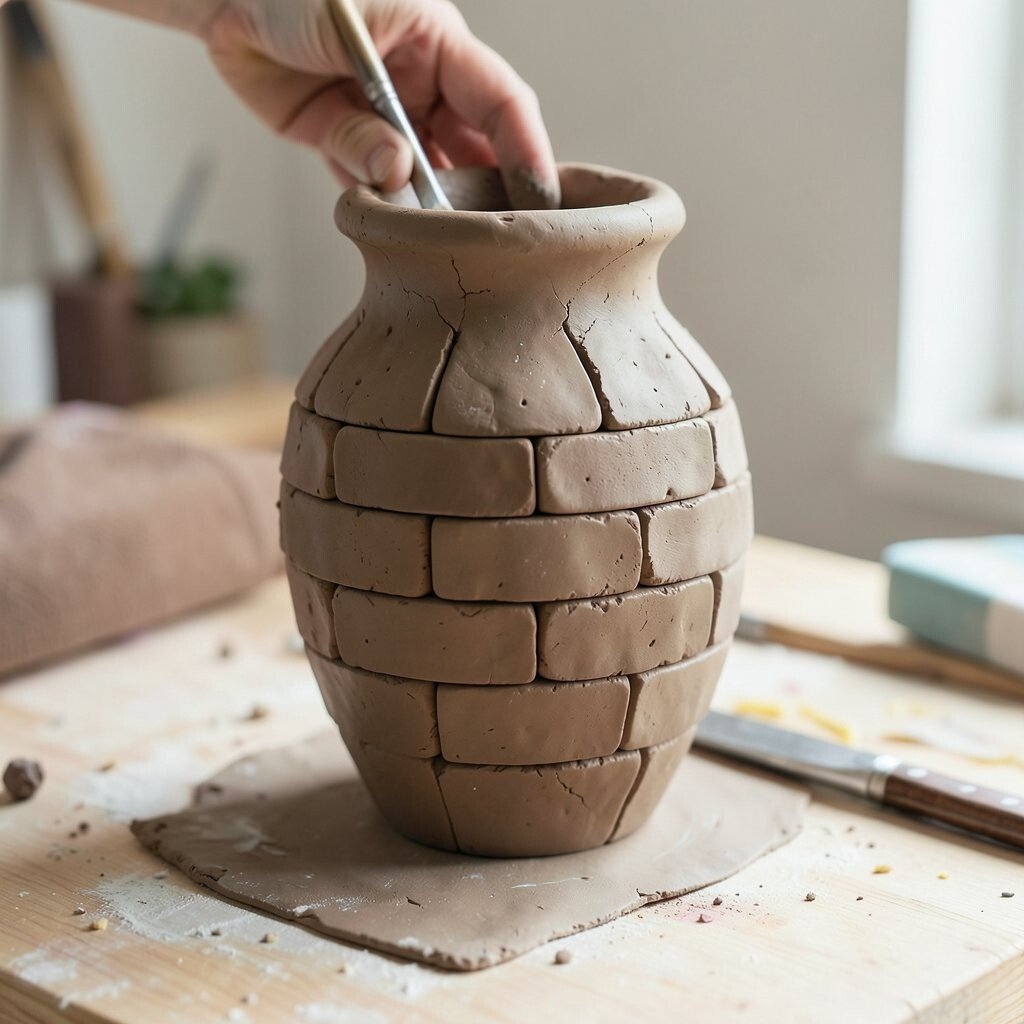
7. Cover a Vase with Clay Tiles
Top Cover A Vase With Clay Tiles Craft Tutorials
- 🎄 Clay Petal Vase + Spring Craft Link Party from centsationalstyle.com.
- 🍁 DIY cute flower vase decor using clay… from facebook.com.
Clay tiles on a vase can make it feel like a tiny mosaic sculpture. The repeated shapes create a neat, eye-catching surface that looks rich and detailed.
You can cut small squares, circles, or petals and press them around the vase. This is a fun way to use leftover clay, so it can be a smart budget choice. It also lets you match the vase to your room colors or to a special event.
Try mixing glossy and matte finishes for extra interest. A simple flower arrangement can look even better inside a vase like this. If you want a more personal piece, choose tile shapes that remind you of a favorite pattern from clothing, tiles, or nature.
8. Sculpt Clay Over a Metal Tray
Top Sculpt Clay Over A Metal Tray Craft Tutorials
- 🎄 Craft clay that sticks to metal from facebook.com.
- 🎄 Sculpting With Polymer Clay : 8 Steps (with Pictures) from instructables.com.
- 🍂 Can I bake clay with metal? : r/Sculpey from reddit.com.
- 🧑🌾 Aves Apoxie Sculpt Beginner's Guide from avesstudio.com.
A metal tray with clay detail can look like a fancy serving piece or wall art. The shiny metal under the clay gives the whole work a cool, modern edge.
You can add raised borders, corner flowers, or bold abstract waves. Since trays are often found secondhand, this can be a low-cost way to make something stylish. It is also a great choice for people who want art that can still be used at home.
Keep the clay design balanced so the tray stays easy to carry. Metallic paint can make the surface look rich and polished. This idea works well with current decor trends that mix old objects with fresh handmade touches.
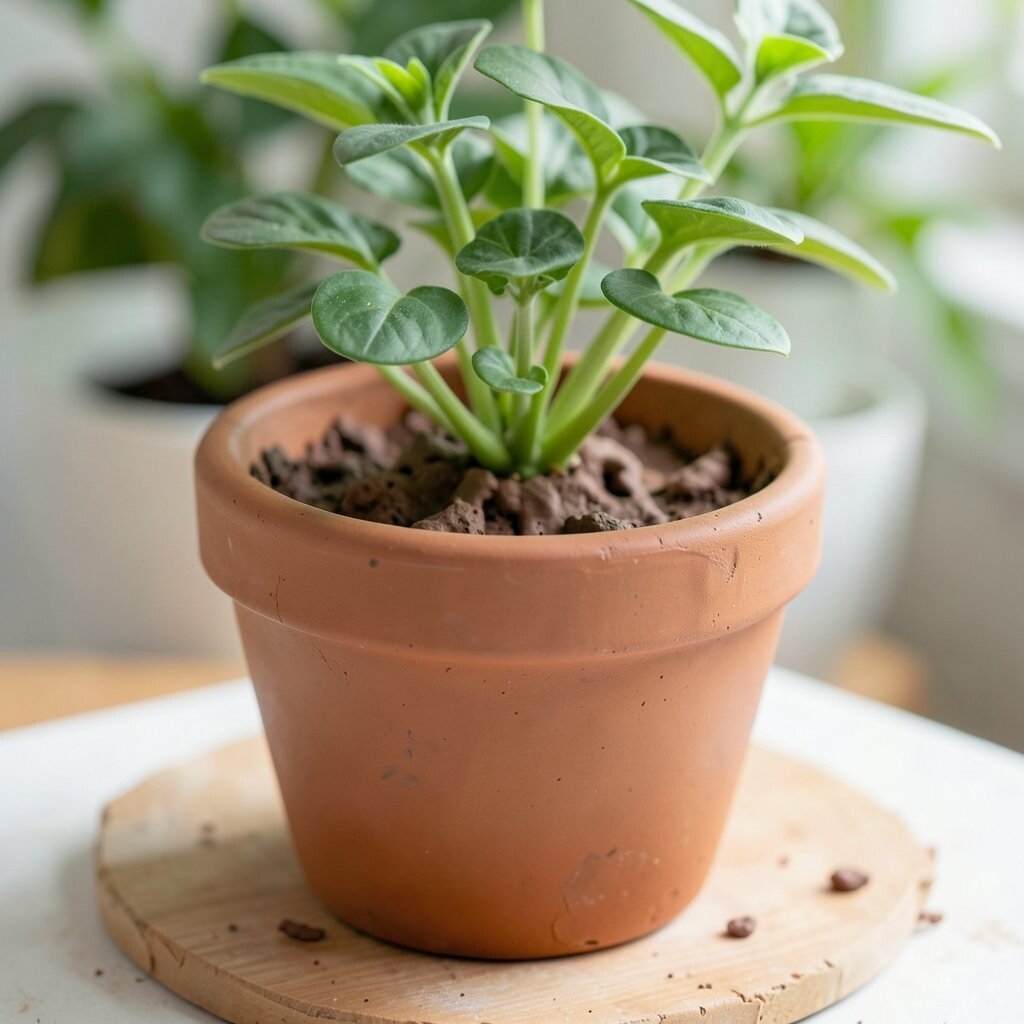
9. Make a Clay Scene on a Plant Pot
Top Make A Clay Scene On A Plant Pot Craft Tutorials
- 🗺️ Step-by-Step DIY Clay Flower Craft #ClayFlowerCraft # … from facebook.com.
- 🗺️ DIY Glam Girl Terracotta Planter from theapplestreetcottage.blogspot.com.
- 💅 Easy Distressed Terracotta Pots from itallstartedwithpaint.com.
A plant pot with clay art can turn a simple home for a plant into a tiny story. The surface becomes a place for vines, animals, faces, or little hills.
This kind of design can make indoor or outdoor spaces feel more cheerful. You can use air-dry clay for light decoration, which helps keep the cost down. The pot also becomes more personal when you shape it around a favorite plant or color theme.
Try matching the design to the plant inside, like cactus spikes for a desert pot or flowers for a blooming vine. Painted details can add more charm after the clay dries. Many people love this trend because it brings art into everyday plant care.
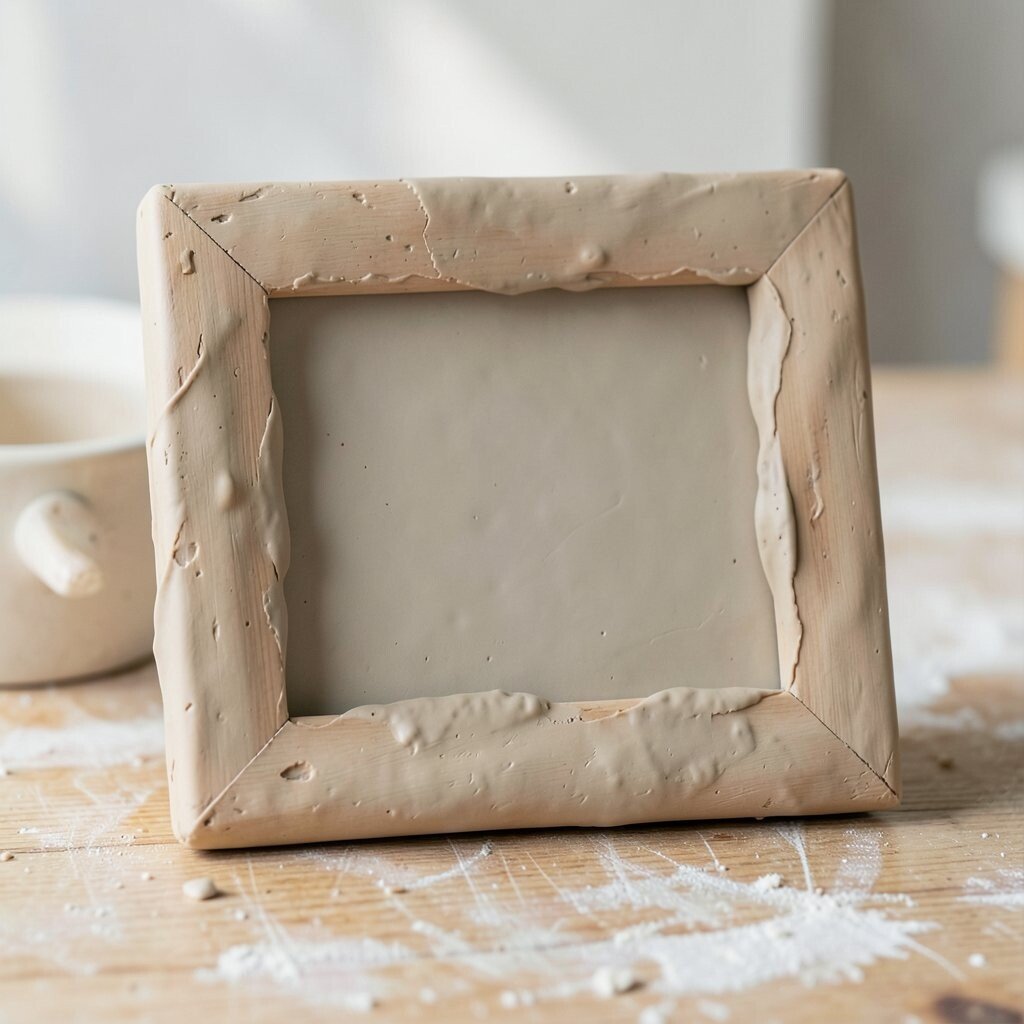
10. Add Clay to a Picture Frame
Top Add Clay To A Picture Frame Craft Tutorials
- 🎨 How to ✨create a one-of-a-kind clay picture frame✨ … from facebook.com.
- 🎄 Make Your Own Clay Photo Frame from theworks.co.uk.
- 🍂 DIY Picture Frame Ornament with Polymer Clay from rockroseclay.com.
- 🧑🌾 DIY clay picture frame — I can see this being a huge hit … from facebook.com.
- 🎄 Easy Clay Picture Frame Tutorial – Ideas for the Home from kenarry.com.
A plain picture frame can become a small artwork on its own with clay decoration. The raised edges help draw attention to the photo or drawing inside.
You can press in stars, shells, hearts, or tiny geometric shapes. This project is usually cheap because simple frames are easy to find and clay scraps can go a long way. It also makes a thoughtful gift since you can match the frame to the person’s style.
For a soft look, use rounded shapes and gentle colors. For a bold look, try sharp lines and bright paint. Personal touches like initials or favorite symbols can make the frame feel one of a kind.
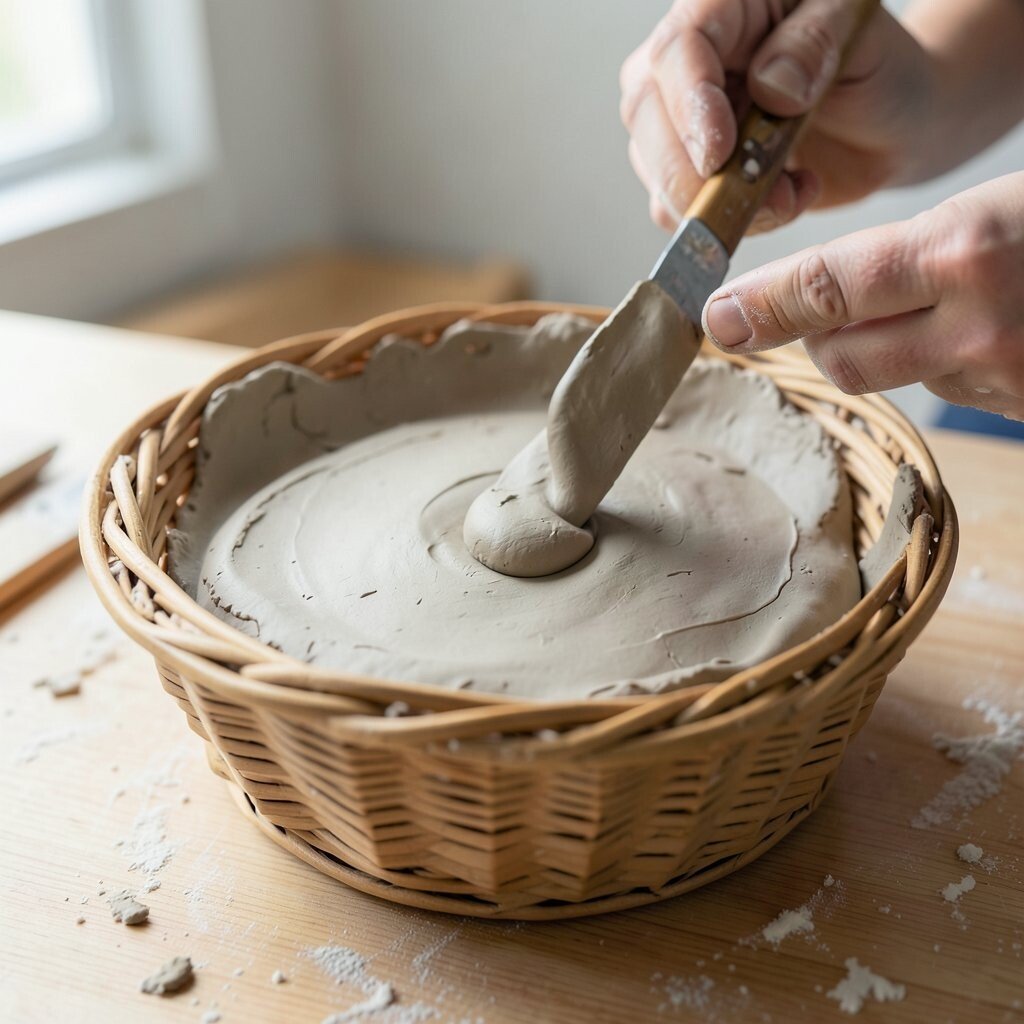
11. Sculpt Clay Over a Basket
Top Sculpt Clay Over A Basket Craft Tutorials
- 👓 Clay sculpture of baby in basket from facebook.com.
- 🖼️ [Self] Made by my 11 year old daughter. She likes building … from reddit.com.
- 🍂 12 Model Magic Clay Ideas: Easy Step-by-Step Sculpture … from artprojectsforkids.org.
- 👓 Cute Clay Projects for Kids from sculpey.com.
A woven basket with clay accents can feel rustic and fresh at the same time. The mix of woven lines and solid clay creates a texture that is fun to look at.
You can add clay flowers, handles, tags, or border strips around the rim. This is a useful way to update storage baskets without spending much money. It works nicely for home decor, gift baskets, or even art displays.
Keep the clay pieces light so the basket stays easy to use. Earthy colors fit this style well, but bright colors can make it feel playful. If you want something special, add shapes that match the season or the room theme.
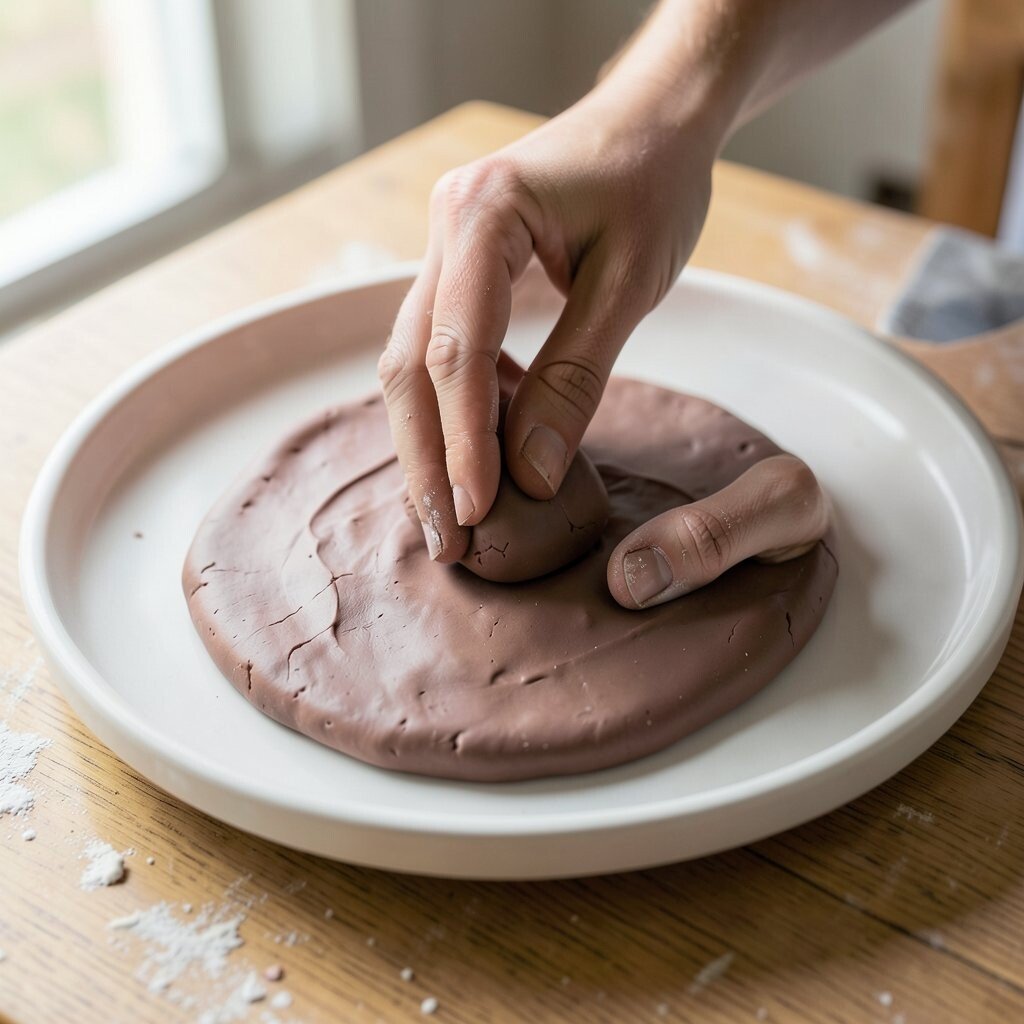
12. Build Clay Over a Ceramic Plate
Top Build Clay Over A Ceramic Plate Craft Tutorials
- 🎄 Ideas for making 12th scale plates from found objects? from facebook.com.
- 🖼️ Tutorial: Polymer clay plates from scs-craft.blogspot.com.
A ceramic plate with clay art can become a display piece instead of just a dish. Raised designs turn the flat surface into something that feels rich and handmade.
You can form fruit, flowers, sunbursts, or abstract patterns across the plate. Since thrift stores often have plain plates, this can be a low-cost project with a big visual payoff. It also fits current trends for wall plates and decorative table styling.
Use shallow clay layers so the plate still looks neat and balanced. Bright glaze or paint can make the shapes stand out even more. A plate like this can reflect your taste, your favorite foods, or even a family memory.
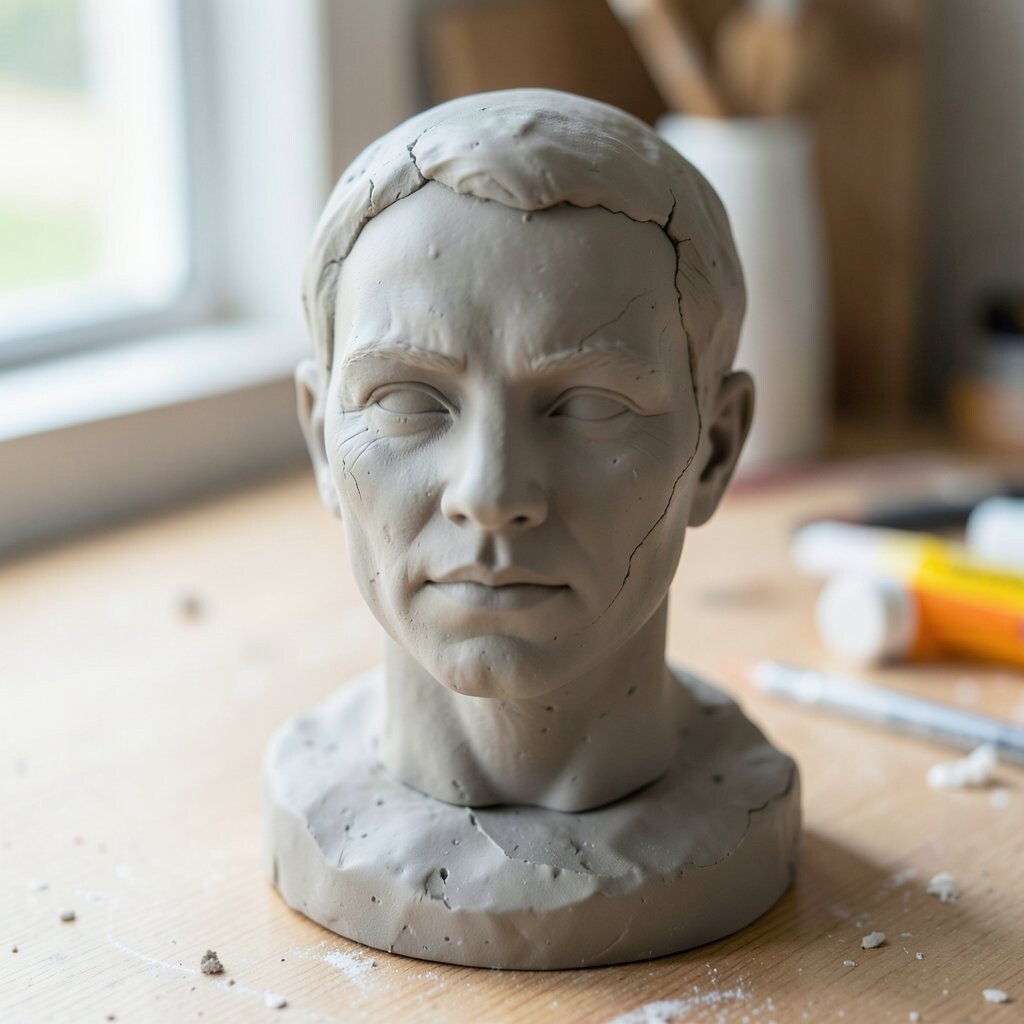
13. Shape Clay Over a Head Sculpture Base
Top Shape Clay Over A Head Sculpture Base Craft Tutorials
- 🎄 Modelling the Head in Clay Part 1 – Armature from accessart.org.uk.
- 🎄 Sculpting Horror Heads with Air Dry Clay from facebook.com.
- 🎨 Making an Armature for a Clay Sculpture from instructables.com.
- 🧑🌾 How to Make Clay Miniatures That Tell a Story, with Portland … from radiusstudio.org.
A head form covered with clay can become a bold art piece with lots of personality. The face, hair, and surface details can feel dramatic, dreamy, or playful.
This idea is great for artists who want to try portraits in a new way. It can cost less if you start with a simple foam or paper base instead of a heavy sculpture form. You can make the piece look real, abstract, or even fantasy-inspired.
Try adding texture to the hair, cheeks, or clothing areas for extra depth. Soft lighting can make the shadows on the clay look wonderful. A personal twist might include symbols that tell a story about the person or mood you want to show.
Many artists enjoy this style because it feels free and expressive. You can keep the face simple and let the surface details do the talking. It is a strong fit for current art trends that mix sculpture with emotion.
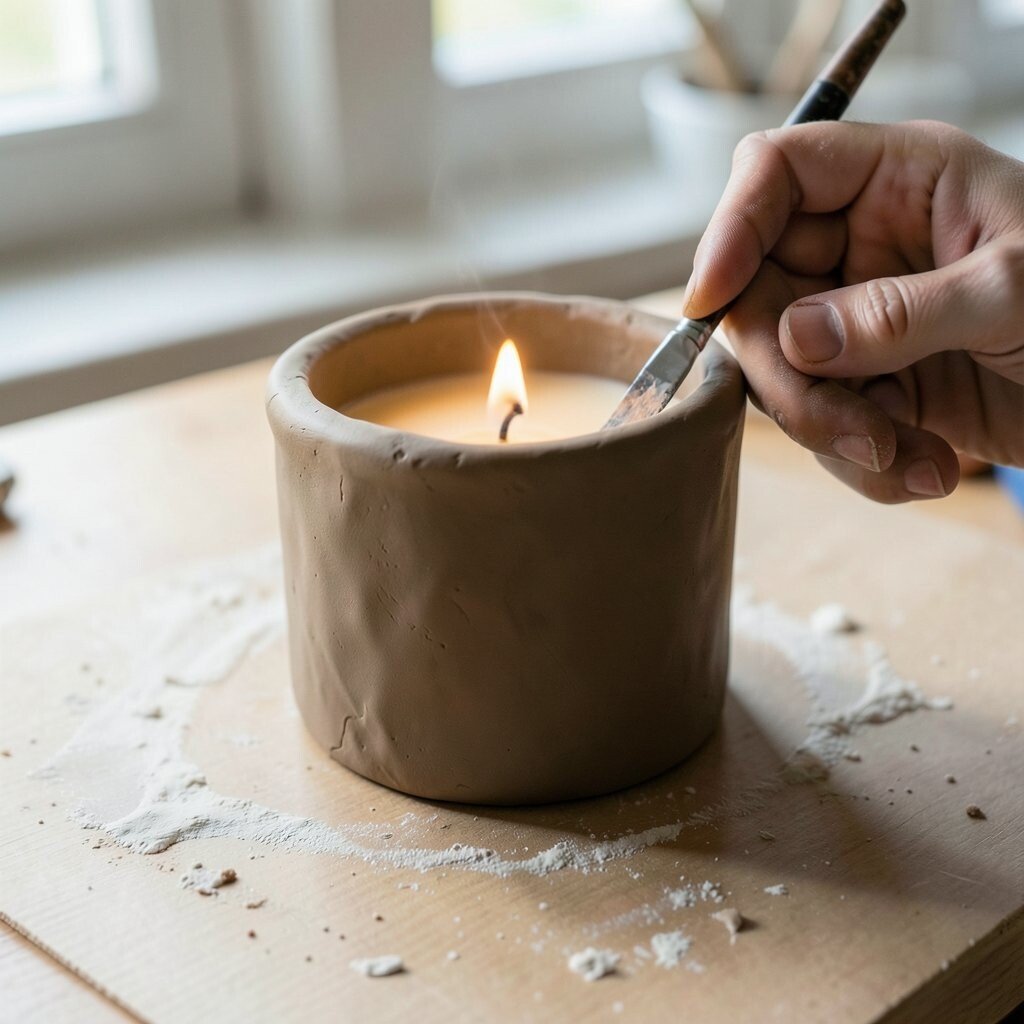
14. Cover a Candle Holder with Clay
Top Cover A Candle Holder With Clay Craft Tutorials
- 🍁 DIY Clay Candle Holders that look like Hammered Metal! from momsandcrafters.com.
- 🎄 DIY Clay Candlestick Holders (Fun Tutorial) from artsyprettyplants.com.
- 👓 DIY clay candle holder Handmade Clay craft ideas – #diy – #art from facebook.com.
- 🧑🌾 i made this small candle holder w polymer clay & used … from reddit.com.
A candle holder with clay around it can feel warm and cozy before the candle is even lit. The tiny raised details make the glow look softer and more magical.
Leaves, dots, and little waves work nicely on small holders. This is a budget-friendly project because plain holders are easy to find and quick to update. It also makes a nice handmade gift for birthdays, holidays, or quiet home nights.
15. Sculpt Clay Over a Box Lid
Top Sculpt Clay Over A Box Lid Craft Tutorials
- 🎄 Tutorial on covering a wood box with polymer clay from facebook.com.
- 🎨 Ceramic Box with Lid Lesson from createartwithme.com.
- 🎄 Tutorial on covering a wood box with polymer clay from facebook.com.
A box lid can become a tiny art panel with clay on top. The flat shape gives you room to tell a story with symbols, patterns, or scenes.
You can make the lid look like a treasure chest, a secret garden, or a mini wall relief. This is a smart way to decorate storage without buying fancy supplies, which keeps costs low. It also gives you a place to hide keepsakes inside something beautiful.
Try using repeating shapes for a clean, neat look. Or make the surface busy and full of tiny details if you like a rich style. Personal items like names, dates, or favorite icons can make the box feel special and meaningful.
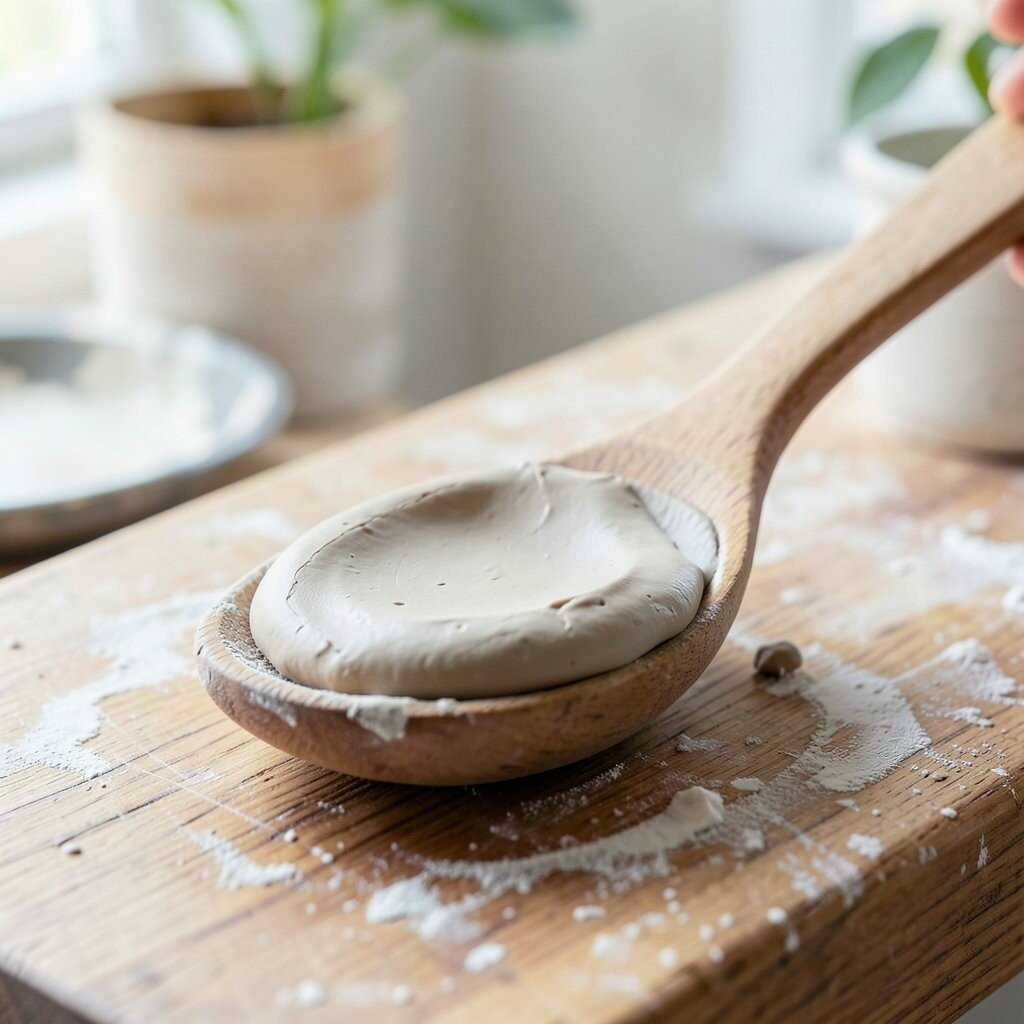
16. Add Clay to a Wooden Spoon Display
Top Add Clay To A Wooden Spoon Display Craft Tutorials
- 🧑🌾 Spoon rest made with wooden spoon and foam clay from facebook.com.
- 🎄 30 DIY Clay Spoon Rest Ideas That Will Make You Fall in … from wonderfuldiy.com.
- 🗺️ Adorable DIY Christmas Wooden Spoon Crafts Hashtags from facebook.com.
Wooden spoons with clay art can look charming on a kitchen shelf or wall. The natural wood grain and shaped clay make a simple object feel like folk art.
You can add tiny flowers near the handle, a small face near the bowl, or decorative bands along the length. This idea is low-cost because wooden spoons are often inexpensive and easy to find. It also works well if you like handmade kitchen decor that feels warm and personal.
Use food-safe thinking if you plan to cook with the spoon, or keep it for display only. Bright paint can make the clay details pop against the wood. Many people like this trend because it turns everyday tools into cheerful art pieces.
17. Create Clay Layers on a Headboard Panel
Top Create Clay Layers On A Headboard Panel Craft Tutorials
- 🎨 How to make a mold of iron finals for a headboard? from facebook.com.
- 💅 New tutorial on YouTube 🩷 Link in the comments ☺️ Re·design … from facebook.com.
- 💅 We make classic traditional shaped headboards maybe … from instagram.com.
A headboard panel with clay details can make a bedroom feel more stylish and custom. The raised surface can look calm, fancy, or bold depending on your design.
You can build soft waves, floral lines, or geometric panels across the wood. This project may take more time, but it can still be cheaper than buying a designer headboard. It gives the room a strong focal point and makes the bed area feel finished.
Choose colors that match blankets, pillows, and curtains for a smooth look. If you want a softer feel, use rounded shapes and gentle tones. For a more modern look, try crisp edges and simple repeating forms.
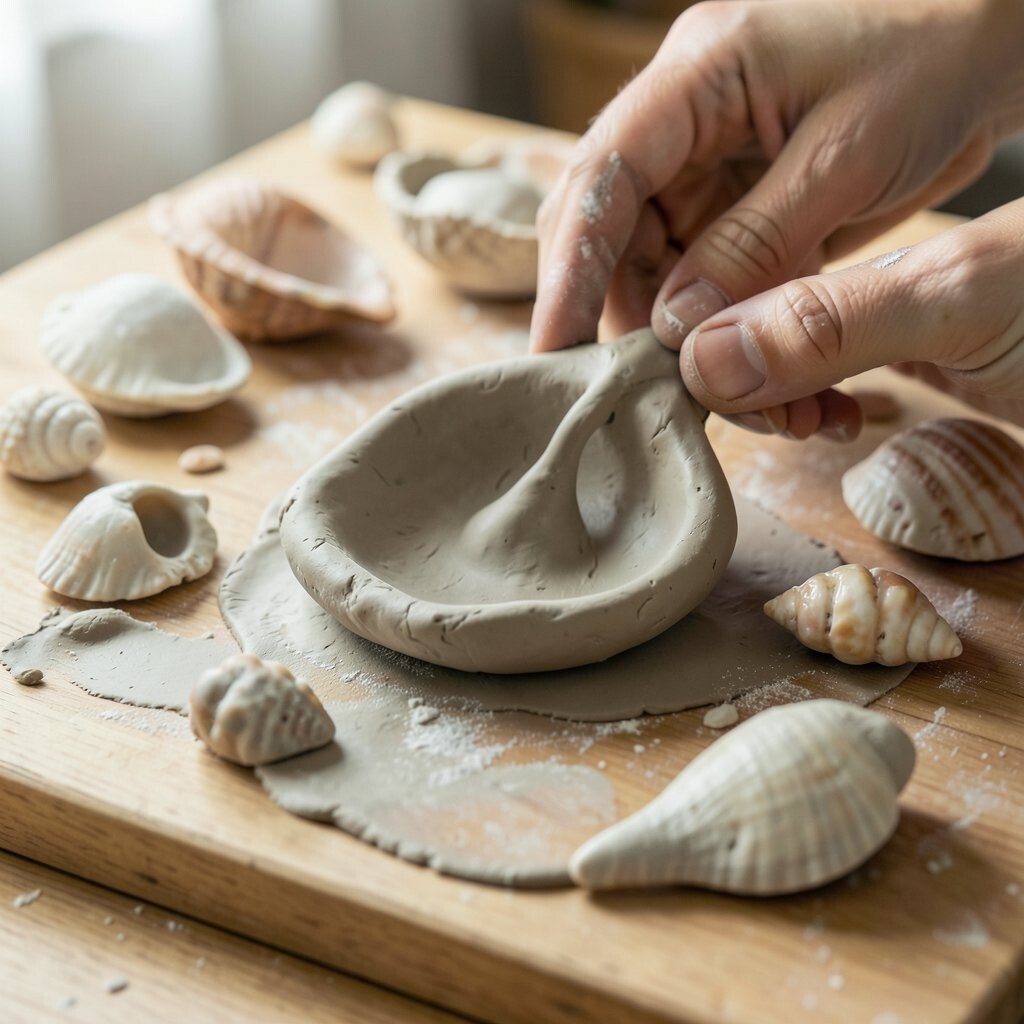
18. Mold Clay Over a Shell Collection
Top Mold Clay Over A Shell Collection Craft Tutorials
- 🎨 Seashell Palette on air dry clay base! 🐚 Unknown artist! … from facebook.com.
- 🧑🌾 Those seashell molds that I bisque fired in class… This is … from facebook.com.
- 🧑🌾 10 Seashell Crafts For A Creative Beach Day from kiwico.com.
Shells covered with clay can become tiny sculptures with a beachy feel. The curved base and shaped top create a lovely mix of nature and art.
You can make shells look like flowers, creatures, or fantasy objects. This is a low-cost idea if you already have shells from trips or craft stores. It is also a nice way to make souvenirs feel more personal and creative.
Try using pearly paint or soft blue tones for an ocean look. If you like a bolder style, add gold touches or bright coral colors. These pieces can work well on shelves, in shadow boxes, or as gift accents.
19. Sculpt Clay Over a Tabletop Center
Top Sculpt Clay Over A Tabletop Center Craft Tutorials
- 🍂 Desk clay sculpture for drawing reference from facebook.com.
- 🍁 star girls!!! 💫✨🌟 my first ever project sculpting with clay and … from instagram.com.
- 🗺️ 20 polymer clay tips and tricks for beginners from montmarte.com.
- 🍁 Aves Apoxie Sculpt Beginner's Guide from avesstudio.com.
- 🍅 Make Fun Clay Sculptures: Easy Ideas for Beginners & DIY … from lemon8-app.com.
A tabletop with clay art in the center can turn a regular table into a showpiece. The design can look like a flower burst, a map, or a flowing river across the wood.
This is a strong choice for people who want a dramatic home update without buying new furniture. Depending on the base, the project can stay fairly affordable and still feel very special. It also gives guests something fun to talk about when they sit down.
Keep the outer edges simple so the center design stands out. A clear finish can protect the surface while keeping the clay visible. You can make it match your home style by choosing natural, bright, or moody colors.
20. Add Clay Details to a Wall Shelf
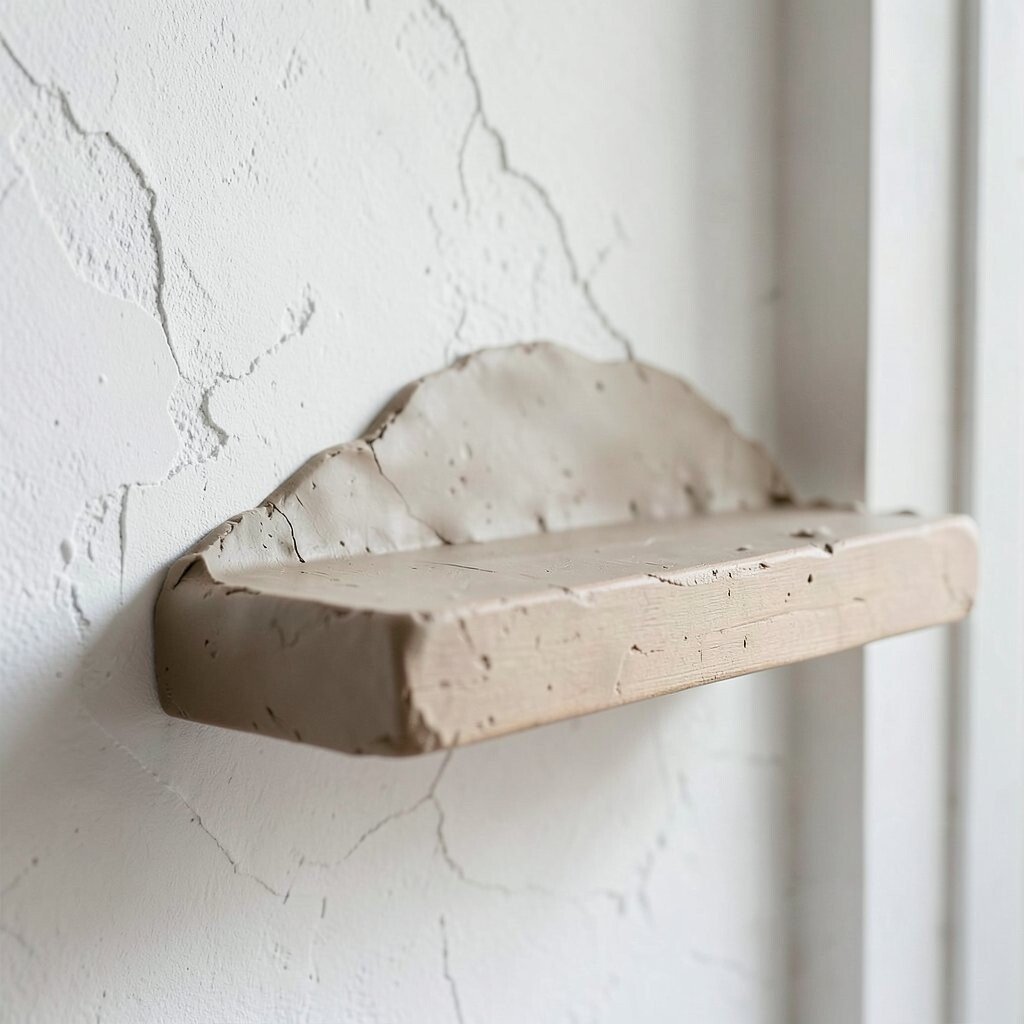
Top Add Clay Details To A Wall Shelf Craft Tutorials
- 🍅 The prettiest air-dry clay leaf shelf from instagram.com.
- 🗺️ DIY wooden shelf with polymer clay decor from facebook.com.
- 🍅 47 Easy Air Dry Clay Ideas and Projects Adults Will Want … from pillarboxblue.com.
- 💅 28 DIY Clay Letter Craft Ideas That Are Almost Too Perfect … from wonderfuldiy.com.
- 🗺️ 20+ Aesthetic Clay Ideas: Easy DIY Projects for Cute … from lemon8-app.com.
A wall shelf with clay accents can make both the shelf and the items on it feel more important. The clay can frame the edge or add little scenes that peek out from the wall.
You might place tiny birds, vines, clouds, or stars along the front. This is a smart way to upgrade a shelf you already own, which keeps the cost low. It also works well in rooms that need a little more charm without too much clutter.
Use small shapes so the shelf still holds books or decor easily. Soft colors can make the piece feel calm, while bright accents can make it pop. Personal touches like a favorite quote or symbol can make the shelf feel like part of your story.
21. Cover a Sculpture Armature with Clay Skin
Top Cover A Sculpture Armature With Clay Skin Craft Tutorials
- 🎄 Using armature with air dry clay for large sculptures? from facebook.com.
- 🍅 Armatures–permanent from glassattic.com.
- 🧑🌾 Wire Armature Sculpture using Polymer Clay – MYT CR8TiV from mytcr8tiv.wordpress.com.
- 💅 Mermaid Maquette: Armature from karengillmoreart.com.
- 🖼️ [Help] Dipping clay into plaster? : r/Sculpture from reddit.com.
Clay over an armature can bring a full sculpture to life with form and texture. The inner frame gives support, while the clay skin creates the final look.
You can shape people, animals, fantasy beings, or abstract forms with this method. It may cost more than some quick crafts because of the armature materials, but it gives you much more control over the final piece. Artists like it because it feels open, flexible, and full of creative room.
Try building the body in simple layers before adding details like hair, fur, or clothing folds. Smooth areas can contrast nicely with rough textures. If you want a personal result, use poses, faces, or symbols that reflect your own ideas and style.