Clay work feels calm and full of surprise.
A few smart supplies can make every shape look better and feel easier to make.
1. Air-Dry Clay
Top Air-Dry Clay Craft Tutorials
- 👓 30 Air Dry Clay Ideas to Try from lovelyindeed.com.
- 💅 air dry clay crafts from gatheringbeauty.com.
- 🖼️ Air Dry Clay Project ideas First-timers must try from medium.com.
- 🎄 How to Make Clay | The BEST Air Dry Clay Recipe from onelittleproject.com.
- 💅 Some of my little air dry clay projects : r/airdryclay from reddit.com.
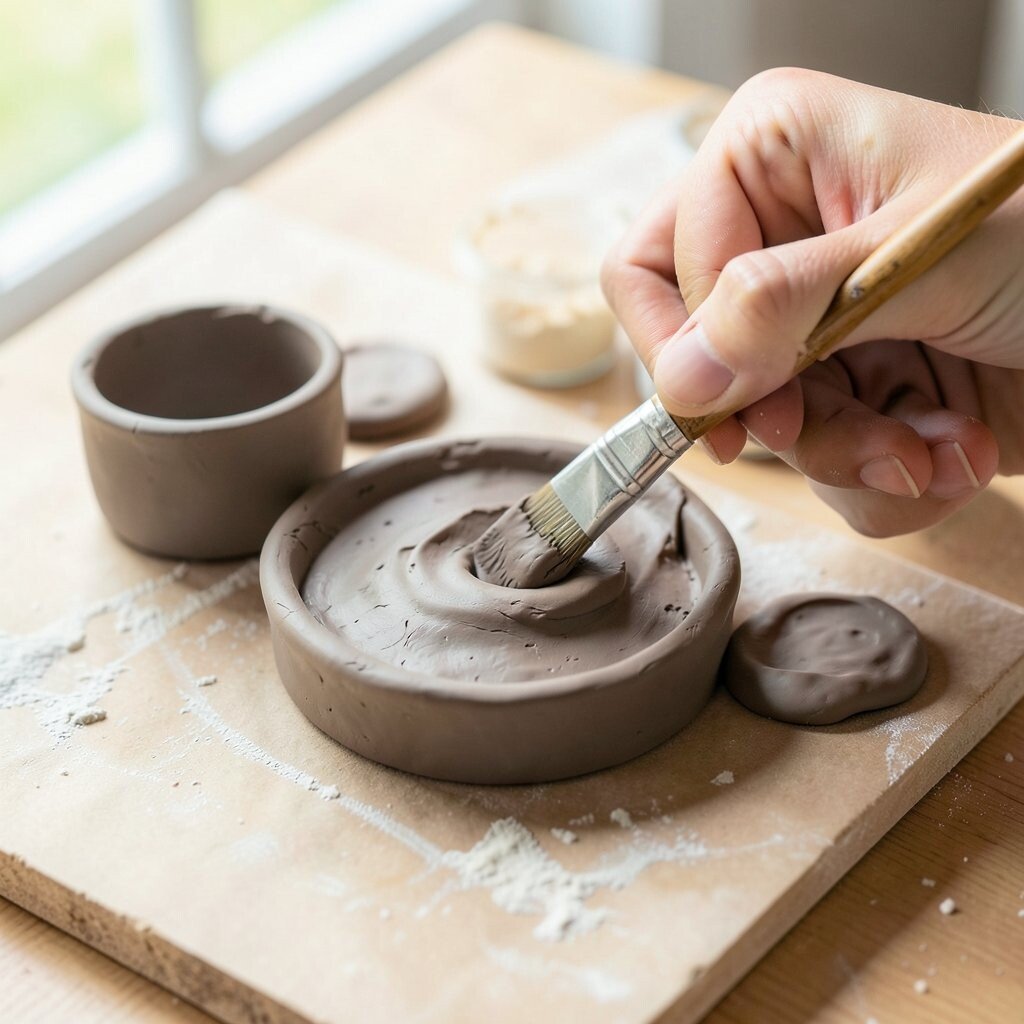
Air-dry clay is soft, smooth, and easy to shape with bare hands. It dries on its own, so you do not need a kiln or oven.
This makes it a great pick for home projects, school art, and quick gift ideas. It is also friendly on the budget, which helps if you want to try many colors and ideas without spending too much. For a personal touch, press leaves, lace, or toy textures into the surface before it dries.
2. Polymer Clay
Top Polymer Clay Craft Tutorials
- 🖼️ Polymer Clay Crafts – 21 Clever Ideas To Try! from katherinededul.com.
- 🗺️ 16 simple polymer clay projects to try from montmarte.com.
- 🧑🌾 Sculpting With Polymer Clay : 8 Steps (with Pictures) from instructables.com.
- 💅 13 Fun DIY Clay Projects to Make & Give as Gifts from sculpey.com.
- 🍂 60+ Clay Craft Projects to Make For Gifts Or To Sell! from thecottagemarket.com.
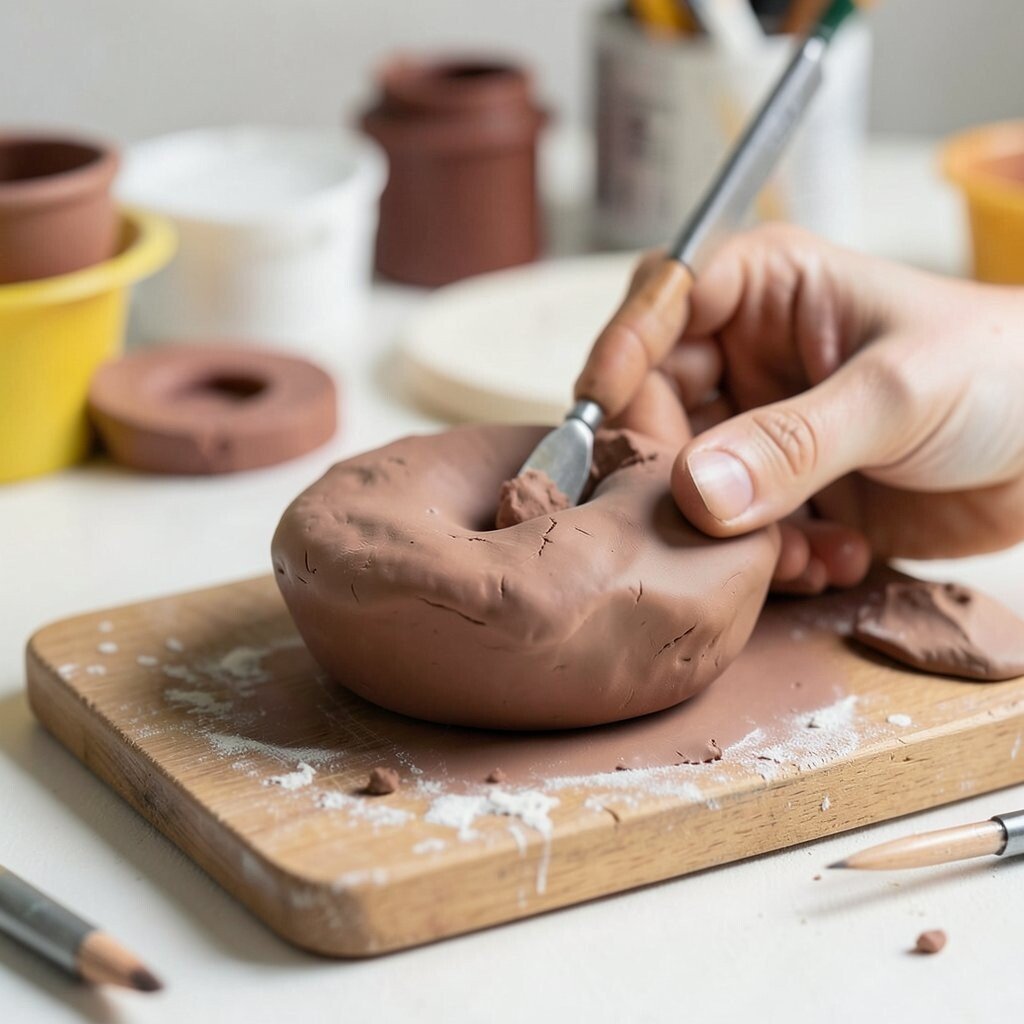
Polymer clay comes in bright colors and has a clean, polished look after baking. It stays soft until heat sets it, so you can work slowly and fix tiny details.
Many makers love it for charms, earrings, mini food, and cute figures. The material can cost more than basic clay, but a little goes a long way for small projects. A current trend is mixing bold colors with marble swirls, metallic bits, and tiny painted faces.
Try storing each color in a sealed bag so it stays fresh and ready for the next project. You can also blend small pieces to make custom shades that match your style. If you want a neat finish, smooth fingerprints with a soft tool before baking.
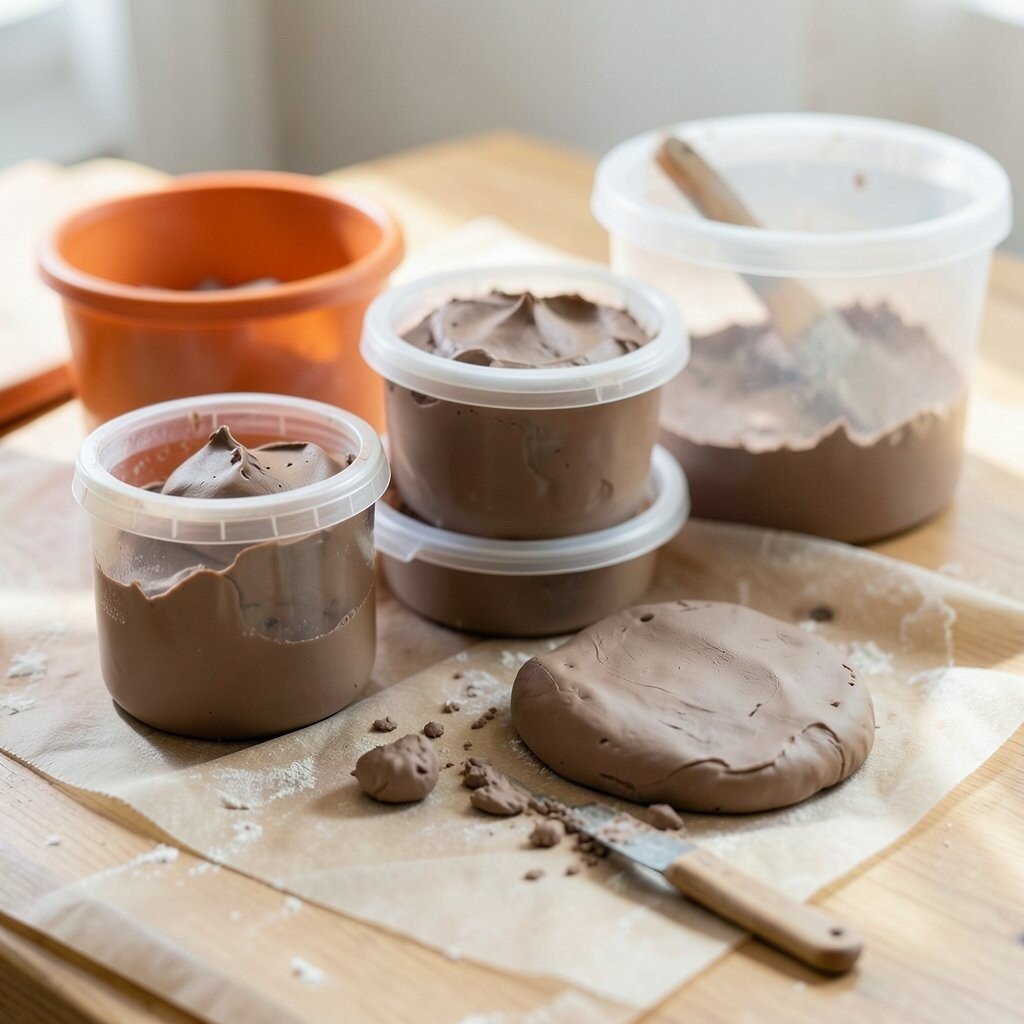
3. Pottery Clay

Top Pottery Clay Craft Tutorials
- 🎨 3D Pottery — Google Arts & Culture from artsandculture.google.com.
- 🧑🌾 Make your own clay creations with three ingredients … from mintmuseum.org.
- 🎨 Slab pottery ideas for beginners – 25 easy clay projects from frombritainwithlove.com.
- 🧑🌾 Claycraft — Shop – Tile from wellstile.com.
- 💅 12 Hand Building Clay & Coil Pottery Techniques from ancientpottery.how.
Pottery clay has a rich, earthy feel and is perfect for bowls, mugs, and vases. It looks simple at first, but it can become very elegant after shaping and firing.
This clay is a strong choice for people who want lasting pieces that can be used every day. It may cost more once you add firing and glaze, yet the final results often feel worth it. Many artists like to carve lines, dots, or waves into the surface for a handmade look.
Keep the clay covered with a damp cloth while you work so it does not dry too fast. You can also test small forms before making a large piece to save time and material. For a personal style, add thumb prints, name stamps, or simple handles with a twist.
Pottery clay also works well with modern home decor trends, especially matte finishes and soft natural tones. If you want a gentle starter project, make a tiny pinch pot first and build confidence from there.
4. Sculpting Tools Set

Top Sculpting Tools Set Craft Tutorials
- 🍅 COSMOBETTY 4 Sets Clay Sculpting Tools Kit White … from walmart.com.
- 🍁 Crafters Kits – Foam Cutting Tools from hotwirefoamfactory.com.
- 🍅 Sculpting Tool Set by Craft Smart® from michaels.com.
- 🍅 Clay Tool Set | Hobby Lobby | 2586907 from hobbylobby.com.
- 💅 Texture Tools for Sculpting Sale from facebook.com.
A sculpting tools set gives you sticks, loops, and blades for shaping clay with more control. The tools make tiny details look neat, which is hard to do with fingers alone.
These sets usually come in many shapes, so one kit can help with smoothing, cutting, and carving. They are often affordable, and even a simple set can make your art feel more polished. Try using different tips for hair, fur, folds, and pattern marks.
5. Rolling Pin
Top Rolling Pin Craft Tutorials
- 🗺️ need some ideas! have like 20 of them.. little wooden … from facebook.com.
- 🖼️ 5" Wooden Rolling Pins from woodpeckerscrafts.com.
- 🗺️ These 4th of July Rolling Pins are Perfect for Tiered Trays from rufflesandrainboots.com.
- 🍂 Restaurant in Milford & Hudson MA | Rail Trail Flatbread … from railtrailflatbread.com.
- 🧑🌾 How To Make Decorative Rolling Pins With Floral Transfer from southerncrushathome.com.
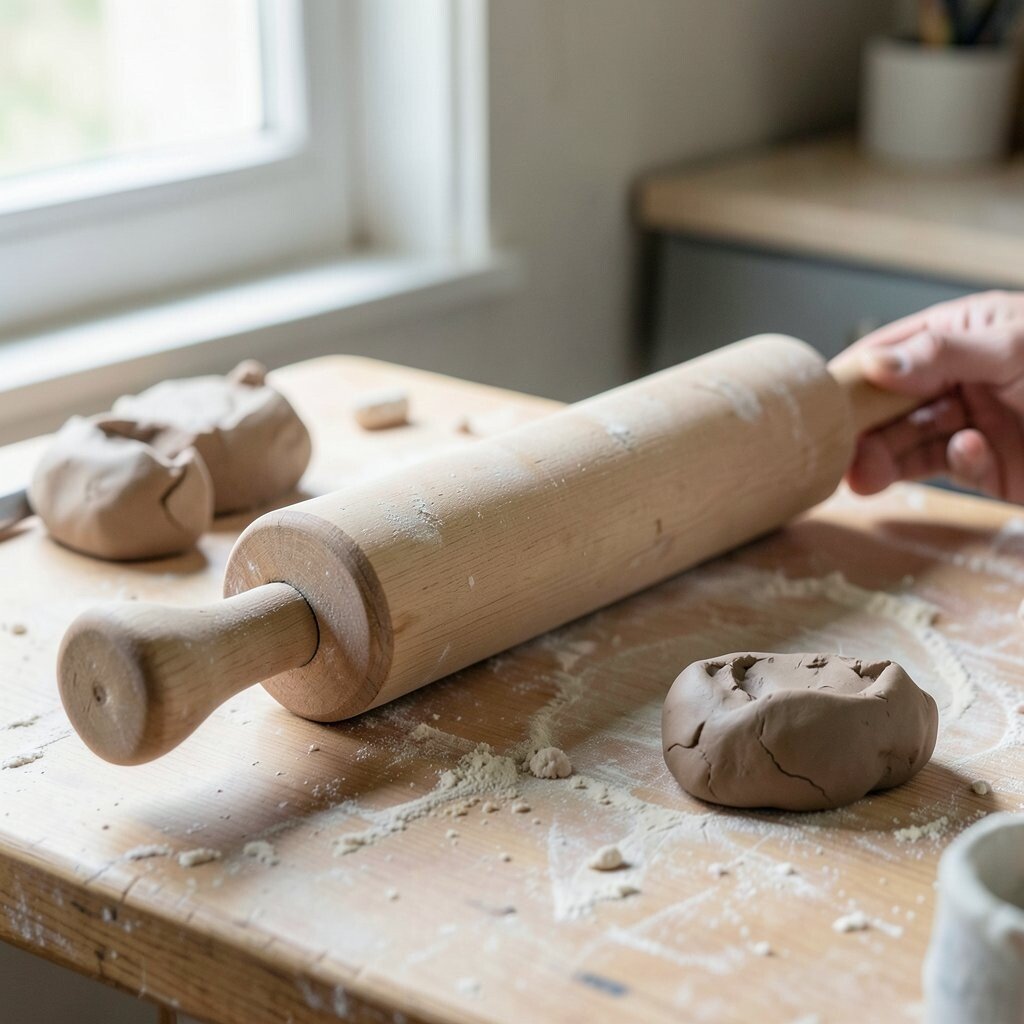
A rolling pin helps flatten clay into even sheets that look clean and tidy. It is useful for making slabs, cutout shapes, and background pieces.
Wood and acrylic versions both work well, and many crafters already have one at home. That makes it a low-cost tool with a big payoff for simple projects. You can wrap the pin in plastic wrap if you want to keep clay from sticking.
For a personal touch, use textured rolling pins that press in lace, leaves, or geometric lines. This is a fun way to make gifts look special without adding much extra work. It also fits a popular trend of handmade patterns and soft surface detail.
6. Clay Cutter Shapes

Top Clay Cutter Shapes Craft Tutorials
- 🧑🌾 6 Organic Shapes Clay Cutters for Polymer Clay, Small & … from michaels.com.
- 🎄 Basic and Classic Shapes Polymer Clay Cutters from theclayimpress.com.
- 🎨 Pattern Cutters and Cookie Cutters for Clay from clay-king.com.
- 👓 Tools : Handbuilding : Cutters from theceramicshop.com.
- 🎄 Elegant Shape No. 6 Clay Cutter from wildhoneycutters.com.
Clay cutters make sharp, neat shapes in seconds and help every piece look clean. They are great for stars, hearts, flowers, and modern outline designs.
Because they save time, cutters are a smart choice for batch projects and party crafts. Many sets are inexpensive, and you can find simple shapes or themed packs for holidays. Press straight down and lift gently to keep the edges crisp.
Mix cutter shapes with paint or glaze to make each piece feel unique. You can also layer cut pieces for earrings, ornaments, or wall art. If you want a custom look, outline the edges with tiny bead marks or carved dots.
7. Acrylic Roller Guides

Top Acrylic Roller Guides Craft Tutorials
- 💅 Multipurpose Acrylic Roller Depth Guides for Clay And Dough … from business.walmart.com.
- 🖼️ Transparent Clay Roller Tool Acrylic And Metal For Craft … from ebay.com.
- 🧑🌾 TOOLS – Acrylic Roller Depth Guides from momostudiollc.com.
- 🖼️ Yayatty 19 PCS Polyer Clay Tools, Acrylic Clay Roller … from gottschlivestockfeeders.com.
- 🍂 Polymer Clay Depth Guide Set for Polymer Clay 7.9×0.8 … from aliexpress.com.
Acrylic roller guides help you roll clay to the same thickness every time. They look simple, but they can make a big difference in neat, even results.
They are especially helpful for earrings, tiles, and matching sets. This tool can save clay and reduce waste, which is nice for both your wallet and your workspace. Many makers like to pair guides with a clear rolling pin for better control.
Try using different guide sizes for thin charms or thicker display pieces. You can also keep a small chart nearby so each project starts with the right thickness. For personalization, make a set of sample tiles to test colors and textures before starting the final piece.
These guides fit well with the current love for clean, minimal craft work. They may seem small, yet they can help beginners feel more confident right away.
8. Clay Cutting Wire

Top Clay Cutting Wire Craft Tutorials
- 🎄 AMACO Magic Mud Wire Clay Cutter, 8 Inches, Hardwood … from schoolspecialty.com.
- 🍁 Clay Cutter Wire from walmart.com.
- 🎨 Tools : Wire Cutters from theceramicshop.com.
- 🍁 Knives, Clay Cutters, Trimming & Needle Tools from georgies.com.
- 🍁 Clay Cutting Wire Tool 2 Pack Flexible Pottery Clay Dough … from ebay.com.
Clay cutting wire slices through soft clay with a smooth, clean motion. It is handy for dividing large blocks or lifting finished pieces from a board.
The wire gives you control without squishing the form, which keeps edges neat. It is also a budget-friendly tool that can last a long time with basic care. Use it gently and keep fingers clear of the line to stay safe.
Some artists use wire to make angled cuts for modern shapes and stacked forms. You can also use it to trim bottoms so bowls and cups sit flat. For a personal touch, pair it with textured marks or hand-carved initials.
9. Clay Smoother

Top Clay Smoother Craft Tutorials
- 🎨 Beginner here, how to smooth the clay? : r/polymerclay from reddit.com.
- 🗺️ Make Paper Mache Clay Smooth Without Sanding from ultimatepapermache.com.
- 🎄 23 Air Dry Clay Tips and Tricks for Beginners from colorfulcraftcorner.com.
- 🍁 How to get clay designs super smooth? from facebook.com.
- 🧑🌾 How to make clay smoother from quora.com.
A clay smoother helps erase rough spots and finger marks. It gives your project a soft, finished look without needing much effort.
Many smoothers are made from rubber, silicone, or plastic, and each type feels a little different in the hand. They are not costly, but they can make beginner work look much cleaner. Use small circles and light pressure for the best finish.
Try smoothing only part of a piece if you want a mix of polished and rustic texture. That contrast can make the art feel more alive and handmade. A trendy idea is to keep some edges smooth while leaving the center with tool marks.
This tool is especially helpful for face sculpting and tiny decorative figures. It can also make painted clay look better because the surface starts out more even.
10. Needle Tool

Top Needle Tool Craft Tutorials
- 👓 Oxford Punch Needle Tools & Sets from amyoxford.com.
- 💅 Beginner Punch Needle Guide: Which Supplies do you … from cleverpoppy.com.
- 🍂 How to Punch Needle For Beginners: A Step-by-Step Guide from jennifermaker.com.
- 🗺️ Oxford Punch Needle Tool | Boxed 10 Regular and 10 Fine … from punchystuff.com.
- 🎨 Introduction to Punch Needle Crafting from diaryofaquilter.com.
A needle tool is a thin, sharp helper for drawing lines and marking details in clay. It looks small, but it can create clean patterns, guides, and tiny holes.
People use it for scoring clay before joining pieces, which helps parts stick together better. The tool is cheap and easy to store, so it is a nice add-on for any craft box. Work slowly so the lines stay neat and do not tear the clay.
Use the needle tool to write names, sketch faces, or map out a design before carving deeper. It is also useful for checking thickness in small forms. For a personal twist, combine it with painted details so your lines stand out more.
This simple tool is still a favorite in many studios because it does so much with so little. It is one of those supplies that looks plain but earns its place fast.
11. Wooden Modeling Sticks

Top Wooden Modeling Sticks Craft Tutorials
- 🎨 Wooden Sticks Round Dowels 3mm 20cm Pack of 100 … from ebay.com.
- 🎄 Arts Crafts & Sewing Wooden Sticks and Dowels … – Walmart from walmart.com.
- 🎨 Craft Wood Sticks from staples.com.
- 🧑🌾 Craft Sticks from dickblick.com.
- 🍁 Wholesale Wooden Sticks from pandahall.com.
Wooden modeling sticks feel warm in the hand and work well for shaping soft clay. Their smooth tips make them gentle for curves, edges, and small pressed details.
They are often sold in sets, and the price is usually kind to beginners. Because wood is light, these sticks are easy to use for longer crafting sessions. You can sand the tips a little if you want a softer touch.
Many makers like wooden tools because they give a natural, handmade feel to the process. You can use them to create eyelids, petal lines, or tiny folds in clothing. For personalization, keep one stick only for texture work and another for smoothing.
12. Silicone Sculpting Tools

Top Silicone Sculpting Tools Craft Tutorials
- 👓 12 Pack: Resin Silicone Tools Set by Craft Smart® from michaels.com.
- 🖼️ Silicone Sculpting Tool for Clay (Small / Set of 5 pcs) from miniaturesweethk.com.
- 👓 Silicone Sculpting Tools from amazon.ca.
- 🎄 I found these sculpting tools in my local hobby shop. Is … from reddit.com.
- 🎨 US Art Supply Pottery and Clay and Sculpting Tools 12 … from walmart.com.
Silicone sculpting tools are soft, flexible, and great for fine detail work. They can smooth clay without leaving hard marks, which makes them very useful for delicate surfaces.
These tools are a smart buy for people who want clean results with less fuss. They are often priced well and last a long time when cleaned properly. Their soft tips also help shape clay around curves and tiny corners.
Try them for blending seams, shaping lips, or softening edges on figurines. They are especially nice for modern character art, which is still very popular. For a unique look, use them to make gentle skin textures or smooth petal layers.
Silicone tools are also easy to wipe clean, which keeps your workspace neat. If you work with many colors, having one tool per color can save time and keep shades pure.
13. Texture Mats

Top Texture Mats Craft Tutorials
- 🧑🌾 Slab Mats | Clay Texture Mats | Pottery Molds from sheffield-pottery.com.
- 🎄 Efco Texture Mats from projects4crafters.blogspot.com.
- 💅 Basketball Texture Mat Board for 13×13 Frames from michaels.com.
- 👓 Custom texture mats : r/polymerclay from reddit.com.
- 🎨 Texture mats for ceramic decoration from theceramicshop.com.
Texture mats press patterns into clay and give plain surfaces instant charm. They can make clay look like fabric, stone, wood, or lace with very little effort.
This is a great way to add style without needing strong carving skills. Mats are usually reusable, so they can be a smart buy for artists who make lots of pieces. Press the clay evenly so the pattern stays clear from edge to edge.
Texture mats are perfect for jewelry, wall hangings, and decorative tiles. You can also cut the patterned clay into shapes after pressing it for a cleaner design. A fun personalization idea is to mix one smooth area with one textured area on the same piece.
Many makers now love natural textures, especially leaf veins and woven looks. These patterns can make simple clay feel rich and special right away.
14. Stamp Sets

Top Stamp Sets Craft Tutorials
- 🎄 Colorations® Easy-Grip Stampers, Shapes – Set of 14 from discountschoolsupply.com.
- 🎄 No Brand "Travel" stamps Set of 14 stamps from ebay.com.
- 💅 Pebbles Cool Boy Small Stamp Set – 14 Pieces from americancrafts.com.
- 🖼️ Tim Holtz Halloween Sketchbook Cling Stamp Set from callandplay.com.
- 🧑🌾 14 Hearts & 8 Sentiments With Storage Bag Tim Holtz Stamps from tabunkanpo.org.
Stamp sets add letters, symbols, and tiny pictures to clay in a fast, neat way. They are great when you want repeated details that look crisp and clear.
Alphabet stamps can turn a plain piece into a name tag, ornament, or gift label. Many sets are low cost, and they are easy to share across many projects. Press them firmly, then lift straight up to keep the image sharp.
Try mixing stamps with paint or colored glaze to make the marks stand out more. You can also stamp a border around a bowl or tile for a custom finish. Trendy makers often use simple words, short quotes, or tiny initials for a clean look.
Stamp sets are great for kids, families, and anyone who wants fast results. They make it easy to add meaning without a lot of extra steps.
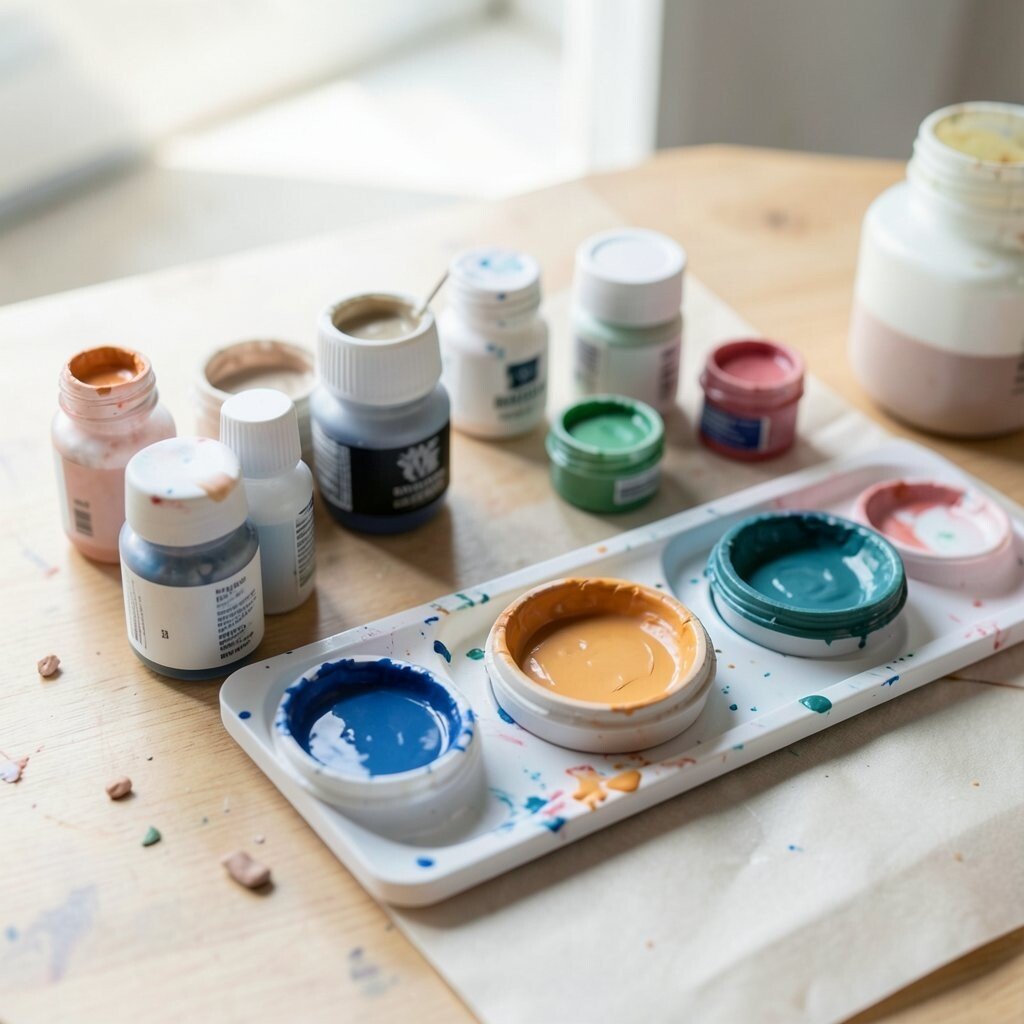
15. Paint Brushes

Top Paint Brushes Craft Tutorials
- 🍅 White Taklon 15 Piece Brush Pack by Craft Smart® from michaels.com.
- 🍁 Hello Hobby 15-Piece Art Brush Set Filbert round flat fan … from walmart.com.
- 🍂 Arteza® Detail Paint Brushes Set, 15 pc. – ARTZ-8009 from plaidonline.com.
- 🍁 Nicpro Micro Detail Paint Brush Set,15 Tiny Professional … from nicpro.com.
- 🎄 Pintar 15-Piece Fine Detail Paint Brushes for Acrylic Painting from pintarartsupply.com.
Paint brushes bring clay work to life with color, shine, and tiny details. They can make a plain shape feel bright, playful, or soft and elegant.
A small brush set is usually affordable and useful for many art projects beyond clay. Fine tips help with eyes, lines, and tiny spots, while wider brushes work for background color. Clean brushes well so the bristles stay soft and ready.
Try using dry brushing for a gentle weathered look or thin paint layers for a smooth finish. You can also add gold, silver, or pearly touches for a trendy handmade style. For personalization, paint patterns that match a room, outfit, or favorite animal.
Brushes are a must if you enjoy changing plain clay into colorful art. They give you a lot of freedom without needing expensive gear.
16. Acrylic Paint Set
Top Acrylic Paint Set Craft Tutorials
- 🎄 16 Color Matte Acrylic Paint Value Pack by Craft Smart® from michaels.com.
- 🎨 Apple Barrel ® Multi-Surface Satin Acrylic Paint 16 Color Set from plaidonline.com.
- 🎨 Crafter's Collection Acrylic Paint – 16 Piece Set from hobbylobby.com.
- 🎨 Colorations® Acrylic Paint Set – 16 Colors from discountschoolsupply.com.
- 🎨 Craft Smart 16 Color Satin Acrylic Paint Value Pack from walmart.com.
An acrylic paint set gives you strong color that works well on dried clay. The paints dry fairly fast, so you can keep building layers without waiting too long.
These sets come in many sizes, from small starter packs to larger artist kits. A basic set is often a great value because it covers so many project ideas. For the best finish, use a primer or base coat if your clay surface is very porous.
Mix colors to match home decor, holiday themes, or favorite characters. You can also paint tiny dots, stripes, and flowers to make each piece feel personal. One current trend is soft pastel palettes with a few bright accent colors.
Acrylic paint is a simple way to make clay look more polished and lively. It works well for kids’ crafts, gifts, and display pieces alike.
17. Sealant or Varnish

Top Sealant Or Varnish Craft Tutorials
- 🧑🌾 What's the difference between varnishes and sealers? from reddit.com.
- 💅 Arts and Crafts Varnish from staples.com.
- 💅 Top Coats and Sealers for Crafts – A Comprehensive Guide! from thegraphicsfairy.com.
- 🎄 What is the best sealant or varnish to use for paintings? from facebook.com.
- 🖼️ Craft Varnish from walmart.com.
Sealant or varnish adds a protective layer that helps clay pieces last longer. It can give a matte, satin, or glossy finish, depending on the look you want.
This supply is worth the cost because it helps protect color and surface details. It can also make a project look more finished and ready for display or gifting. Brush on thin coats and let each layer dry fully for the best result.
Choose a finish that fits the mood of your piece, such as shiny for cute charms or matte for natural decor. You can even use different finishes on one project to highlight certain areas. For personalization, seal only the painted parts and leave some clay bare for contrast.
Many makers use sealant on modern jewelry and home decor because it keeps the work looking fresh. It is a small step that can make a big visual change.
18. Work Mat

Top Work Mat Craft Tutorials
- 🖼️ Fiskars Self-Healing Cutting Mat 18 X24 from walmart.com.
- 💅 18" x 24" Cutting Mat: 3-ply, fully gridded – translucent-MT from artsupply.com.
- 🍂 Arteza® Self-Healing Rotary Cutting Mat, 18" x 24" from plaidonline.com.
- 🎄 WORKLION 12" x 18" Art Self Healing PVC Cutting Mat … from michaels.com.
- 💅 18 In. X 24 In. 5-Ply Cutting Mat, Pink/Blue from usartsupply.com.
A work mat gives you a clean place to shape clay and keeps your table safer. It also helps stop sticking, which makes cleanup much easier.
Silicone mats are a popular choice because they are flexible and simple to wipe off. They may cost a little more than paper, but they last much longer and feel nicer to use. A mat with measurement lines can help you cut and size pieces more evenly.
Use a dark mat for light clay and a light mat for dark clay so your work stands out clearly. You can also keep one mat just for messy paints and another for clean shaping. For a personal setup, place small trays nearby for tools, scraps, and finished parts.
This supply helps your whole creative space feel more organized and calm. It is a quiet helper that makes every project smoother from the start.
19. Storage Containers
Top Storage Containers Craft Tutorials
- 🗺️ Bevtee Art Supplies Storage Organizer, 19" Collapsible … from walmart.com.
- 💅 Craft Storage | Boxes, Containers & Organizers from hobbylobby.com.
- 🍁 19 Tan Plastic Vial Bottle Storage Container Lid Empty 2 … from ebay.com.
- 🧑🌾 Craft Storage, Containers, Organizers & Carts | Size: 19" x 9" x 7" from canada.michaels.com.
- 🗺️ Storage Boxes & Organization Bins from ikea.com.
Storage containers keep clay, tools, and finished pieces neat and easy to find. Clear boxes are especially nice because you can see what is inside right away.
Good storage saves money by helping clay stay fresh and tools stay in good shape. Lidded bins, jars, and drawer trays all work well, and many are easy to find at a fair price. Labeling each container can save time when you are in the middle of a project.
Try sorting by color, tool type, or project stage so your setup feels simple and fast. You can also keep a small “ideas box” with charms, beads, and texture bits for future use. A trendy idea is using matching containers for a tidy studio look that feels calm and creative.
Storage can also make your supplies feel more personal and inspiring. When everything has a place, it is easier to start making art right away.