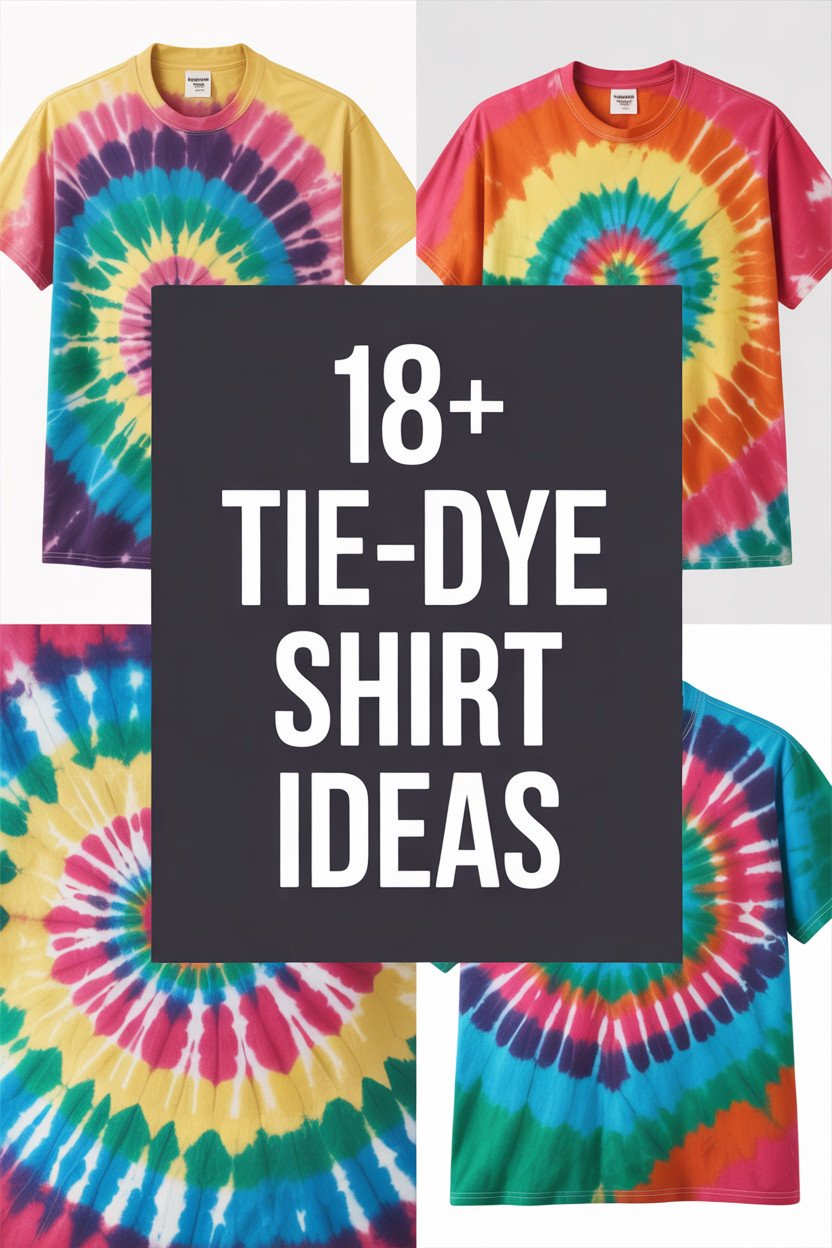
There’s something magical about creating your own tie-dye shirt. With just a few simple supplies, you can turn a plain shirt into a wearable work of art. Ready to unleash your creativity?
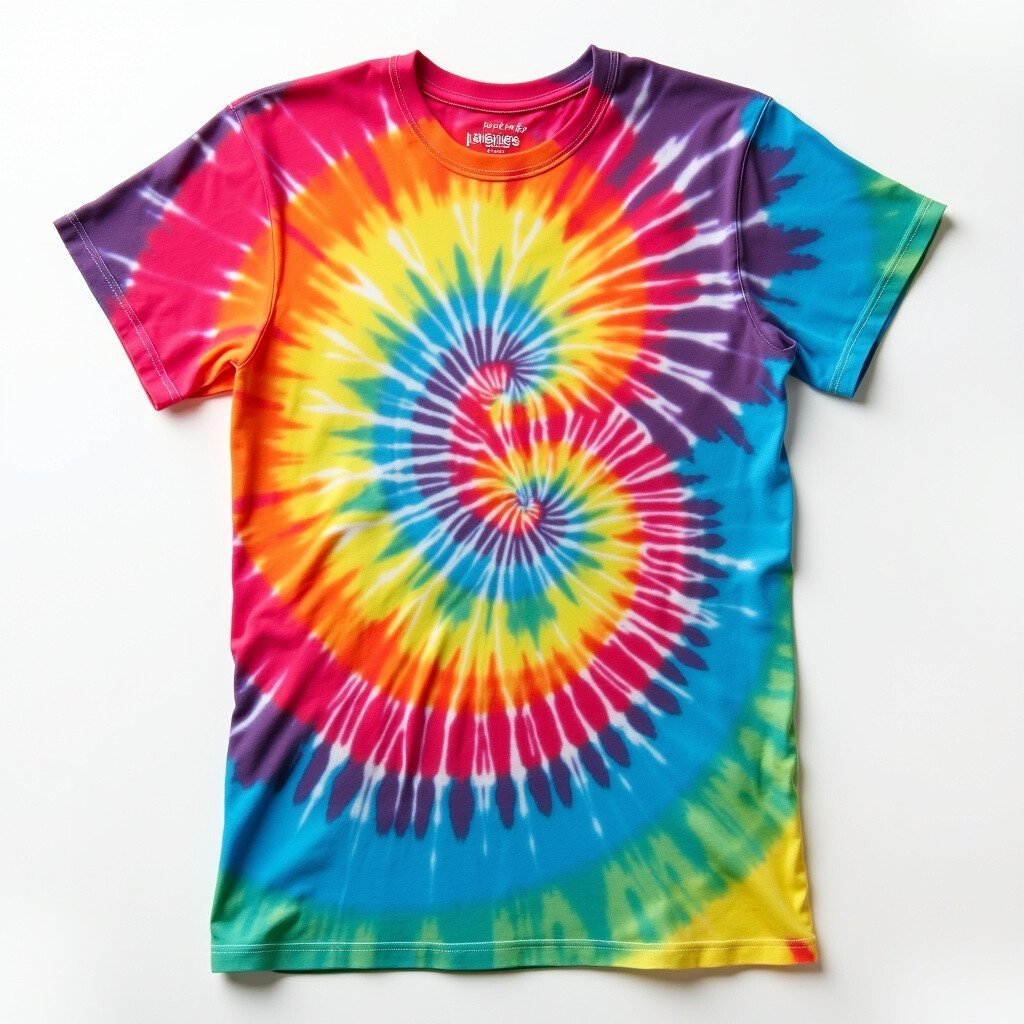
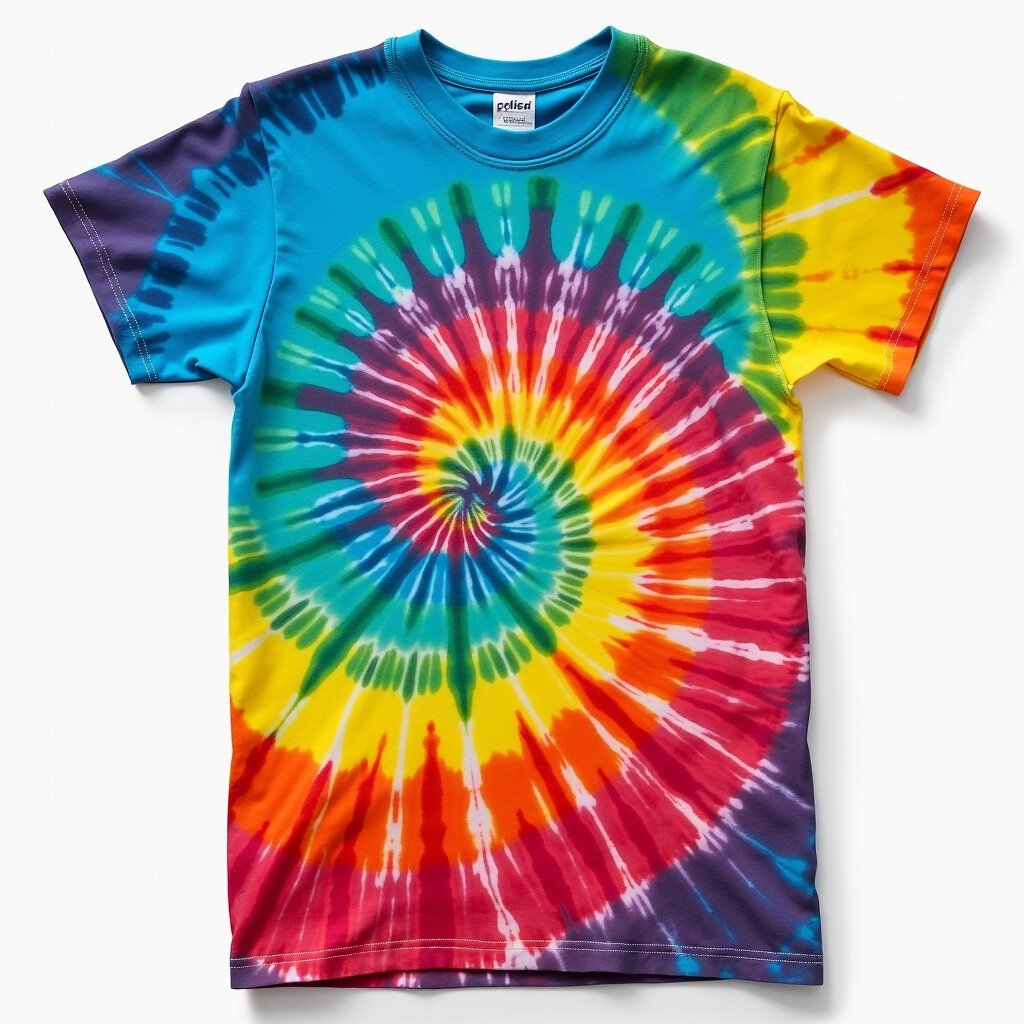
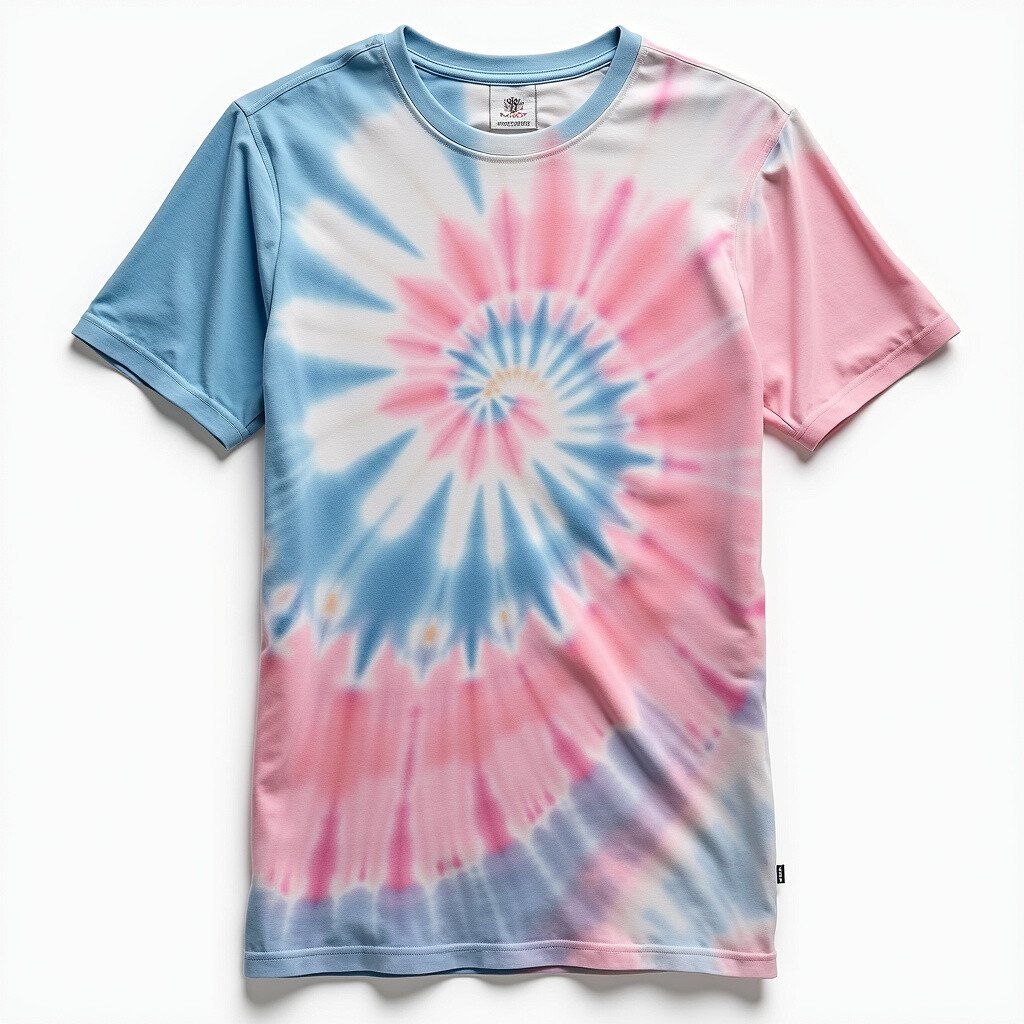
1. Classic Spiral
Top Classic Spiral Craft Tutorials
- 🎨 Spiral Art Kit from walmart.com.
- 🍅 Tie-Dye 101 {the classic spiral|} from jedicraftgirl.com.
- 🧑🌾 Spiral Art Kit for Kids: Creative DIY Craft Sets from target.com.
- 🍁 1 classic a4 lined spiral notebook fun spiral notebook funny from temu.com.
- 🧑🌾 Spiral Art Craft Set Spirograph Stencil … – eBay from ebay.com.
The classic spiral tie-dye shirt is a timeless favorite. Twist the center of your shirt, add some rubber bands, and apply different dye colors in sections. This design creates a vibrant, swirling rainbow effect that’s perfect for any occasion.
It’s unique because each twist results in a different pattern, so no two shirts are ever the same. The process is simple and doesn’t require precise measurements, making it great for beginners.
Keep costs low by using a basic white shirt and a small tie-dye kit. Play with color combinations to match your personal style or the latest fashion trends.
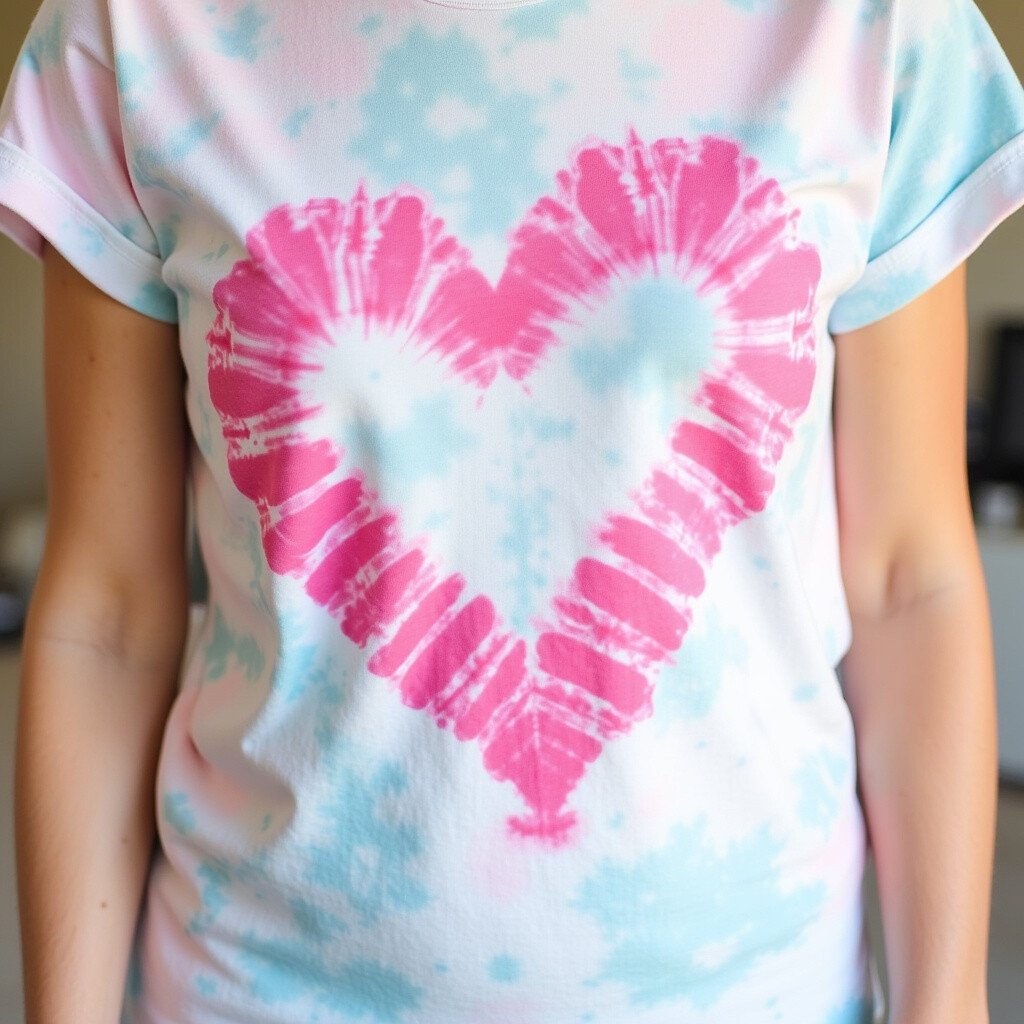
2. Heart Shape
Top Heart Shape Craft Tutorials
- 🗺️ 2 Hearts Shaped DIY crafts #idea #flowers #trend from facebook.com.
- 🍂 Tissue Paper Puffy Heart Valentine's Window Decoration from smilemercantile.com.
- 🎄 Cut craft foam heart shapes in half to make "TWEET" little … from facebook.com.
- 👓 20 Adorable Heart Crafts (2026) from abcdeelearning.com.
Show some love with a heart-shaped tie-dye design. Fold your shirt in half, draw half a heart with a washable marker, and pleat along the line. Secure with bands and apply your favorite colors.
This idea is perfect for expressing love and positivity. It’s a great gift for friends or to wear at events like Valentine’s Day.
Choose bold colors for a striking look, or soft pastels for a subtle effect. Personalize by adding initials or small symbols inside the heart.
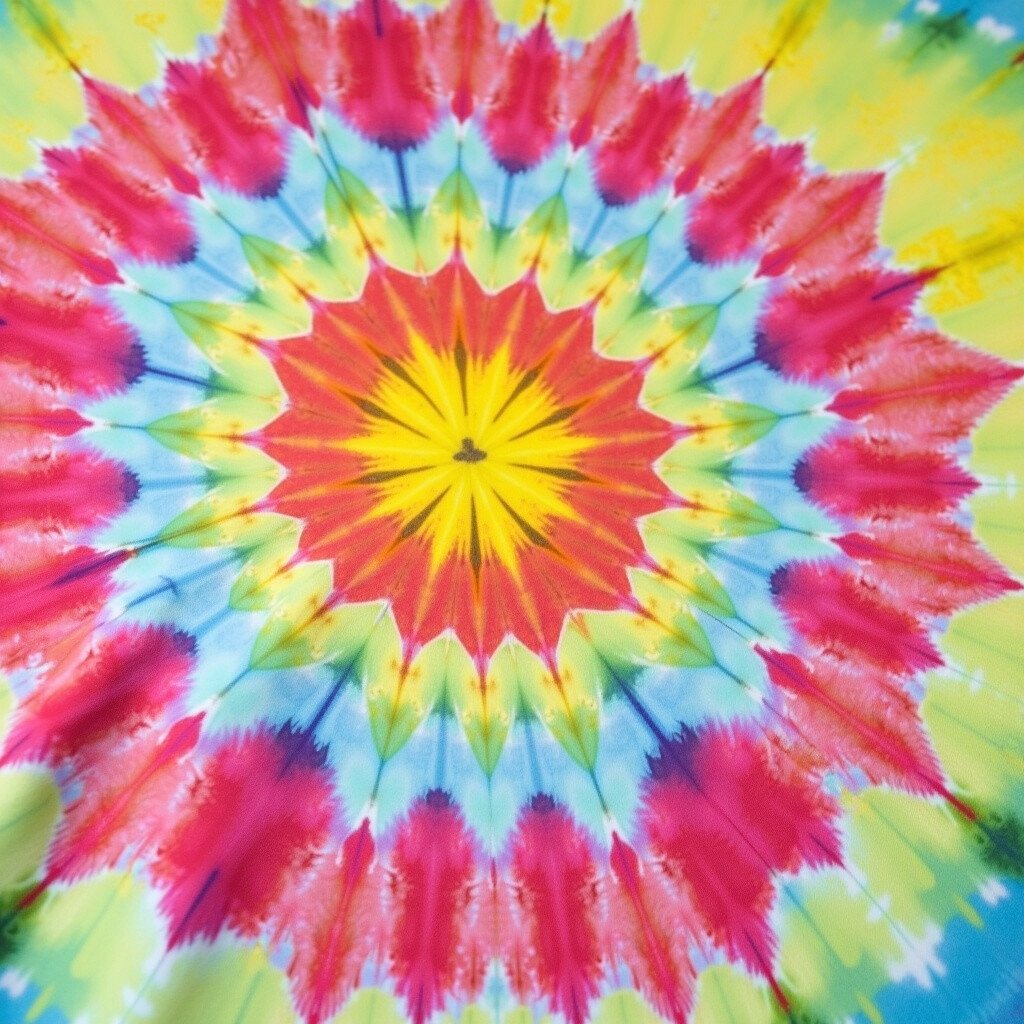
3. Sunburst
Top Sunburst Craft Tutorials
- 🖼️ 3" Sunburst (10 Pack) from solawoodflowers.com.
- 💅 SunBurst Craft Beads – Page 3 from beadtin.com.
- 🧑🌾 Ruby misc sizes Sunburst Craft Beads 3 new in bags from ebay.com.
- 🗺️ Sunburst Craft Supplies Crafting from walmart.com.
- 💅 I crafted my own sunburst wall decor. Very happy with the … from facebook.com.
Create a burst of sunshine with the sunburst design. Pinch the fabric where you want the center of the burst and secure with bands. Add concentric circles of color to mimic the sun’s rays.
This design is bright and cheerful, ideal for summer wear. Each burst can be a different color or shade, allowing endless personalization.
It’s a cost-effective project since you can use leftover dye from other projects. Experiment with different center placements for unique results.
4. Crumple Technique

Top Crumple Technique Craft Tutorials
- 🎄 How To Crumple Tie Dye from mygrowingcreativelife.com.
- 🧑🌾 Learn how to crumple tie dye! from gathered.how.
- 🍂 Tie-Dye Tutorial: Crumple Technique for Beginners from domestika.org.
- 🎄 How to Crumple Tie Dye Technique from sarahmaker.com.
- 🗺️ Crumple Bleach Tie Dye : 5 Steps (with Pictures) from instructables.com.
The crumple technique is as easy as it sounds. Scrunch your shirt into a ball and apply dye randomly for a spontaneous, abstract pattern.
It’s the ultimate low-effort, high-reward project. The randomness ensures each shirt is one-of-a-kind, and there’s no wrong way to do it.
Use minimal dye for a subtle look or go wild with color for a bold statement. It’s a great way to use up small amounts of leftover dye.
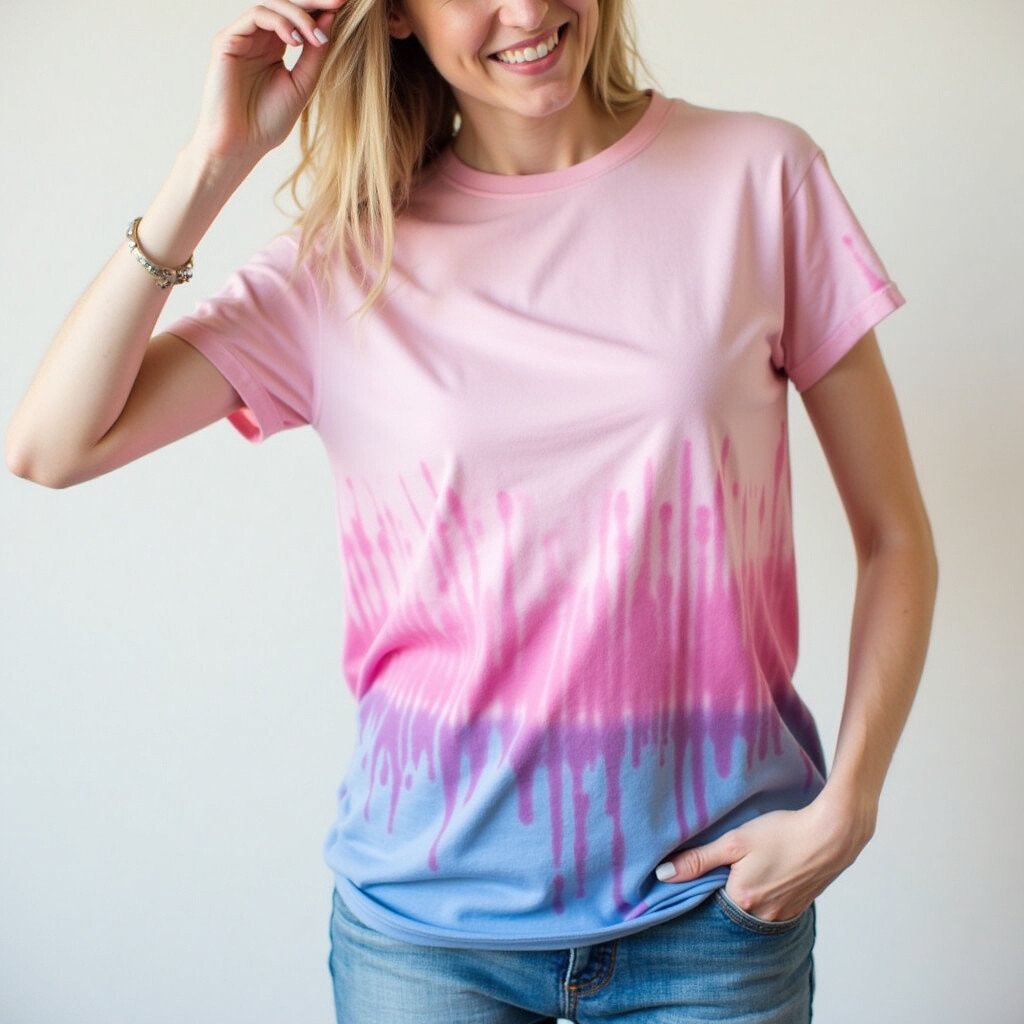
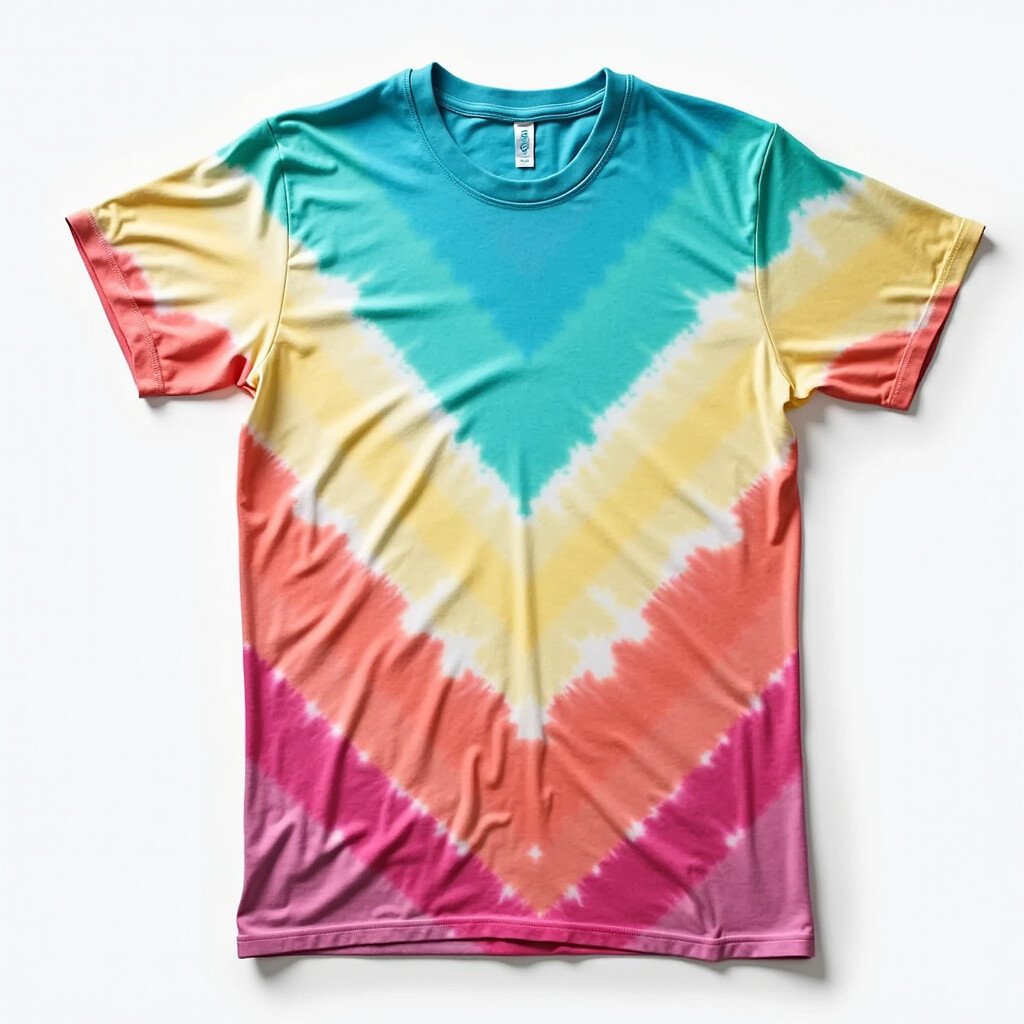
5. Ombre Effect
Top Ombre Effect Craft Tutorials
- 💅 5 Ways to Do Ombre from infarrantlycreative.net.
- 🍁 Make a Set of Five Ombre Crocheted Coasters | Envato Tuts+ from design.tutsplus.com.
- 🎨 How To Easy Ombre Glitter Effects from gerryscraftroom.com.
- 🍂 Creating Ombre Effect on Cards with March Plate from facebook.com.
- 🎨 How to Paint an Ombre Canvas Painting DIY from paintspirationart.com.
For a modern, stylish look, try the ombre effect. Dip the bottom of your shirt into dye, allowing it to gradually fade upwards.
This technique is very trendy and can be customized with any color, from cool blues to fiery reds. It’s perfect for creating a chic, elegant garment without much effort.
To achieve a smooth gradient, slowly lift the shirt from the dye. You can use natural dyes for an eco-friendly twist.
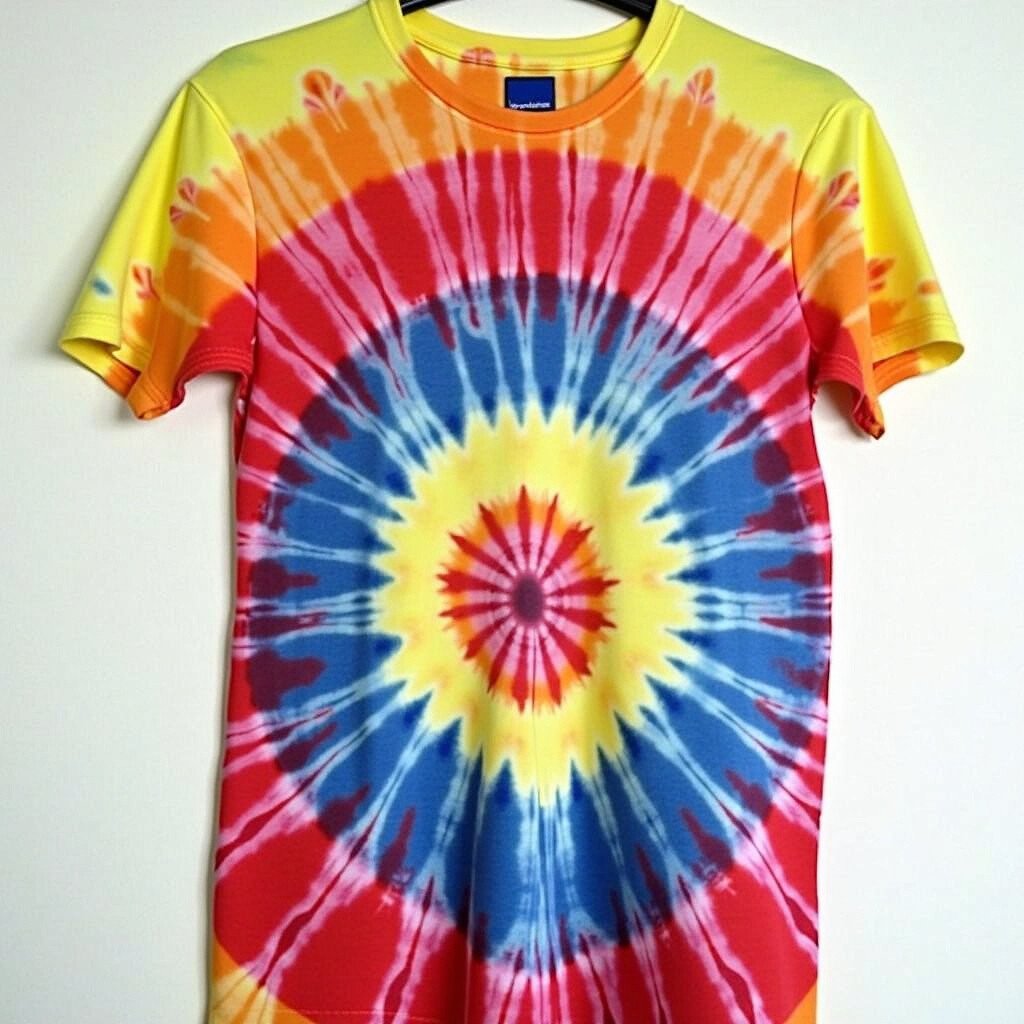
6. Bullseye
Top Bullseye Craft Tutorials
- 👓 Advancement – Minecraft Wiki – Fandom from minecraft.fandom.com.
- 🍅 Bullseye Location: Weapon Stats and Info | Far Cry 6 from game8.co.
- 🍅 Advancement from minecraft.wiki.
- 🍂 DIY for Kids: Hit the Bullseye With Your Own Bow and … from galileo-camps.com.
- 🧑🌾 Wood banner triangle and bullseye house craft tutorial from facebook.com.
Make a bold statement with the bullseye design. Pinch the center of your shirt, tie it with bands in sections, and apply contrasting colors.
This idea is powerful and eye-catching. It’s especially popular for sports events or festivals.
Try using your favorite team’s colors or mix and match for a playful look. The materials needed are minimal, keeping costs down.
7. Stripes

Top Stripes Craft Tutorials
- 👓 7" Stripe Gift Box Decoration: Black & White from craftoutlet.com.
- 🎨 Craft ideas for kids for Stars and Stripes week? from facebook.com.
- 🍅 Stars & Stripes Burlap Ruffle Wreath from awesomewithsprinkles.com.
- 🗺️ Stars & Stripes – Red, White & Blue Crafts from craftingjeannie.com.
- 🎄 Stars & Stripes: Patriotic Crafts for Toddlers from ppppizzazz.blogspot.com.
Achieve a classic look with tie-dye stripes. Fold your shirt accordion-style, secure with bands, and dye in sections.
Stripes are always in fashion and work well with any color combination. They’re perfect for creating a nautical or retro vibe.
Play with stripe widths and orientations for different effects. This design is a great way to practice precision in dye application.
8. Ice Dye
Top Ice Dye Craft Tutorials
- 🍂 Ice Dye Technique from tiedyeyoursummer.com.
- 🎨 Ice Dye Set – 6 colors (8 oz) from store.jacquardproducts.com.
- 🍁 Ice dye tutorial for beginners? from facebook.com.
- 🍅 Unleash Your Creativity with Ice Dye: A Step-by- … from tulipcolor.com.
- 🍁 7 Tips for Creating Amazing Designs With Ice Dye – Jojotastic from jojotastic.com.
Add an element of surprise with ice dyeing. Cover your shirt with ice, sprinkle powdered dye on top, and watch as the ice melts, blending colors together.
This method creates unique, watercolor-like patterns that are soft and beautiful. It’s perfect for those who enjoy unexpected results.
Experiment with different ice arrangements and dye colors. The technique is easy and requires no special skills or tools.
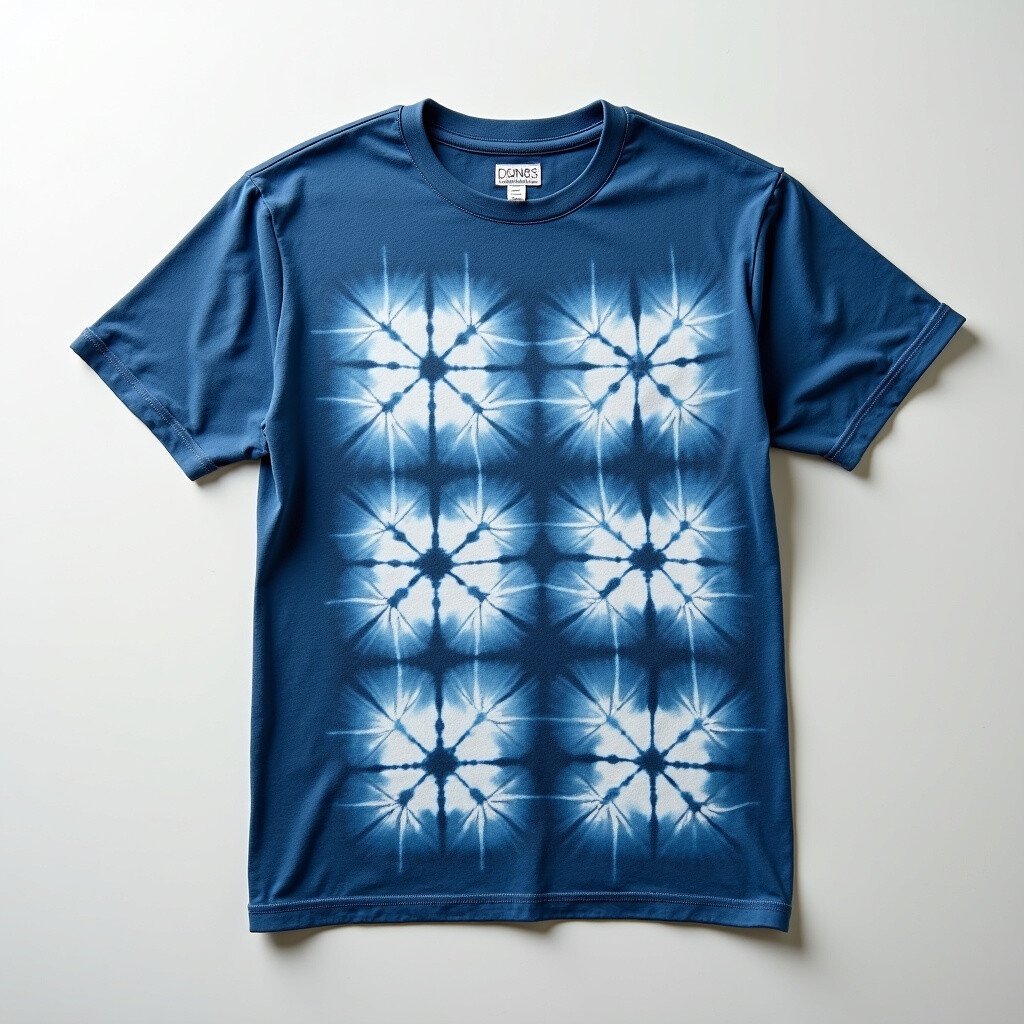
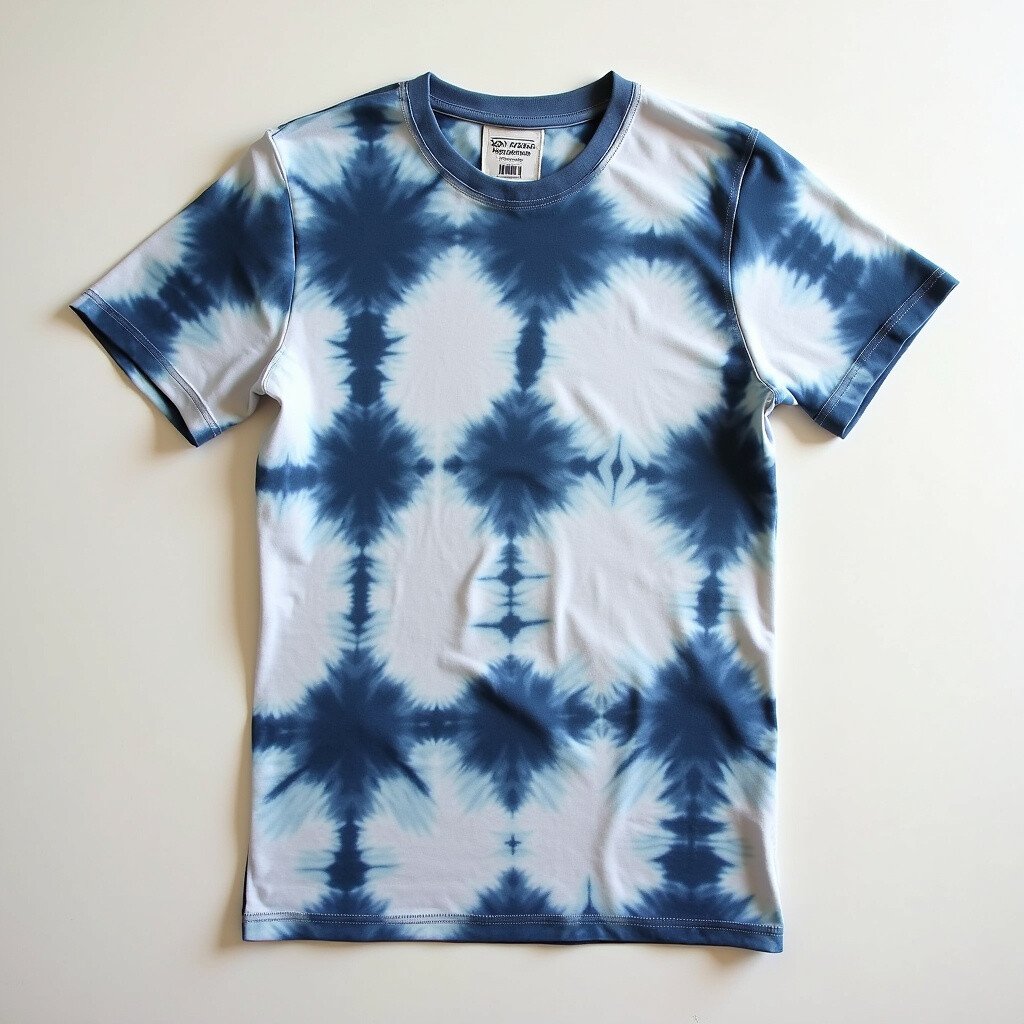
9. Shibori-Inspired
Top Shibori-Inspired Craft Tutorials
- 🍅 Shibori Inspired from littleislandcrafts.com.
- 🎄 Shibori Tie Dye – 12 Easy Patterns from paintsewgluechew.com.
- 🍂 Make Shibori-Inspired Paper Snowflakes from creativebug.com.
- 🎨 Easy DIY Shibori Techniques and Ideas from jenniferperkins.com.
- 🎄 Favorite DIY Shibori Projects from aliceandlois.com.
Embrace Japanese tradition with a shibori-inspired design. Use folding and binding techniques to create intricate geometric patterns.
Shibori is known for its elegance and complexity. It’s a great way to add cultural flair to your wardrobe.
Start with basic shapes and work your way up to more complex designs. Indigo dye is traditionally used, but any color can create stunning results.
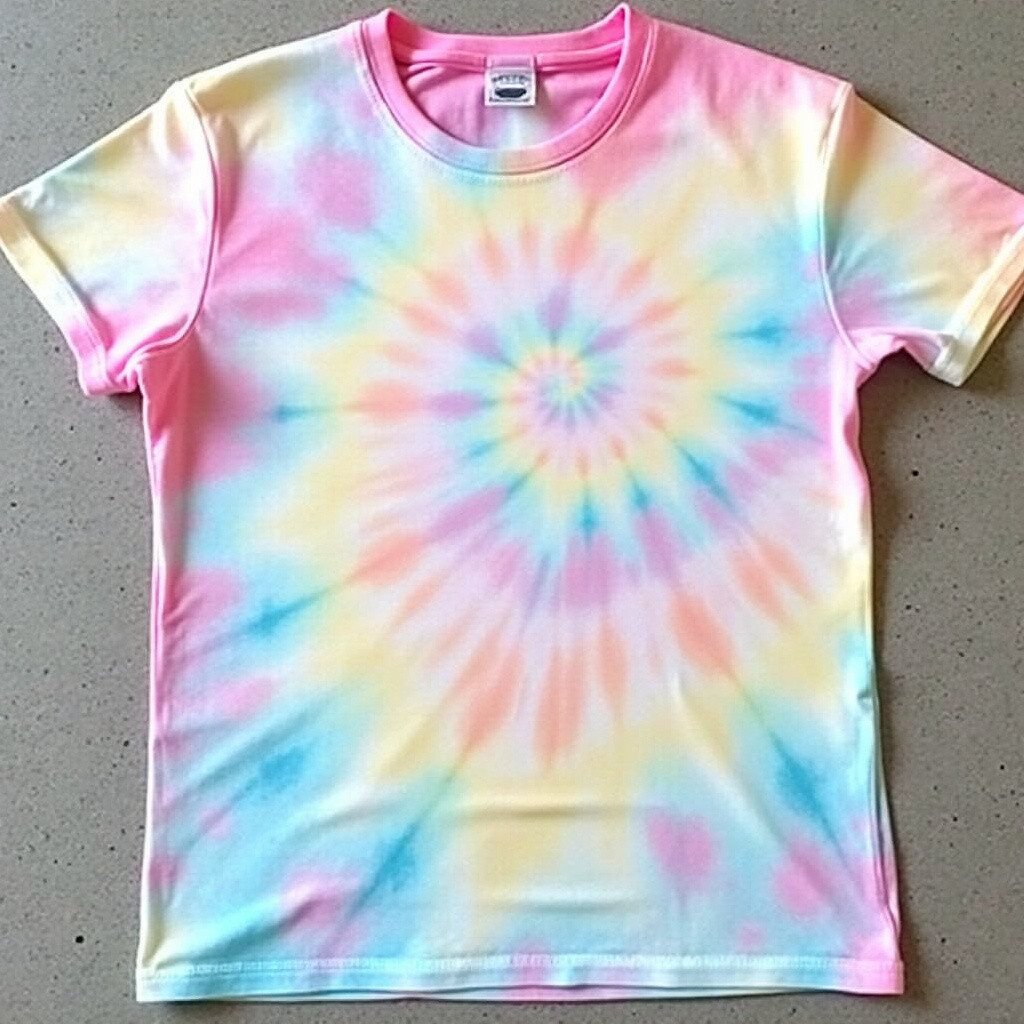
10. Rainbow Burst
Top Rainbow Burst Craft Tutorials
- 🖼️ HOW TO MAKE COLORFUL "SAND" 🌈 This rainbow in a … from facebook.com.
- 🍅 10+ Rainbow Art Activities for Kids from sugarspiceandglitter.com.
- 👓 10Pcs Rainbow Burst Faux Leather Sheets Gradient Color … from walmart.com.
- 🗺️ Round Rainbow Burst | MakerPlace by Michaels from michaels.com.
- 🍅 10 Rainbow Craft Ideas for St Patrick's Day from awesomelycrafty.com.
Bring color to life with a rainbow burst. Fold your shirt in a spiral and apply all the colors of the rainbow from the center outwards.
This design is vibrant and joyful, perfect for parties or pride events. It showcases the full spectrum of colors in a dynamic way.
Use high-quality dyes for the brightest results. It’s a fun project for all ages and an excellent way to express inclusivity and diversity.
11. Chevron Pattern
Top Chevron Pattern Craft Tutorials
- 👓 How to count to 11 with chevron? from facebook.com.
- 🖼️ Chevron Pattern Bracelet : 18 Steps from instructables.com.
- 🍁 Stencil1 Stencil – Chevron, Repeat Pattern, 11" x 11" from dickblick.com.
- 👓 Easy Crochet Chevron Blanket from repeatcrafterme.com.
- 🗺️ Chevron with Break Repeat Pattern Wall Stencil (11″x11″) from stencil1.com.
Turn heads with a trendy chevron pattern. Fold your shirt in a zigzag pattern and apply different colors to each section.
Chevron is modern and stylish, a favorite for fashion-forward individuals. It’s a great way to add structure and artful direction to your designs.
Experiment with color gradients or bold contrasts. This pattern looks professional but is easy enough for beginners to master.
12. Polka Dots
Top Polka Dots Craft Tutorials
- 🍁 Polka Dot Craft Pieces (12 Pieces) Polyester 22" x 4" from ebay.com.
- 💅 12" Wooden Sign: Hello and Welcome Polka Dots from craftoutlet.com.
- 🍂 Tiny Polka Dot Scrapbook Paper – 12" x 12" from hobbylobby.com.
- 🍂 Baby Brown Dream Collection – 12 x 12 Paper – 10 Pack from scrapbook.com.
- 🗺️ Cute Polka Dot Scrapbook Paper Craft Pad: 12 Seamless Pastel … from amazon.ca.
Add some fun with polka dots. Use small elastics to create dots of color scattered across your shirt.
This design is playful and versatile, fitting both casual and semi-formal settings. It’s perfect for those who love simple, yet eye-catching patterns.
Mix small and large dots for extra flair. The technique is simple and a great way to engage kids in crafting.
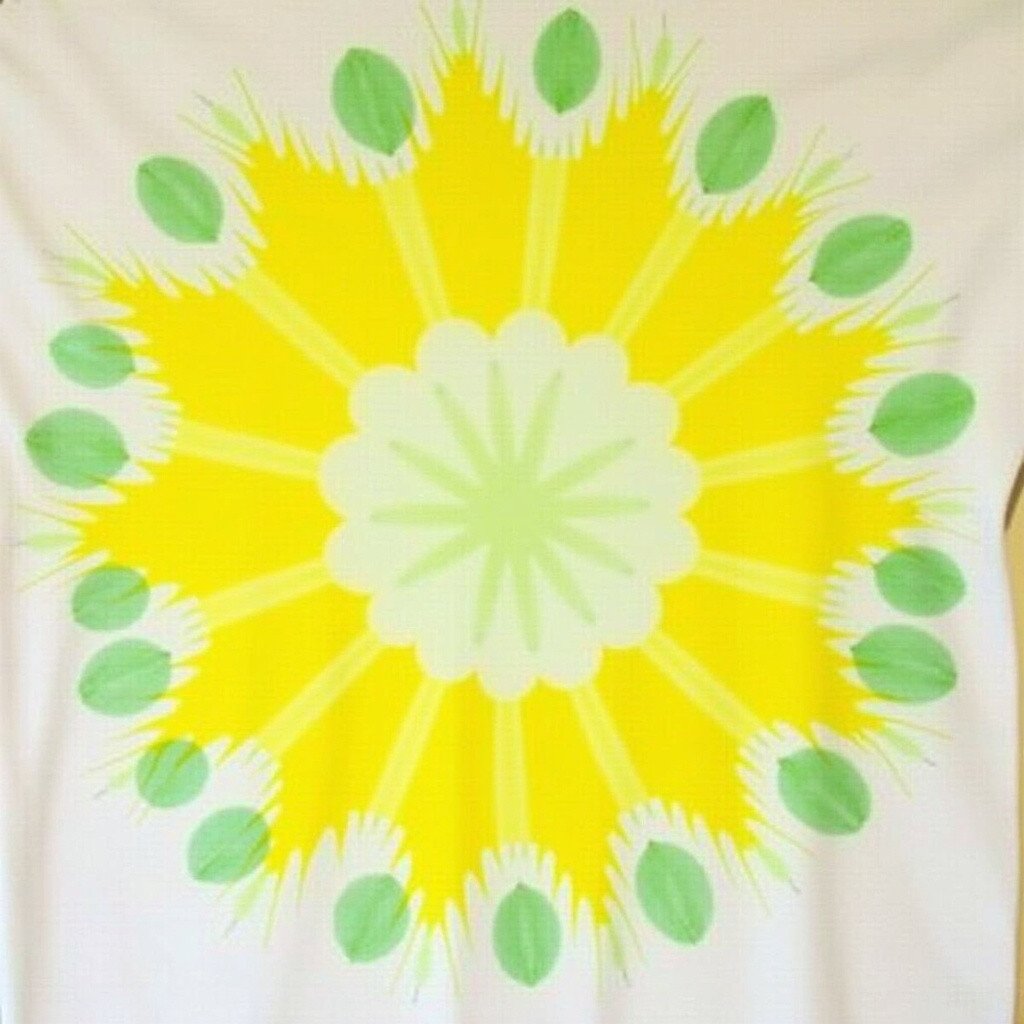
13. Sunflower Design
Top Sunflower Design Craft Tutorials
- 🍂 13 Files Sunflower Design Bundle Graphic by KtwoP from creativefabrica.com.
- 🧑🌾 MATTE NATURAL 6 Matte 13" Sunflower Design Plastic … from ebay.com.
- 🍁 Sunflower Craft Projects from youtube.com.
- 🎨 13" Mixed Mum & Sunflower Bush: Beige (10 Stem) from craftoutlet.com.
- 🧑🌾 8 Reusable 13×7 Inch Mylar Templates For Wall Painting & … from cohosmarket.com.
Brighten your wardrobe with a sunflower design. Center a large circle of yellow dye surrounded by smaller green circles to represent leaves.
This cheerful design is perfect for nature lovers and adds a sunny touch to any day. It’s a fun way to celebrate summer or bring a touch of warmth to colder months.
Personalize by adding other floral elements. The materials are minimal, making it a budget-friendly option.
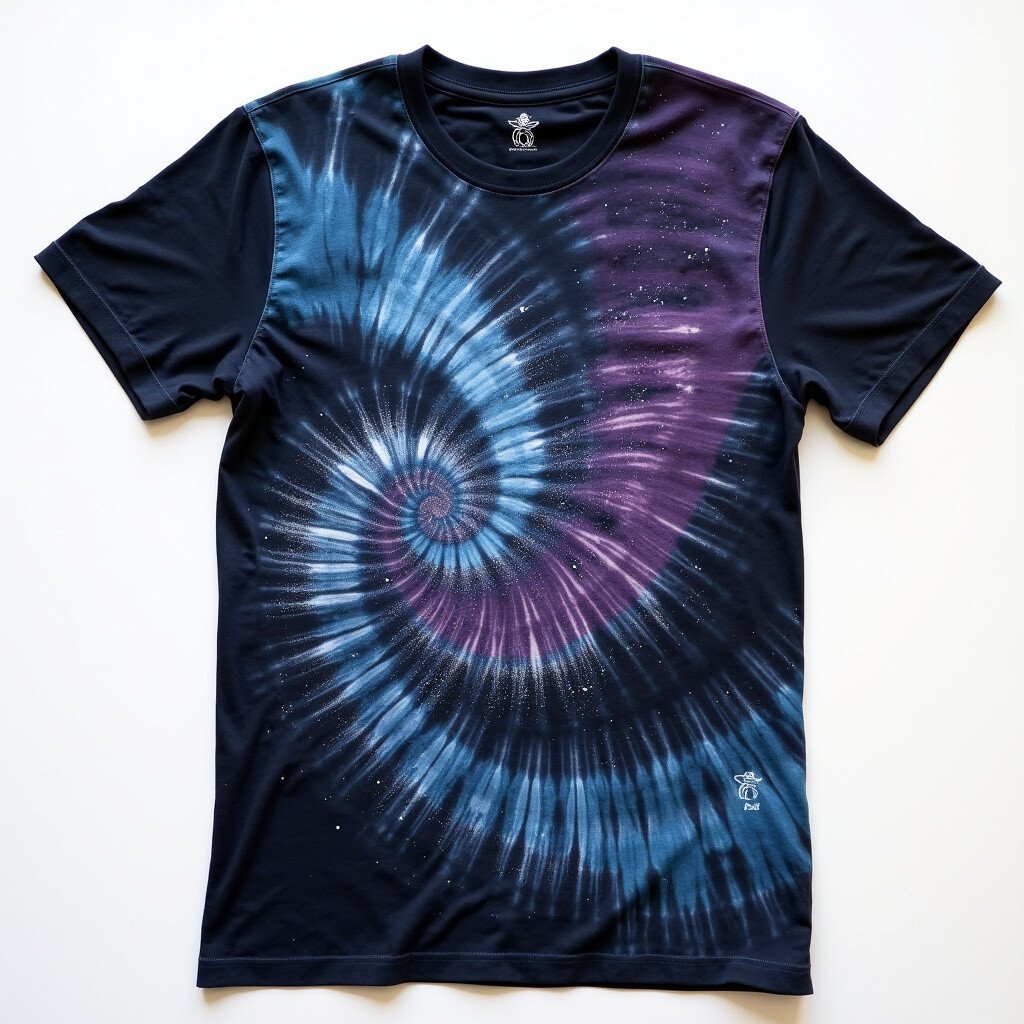
14. Galaxy Swirl
Top Galaxy Swirl Craft Tutorials
- 🎨 Galaxy Mason Jars – DIY Paint Pour Lantern Craft from onelittleproject.com.
- 🧑🌾 Make Your Own Swirl Baking Soda Galaxy Ornaments … from facebook.com.
- 🎨 Make Your Own Swirl Baking Soda Galaxy Ornaments … from facebook.com.
- 🎨 Make Your Own Mini Galaxy Ornaments at Home Looking … from facebook.com.
- 🗺️ Galaxy Jars Step-by-Step Tutorial from jugglingactmama.com.
Create an out-of-this-world look with a galaxy swirl. Use dark colors like navy, black, and purple, adding white specks to mimic stars.
This design is mysterious and captivating, great for night events or themed parties. It captures the beauty of the cosmos in wearable form.
Use toothbrushes or spray bottles to add star-like specks. The result is unique and mesmerizing, just like the night sky.
15. Animal Print

Top Animal Print Craft Tutorials
- 🎨 Printable Animal Crafts for Kids | Color Cut and Paste … from teacherspayteachers.com.
- 🍂 15 Sheets A4 Animal Print Craft Card – Colored Cardstock … from diychris.com.
- 🍅 15 Sheets A4 Animal Print Craft Cards – Coloured Cardstock For … from peddlerwv.com.
- 🖼️ Mess-free Kids Craft Skillmatics Waxy Window Art Kit from ketiv.com.
- 🍁 Animal Craft Ideas Archives – Page 8 of 15 from funhandprintartblog.com.
Go wild with an animal print design. Use binding techniques to mimic patterns like zebra stripes or leopard spots.
This idea is bold and adventurous, perfect for making a fashion statement. It’s a fun way to bring the safari to your wardrobe.
Use natural colors for realism or bright hues for a pop-art effect. The materials are basic, keeping costs low while creativity runs high.
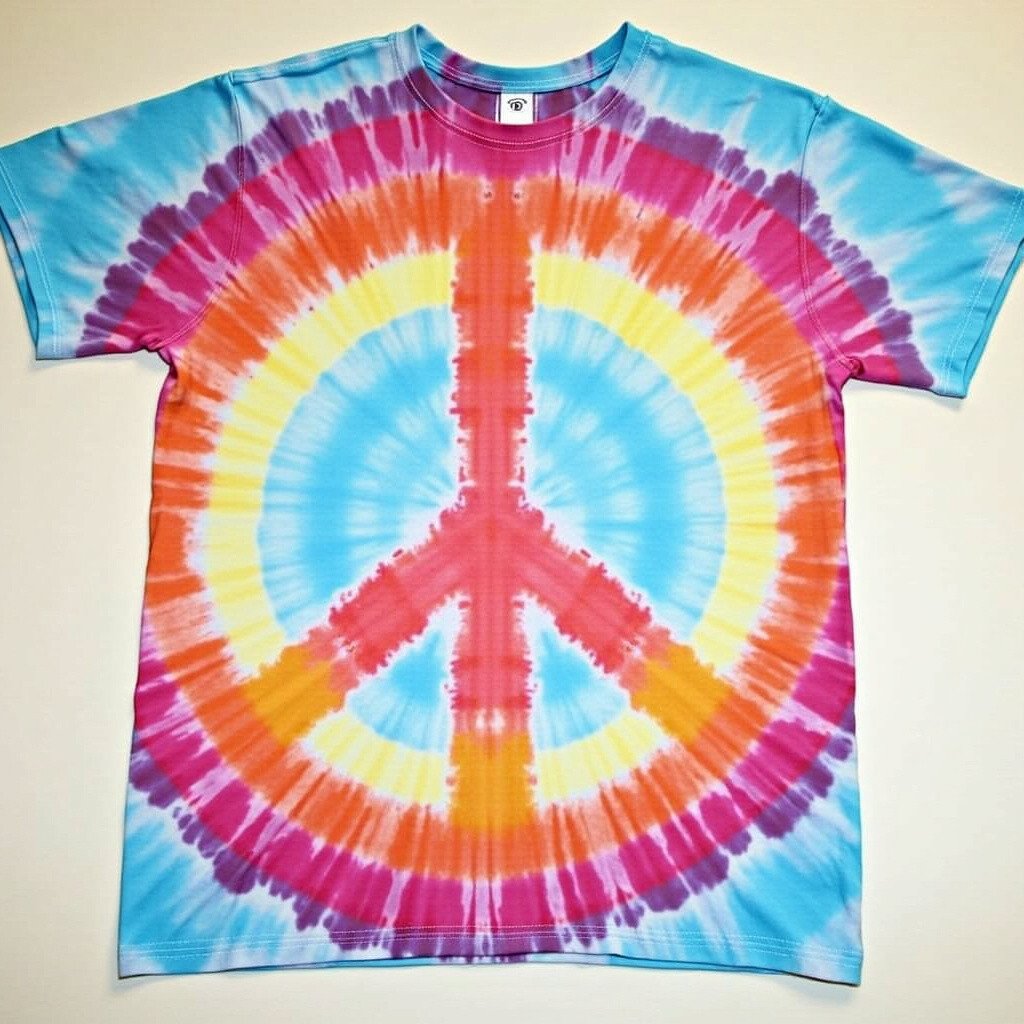
16. Peace Sign
Top Peace Sign Craft Tutorials
- 🎨 Unfinished Wood Peace Sign Symbol Shape – Craft from 24hourcrafts.com.
- 💅 Peace Sign Craft from teacherspayteachers.com.
- 🧑🌾 Paper Plate Peace Sign | DIY for Beginners from kiwico.com.
- 🗺️ Unfinished Wood Peace Sign Symbol Shape – Craft from walmart.com.
- 🍂 Peace Sign (Love and Peace Symbol Clipart & Templates) from suncatcherstudio.com.
Promote peace and harmony with a peace sign design. Fold your shirt to create a circular pattern with the iconic symbol at the center.
This design is timeless and meaningful, ideal for festivals and gatherings. It sends a positive message in a stylish form.
Choose calming colors or go for a vibrant palette. It’s easy to create and perfect for spreading good vibes.
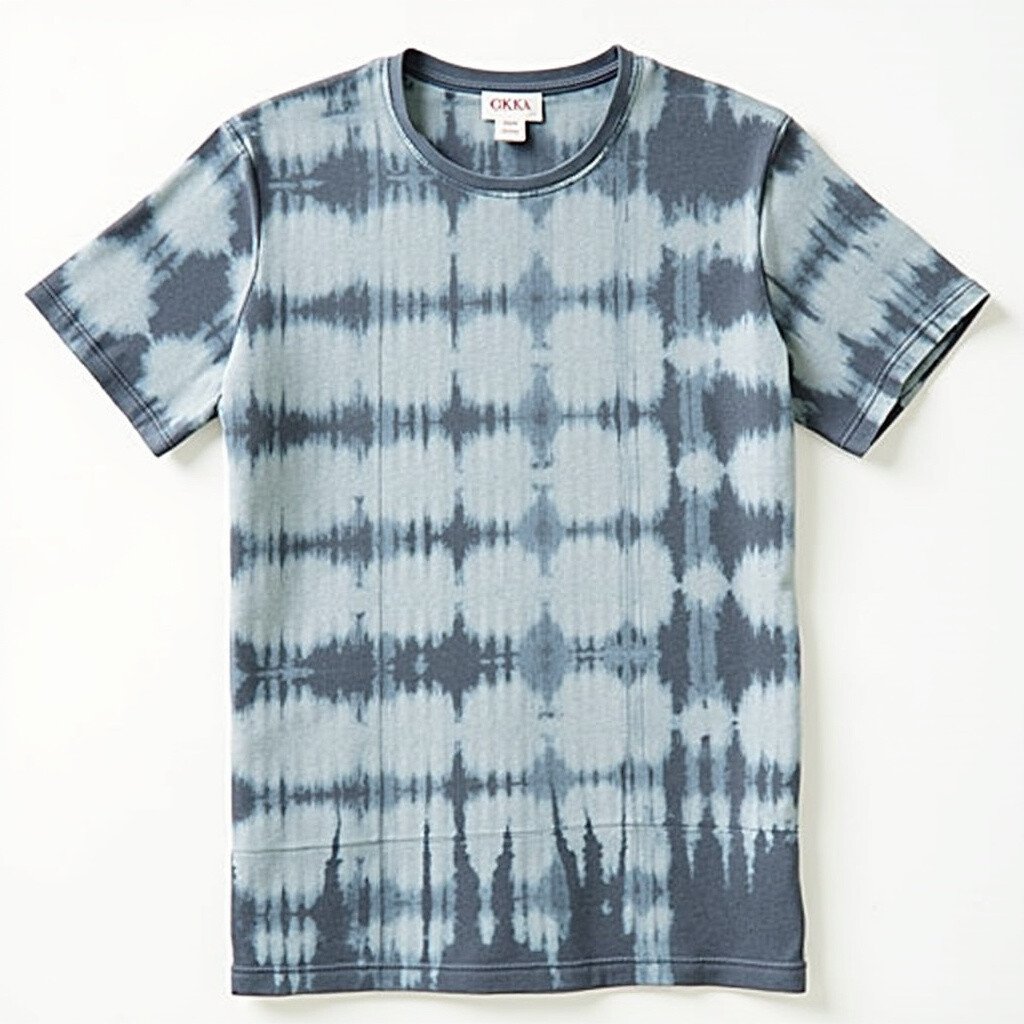
17. Geometric Shapes
Top Geometric Shapes Craft Tutorials
- 💅 Easy & Trendy Tie-Dye Techniques For All Skill Levels from tiedyeyoursummer.com.
- 💅 Tie Dye Patterns on Shirts, Pants, Socks Video Tutorials from youtube.com.
- 🧑🌾 How to Tie Dye an Old White Shirt : 14 Steps (with Pictures) from instructables.com.
- 🗺️ How to Tie Dye Shirts with Kids from artfulparent.com.
- 🍁 How to tie dye 3 easy patterns from thecrafttrain.com.
Achieve a modern look with geometric shapes. Use folding and binding to create triangles, squares, and other shapes.
This design is sleek and contemporary, great for art enthusiasts. It’s a fantastic way to incorporate symmetry into your clothing.
Try monochrome schemes for sophistication or bright colors for fun. This technique allows for endless experimentation and creativity.
18. Lattice Pattern
Top Lattice Pattern Craft Tutorials
- 🍁 Arabic Lattice Quilt Pattern 18” Plexiglass Templates Flynn … from ebay.com.
- 🍁 lattice repeating pattern reusable stencil for DIY crafts from thestencilsmith.com.
- 🍅 Lattice Stencil / Seamless Pattern Stencil from wallcutz.com.
- 🗺️ Lattice Stencil from walmart.com.
Craft a chic lattice pattern by folding and binding your shirt in crisscross sections. Apply dye to create a woven look.
This design is elegant and distinctive, suitable for both casual and formal occasions. It adds texture and interest to any outfit.
Experiment with different colors for the lines and background. The result is a refined and artistic piece that’s sure to impress.
19. Watercolor Effect
Top Watercolor Effect Craft Tutorials
- 👓 Dreamy Watercolor Effect with Transparent Pouring Medium from fionaart.medium.com.
- 🍂 Make gorgeous (cheater) watercolor prints using markers … from itsalwaysautumn.com.
- 🧑🌾 9 Simple Watercolor Projects for Beginners from jennarainey.com.
- 🍁 Watercolor & Recycled Newspaper Flower Craft from mauifamilymagazine.com.
- 🗺️ 25 essential watercolor techniques from gathered.how.
Emulate the fluid beauty of watercolor paintings. Apply diluted dye to your shirt, allowing colors to bleed and blend naturally.
This technique is soft and artistic, perfect for creative spirits. It captures the essence of painting in a wearable format.
Use pastel shades for a gentle look or bold colors for striking impact. The process is simple and forgiving, great for artists of all levels.