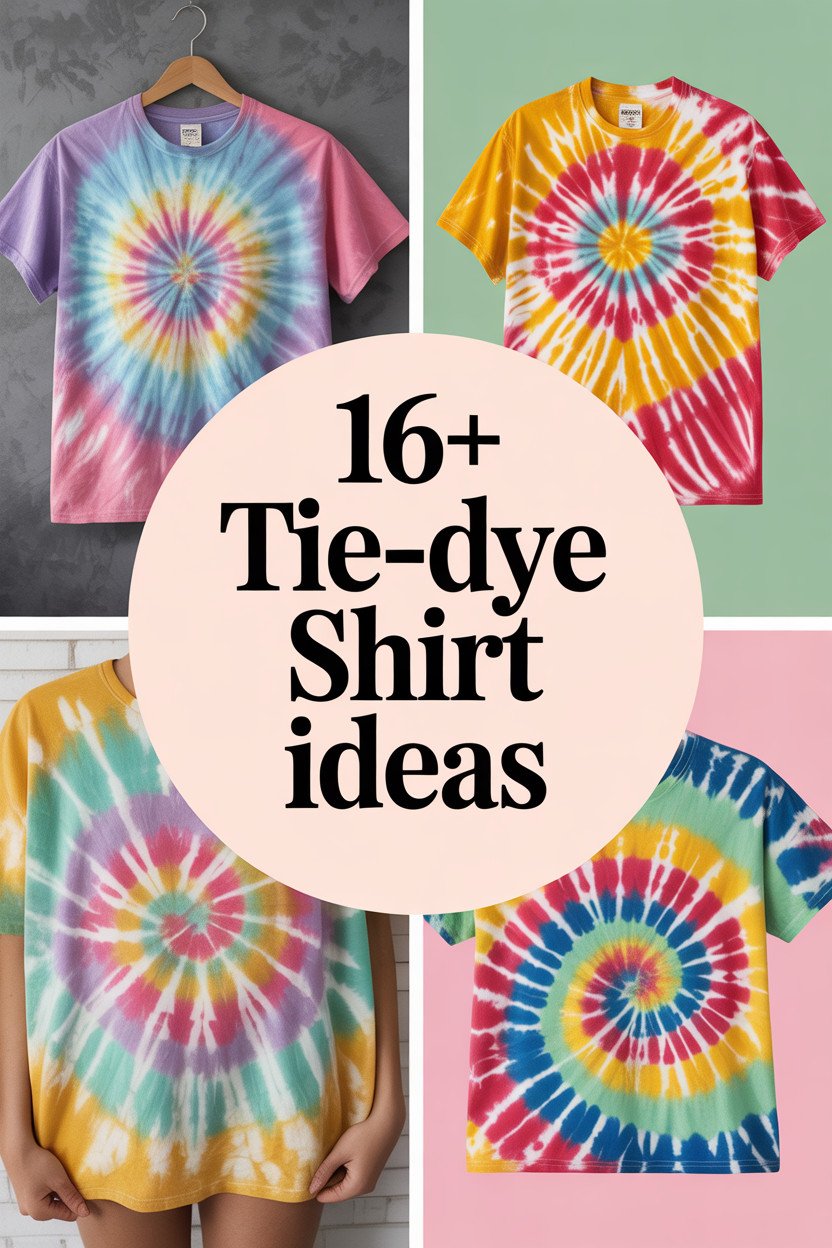
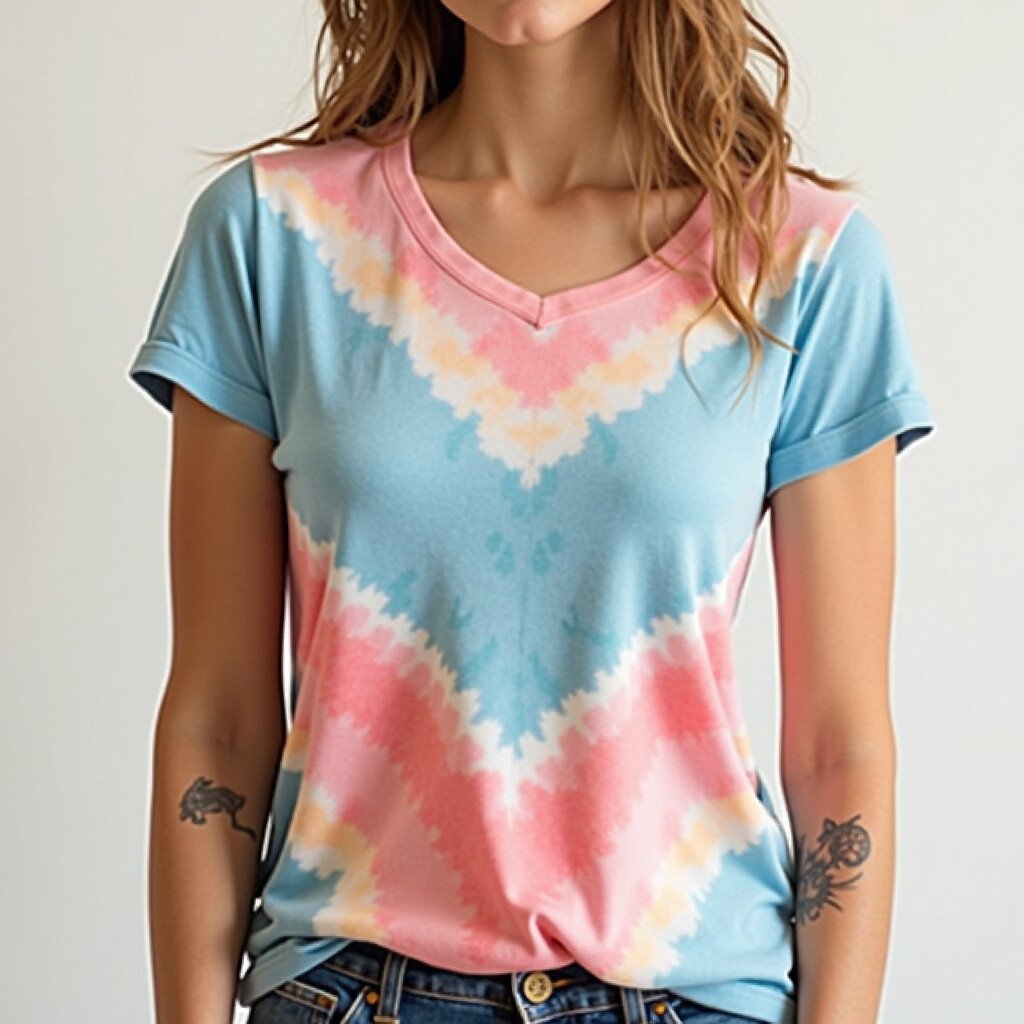
Imagine the vibrant swirl of colors dancing across a fabric, each shirt telling its own story of creativity and flair. With vintage tie-dye, you can bring a splash of the past into your wardrobe, where each piece is as unique as a fingerprint. Here are ideas that will make you want to grab some dye and start creating your own magical works of art.
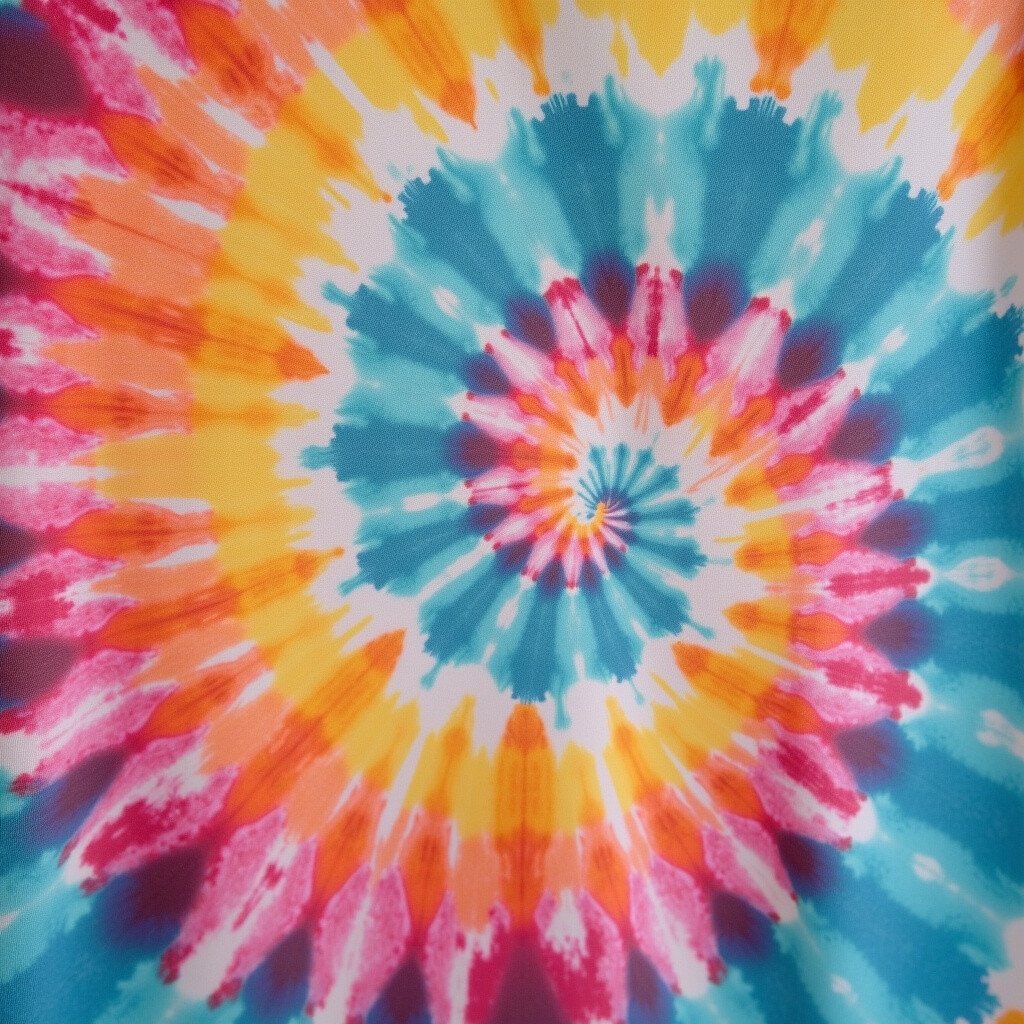
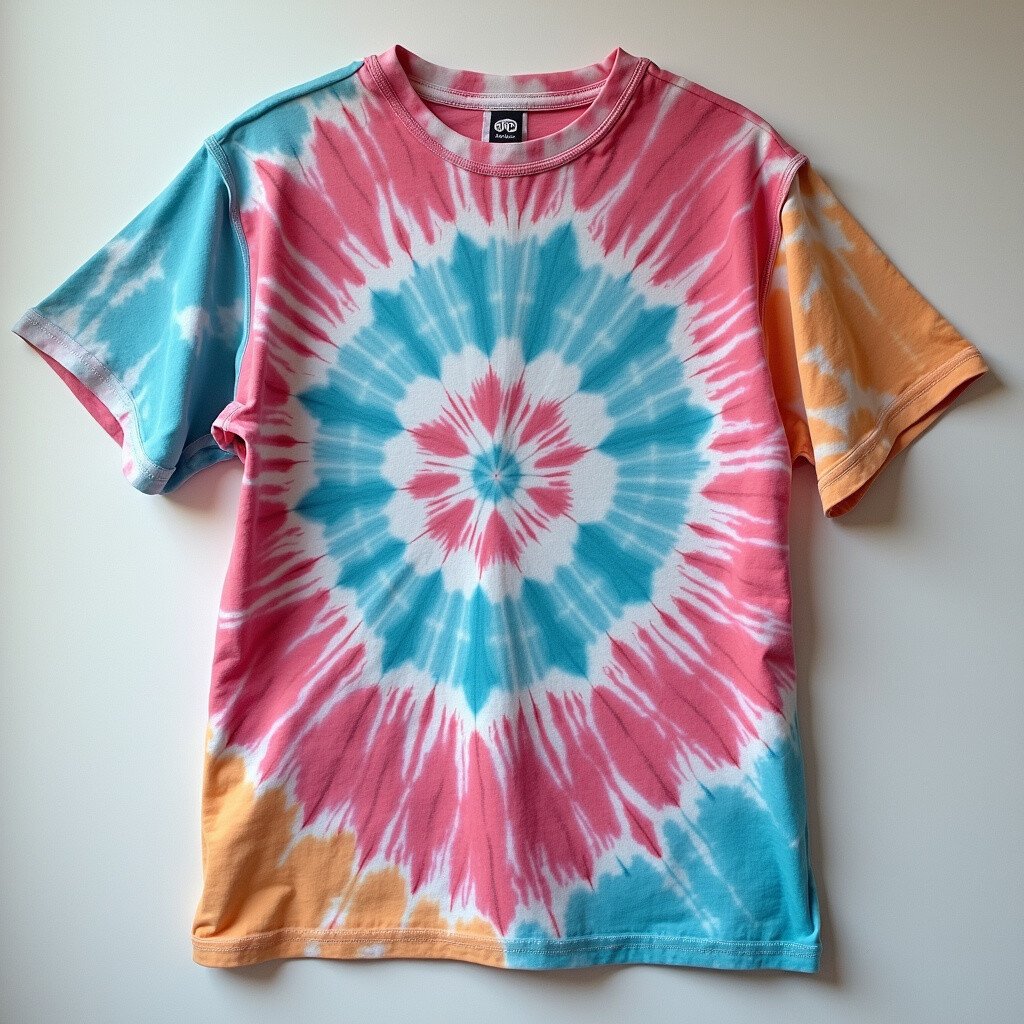
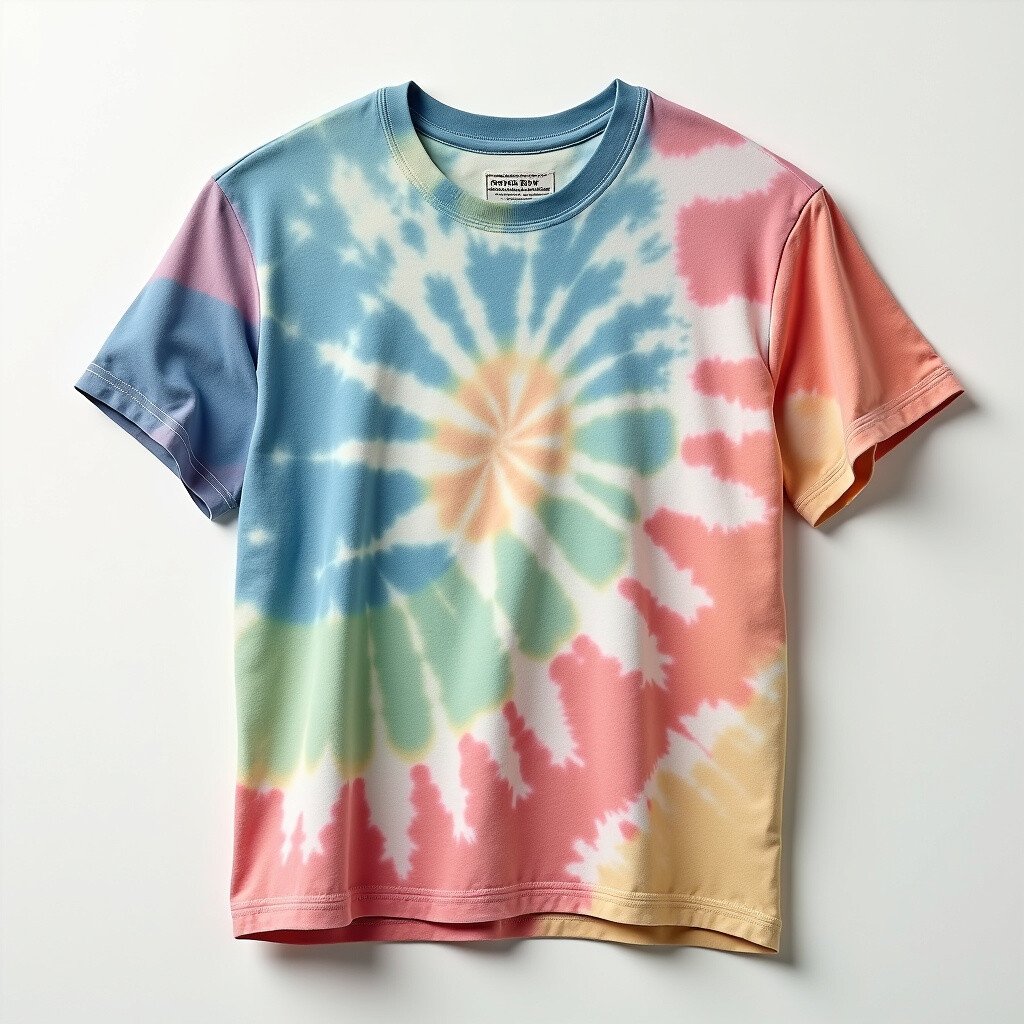
1. The Classic Spiral
Top The Classic Spiral Craft Tutorials
- 💅 Tie-Dye 101 {the classic spiral|} from jedicraftgirl.com.
- 🍂 Spiral Art Kit from walmart.com.
- 🍅 Spiral Art Kit for Kids: Creative DIY Craft Sets from target.com.
- 🎄 Spiral Art Craft Set Spirograph Stencil Spiral Wheels … from ebay.com.
- 👓 Lesson: How to Tie Dye Spiral Pattern from theneonteaparty.com.
There’s something magical about the classic spiral pattern. It’s like a hypnotic swirl that draws you in. To create this, twist your shirt from the center and secure it.
Use a mix of bright and pastel colors for a vintage feel. The best part? No two spirals are ever the same, so each shirt is truly one of a kind. It’s an affordable way to express your individuality.
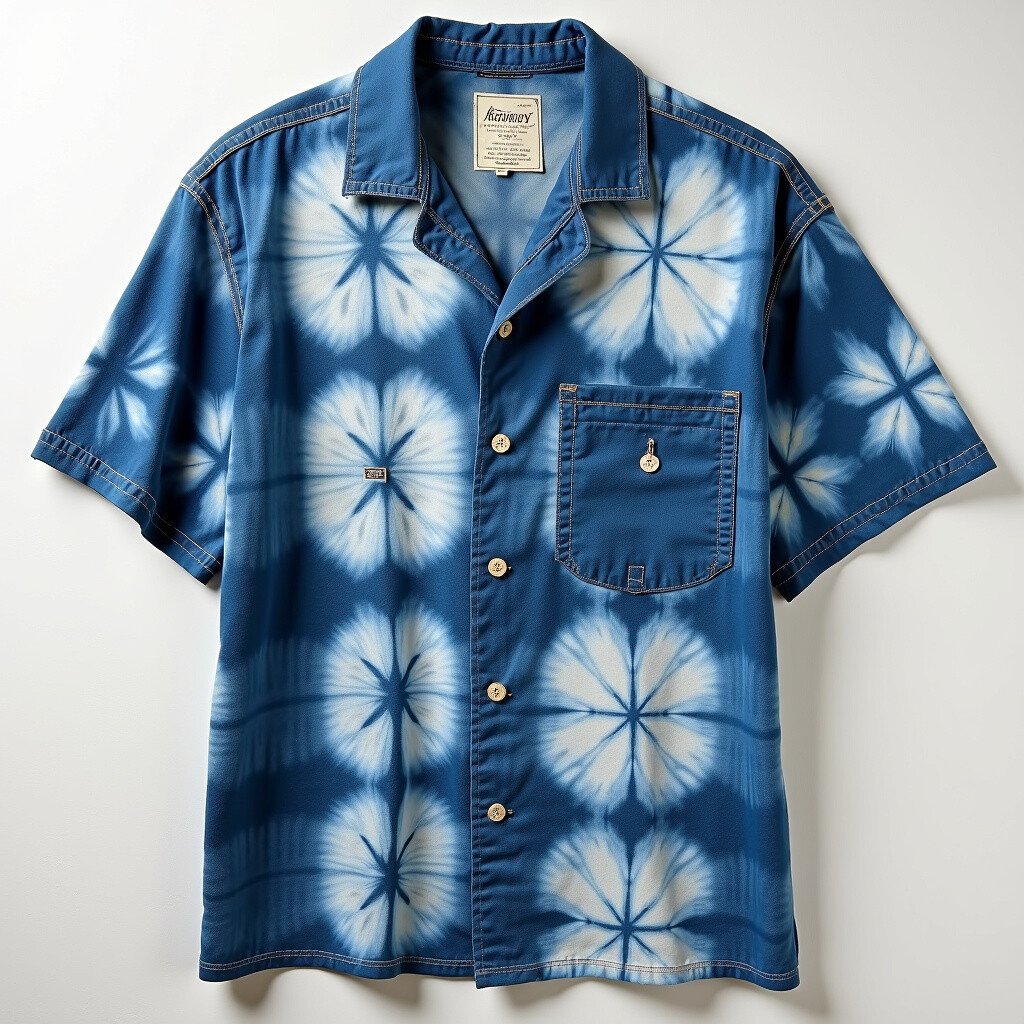
2. Shibori Style
Top Shibori Style Craft Tutorials
- 🍅 Shibori Folding Techniques: 5 Easy Patterns for Beginners … from practicalandpretty.com.
- 🍁 Shibori Style Techniques – Project Ideas from dickblick.com.
- 🎄 Shibori Dyeing Techniques for Five Beautiful Patterns from marthastewart.com.
- 👓 Simplified Shibori Dyeing from madebybarb.com.
- 🎄 DIY: How To Shibori Dye from brooklyncraftcompany.com.
Inspired by traditional Japanese techniques, Shibori tie-dye uses folding and binding to create intricate patterns. This method is all about precision and patience.
Try using indigo dye for an authentic look. The deep blue hues create a timeless and sophisticated style. This approach is perfect if you’re looking to add a touch of elegance to your collection.
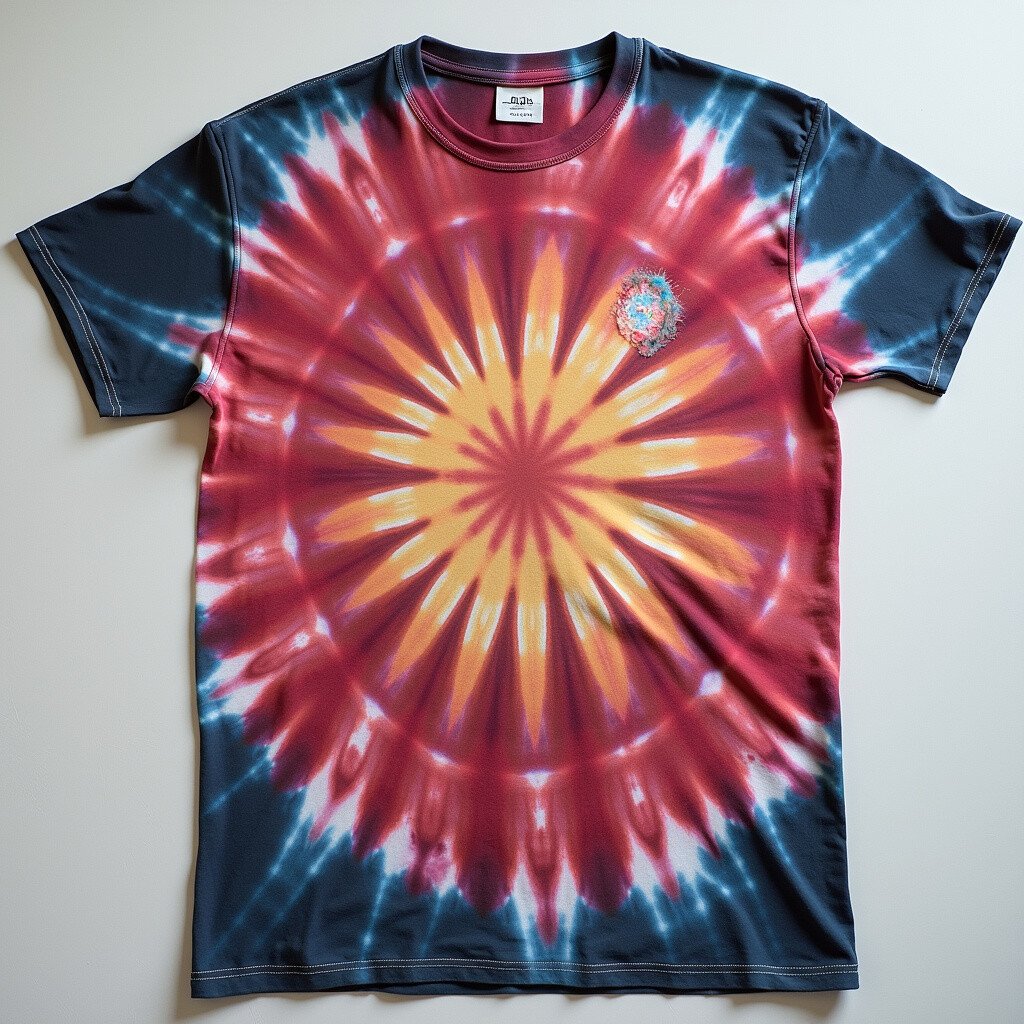
3. Sunburst Designs

Top Sunburst Designs Craft Tutorials
- 🗺️ Scrapbook Design Idea: Easy Sunburst from allisondavis4sg.com.
- 🧑🌾 How To Make A Sunburst Card ~ Stampin' Up! In Colors from stamptasticdesigns.com.
- 🍁 Card Making Designs Sunburst Cards That Are Beautiful from lisasstampstudio.com.
- 💅 sunburst designs usa made hand painted stained glass … from ebay.com.
- 🍅 Starburst (Sunburst) Technique: A Great Way To Use … from simplykardsbykathi.com.
Nothing says “sunny day” like a sunburst design. It’s bursting with energy and life! Pinch small sections of the shirt and tie them off to create the sunburst effect.
Use warm colors like yellow, orange, and red for a lively shirt. It’s like wearing a piece of sunshine, brightening your day with every wear. This project is also budget-friendly and great for beginners.
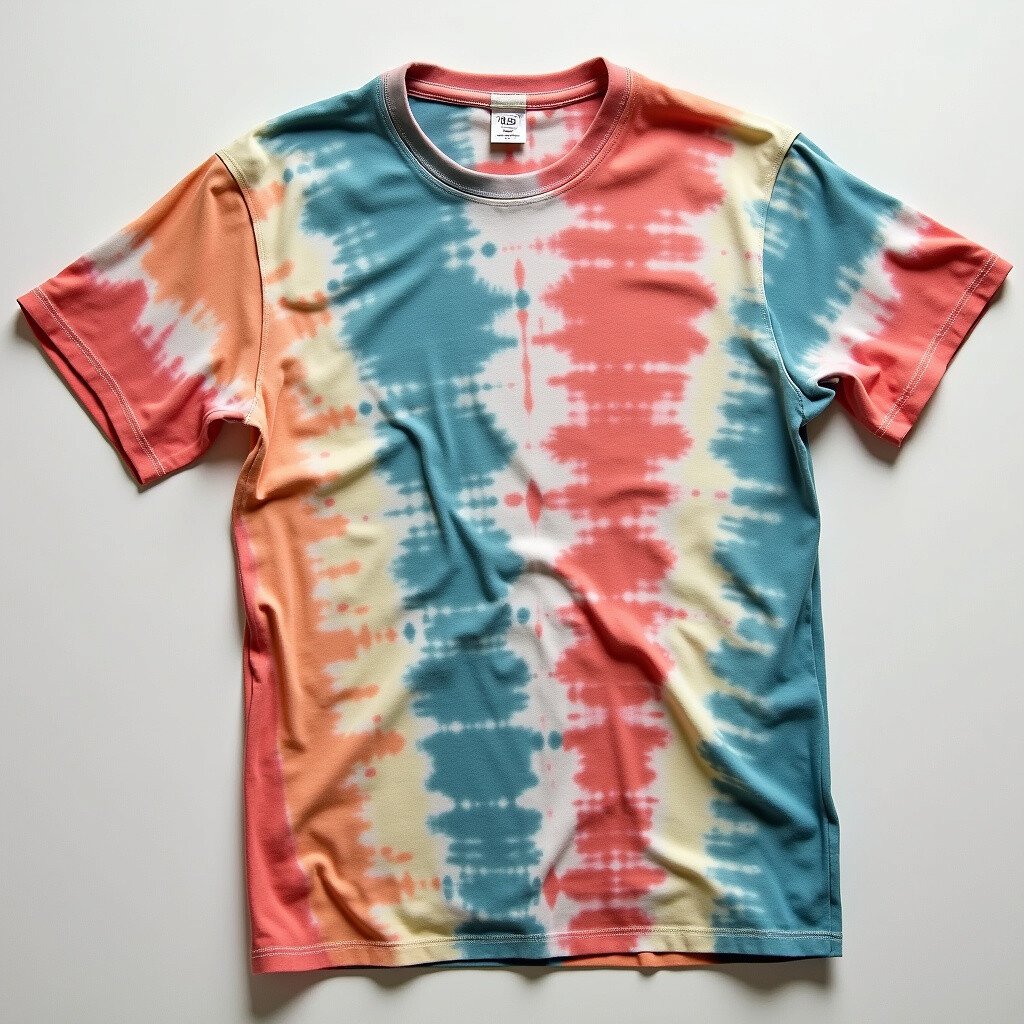
4. Crumple Technique
Top Crumple Technique Craft Tutorials
- 💅 How To Crumple Tie Dye from mygrowingcreativelife.com.
- 🎄 Learn how to crumple tie dye! from gathered.how.
- 🍁 Tie-Dye Tutorial: Crumple Technique for Beginners from domestika.org.
- 👓 How to Crumple Tie Dye Technique from sarahmaker.com.
- 🍅 Crumple Tie Dye Technique from Tulip from favecrafts.com.
For those who love a more abstract look, the crumple technique is perfect. Simply crumple your shirt into a ball and apply the dye randomly.
This method results in a chaotic, yet beautiful pattern. It’s incredibly easy and quick, perfect for a last-minute crafting session. Plus, it’s a great way to use leftover dye.
5. Ice Dyeing
Top Ice Dyeing Craft Tutorials
- 🍁 Watch What Happens When You Add ICE to Dye! 🧊💥 from facebook.com.
- 🧑🌾 Creativity for Kids Ice Dye Headbands Craft Kit – Create 5 DIY Tie … from midwestyouthchampionships.com.
- 👓 Make 5 DIY Tie Dye Headbands With Cool Ice Technique from scrumptiouscateringkc.com.
- 🍂 Creativity For Kids Ice Dye Headbands Craft Kit from elite-essential.com.
- 🎨 Add ICE to your Dye and see what happens! 🧊💥 from facebook.com.
Ice dyeing is a trendy technique that creates stunning watercolor effects. Place ice cubes on your shirt and sprinkle dye powder over them.
As the ice melts, it blends the colors in unique ways. The results are always surprising and delightful. It’s like nature is your assistant, helping you craft a masterpiece.
6. Reverse Tie-Dye
Top Reverse Tie-Dye Craft Tutorials
- 👓 Reverse Tie-Dye Technique from tiedyeyoursummer.com.
- 🍁 How To Reverse Tie Dye: 3 Different Ways from mygrowingcreativelife.com.
- 👓 Here's a reverse tie dye T-shirt I made from facebook.com.
- 🍅 Easy Reverse Tie-Dye: How to Tie Dye with Bleach from papernstitchblog.com.
- 🍂 Reverse Tie Dye: A Fun and Easy way to update your wardrobe! from fredericksburg.macaronikid.com.
Reverse tie-dye flips the script by removing color instead of adding it. Use bleach to create striking designs on darker shirts.
This technique gives you a cool, edgy look. It’s a fun experiment with dramatic results. Just be careful with the bleach, and you’ll have a shirt that’s sure to make a statement.
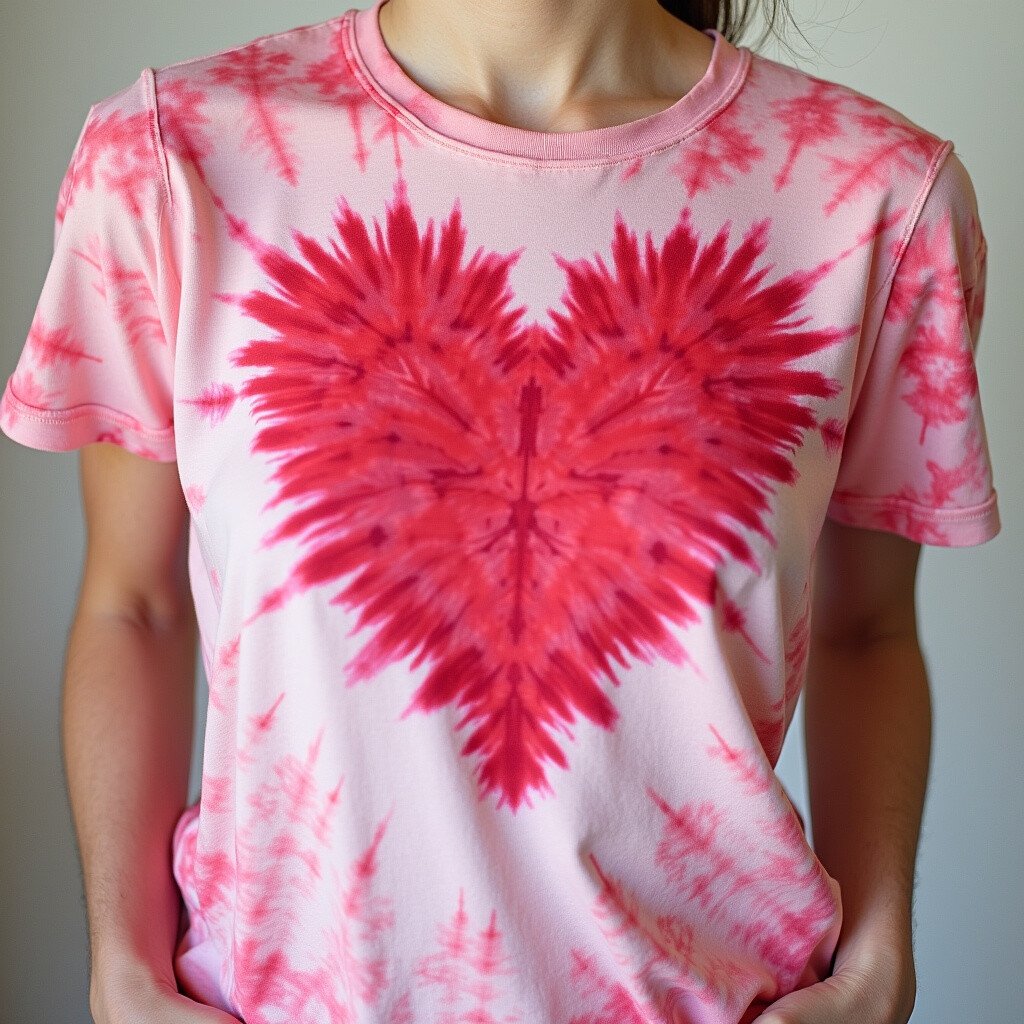
7. Heart Patterns
Top Heart Patterns Craft Tutorials
- 👓 7 Heart Animal Crafts with free templates from domesticheights.com.
- 🧑🌾 9 FREE Fabric Heart Patterns You'll ♥ from craftsy.com.
- 🗺️ 30 Free Printable Heart Templates, Patterns & Stencils from homemade-gifts-made-easy.com.
- 🗺️ 14 Best Sources for Free Heart Templates and Stencils from thesprucecrafts.com.
- 🍅 12 Heart Crafts For Kids To Make For Valentine's Day from ilcs.org.
Show some love with heart patterns on your tie-dye creations. Fold the shirt to form a heart shape and use string to secure it.
Use vibrant reds and pinks for a romantic feel. This pattern is perfect for gifting someone special or just showing yourself some love. It’s a sweet, personal touch to your wardrobe.
8. Rainbow Stripes

Top Rainbow Stripes Craft Tutorials
- 🗺️ Rainbow Craft: How to Make Paper Strip Rainbows from onelittleproject.com.
- 🗺️ This rainbow craft is SO FUN and it's really simple to make … from facebook.com.
- 🍁 Rainbow Paper Plate Craft – AWANA Cubbies Bear Hug #8 from meaningfulmama.com.
- 🎄 20 Rainbow Crafts & Activities for Kids {Hands-on Learning!} from lifeabundantlyblog.com.
- 💅 7/8" Pastel Rainbow Stripes White Sheer Woven Ribbon … from craftoutlet.com.
Rainbow stripes are a cheerful way to wear all the colors you love. Fold your shirt accordion-style and dye each section a different color.
This technique is all about precision but totally worth the effort. The result is a vibrant, happy shirt that’s sure to spread joy wherever you go. It’s a playful trend that’s always in style.
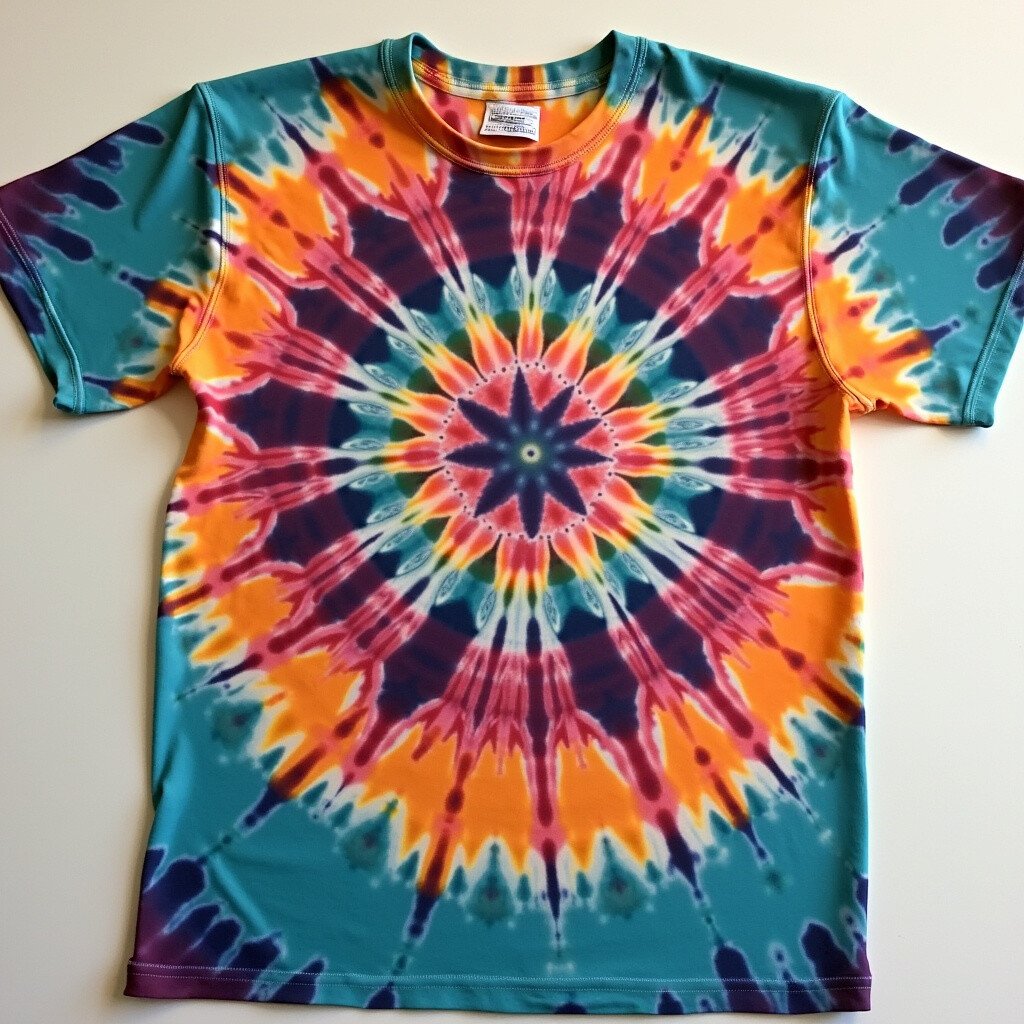
9. Mandala Magic
Top Mandala Magic Craft Tutorials
- 👓 9-Piece Reusable Stencils Set for DIY Art&Craft from ebay.com.
- 🍂 DIY Wall Art Stencils MWOOT 9-Piece Mandala Stencil Kit from team91national.com.
- 🍁 Mandala Magic: 9-Pack Large Stencils for Painting from ebay.com.
- 🎄 Metallic mandala art on 9 inch canvas board from facebook.com.
- 🍅 Mandala Magic: 9-Piece Reusable Stencils Set for DIY … from walmart.ca.
Channel your inner artist with mandala designs. Create intricate circular patterns by folding and tying your shirt in sections.
Use a variety of colors for a psychedelic effect. This design is like wearing a piece of art, showcasing your creativity and style. It’s a bit more advanced, but the results are stunning.
10. Ombre Effect
Top Ombre Effect Craft Tutorials
- 🖼️ How To Easy Ombre Glitter Effects & Shocking News from gerryscraftroom.com.
- 💅 Creating Ombre Effect on Cards with March Plate from facebook.com.
- 💅 How to Paint an Ombre Canvas Painting DIY from paintspirationart.com.
- 💅 10" Metallic Wide Foil Ombré Mesh: Dark Mint, Ice Blue … from craftoutlet.com.
An ombre effect adds a subtle, elegant touch to your tie-dye shirt. Dip the shirt gradually into the dye to create a gradient look.
This technique offers a sophisticated style that’s perfect for any occasion. Use complementary colors for a harmonious effect. It’s a gentle way to experiment with color transitions.
11. Geometric Shapes
Top Geometric Shapes Craft Tutorials
- 🎨 Geometric Shapes Templates from teacherspayteachers.com.
- 🍅 35 Geometric Patterns and How to Design Your Own from skillshare.com.
- 🗺️ List of Geometric Shapes from math-salamanders.com.
- 🎨 20 Show-Stopping Shape Crafts for Kids from artsycraftsymom.com.
- 🎄 Math Art Idea: Explore Geometry Through String Art from babbledabbledo.com.
For a modern twist, try creating geometric shapes. Use tape or stencils to outline your design before applying the dye.
This approach results in clean, bold lines that stand out. It’s a fantastic way to experiment with different patterns and colors. Plus, it’s a cost-effective way to update your wardrobe.
12. Striking Stripes
Top Striking Stripes Craft Tutorials
- 💅 30 Big Resin 12mm x 10mm Striped Barrel Plastic Acrylic Loose … from amazon.ca.
- 🗺️ Sequins For Crafts 12 Color Flat Roll – 60 Yards Total Of … from cohosmarket.com.
- 🍂 This art- 'Paper Stripe Craft' is a best way to keep kids … from instagram.com.
- 🎄 The Crafters Workshop 12×12 Stencil Stripes Explosi from worldofcraft.co.uk.
- 🗺️ 6 Pcs 12 Inch Black and White Stripes Christmas Poinsettia … from ebay.com.
Stripes never go out of fashion, and tie-dye stripes are no exception. Fold your shirt and tie it at intervals to create wide or narrow stripes.
Play with different color combinations for varied effects. Stripes add a touch of elegance and are easy to style with other pieces. It’s a classic look with a tie-dye twist.
13. Polka Dot Delight
Top Polka Dot Delight Craft Tutorials
- 🍁 Polish Pottery Dessert Plate Ceramika Artystyczna Polka Dot … from ebay.com.
- 🗺️ 20 International Dot Day Art Projects for Kids from artsycraftsymom.com.
- 🍁 Polka Dot Party Decorations & Supplies from orientaltrading.com.
- 🍂 Polka dot park craft for kids from facebook.com.
- 🗺️ 13 Bunny Fabric Squares Quilt Cotton Blue White Polka … from mountainskillsacademy.com.
Polka dots add a playful touch to any outfit. To create this pattern, tie small sections into tiny balls and dye them.
Choose contrasting colors for a vibrant look. Polka dots are timeless and add a cheerful vibe to your shirt. It’s a fun, easy project that brings smiles all around.
14. Starry Night
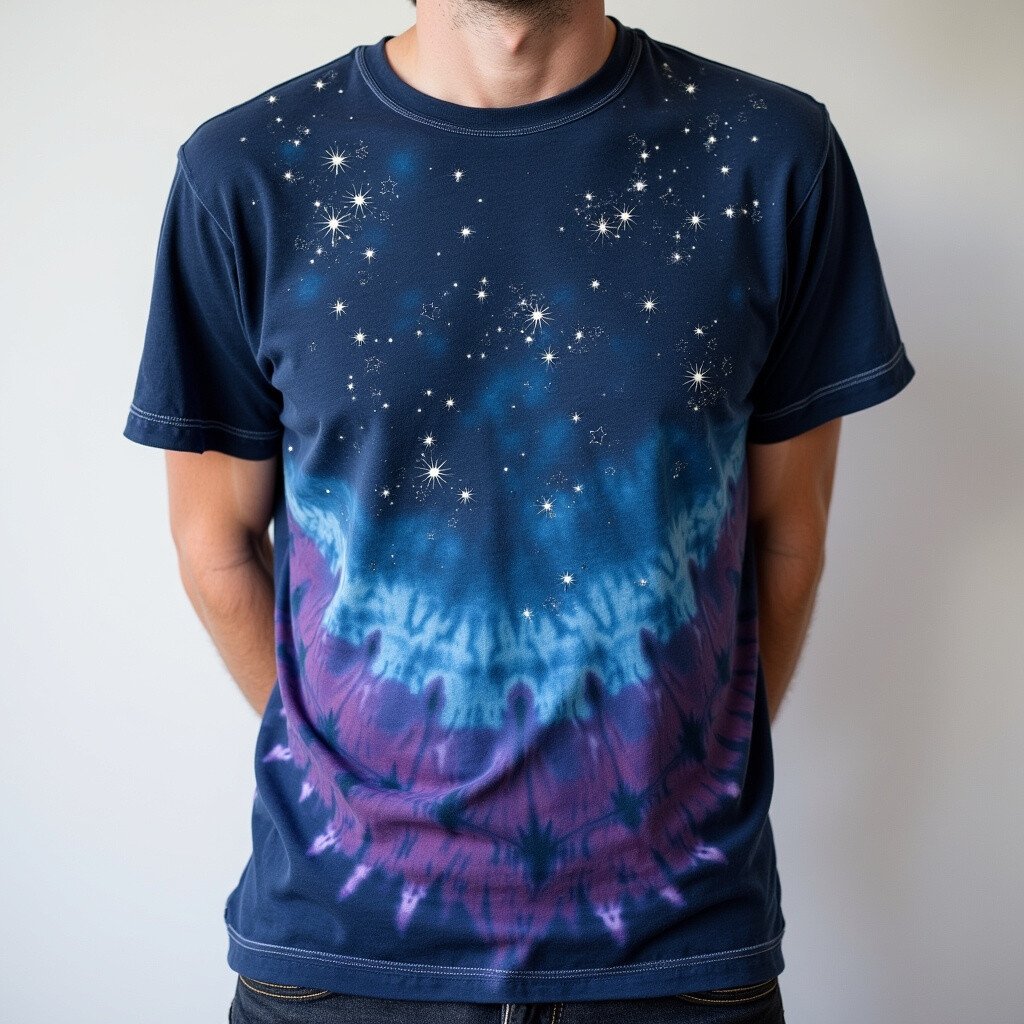
Top Starry Night Craft Tutorials
- 👓 Royal Brush Paint Your Own Masterpiece 11"x14" Starry … from artsupplywarehouse.com.
- 🍁 POMA4 | Paint your own Masterpiece™ 17pc 14" x 11" … from art.royalbrush.com.
- 💅 Starry Night Diamond Art Kit – 14×14 Inch Sparkling DIY … from thetuxtailor.com.
- 🗺️ "The Starry Night" Simplified Art Lesson from kathy-angelnik.blogspot.com.
- 💅 Riolis 14 Count Starry Night After Van Gogh's Painting … from easycorte.com.
Bring the night sky to your shirt with star patterns. Use small rubber bands to create tiny points that resemble stars.
Opt for dark blues and purples with splashes of white for a cosmic effect. This design is perfect for dreamers and stargazers alike. It’s a wearable piece of the universe.
15. Watercolor Wash
Top Watercolor Wash Craft Tutorials
- 🧑🌾 16 Watercolor Techniques You Have to Try from craftsy.com.
- 🍅 15 Cheap or FREE Watercolor Hacks! – The Frugal Crafter Blog from thefrugalcrafter.wordpress.com.
- 🗺️ 15 Watercolor Painting Ideas from thesprucecrafts.com.
- 💅 How to Paint a Watercolor Wash Background from doodlecraftblog.com.
- 🍁 How to properly apply washes and drop in color … from facebook.com.
Watercolor wash gives your shirt a soft, blended look. Use a brush to apply diluted dye, creating gentle, flowing patterns.
This method is perfect for those who prefer subtlety over boldness. It’s a calming process that results in a beautifully understated design. The cost is low, but the impact is high.
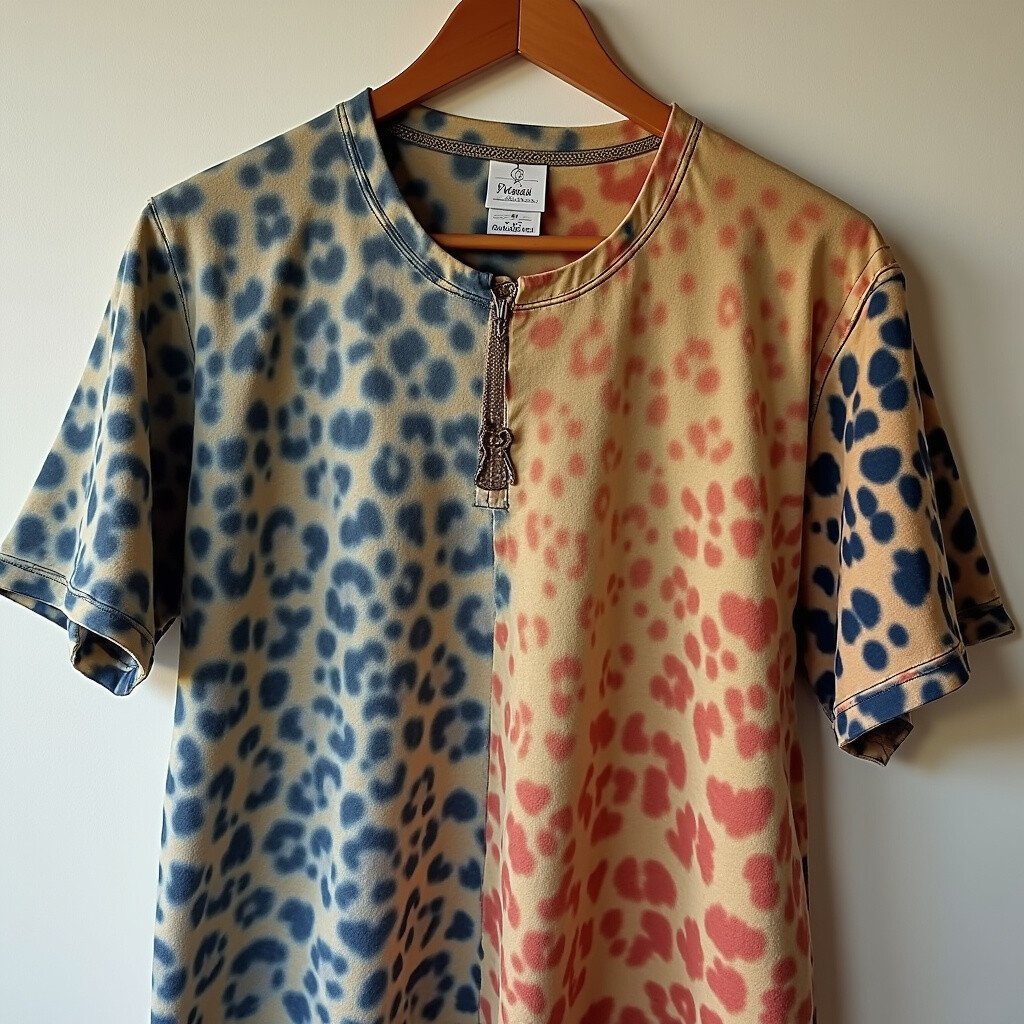
16. Animal Print
Top Animal Print Craft Tutorials
- 👓 16 Pack Animal Handprint Craft Kit For Toddlers – DIY Art … from viscommproducts.com.
- 🎄 16 Animal Designs With Colorful Foil Papers, Ages 6-10 … from montanatechhockey.com.
- 🎄 My First Safari Animal Paper Craft Kit, 16 DIY Arts and Crafts Zoo … from ebay.com.
- 🍅 80 Sparkle Sheets & 16 Animal Designs For Kids Crafts from dmc-nordic.com.
- 👓 Footprint Animal Crafts From A – Z Featuring O, P & Q from thepinterestedparent.com.
Unleash your wild side with animal prints. Use string to create stripes or spots, mimicking your favorite animal patterns.
Choose earthy colors for a natural look or go bold with vibrant shades. It’s a fun way to add some sass to your closet. Animal prints never fail to make a statement.
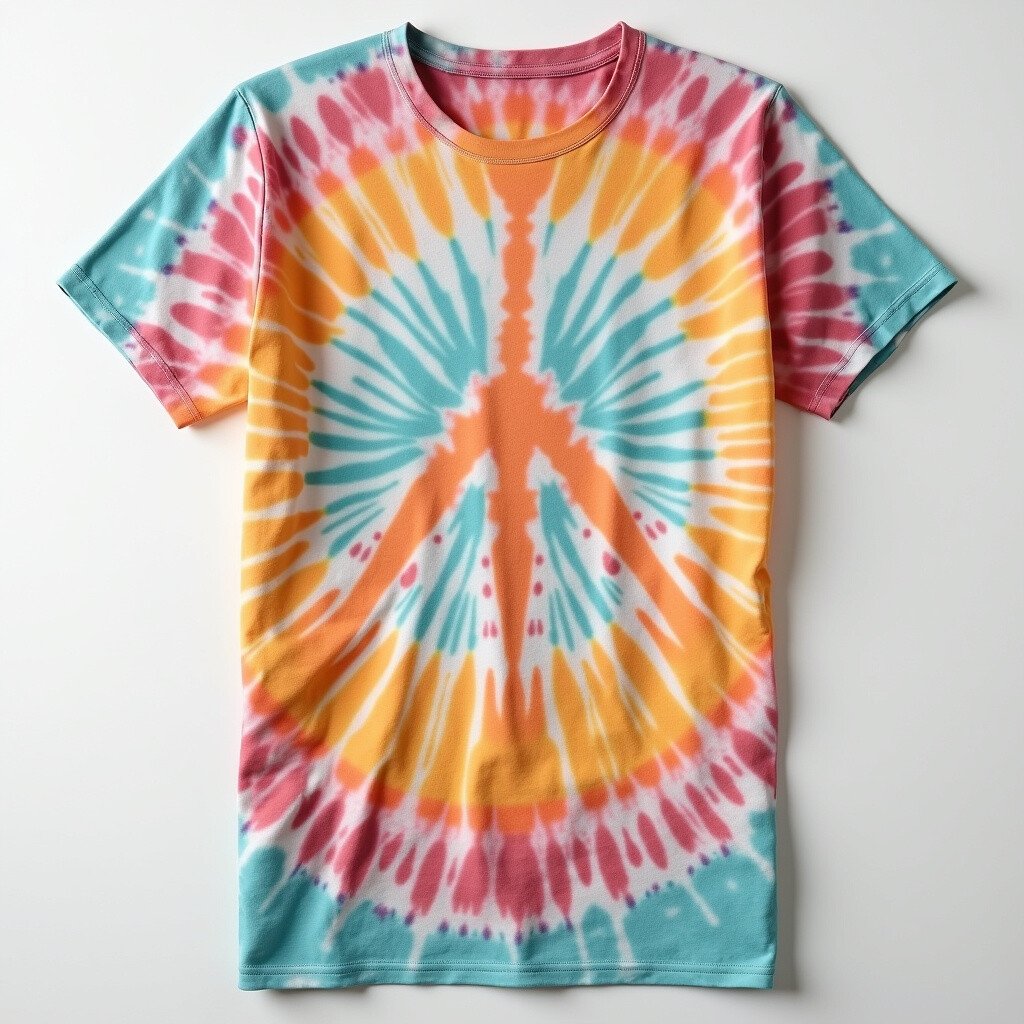
17. Peace Sign Patterns
Top Peace Sign Patterns Craft Tutorials
- 🗺️ Peace Sign (Love and Peace Symbol Clipart & Templates) from suncatcherstudio.com.
- 🧑🌾 Yarn Wrapped Cardboard Peace Sign from friendsandfaire.com.
- 🎄 Peace Sign (detailed) pattern by Rachel Choi from ravelry.com.
- 🍁 Peace Sign Craft from teacherspayteachers.com.
- 👓 Search Results: Peace Sign Bead Patterns from kandipatterns.com.
Share a message of peace with a tie-dye peace sign. Fold and tie your shirt to create this iconic symbol.
Use soothing colors like pastels or earth tones for a calming effect. This design is both meaningful and stylish, perfect for spreading positive vibes. It’s a timeless addition to any wardrobe.