Clay can hold a memory before it holds a shape. Hands can turn simple material into a story.
1. Hand Building with Clay

Top Hand Building With Clay Craft Tutorials
- 🍅 12 Hand Building Clay & Coil Pottery Techniques from ancientpottery.how.
- 🖼️ My Obsession with Hand-Building Clay Pottery Ideas from my100yearoldhome.com.
- 🍂 Pinch Pot Basics: A Beginner's Guide to Handbuilding with … from clayground.net.
- 🎄 Methods and Techniques of Hand-Building Working With … from lakesidepottery.com.
- 🎄 Slab pottery ideas for beginners – 25 easy clay projects from frombritainwithlove.com.
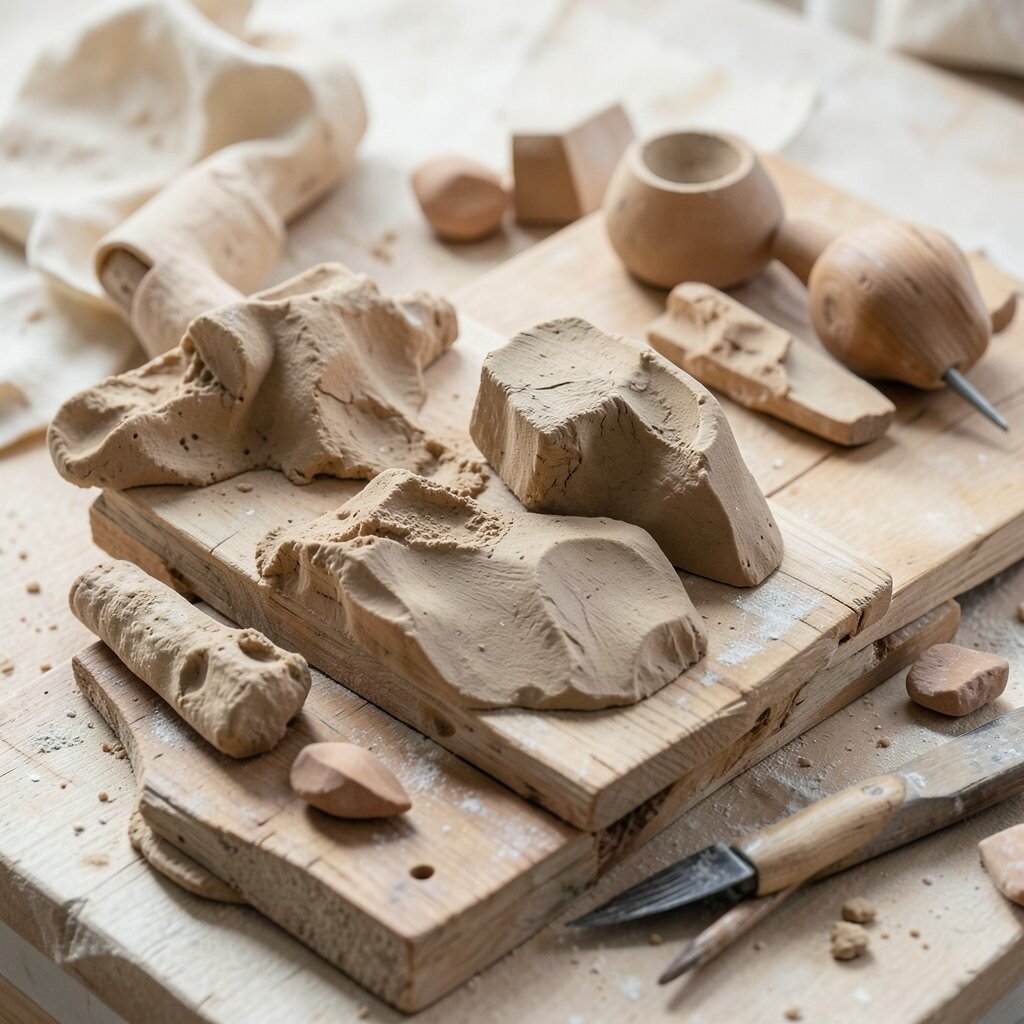
Hand building is one of the most welcoming ways to start sculpting. You shape clay with your fingers, palms, and simple tools, so the work feels direct and personal.
The look is often soft, warm, and a little imperfect in the best way. This method is budget-friendly because it needs very little equipment, and it is great for making bowls, masks, figures, and wall pieces. Try adding thumb marks or finger lines on purpose, since those small details can make the piece feel alive and handmade.
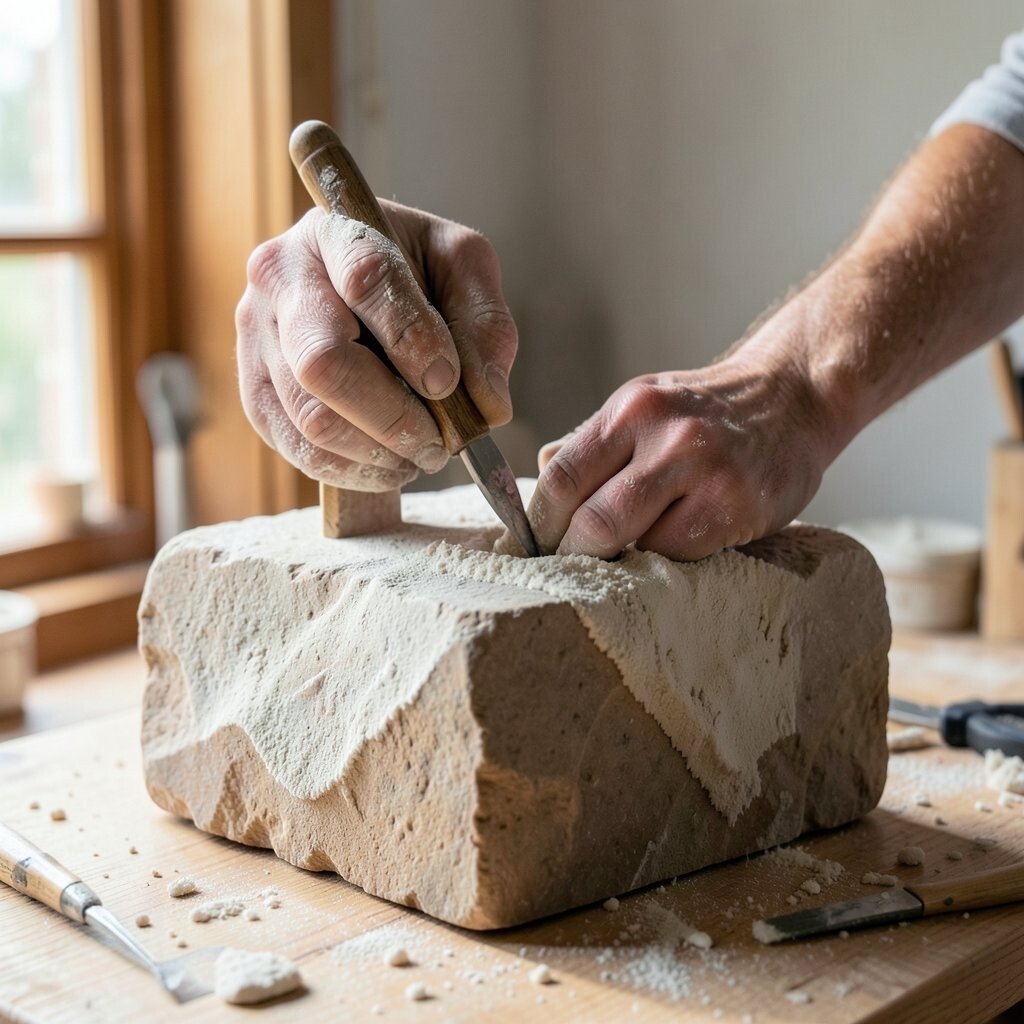
2. Carving Stone
Top Carving Stone Craft Tutorials
- 🎄 Stone Carving Workshop from 2sculpt.com.
- 🖼️ Stone carving from en.wikipedia.org.
- 🖼️ How to Carve Stone: A Step-by-Step Guide for Beginners from wikihow.com.
- 👓 Carving Rocks with a Dremel from lilblueboo.com.
- 🍁 Stone Carving from art21.org.
Stone carving has a bold, timeless feel that can make any space seem more grounded. The surface can go from rough and heavy to smooth and glowing as you work deeper into it.
This method teaches patience, care, and strong planning. It can cost more because stone and tools are not cheap, but the finished piece can last for generations. If you want a personal touch, choose a stone with color bands or natural cracks that guide the design instead of fighting it.
Many artists today like stone for calm, simple shapes that fit modern homes. A small polished stone figure can look elegant on a shelf, while a larger rough piece can feel wild and powerful. Always wear safety gear and begin with a clear idea, since stone does not forgive rushed cuts.
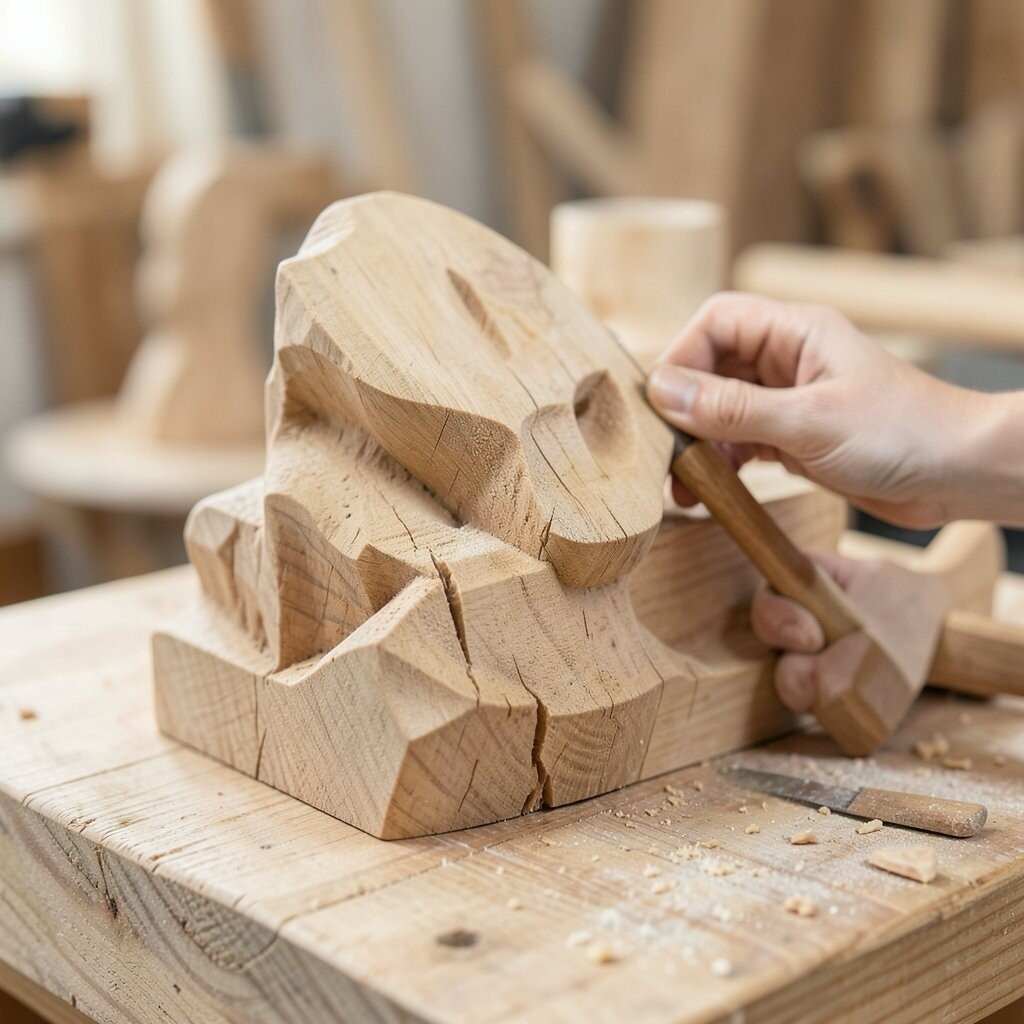
3. Wood Carving
Top Wood Carving Craft Tutorials
- 🍅 Wood Carving Tools & Carving Utensils from woodcraft.com.
- 👓 Wood Carving Tool Set for Spoon Carving – S13 from beavercrafttools.com.
- 🖼️ How to Start Wood Carving: A Beginner's Guide … from schaaftools.com.
- 🎄 Thick Shell & Splash Wood Carving – 13-1/2" X 3/4" from dlawlesshardware.com.
- 🎨 Wood carving from en.wikipedia.org.
Wood carving brings out warm lines and natural grain patterns that no paint can fully copy. The finished work can feel cozy, rustic, or even playful, depending on the wood and the cuts you make.
It is a smart choice if you want a material that is easier to find than stone. Soft woods are cheaper and easier for beginners, while harder woods give a richer look and longer life. You can personalize a carved bird, face, or symbol by following the grain, which often adds movement and charm.
Wood carving is still popular in home decor, folk art, and small gift items. Many makers enjoy mixing old hand tools with simple sanding for a clean finish. If you want a fresh look, leave some tool marks visible so the piece keeps its handmade character.
4. Modeling in Wax

Top Modeling In Wax Craft Tutorials
- 👓 How to make wax mold for jewelry? Uncover the secrets … from sobling.jewelry.
- 🖼️ Book Review: Modeling in Wax for Jewelry and Sculpture from ganoksin.com.
- 🎄 Lost Wax Casting: From Ancient Craft to Modern Jewelry Art from enterprise.flashforge.com.
- 🎄 Introduction to Wax Modeling for Metal Jewelry from domestika.org.
- 👓 Wax carving can be great for making patterns for sand … from facebook.com.
Wax sculpting feels smooth, quiet, and a little magical in the hand. It is often used to create small detailed forms before casting them in metal, but it can also stand alone as an art piece.
This method is lovely for fine textures like hair, leaves, and tiny folds. Wax itself is not too expensive, though special tools and casting may add cost later. You can make the work feel personal by pressing in patterns from lace, shells, or leaves from your own yard.
Wax models are useful for artists who want to plan a final sculpture before spending on a bigger material. The surface can look glossy, matte, or softly translucent depending on how it is finished. Many creators enjoy this method because it allows careful changes without the pressure of chopping or chiseling.
5. Clay Modeling

Top Clay Modeling Craft Tutorials
- 🖼️ Clay Modelling craft ideas | Craft guides & templates from bakerross.co.uk.
- 🎨 8 Clay Craft Ideas: Fun and Easy Projects for Kids at Home from mothercould.com.
- 👓 20 Clay Crafts For Creative Play from kiwico.com.
- 🎨 Clay modelling for kids from eduart4kids.com.
- 🖼️ Cute Clay Projects for Kids from sculpey.com.
Clay modeling is flexible, forgiving, and full of creative freedom. You can pinch, roll, press, and smooth the form until it feels just right.
The visual result can be soft and organic or sharp and detailed. Air-dry clay is a low-cost choice for beginners, while kiln-fired clay offers more strength and a classic ceramic look. Try building a small figure from your own sketchbook ideas, since clay is great for testing poses, faces, and fantasy creatures.
This method is popular in classrooms, studios, and home craft spaces because it is easy to start. It also helps with hand-eye skill and shape planning. If you want a more modern style, keep the surface simple and let the silhouette do the talking.
6. Lost-Wax Casting

Top Lost-Wax Casting Craft Tutorials
- 👓 Lost Wax Casting : 23 Steps (with Pictures) from instructables.com.
- 🖼️ Lost-wax casting from en.wikipedia.org.
- 🎄 Metal Casting/Lost wax from youtube.com.
- 🎨 Lost Wax Casting: From Ancient Craft to Modern Jewelry Art from enterprise.flashforge.com.
- 👓 Basic Lost Wax Casting from shane.engineer.
Lost-wax casting has a rich history and a polished final look that feels special. Artists first make a wax model, then replace it with metal, which creates crisp detail and lasting strength.
The process can be costly because it needs molds, heat, and metal materials. Even so, it is prized for rings, small figures, and fine art pieces with smooth edges and tiny textures. A personal design idea is to include fingerprints, initials, or tiny symbols in the wax before casting.
This method works well for artists who want a classic finish with room for fine detail. The shine of bronze or silver can make a piece feel elegant and timeless. It also fits current interest in custom jewelry and small collectible art objects.
7. Plaster Sculpting

Top Plaster Sculpting Craft Tutorials
- 🧑🌾 plaster crafts from suzyssitcom.com.
- 🎄 Plaster of Paris Freeform Sculpture | Kids' Crafts from firstpalette.com.
- 🎨 Hand-Formed Simple Sculpting with Plaster from stephanieleeart.com.
- 🖼️ Sculpting In Plaster | ArtClubBlog from artclubblog.com.
- 🍁 Plaster Sculpture from teacherspayteachers.com.
Plaster has a bright, clean look that can feel both old-fashioned and fresh. It sets quickly, so the work often feels active and full of energy while you shape it.
This method is useful for masks, reliefs, study models, and quick ideas. It is often affordable, though it can get messy and may need sealing or paint for a finished look. If you want to make it your own, try pressing in fabric, rope, or cardboard forms before the plaster hardens.
Plaster is a favorite for artists who like smooth surfaces and strong edges. It can be painted in many styles, from soft white to bright color. Because it dries fast, it is best to plan ahead and keep your tools ready.
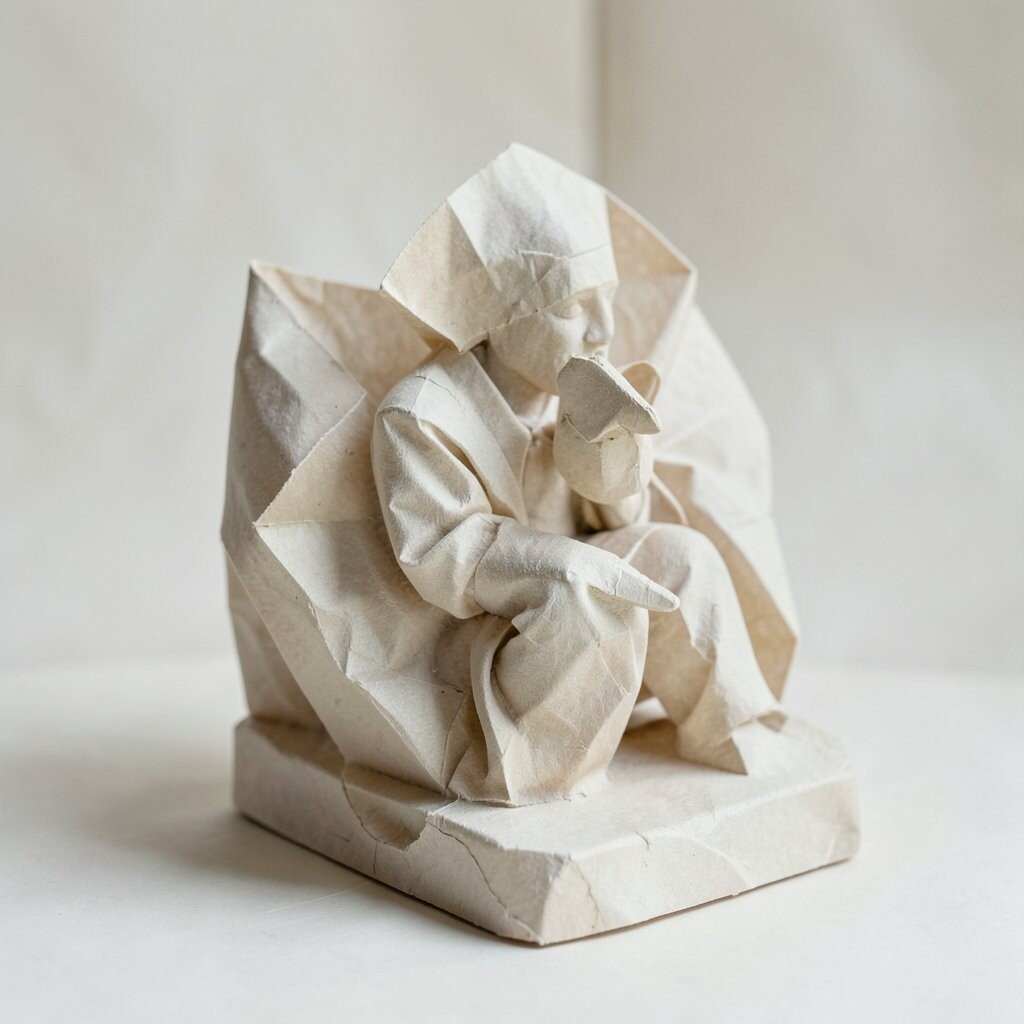
8. Papier-Mâché Sculpting

Top Papier-Mâché Sculpting Craft Tutorials
- 🎄 20 Paper Mâché Ideas For Kids – ARTBAR – Art Bar Blog from artbarblog.com.
- 🍅 Paper Mache Techniques – Red Ted Art – Kids Crafts from redtedart.com.
- 🍁 8th grade paper mache wearable sculpture has wrapped … from instagram.com.
- 🎄 Paper Mache – For Beautiful Sculptures And Masks • Ultimate … from ultimatepapermache.com.
- 🖼️ PAPIER MACHE from youtube.com.
Papier-mâché feels playful, light, and full of charm. Layers of paper and paste can become masks, animals, giant heads, or fantasy props with lots of personality.
This is one of the cheapest sculpting methods, since it can use recycled paper and simple glue mixtures. It is a great choice for kids, teachers, and artists who want big shapes without heavy materials. For a personal twist, add torn magazine pieces, fabric scraps, or hand-painted patterns to the surface.
The final piece can look rough and rustic or smooth and colorful, depending on how you finish it. It is also a strong trend in eco-friendly art because it reuses paper that might otherwise be thrown away. Keep the layers thin and patient, and the result can be surprisingly sturdy.
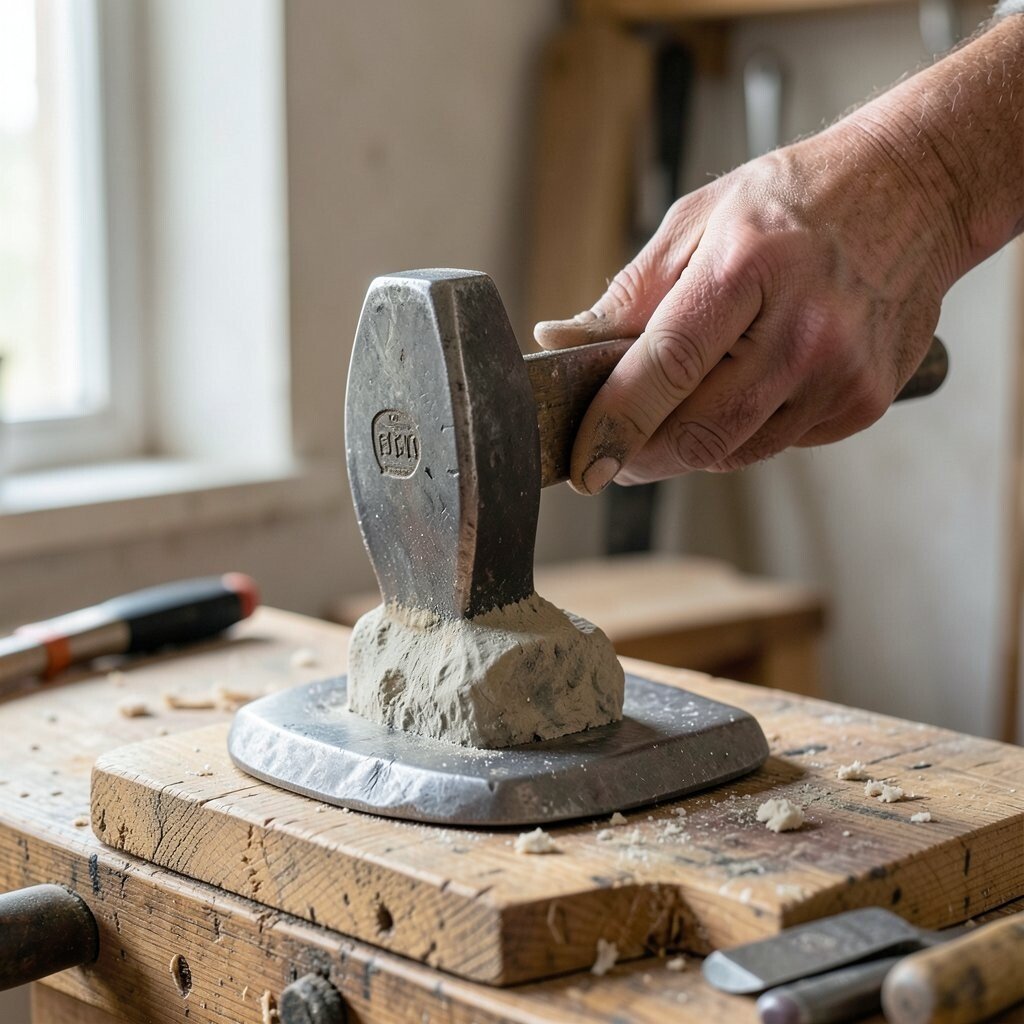
9. Metal Hammering
Top Metal Hammering Craft Tutorials
- 🍅 Hammers & Mallets | Jewelry Forming & Texturing Tools from pmcsupplies.com.
- 🍅 Rounded Wide Raising Hammer, Fretz HMR-9 from pepetools.com.
- 👓 Hephaestus from en.wikipedia.org.
- 🎄 The hammering technique is one of the oldest methods … from facebook.com.
- 🧑🌾 9-1/4" Mini Sharp Designer Hammer Jewelry Making Metal … from ebay.com.
Metal hammering gives sculptures a crisp, shining presence that catches light beautifully. The sound, the shine, and the repeated shaping create a rhythm that feels almost musical.
This method is often used for bowls, panels, masks, and abstract forms. It can cost more because metal sheets and tools add up, but the final look is durable and eye-catching. You can make the work more personal by choosing copper for warmth, brass for gold tones, or aluminum for a lighter feel.
Metal surfaces are popular in modern interiors and outdoor art because they age well and stand out. Small dents and marks can add character instead of ruining the piece. If you enjoy strong textures and reflective surfaces, this method can be deeply satisfying.
10. Wire Sculpting

Top Wire Sculpting Craft Tutorials
- 👓 Wire Sculptures. from instructables.com.
- 🎨 Wire Art For Beginners from youtube.com.
- 🎨 Wire Crafts: Easy Embellishments! from thegraphicsfairy.com.
- 🎄 BENECREAT 10 Gauge 80Feet Jewelry Craft Aluminum … from walmart.com.
- 💅 Artistic Wire 10 Guage Wire – 3 Variations from texasart.com.
Wire sculpting is light, quick, and full of motion. A simple bend can suggest a face, a bird, a dancer, or a whole tree.
This method is often low-cost and easy to store, which makes it great for beginners and small studios. It can be used alone or as a frame for mixed-media work. Try wrapping colored thread, beads, or thin fabric around the wire to give it a more personal and lively look.
The style feels modern and airy, which is why it appears often in galleries and home decor. Artists like it for its open spaces and sketch-like feel in three dimensions. Use pliers and a plan, but allow a little looseness so the line can stay graceful.
11. Soap Carving

Top Soap Carving Craft Tutorials
- 💅 Soap Carving from butfirstwecraft.com.
- 🎄 Easy Soap Carving for Kids Inspired by KiwiCo from momsandcrafters.com.
- 💅 Soap Carving for Everyone from hiphomeschoolmoms.com.
- 🧑🌾 Basic soap carvings from youtube.com.
- 🎨 Soap Carving from marshallfredericks.org.
Soap carving is simple, gentle, and surprisingly satisfying. The material is soft enough for careful cutting, so the work can be done with small tools and a light touch.
This method is very affordable and perfect for practice pieces or quick gifts. The finished forms may be tiny animals, flowers, symbols, or abstract shapes with smooth edges. Choose soaps with color layers or scents if you want the piece to feel more personal and fun.
Because the material is small and easy to handle, it works well for children or anyone new to carving. It also encourages clean lines and careful planning. If you want a trendy craft idea, soap carving can be turned into custom party favors or desk decorations.
12. Ice Sculpting

Top Ice Sculpting Craft Tutorials
- 🍅 How to Build Coloured Ice Sculptures in the Snow from happyhooligans.ca.
- 👓 14 Incredible Ice and Snow Sculptures from familyhandyman.com.
- 🎄 Ice art :: winter craft for kids from nurturestore.co.uk.
- 🍂 Salt Painting Ice Sculptures | DIY for Beginners from kiwico.com.
- 🖼️ Richard Rewey saw this sculpture made with 2-foot blocks … from facebook.com.
Ice sculpting has a bright, dramatic look that feels alive for the short time it lasts. Clear blocks can become birds, flowers, letters, or elegant abstract forms that glow under light.
This method is often used for events, displays, and special celebrations, so it can be more expensive and time-sensitive than other forms. The short lifespan is part of its charm, since the sculpture changes as it stands. A personal touch can come from frozen flowers, colored water, or shapes that match a wedding or holiday theme.
Ice sculpture is popular because it feels fresh and surprising. It works best with planning, sharp tools, and a cold space. If you enjoy art that is both beautiful and temporary, this method can be unforgettable.
13. Sand Sculpting

Top Sand Sculpting Craft Tutorials
- 🧑🌾 Sandcastles That Will Last from meaningfulmama.com.
- 🍅 Global sand sculptors vie for victory at 2025 Neptune … from 13newsnow.com.
- 🎄 12 Creative Things You Can Make with Sand from tinybeans.com.
- 🍂 Making a sand sculpture. : r/nextfuckinglevel from reddit.com.
- 👓 Siesta Key Crystal Classic Sand Sculpting Festival FL from siestakeycrystalclassic.com.
Sand sculpting can look grand, soft, and full of texture all at once. The surface may hold tiny grains, deep grooves, and smooth curves that catch sunlight in a lovely way.
This method is low-cost when done at the beach, though special sand and tools may be needed for bigger projects. It is a favorite for festivals, family outings, and team art projects. You can personalize the design by adding shells, driftwood, or sea-themed shapes that match the setting.
Sand art is a current favorite for outdoor events because it feels fun and social. It also teaches balance, timing, and gentle shaping. Since wind and water can change the sculpture fast, the process matters as much as the result.
14. Relief Sculpting

Top Relief Sculpting Craft Tutorials
- 🖼️ Plaster Relief Sculpture from thevirtualinstructor.com.
- 🍁 How to Make a Relief Sculpture Plate in Air Dry Clay from theartlady2017.blogspot.com.
- 🧑🌾 Cardboard Tube Relief Sculptures from amslerartroom.com.
- 🍁 A Base Relief Sculpture in the Modern Bronze Age from epoxyworks.com.
- 🍁 Bas-Relief Sculpture: What is it and how can it be used in … from pigmentti.com.
Relief sculpting creates depth on a flat surface, almost like a picture that rises out of the wall. It can be shallow and delicate or deep and bold, which gives artists many style choices.
This method is useful for plaques, wall art, building details, and storytelling scenes. It can be done in clay, plaster, wood, or stone, so the cost can fit many budgets. A personal idea is to use family symbols, favorite plants, or travel memories in the design.
Relief work is still common in architecture and decorative art because it adds beauty without taking up much space. The lighting can make the raised parts stand out in a dramatic way. If you want a piece that feels both picture-like and sculptural, this method is a strong choice.
15. Assemblage Sculpture
Top Assemblage Sculpture Craft Tutorials
- 🍅 RE- THINKING ASSEMBLAGE SCULPTURE from creativepinellas.org.
- 🗺️ Vintage Assemblage from youtube.com.
- 🖼️ Assemblage Art Tutorial: A Semi-Steampunk 3D Collage from artsupplyguide.com.
- 🍁 Making an Assemblage & Learning about Louise Nevelson – from artisbasic.com.
- 💅 Fri 5/15 Assemblage 6pm from remainderspas.org.
Assemblage sculpture brings together found objects in a way that feels clever and surprising. A spoon, a toy, a broken tool, or a scrap of wood can become part of a new story.
This method can be very low-cost if you use recycled materials from home, thrift stores, or workshops. It is a wonderful choice for artists who enjoy mixing textures, colors, and shapes that would not normally belong together. Try building around a memory item, like a key or postcard, to make the piece feel more personal.
Assemblage fits current trends in sustainability and upcycled art. It often looks modern because it mixes the old and the new in fresh ways. Keep the balance in mind, and the piece can feel playful without becoming cluttered.
16. Paper Sculpture
Top Paper Sculpture Craft Tutorials
- 💅 Paper Sculpture from youtube.com.
- 🖼️ Fun and easy paper sculpture made using different … from facebook.com.
- 💅 1ST AND 2ND GRADE INSPIRED BY CHARLES MCGEE from artwithmrsfilmore.com.
- 🍁 How to Make Paper Sculptures | Turn Flat Sheets Into 3D Art from paperpapers.com.
- 🎨 Playful Paper Sculptures! A one day make-and-take in … from facebook.com.
Paper sculpture can look delicate, crisp, and full of motion. Folded, cut, curled, or layered paper can create flowers, animals, faces, and abstract forms with a clean look.
This method is budget-friendly and easy to test, which makes it great for beginners and design lovers. It can be used for home decor, stage props, cards, and display art. Pick colored paper, handmade paper, or printed paper to match your mood and give the work a personal voice.
Paper art is very current in display windows, weddings, and social media projects because it photographs well. The shadows it casts can be just as beautiful as the paper itself. Use a sharp blade, careful folds, and a steady hand for the best results.
17. Terracotta Sculpting

Top Terracotta Sculpting Craft Tutorials
- 🖼️ Terracotta clay sculpture before kiln firing from facebook.com.
- 🍂 Essential Tools for Terracotta Making from crafty-clayworks.com.
- 🖼️ Crafter Pottery Stainless Clay Sculp Tools 17 Piece Art Sculpture … from ebay.com.
Terracotta has a warm, earthy color that feels timeless and natural. The clay can be shaped into pots, figures, tiles, and garden pieces that seem to belong to the sun and soil.
This method is often affordable and widely available, though firing in a kiln adds some cost. The final surface can be left plain, polished, or painted with bright designs. For a personal touch, press in leaves, lace, or carved lines that reflect your own style.
Terracotta remains popular in both traditional craft and modern home decor. It works well indoors and outdoors, which makes it very flexible. If you like a warm, handmade look, this material can bring a calm and friendly feeling to your work.
18. Chiseling Marble

Top Chiseling Marble Craft Tutorials
- 🎄 Francesco Queirolo's 18th-century marble masterpiece from facebook.com.
- 🗺️ [HELP]Marble sculpture – where to start from reddit.com.
- 🍂 Craft techniques at ADRI . . . #chiseling #marble #handmade # … from instagram.com.
- 🖼️ The Art Of Marble Carving from ruralhandmade.com.
- 🍅 18" Marble Table Top Pietra Dura Art Crafts Handmade … from ebay.com.
Marble chiseling has a graceful, classic beauty that feels rich and steady. The smooth white or colored stone can reveal soft curves, sharp edges, and gentle shadows as the form comes forward.
This method can be expensive because marble is prized and the tools are specialized. Still, the result can be stunning for busts, figures, and elegant abstract shapes. A personal idea is to design a small piece that follows the natural veins in the stone, since those lines can add character.
Many artists admire marble for its link to old masterworks and fine public statues. It is also a material that photographs beautifully in natural light. If you want a sculpture with a noble and lasting feel, marble can be deeply rewarding.
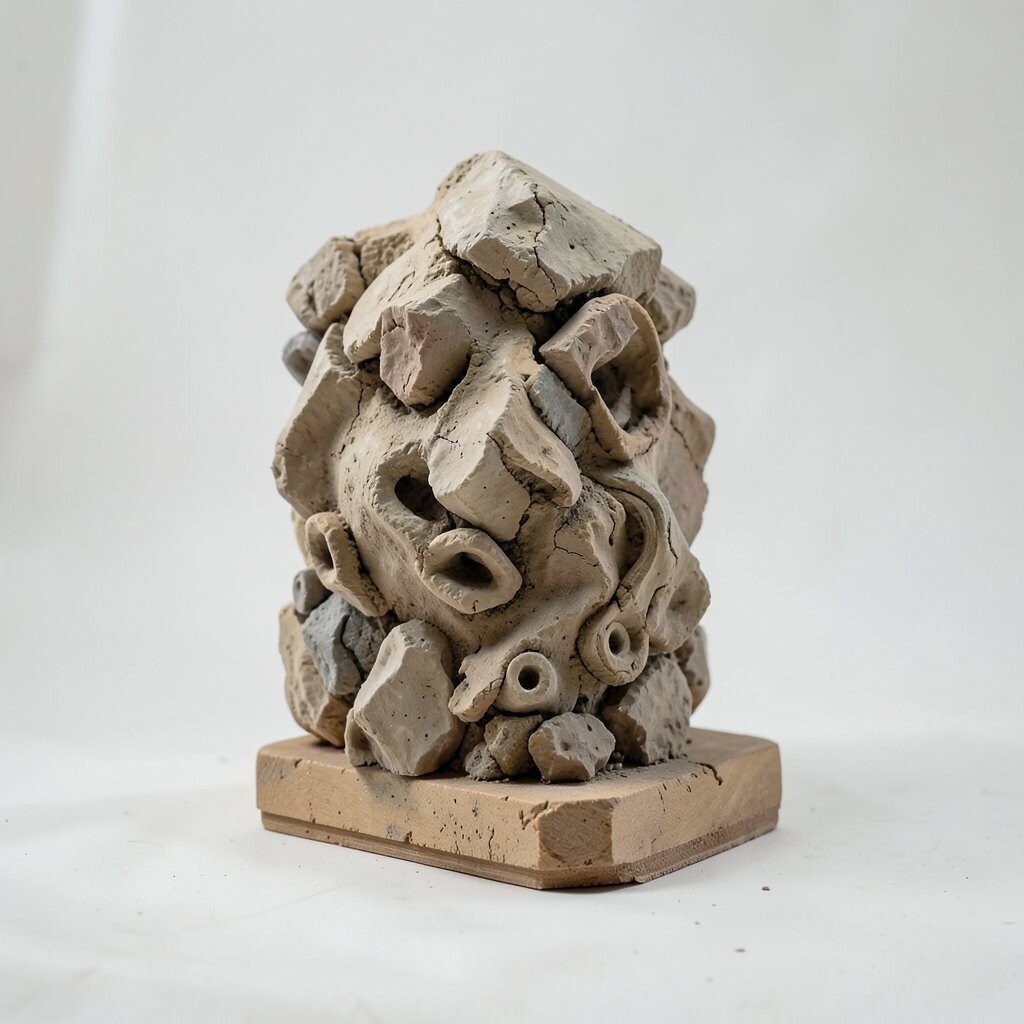
19. Modeling in Found Natural Materials
Top Modeling In Found Natural Materials Craft Tutorials
- 🧑🌾 Outdoor modeling clay projects from facebook.com.
- 👓 Model Building Materials from scoutingevent.com.
- 👓 Ideas take shape through craft. Bamboo scale models help us … from instagram.com.
- 🍅 Craft Natural Modeling Clay(999+) from alibaba.com.
Using natural materials like bark, twigs, seeds, shells, and dried plants can lead to sculptures that feel earthy and fresh. The colors and textures are already interesting, so the piece often looks rich without much extra work.
This method can cost very little if you gather materials carefully and respectfully. It is a great fit for eco-friendly art, classroom projects, and outdoor displays. Try arranging the materials around a theme such as birds, seasons, or family roots to make the work feel personal.
Natural-material sculpture is popular now because many artists want a closer link to the environment. The textures can feel rough, soft, shiny, or fragile all in one piece. Keep the design simple and let the natural shapes lead the way, since that often creates the strongest result.