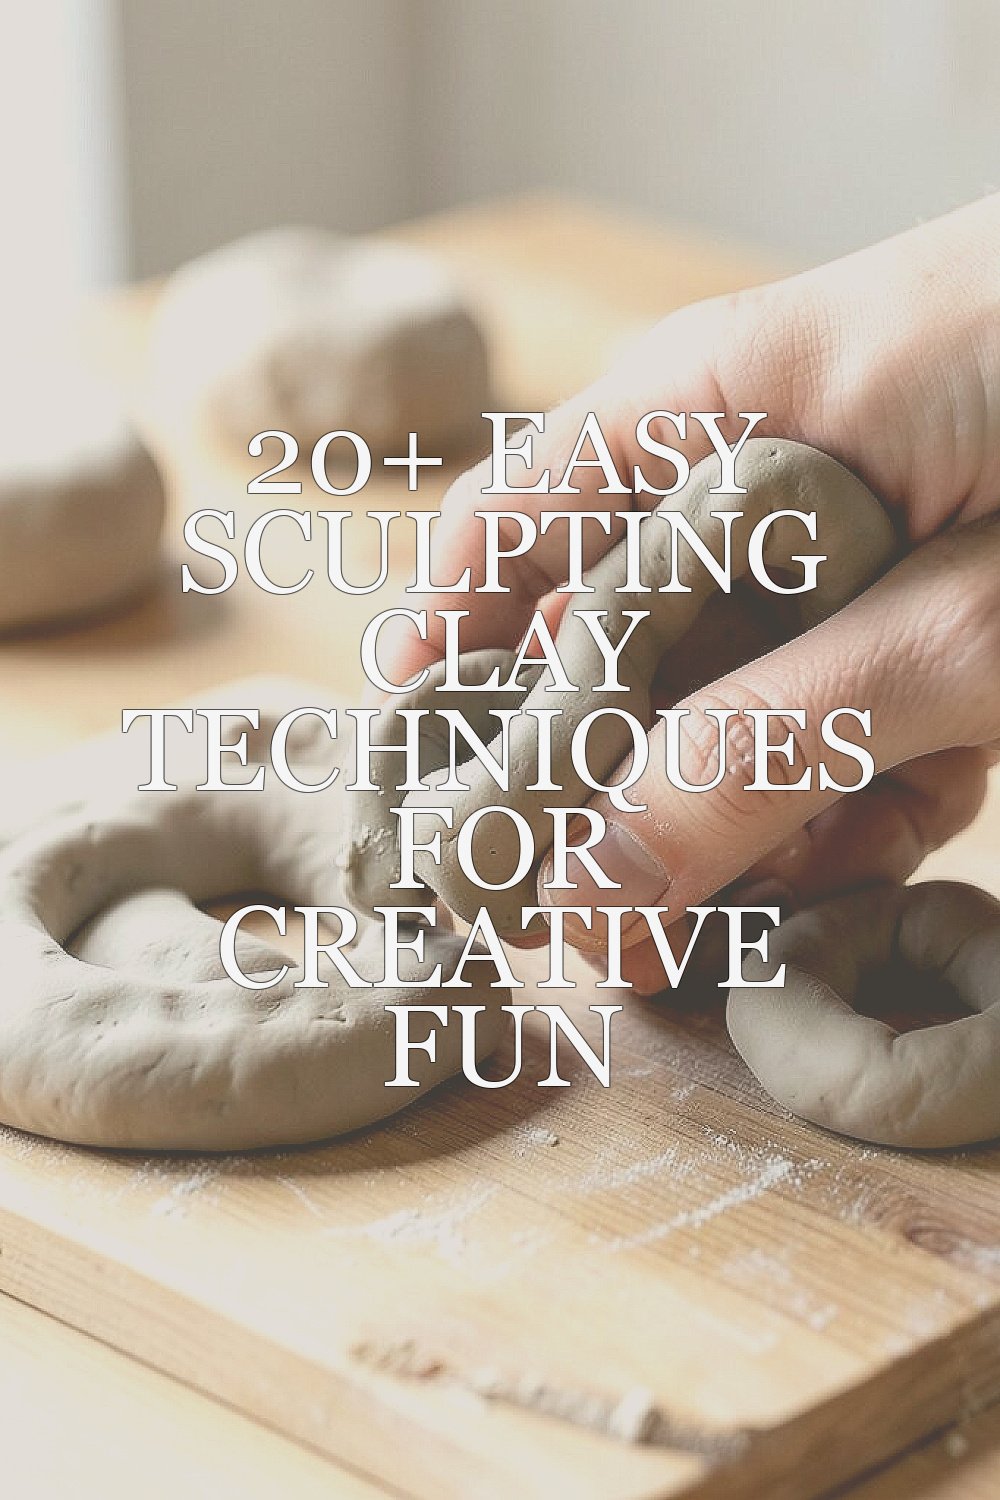
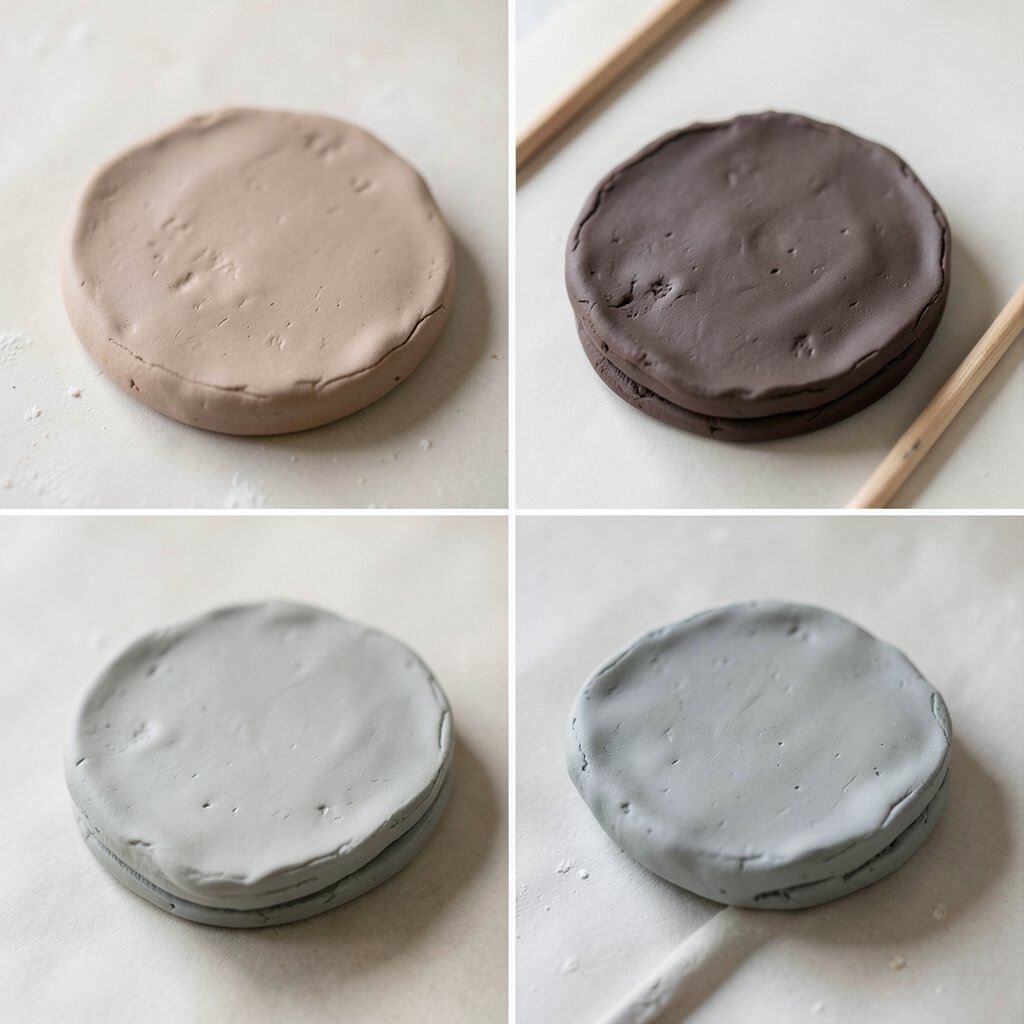
Clay can turn a quiet table into a tiny world of color and shape. A few simple moves can make plain lumps feel full of life.
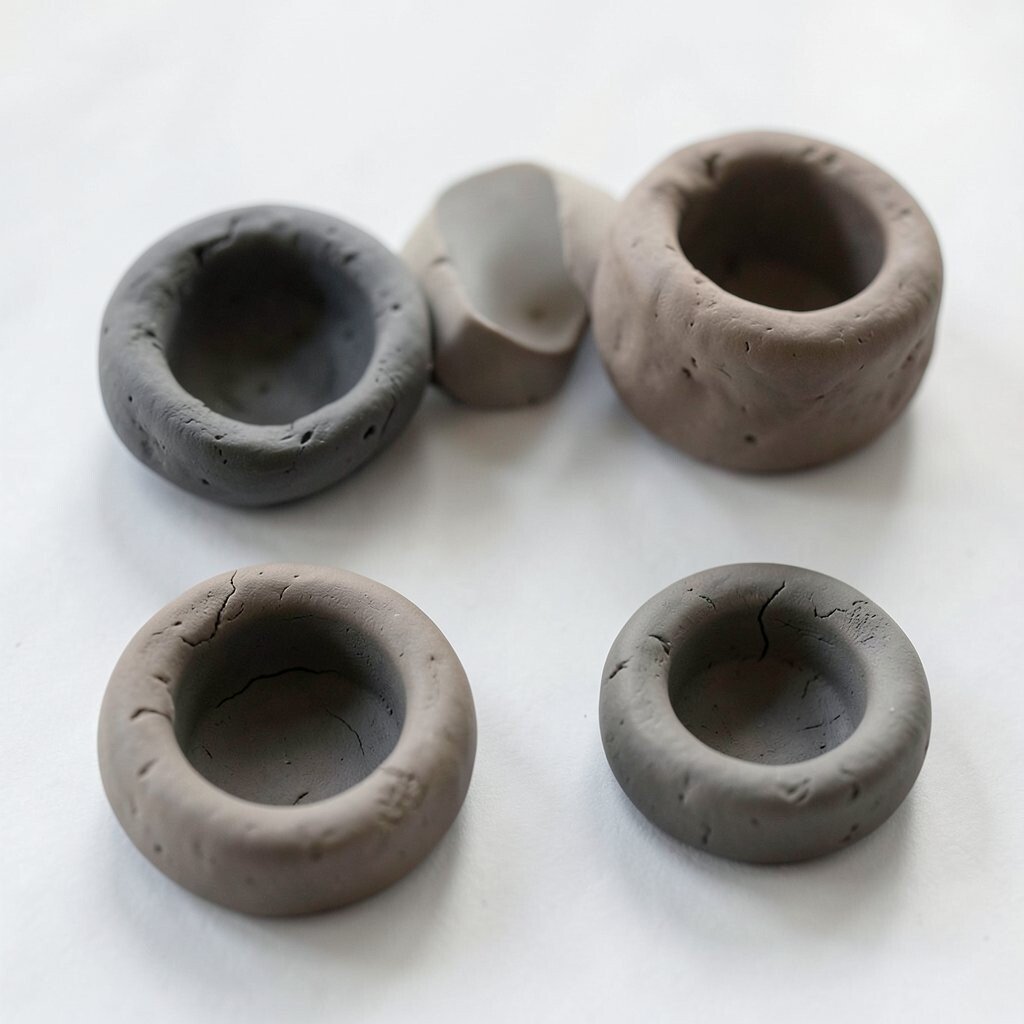
1. Pinch Pot Magic

Top Pinch Pot Magic Craft Tutorials
- 💅 Pinch Pot Monsters – Clay Making for Kids from schooltimesnippets.com.
- 🍂 Crystallized Pinch Pots from dbrl.org.
- 👓 ✨Make a pinch pot!✨ This elementary school craft project is … from instagram.com.
- 🎨 How To Build Clay Monster Pinch Pots for Kids from craftyartideas.com.
Pinch pots are one of the easiest ways to begin with clay. They look simple at first, but they can become bowls, cups, or little art pieces with soft curves.
Start by rolling clay into a ball and pressing your thumb into the center. Gently pinch the sides as you turn the piece in your hand, and keep the walls even so they do not crack. This method is low-cost because it uses only a small amount of clay, and it feels great for kids and beginners who want fast success.
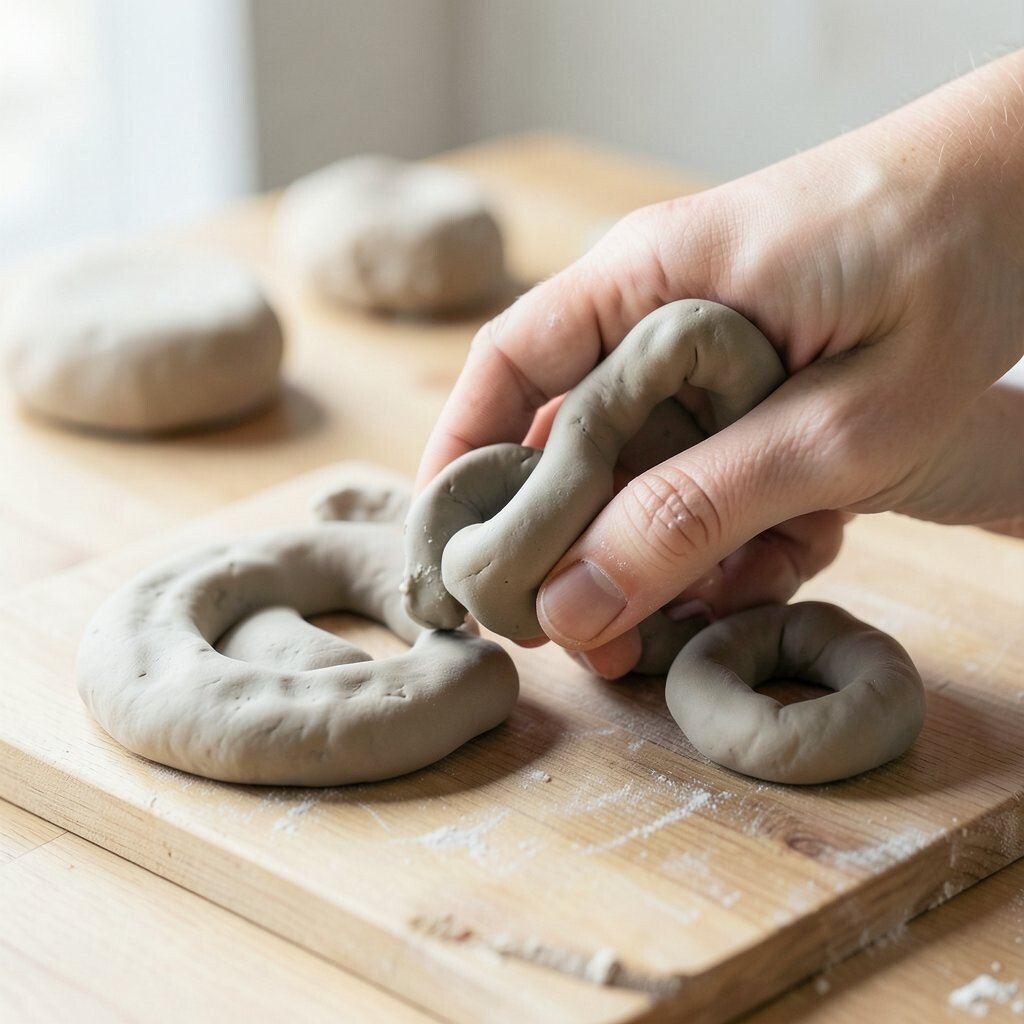
2. Coil Building
Top Coil Building Craft Tutorials
- 🍅 Coil Building Techniques, Pinch Cup and Handles from artescaperetreat.com.
- 👓 How to Make a Coil Pot – Step by step guide with photos … from ancientpottery.how.
- 🎨 How to Coil-build with clay from small to monumental. from ospreystudios.org.
- 🎨 Workshop II: Coil Work – Nashville from christinacohnceramics.com.
- 🧑🌾 Polymer Clay Coil Pot from wheatonarts.org.
Coil building gives clay a neat, hand-made look. The finished surface can feel cozy and earthy, with visible rings that make each piece special.
Roll long ropes of clay and stack them in circles or layers. Smooth the joins with a finger or a simple tool, and try making a vase, pot, or small basket shape. You can keep the coils visible for a rustic style or blend them for a cleaner look, which makes this technique easy to personalize.
Coils are also trendy in home decor because they look handmade and warm. Since the method works with basic tools, it stays friendly for tight budgets and small craft spaces.
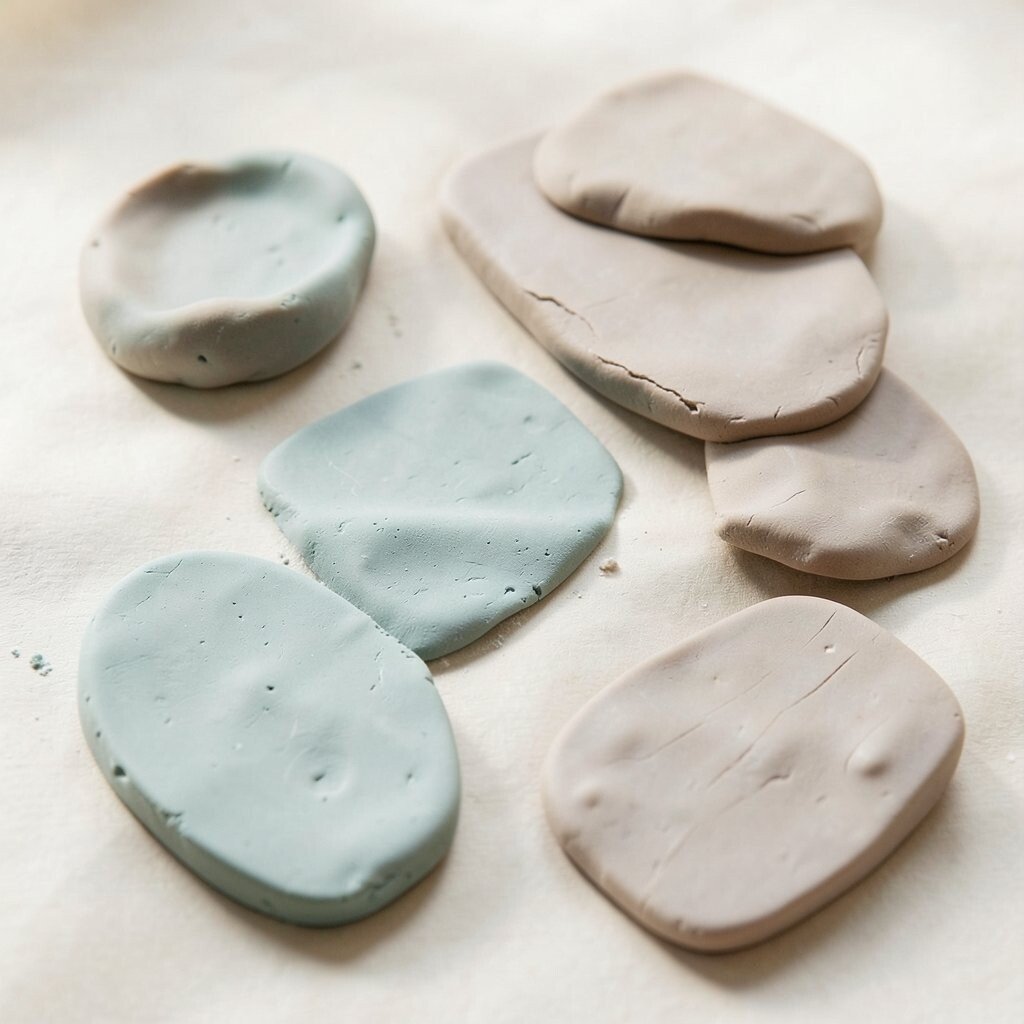
3. Slab Shapes
Top Slab Shapes Craft Tutorials
- 🗺️ Create amazing shapes with slab pottery from gathered.how.
- 🍅 Slab pottery ideas for beginners – 25 easy clay projects from frombritainwithlove.com.
- 🧑🌾 Exploring Ceramics: The Slab Technique from domestika.org.
- 🎄 Lumber and Craft from facebook.com.
- 🍅 Craft ideas using tree trunk slabs? from facebook.com.
Slab work uses flat pieces of clay to build boxes, plaques, and little houses. The edges can look crisp and tidy, which gives the finished project a smart, modern feel.
Flatten the clay with a rolling pin or a smooth bottle. Cut shapes with a plastic knife or craft stick, then join them with gentle pressure and a bit of water or slip. This style is helpful for people who like neat lines, and it is easy to change by adding stamps, textures, or drawn patterns.
Try making a name plate, a tray, or a tiny desk organizer. Slab projects can be made with only a medium amount of clay, so they are still easy on the wallet.
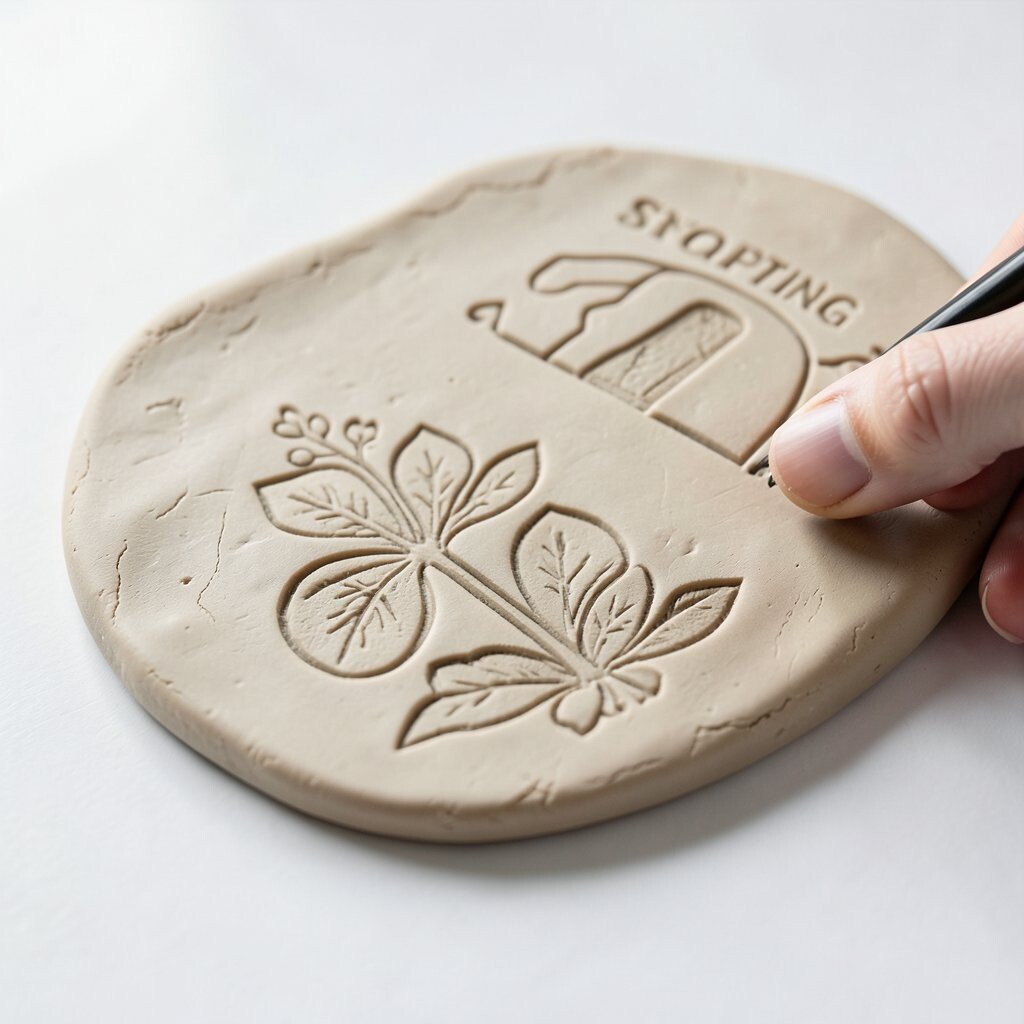
4. Texture Pressing

Top Texture Pressing Craft Tutorials
- 🍅 20 Texture techniques – Mont Marte Global from montmarte.com.
- 👓 Texture Pressing tutorial from splitcoaststampers.com.
- 🖼️ Glue Texture Rubbings Art Project for Kids from kidsactivitiesblog.com.
- 💅 9 Ways to Imprint your Pottery for Texture and Design from meeshpottery.com.
- 💅 4 Card Backgrounds with the BetterPress Essential Textures from blog.altenew.com.
Texture pressing adds patterns that catch the eye right away. The clay can look like fabric, leaves, lace, bark, or even tiny waves.
Press safe objects into the surface, such as buttons, shells, combs, or toy parts. Move slowly and test each item on scrap clay first so the marks come out clear without tearing the piece. This technique is fun because it turns simple clay into something richer and more personal, and it works well with current handmade decor trends.
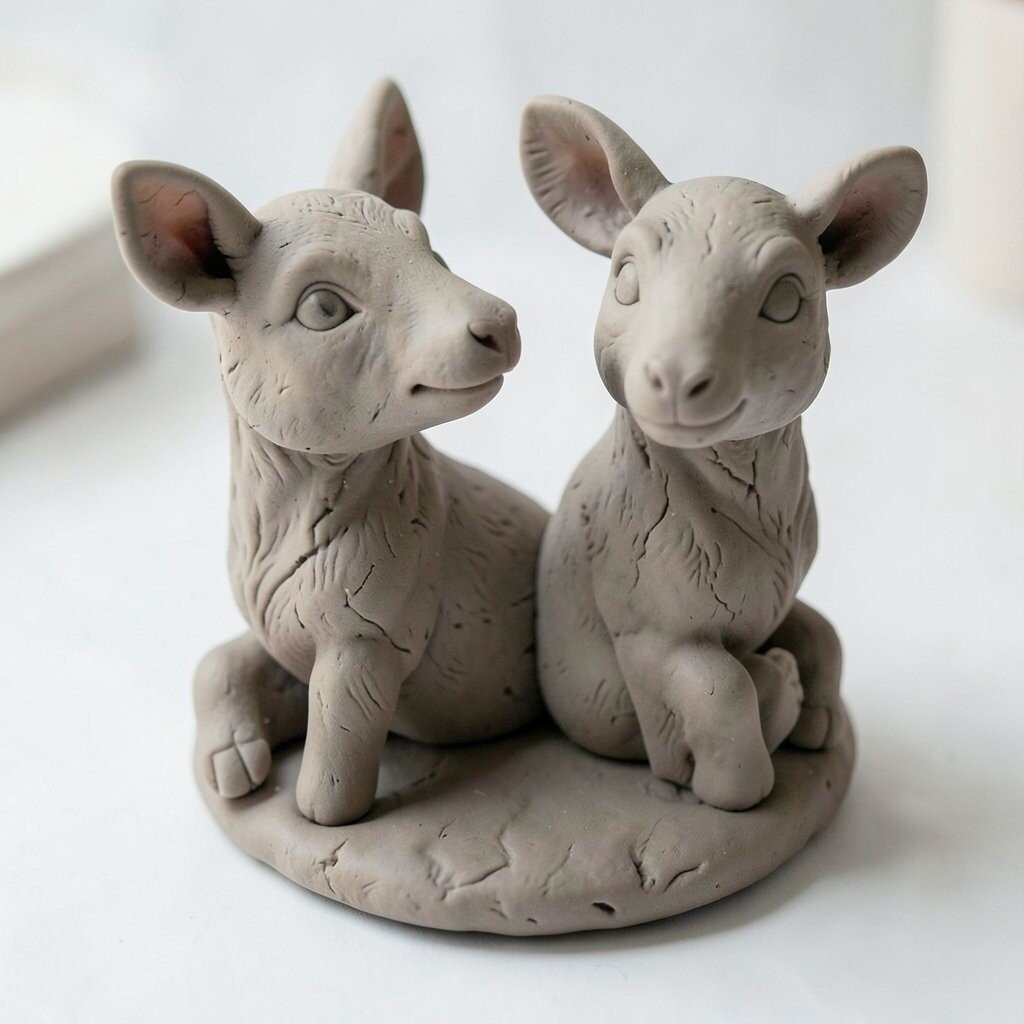
5. Add-On Sculpting
Top Add-On Sculpting Craft Tutorials
- 👓 Non-Clay Sculpture Lessons: 10 Sculpture Ideas Without … from artwithtrista.com.
- 🍅 5 plaster sculpture techniques from montmarte.com.
- 👓 The 5 best sculpting materials for modeling, molding and … from minimalistdesigner.com.
- 🧑🌾 Craft for Kids: Make Your Own Clay & Sculpt Away! from craftinamerica.org.
- 🎄 Materials for sculpture other than clay? : r/Hobbies from reddit.com.
Add-on sculpting is all about building a form by attaching small parts. A plain shape can quickly become an animal, a face, or a fantasy creature with ears, arms, and tails.
Make the base shape first, then press on extra pieces where they belong. Score both surfaces, add a little slip, and blend the edges so the parts stay strong. This method helps with planning and patience, and it gives you room to make each piece look unique with different features or expressions.
Use less clay for small details if you want to save money. Many makers enjoy this style because it feels playful and works well for custom gifts.
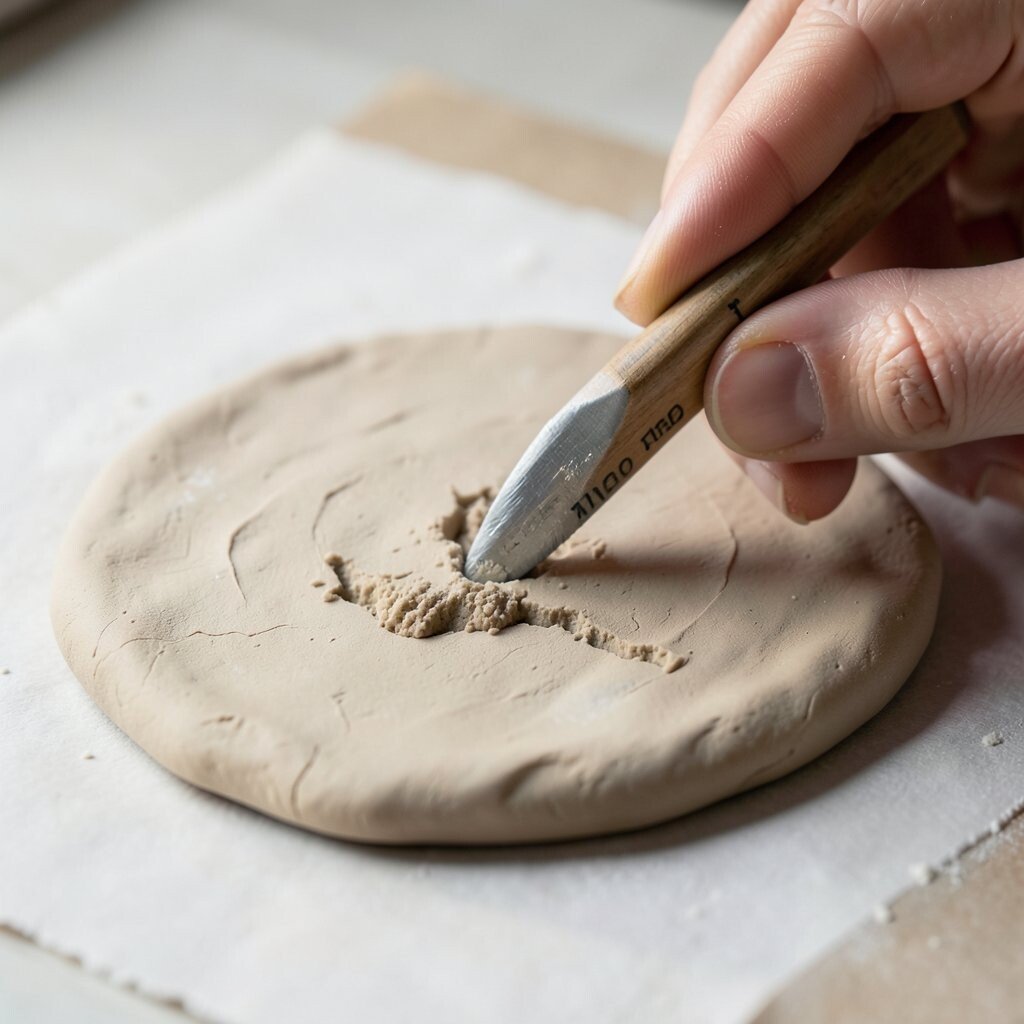
6. Carving Lines
Top Carving Lines Craft Tutorials
- 🎄 10 Easy Relief Carving Projects for Beginners from schaaftools.com.
- 🧑🌾 Wood Carving Patterns for Beginners – Easy Whittling … from beavercrafttools.com.
- 🎄 2025 List of patterns free & other from forum.woodcarvingillustrated.com.
- 🖼️ Chip Carving Projects from lsirish.com.
- 🍅 5 Minute Wizard Whittling Project from caseknives.com.
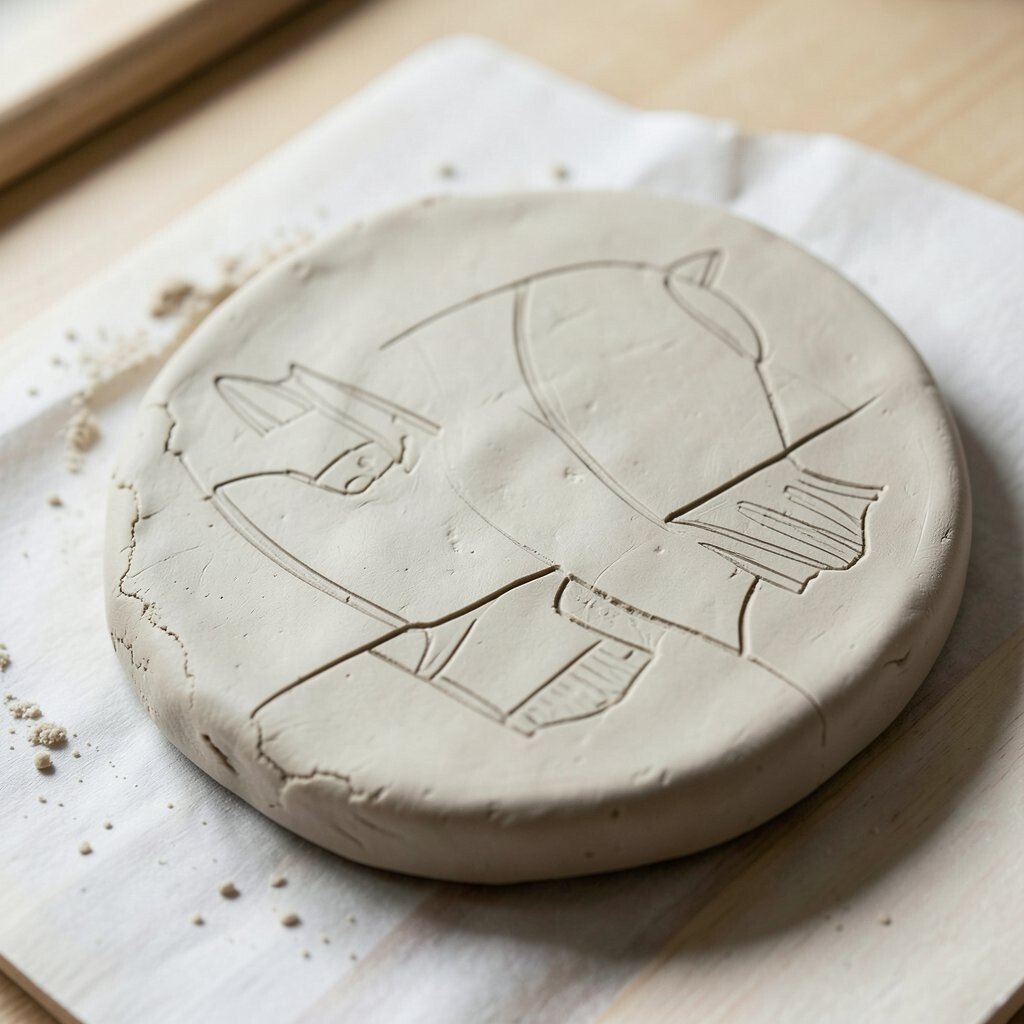
Carving lines can make clay pieces look sharp and detailed. Even a plain surface can feel fancy once you add grooves, swirls, or simple outlines.
Wait until the clay is a little firm, then use a wooden tool, toothpick, or craft stick to draw into the surface. Keep your hand light so the marks stay clean, and wipe away crumbs before they dry in the lines. This is a great way to add names, stars, leaves, or doodles, and it costs almost nothing if you use simple tools from home.
Try mixing deep cuts with thin scratches for more visual interest. Carving also works well with painted clay because the lines help the color stand out.
7. Smooth Blending
Top Smooth Blending Craft Tutorials
- 🖼️ Mastering Ink Blending for Jaw-Dropping Card Designs from altenew.com.
- 💅 The Ultimate Guide to Blending Graphite from ioannaladopoulou.design.
- 🎄 Acrylic Paint Blending Techniques from arttoart.net.
- 🎨 How to INK BLEND – Includes 5 EPIC Card Design Ideas … from lostinpaper.com.
- 🍂 How to achieve smoother blending for softer painting effects? from facebook.com.
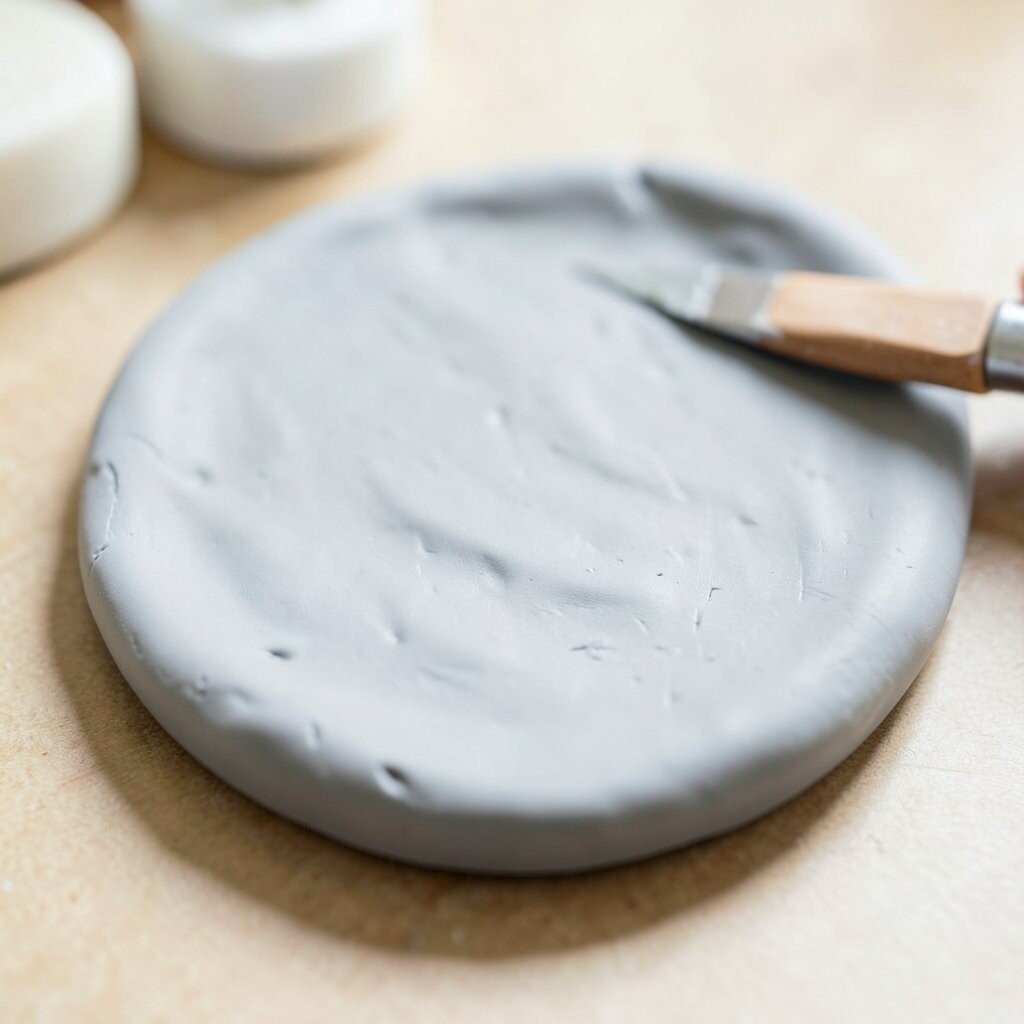
Smooth blending gives clay a soft, polished look. It can make a sculpture feel calm, clean, and much more finished.
Use your fingers, a sponge, or a small rubber tool to rub away bumps and seams. Work slowly so the shape stays round and natural, and add a tiny bit of water only when needed. This technique is useful for faces, animals, and rounded forms, and it helps beginners build confidence because mistakes can often be softened away.
If you like a modern style, keep the surface sleek and simple. If you want a handmade feel, leave a few gentle marks so the piece shows your touch.
8. Finger Impressions
Top Finger Impressions Craft Tutorials
- 🖼️ Hand Print Art: O is for Octopus from crystalandcomp.com.
- 🖼️ Fingerprint Art: Flower Pot Kids Craft – Jessica Etcetera from jessicaetcetera.com.
- 🖼️ 24 of the best finger painting ideas from gathered.how.
- 🎄 Fingerprint Crafts August 8 – CrossWay Church from crosswaychurchwa.com.
- 🧑🌾 More season ideas. Finger print art from facebook.com.
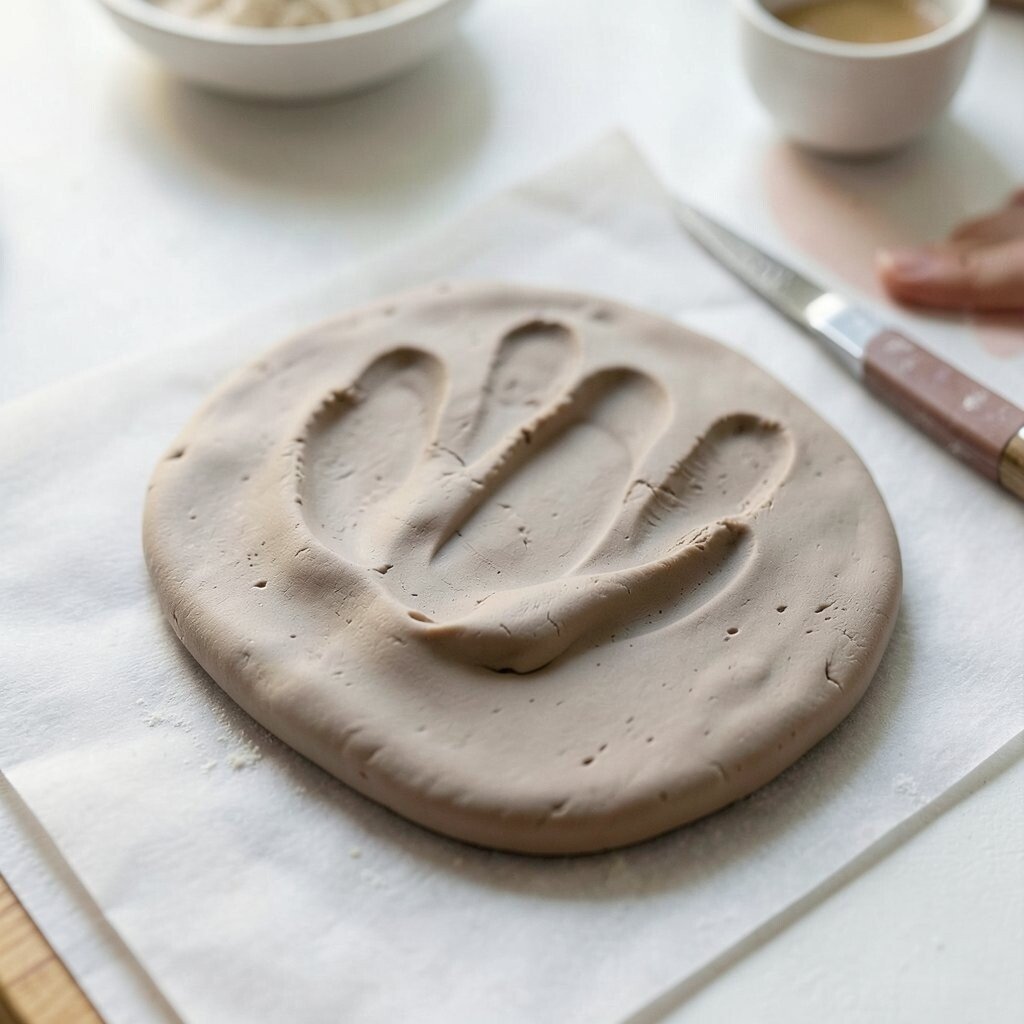
Finger impressions make clay feel warm and human. The little dents and curves can become part of the design instead of something to hide.
Press fingertips, knuckles, or the side of a finger into the clay to create soft marks. Repeat the pattern in rows or clusters for a look that feels lively and handmade. This is a very low-cost method because it uses your own hands, and it is easy to make each piece personal by changing the pressure or spacing.
Try using your fingerprints to make petals, scales, or pebble-like textures. Many artists like this trend because it gives clay work a friendly, organic style.
9. Rolling Pin Patterns
Top Rolling Pin Patterns Craft Tutorials
- 🎄 Algis Crafts 9” Textured Embossed Dough Rolling Pin Floral from ebay.com.
- 🎄 Rolling Pin Acrylic Pattern #9 – Fleur De Lis from cuttercraft.com.au.
- 🍅 Embossed Rolling Pin – Made In Poland | PastryMade … from pastrymade.com.
- 🖼️ Buy 35cm Embossing Rolling Pin, 9 Pattern 3D Printed … from amazon.in.
- 🗺️ Pattern 765-009 Rolling Pin from jbcookiecutters.com.
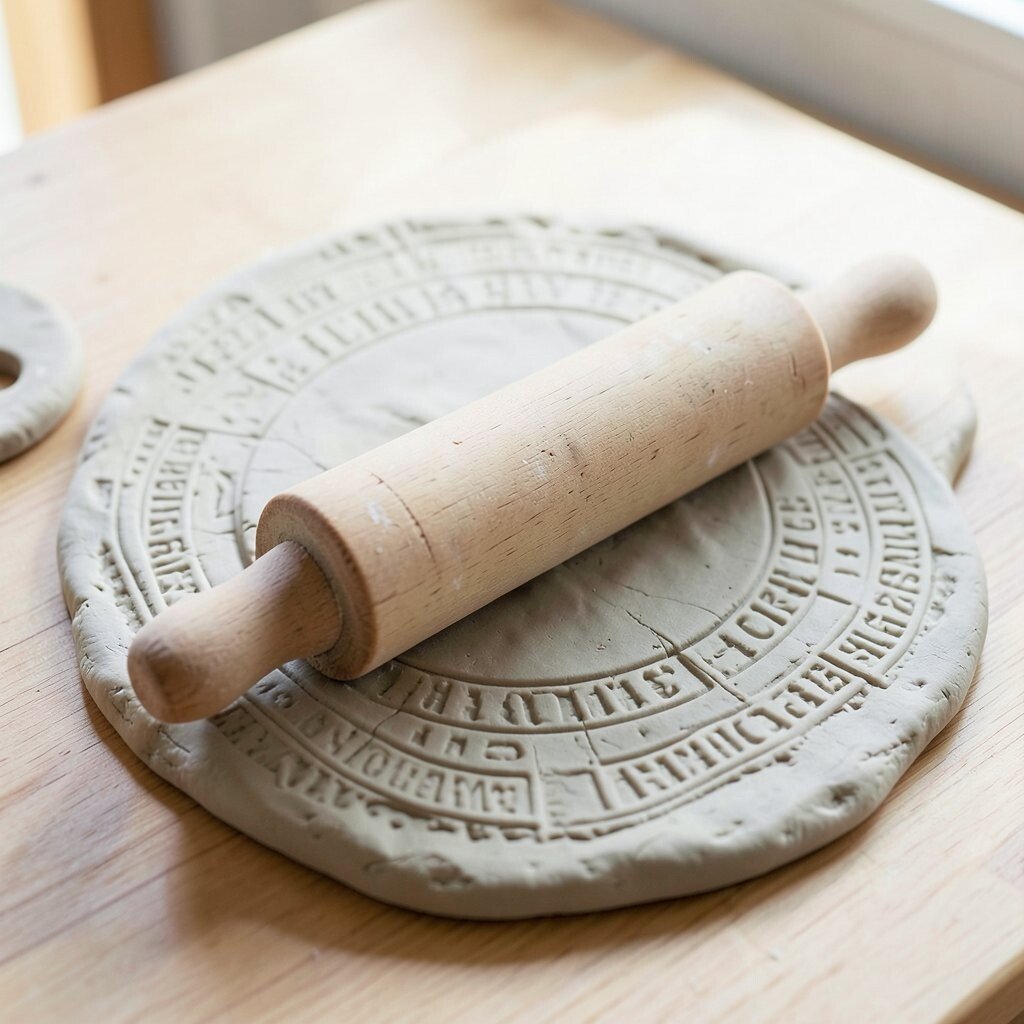
A rolling pin can do more than flatten clay. With the right surface, it can leave behind repeating shapes that look neat and cheerful.
Wrap the pin with lace, string, or textured fabric, then roll it over soft clay. The pattern comes out in a clean strip or a full sheet, ready for cutting and shaping. This is a smart way to make gift tags, ornaments, or wall tiles, and it keeps costs low because you can reuse simple household items.
Choose bold patterns for a playful look or tiny ones for a softer style. You can also match the texture to the season, like snowflakes in winter or flowers in spring.
10. Hollow Forms
Top Hollow Forms Craft Tutorials
- 🍂 Hollow Forms and Boxes from youtube.com.
- 🍅 Hollow Form 10 from fishwickwoodcrafts.co.uk.
- 🖼️ Introduction to Hollow Form Construction from petersvalley.org.
- 🍅 Hollow Form from artofturning.com.
- 🖼️ Hollow form ornaments for beginners from facebook.com.
Hollow forms help clay sculptures stay lighter and dry more evenly. They can look large and bold without becoming too heavy to move.
Build the shape around a small pocket of air or create two halves and join them together. Make a small opening so trapped air can escape during drying and firing. This technique is useful for bigger projects, and it gives you freedom to make animals, masks, or decorative jars that feel more advanced.
Hollow pieces often look impressive on shelves and tables. They may use more planning than simple shapes, but they can still be made with a modest amount of clay if you keep the walls thin.
11. Stamping Designs
Top Stamping Designs Craft Tutorials
- 🗺️ Creative Stamping Designs | Karen Ksenzakovic, Independent … from creativestampingdesigns.com.
- 🎨 Creativity Made Simple Volume 11 | Card Making Templates from sunnydaystamping.com.
- 🎄 💟Stampin up! Lot 11 Craft Stamp and 2 Die Set💟 from oursaviorschurch.com.
- 🎄 Valentine's Day Crafts: Creative, Heartfelt Ideas for Kids … from thestampmaker.com.
Stamping is a fast way to add charm to clay. The surface can go from plain to playful in just a few presses.
Use alphabet stamps, craft stamps, or found objects with interesting shapes. Press straight down, lift carefully, and repeat with even spacing if you want a pattern. This method works well for labels, keepsakes, and custom names, and it is easy to adjust for your own style by choosing bold or tiny stamps.
Stamped clay fits nicely with current maker trends because it looks clean and personal. It also saves time, which is helpful when you want a polished result without buying many supplies.
12. Animal Features
Top Animal Features Craft Tutorials
- 👓 10 Animal Crafts for Kids from thesprucecrafts.com.
- 👓 Twenty Fantastic Animal Crafts for Kids from twinkl.com.
- 🍂 Creative Animal Craft Ideas for Kids from imthecheftoo.com.
- 🧑🌾 20+ fun and easy ANIMAL CRAFTS to make with your kids … from facebook.com.
- 🍁 Zoo Animal Themed Crafts & Activities – S&S Blog from ssww.com.
Adding animal features can make clay feel full of personality. A tiny nose, a pair of ears, or a curled tail can change the whole mood of a piece.
Start with a simple base shape, then build on features one by one. Keep the parts balanced so the sculpture stands well and looks friendly instead of crowded. This technique is great for custom gifts, room decor, and school projects, and you can make each animal unique by changing the eyes, posture, or texture.
Use small scraps of clay for details so you do not waste material. Many people enjoy this style because it is cute, fun, and easy to adapt for pets, woodland animals, or fantasy creatures.
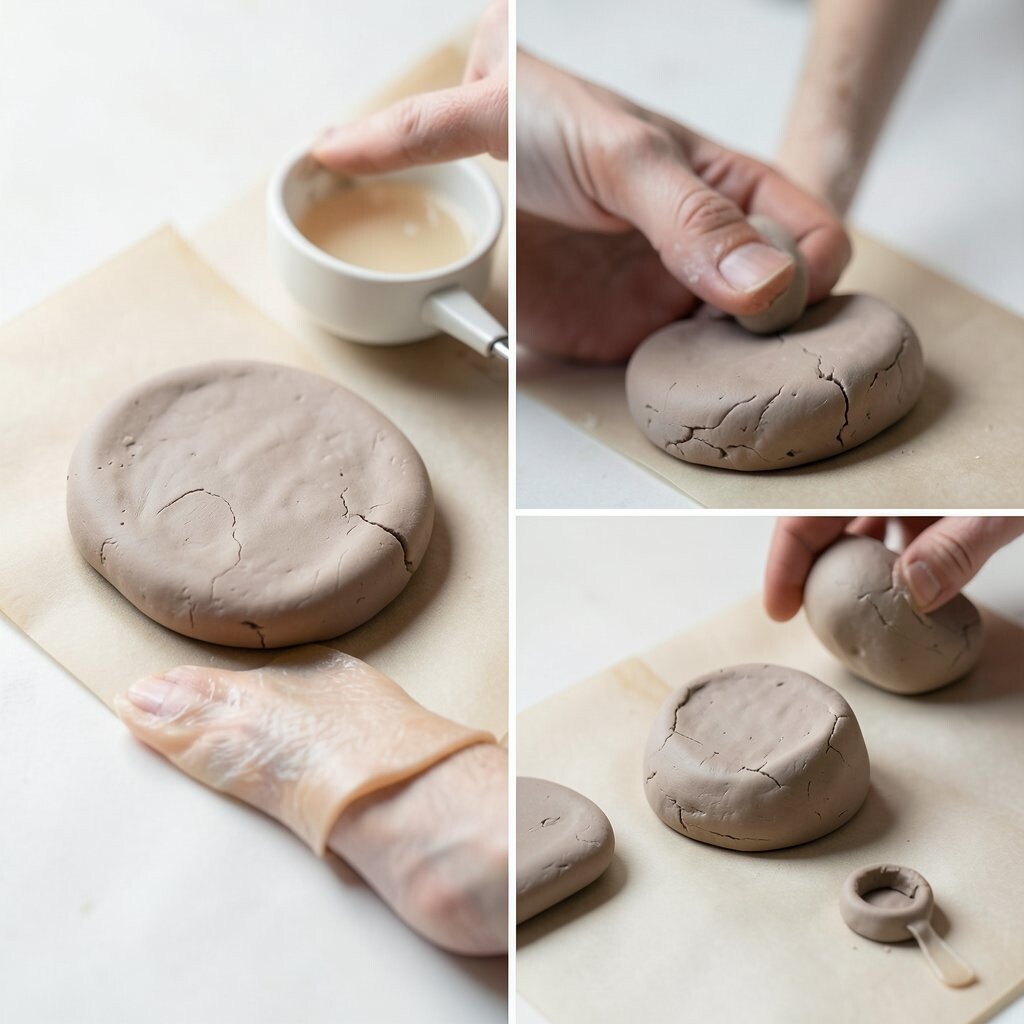
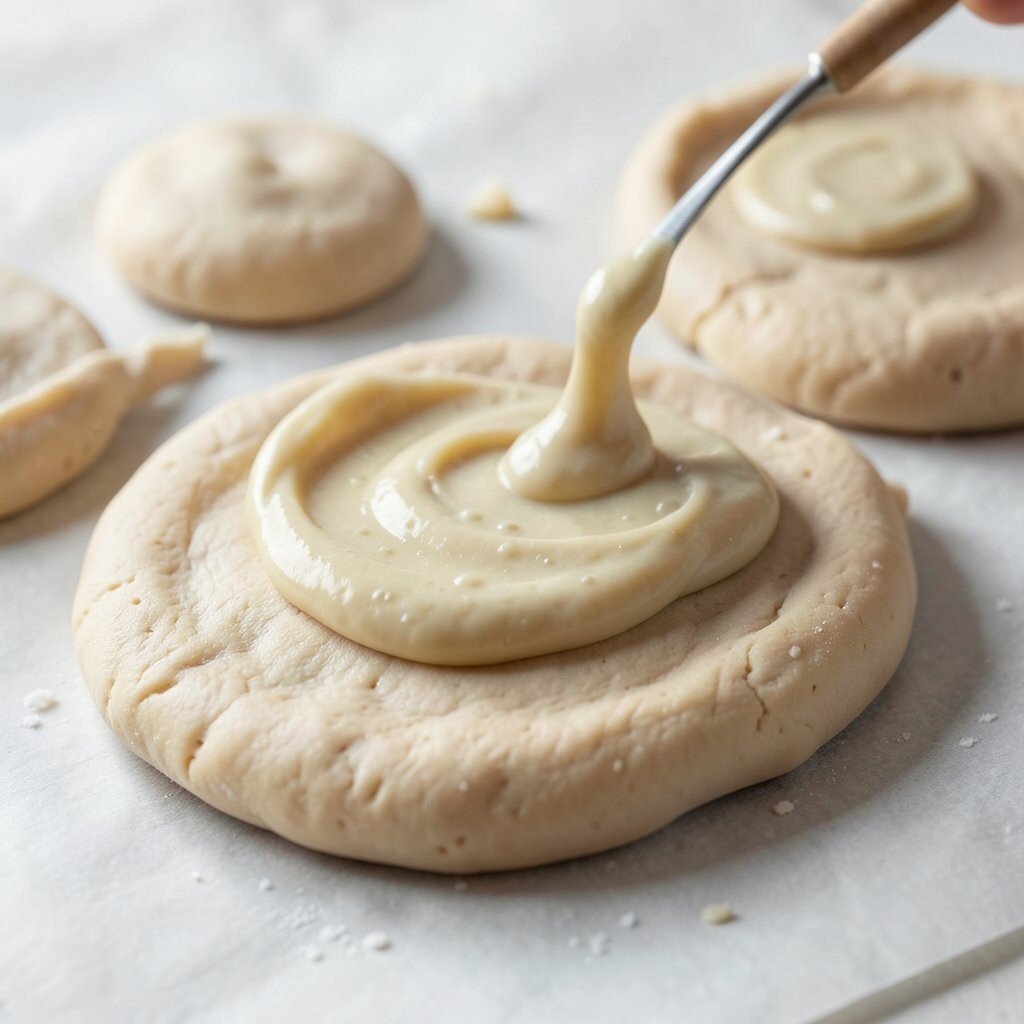
13. Slip as Glue
Top Slip As Glue Craft Tutorials
- 🍅 How to Make the Perfect Clay Slip for All Your Clay Projects from teachkidsart.net.
- 🗺️ Slip Definition for Pottery and Ceramics from thesprucecrafts.com.
Slip is one of the most useful helpers in clay work. It can hold pieces together and make joins look smooth and strong.
Mix clay with a little water until it becomes a creamy paste. Score both surfaces, brush on slip, and press the parts together before smoothing the seam. This simple step can save a project from falling apart, and it is a great habit for beginners who want fewer cracks and cleaner results.
Because slip uses the same clay you already have, it costs almost nothing. Try keeping a small covered jar of slip nearby so you can work faster and keep your ideas flowing.
14. Layered Details
Top Layered Details Craft Tutorials
- 🗺️ 3D Layered paper designs are one of my favorite … from facebook.com.
- 🎨 Learn how to make gorgeous 3D layered paper cut art … from facebook.com.
- 🎄 If you LOVE making paper crafts with your Cricut and have a … from instagram.com.
- 🗺️ Paper Layered Art (Inspired by Silent Hill F) from instructables.com.
- 🧑🌾 Layered Cross Craft Kit by Dennehy Design – icotec Medical from icotec-medical.com.
Layering gives clay art depth and interest. A flat shape can suddenly look rich and lively when you add raised pieces on top.
Cut small shapes, thin strips, or tiny blobs and place them in layers after the base is firm enough to hold them. This works well for flowers, feathers, outfits, and decorative borders. Layered work is easy to personalize with favorite colors or themes, and it can look very fresh because many makers use layered textures in modern handmade art.
Try keeping some layers thin and some thick for variety. If you plan ahead, you can make a striking piece without using much extra clay.
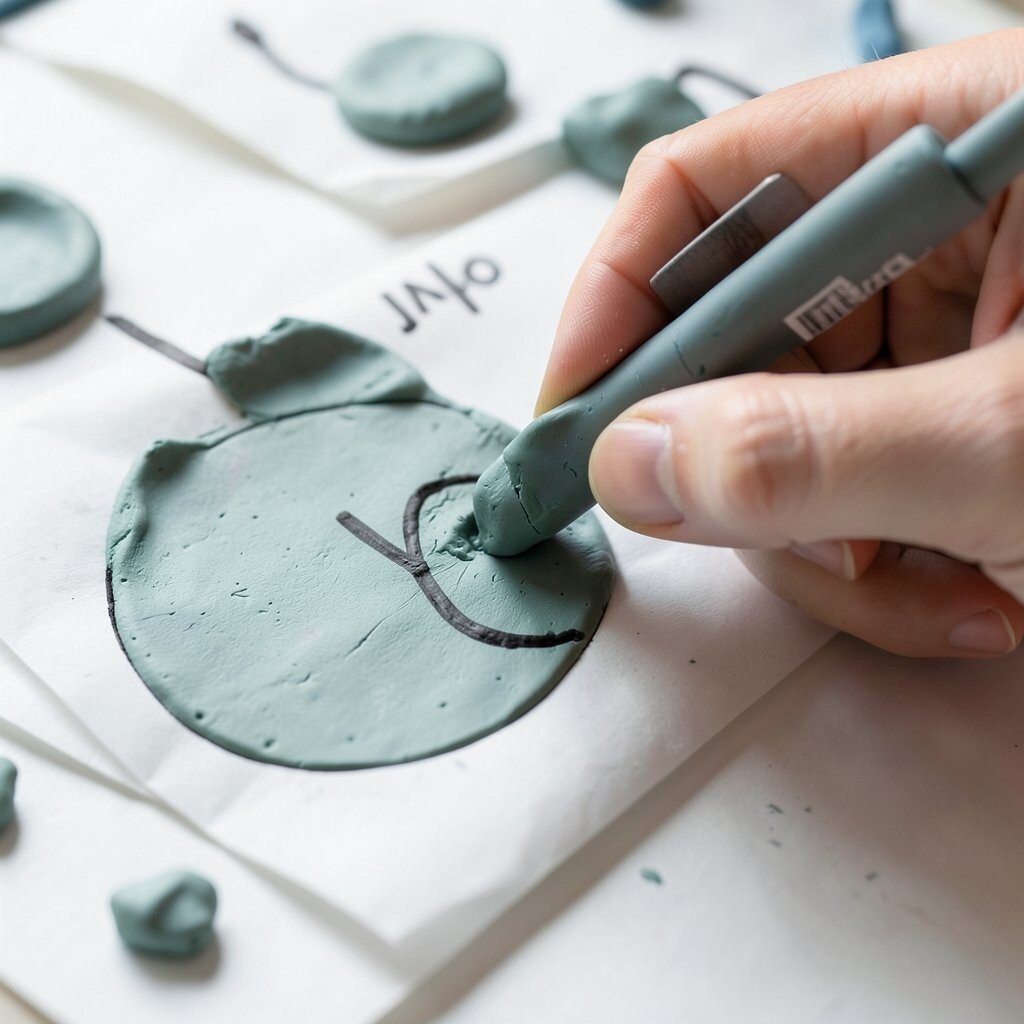
15. Sgraffito Scratching
Top Sgraffito Scratching Craft Tutorials
- 🍂 Sgraffito from en.wikipedia.org.
- 🎨 What Is Sgraffito? from thesprucecrafts.com.
- 🎄 What is Sgraffito? Its History, Process & Use on Frames … from 15thstreetgalleryboulder.com.
- 🎨 Sgraffito 101 – Schoolyard Blog – School Specialty from blog.schoolspecialty.com.
- 🍁 How to Make Beautiful Sgraffito Decorated Eggs from craftinvaders.co.uk.
Sgraffito means scratching through a top layer to show what is under it. The effect can look bold, neat, and full of contrast.
Cover clay with a thin layer of colored slip or underglaze, then scratch a design into the top. The lower color peeks through the lines, making shapes and pictures stand out. This method is fun for names, flowers, and simple scenes, and it gives you a chance to make each item feel one of a kind.
It also works well for people who like strong visual contrast. Since the tools can be as simple as a toothpick or skewer, the cost stays low while the results look rich.
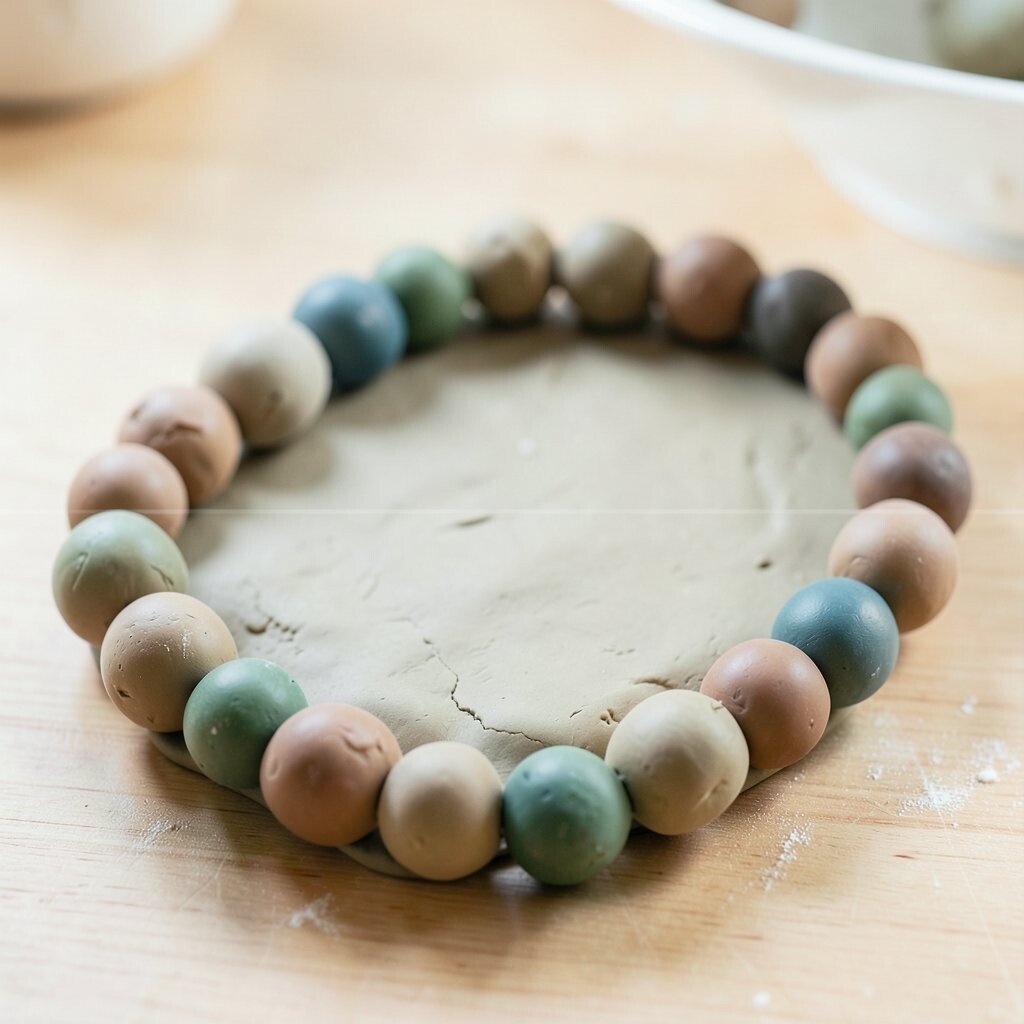
16. Rolling Beads
Top Rolling Beads Craft Tutorials
- 💅 16mm Round Beads from craftdealz.com.
- 🍂 Handmade Paper Rolled Beads & Glass Bead 16" from ebay.com.
- 🖼️ 16 rolls colorful rubber elastic flat string beads 10 meters from temu.com.
- 🖼️ Having 16 sets of bead earrings to do today and I'm loving … from facebook.com.
- 🗺️ Hohopeti 16 Roll Set Hand Craft Tool Multicolor Beads Spool … from amazon.eg.
Clay beads are tiny, cheerful projects with lots of style. They can look smooth and bright, or rough and earthy, depending on how you finish them.
Roll small balls, poke holes before the clay hardens, and keep the sizes similar if you want a neat string. You can also shape them into ovals, cubes, or little nuggets for a more playful look. Beads are useful for bracelets, necklaces, and hanging decor, and they are a great way to use leftover clay without spending much.
Mix colors or add texture for a more personal touch. Bead making is popular because it is quick, simple, and easy to turn into gifts.
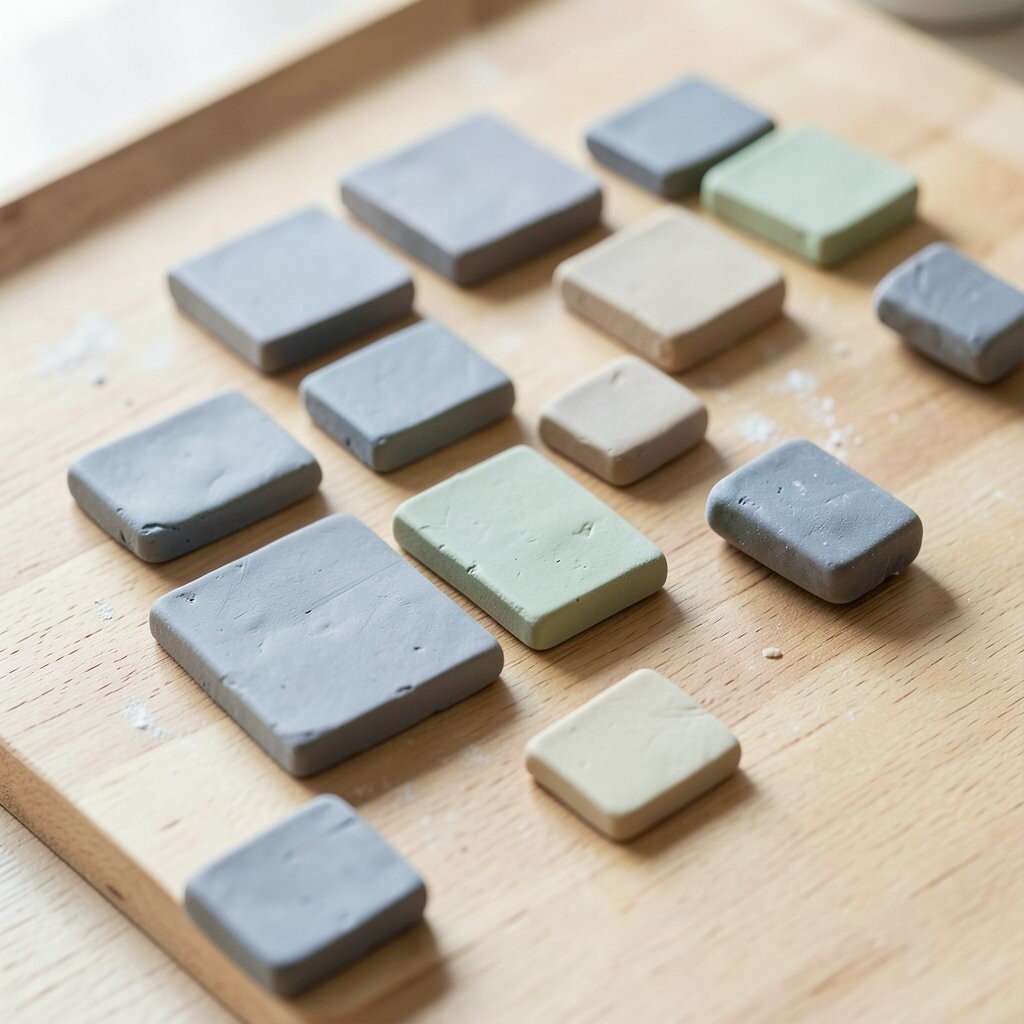
17. Tiny Tiles
Top Tiny Tiles Craft Tutorials
- 🍁 Tiny tiles, big creativity. 🧩✨ Join us for Community Craft Night … from instagram.com.
- 🍂 Where do you like to get tiny tiles for small projects? from reddit.com.
- 👓 Sets of 18 tiny tiles are NEW in my shop. Check them out. from facebook.com.
- 🍁 Craft Night (winter) from tinytilemosaics.com.
- 🖼️ How to Upcycle Leftover Tiles (DIY Craft Ideas) from tilezz.com.
Tiny tiles are small, flat pieces that can hold a lot of style. They look clean on their own and even better when joined into a set.
Cut clay into little squares, circles, or other shapes, then press in patterns, words, or pictures. You can make magnets, coasters, wall art, or memory pieces with them. This technique is useful for practicing control, and it helps you make affordable gifts because each tile uses only a small bit of clay.
Try a theme like stars, pets, plants, or favorite sayings. Tiny tiles fit well with current handmade gift trends because they feel thoughtful and easy to display.
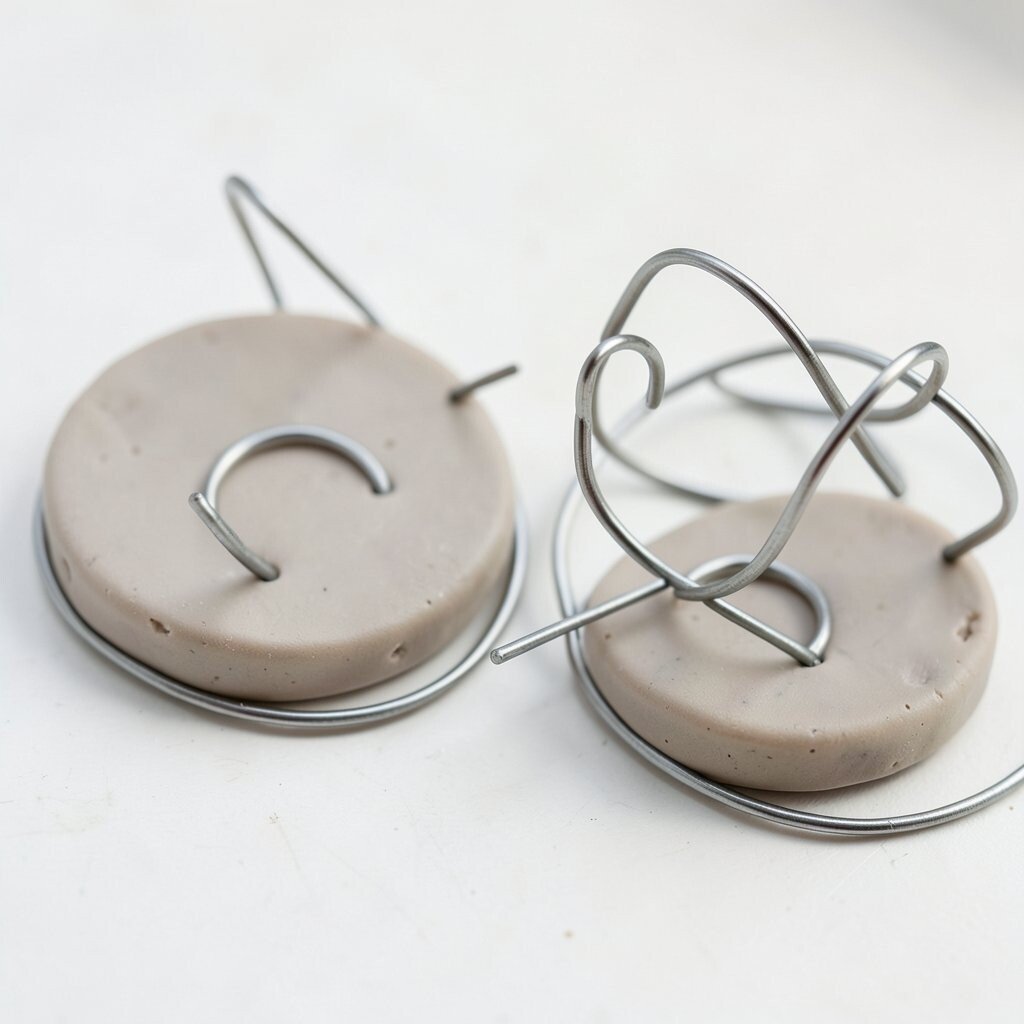
18. Wire Support
Top Wire Support Craft Tutorials
- 🖼️ Cousin DIY – 18 Gauge, Aluminum Metallic Multicolor Wire … from walmart.com.
- 👓 18 Gauge Wire for Jewelry Making, 1Mm Craft … from ebay.com.
- 🎄 BENECREAT 18 Gauge Matte Jewelry Craft Wire 492 Feet … from beebeecraft.com.
- 🗺️ 18 Gauge Stainless Steel Crafting Wire for Knitted Wire Art from twiceshearedsheep.com.
- 🍁 Unique Bargains 18 Gauge Anodized Aluminum Craft Wire … from lowes.com.
Wire support can help clay stand tall in thin or tricky shapes. It is especially handy when you want long arms, necks, stems, or legs.
Shape the wire first, then wrap or press clay around it carefully. Keep the clay layer even so the wire does not show through, and make sure the base is steady. This method opens the door to more daring designs, and it can save time and material when you want a sculpture with a strong pose.
Choose simple wire from a craft store or reuse clean wire from home to keep costs down. It is a smart choice for artists who want to make lively figures without using a huge amount of clay.
19. Surface Painting
Top Surface Painting Craft Tutorials
- 💅 19 Surfaces to Spray Paint & Counting | Art Inspiration from keetonsonline.wordpress.com.
- 🎄 50+ Painting Ideas for Kids (Fun & Easy Art Projects) from modpodgerocksblog.com.
- 🍁 25 easy acrylic painting ideas from gathered.how.
- 👓 78 Painting Ideas to Inspire and Delight Your Inner Artist from chalkola.com.
- 👓 32 Painting Activities For Adults (Complete Guide) from paintyournumberss.com.
Painting clay brings out shape, texture, and mood. Color can make a plain form feel bright, soft, spooky, or cheerful.
After the clay dries or fires, use paint to add details like cheeks, spots, leaves, or stripes. Thin layers work best, and a clear finish can help protect the surface when the piece is dry. This technique is easy to personalize with favorite colors, and it helps small sculptures match room decor or seasonal themes.
Paint is also a good way to refresh older clay pieces. Since many craft paints are affordable, this method lets you make the most of simple projects without a big expense.
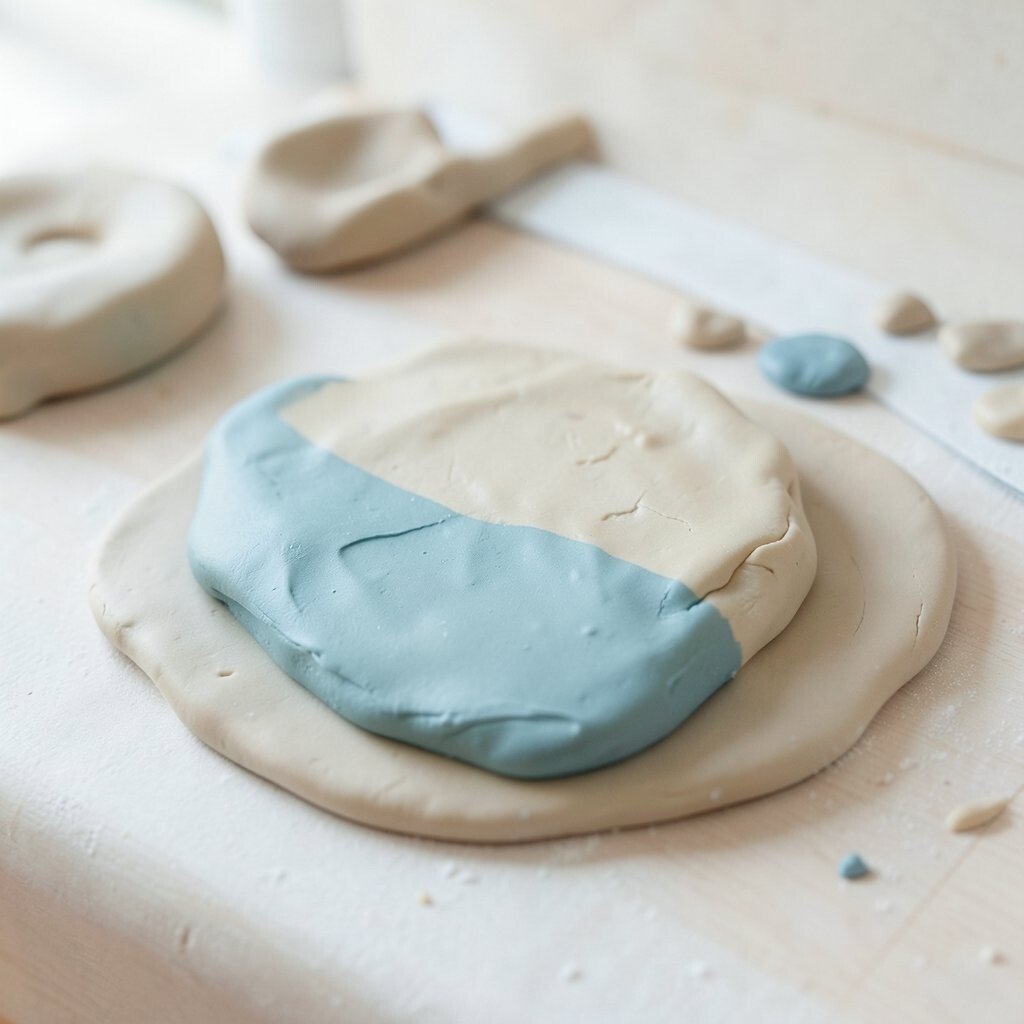
20. Mixed Media Mix-In

Top Mixed Media Mix-In Craft Tutorials
- 🎄 100 Mixed Media Techniques Anyone Can Try from sarahrenaeclark.com.
- 🖼️ 10 mixed media techniques from montmarte.com.
- 🍁 11 DIY Craft Supplies: (for Mixed Media)! from thegraphicsfairy.com.
- 👓 Mixed Media Art from Recycled Materials from thoughtfuldiycreations.com.
- 👓 The Art of Mixed Media Painting: Types, Techniques & … from visualartspassage.com.
Mixed media gives clay projects extra sparkle and surprise. Small add-ins like beads, fabric, paper, or foil can make the final piece feel lively and special.
Press safe extras into the clay or attach them after the clay has set. Keep the mix balanced so the piece still feels sturdy and easy to handle. This style is popular with makers who like bold, layered looks, and it is a smart way to use leftover craft supplies instead of buying new ones.
Try combining matte clay with shiny bits for a fun contrast. Personal touches like initials, charms, or tiny found objects can make the work feel more meaningful.
21. Free-Form Doodling
Top Free-Form Doodling Craft Tutorials
- 👓 21+ Imaginative Doodle Art Templates & Designs from template.net.
- 🗺️ Stop by the NHCC for Doodle Night! This will be a free form … from instagram.com.
- 🧑🌾 14 Crafts for Teens and Tweens – ARTBAR from artbarblog.com.
- 🧑🌾 Brushing Away Stress: 21 Art Therapy Activities for Self- … from rmcad.edu.
- 👓 75 Cute Doodles To Draw Anytime from artmakespeople.com.
Free-form doodling turns clay into a playful sketch in three dimensions. It can look loose, happy, and full of movement, almost like a drawing that jumped off the page.
Use your fingers or a small tool to make swirls, squiggles, faces, stars, or random shapes without worrying too much about perfect lines. This technique is great for relaxing, and it invites imagination to lead the way. It also costs very little because it works well with scraps, and it is easy to make each piece truly your own by following a favorite mood, song, or color theme.
Many current clay trends favor handmade, imperfect charm, and doodling fits that style well. Keep a few simple tools nearby, and enjoy how each mark changes the look of the clay in a fresh way.